


I’m a sucker for a fat bottom and that’s exactly what we have here in the Kaywoodie Hand-Made Over-size line of pipes. They’re getting harder to find, so when one pops up I have to jump on it. My search for a chunky Kaywoodie lead me to this line of pipes and about a year ago I had the pleasure of refurbishing two, there thick walls and chunky shape not only make it comfortable in the hand but it produces a cool smoke.
As Received

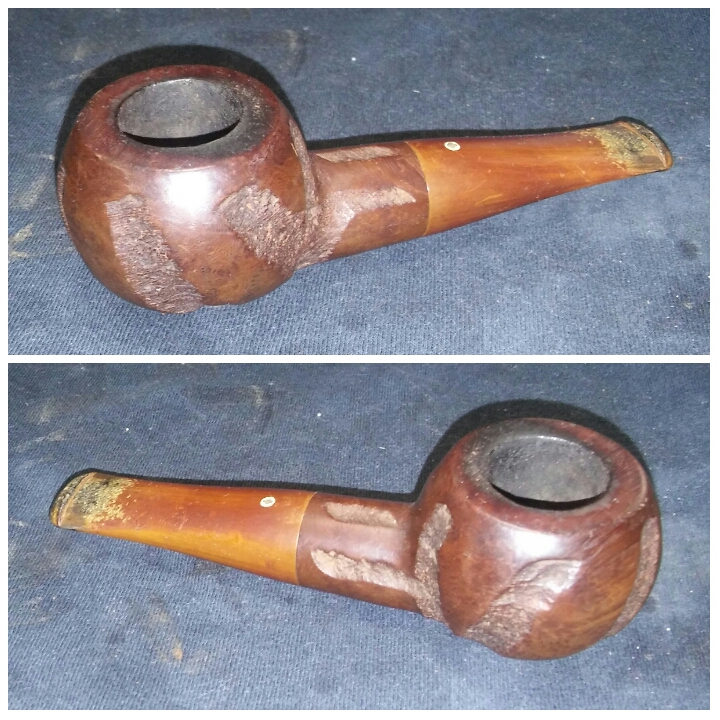

The nomenclature was lightly stamped or worn.

Over all she was in nice condition and seemed well cared for. Heavy stem oxidation, chatter and a little rim tar&char.

I started by reaming the chamber with my Pipnet reamer, first with the smallest attachment and working up to the third taking it back to briar, the chamber was free of any imperfections. I smoothed out the chamber with 400 grit sandpaper. The rim, I applied a generous amount of Method Good For Wood Polish and set aside to penetrate the debris. Using Q-tips I removed the oils and tars from the rim.

The char/rim darkening was removed with worn micro-mesh.Using EverClear, Q-tips and stiff/soft pipe cleaners I gave the mortise and chamber a quick once over to get out the loose debris. Now the soak, I unrolled a cotton ball, twisted it together to form a long swab and inserted it tightly into the mortise and filled the chamber with EverClear a quarter of the way. I allowed the swab to absorb the alcohol, then I filled the chamber with two cotton balls and added EverClear until the cotton balls were saturated. I left it aside to allow the cotton balls and alcohol to absorb the oils and tars.

The stem was heavily oxidized and had quite a bit of chatter. I started first by appling Soft Scrub with a children’s toothbrush to the stem and left it to penetrate the oxidation. Once the Soft Scrub turns from white to a brownish color its time to start the vigorous scrubbing with a rag, I would repeat this process a few times to get the bulk of the oxidation off. To get the rest of stubborn oxidation I used heat. Heat can be your best friend or your worst enemy and doesn’t work on all stem materials.(Nylon & Acrylic stems do not respond the same and melt or burn, I have had success with ebonite swirled cumberland stems in the past) In this case I’m working with vulcanite which is more resilient and responds well to heat. I heated the oxidized portions of the stem with a Bic Lighter (moving the flame rapidly never leaving it in one spot too long) working carefully around the clover logo inserted in the stem, In the past I’ve had a few inserts on Kaywoodie and Dr. Grabow pipes pop out using this method of heat. At this time I heated the bit/button portion of the stem to raise some of the chatter.

With the oxidation removed I could begin sanding.

After giving the stummel time to sit to allow the cotton balls and EverClear to absorb the tars and oils I could do a good internal cleaning of the chamber,mortise and stem. Using cotton balls,Q-tips and stiff/soft pipe cleaners I cleaned the internals of the stummel and stem until the pipe cleaners came out as they went in.
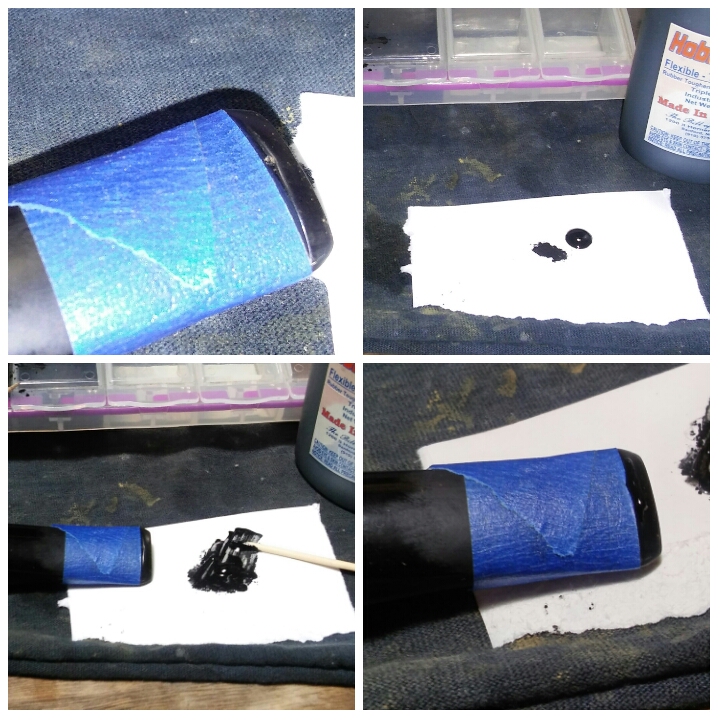

After removing the chatter with 1000 grit sandpaper there was still one indentation on the button that did not raise with heat and would need filling. I mixed a paste using thick black CA glue and activated charcoal power, I taped off the button area so the fill would remain in one spot. I applied the paste with a toothpick allowed it to set up a bit, then removed the painters tape and hit it with the accelerator, setting it aside to cure.

After the fill had time to cure I began to form the new button with needle files and sandpaper. The stem could now be run though the various grits of micro-mesh.

I ran the stem through the various grits of sandpaper and micro-mesh. 1000 grit sandpaper wet, 1500,1800, 2000, 2400 wet and 3200-12000 dry. There were a few pieces of metal or aluminum embedded in the rubber which tells me it was wartime recycled rubber. You can see the embedded imperfections in my final photos. Tho not very noticeable.

I gave the stummel a wipe down with Howard’s butcher block conditioner and let it penetrate for a few minutes hand buffing off the excess. She was now ready for the wheel.
Fin

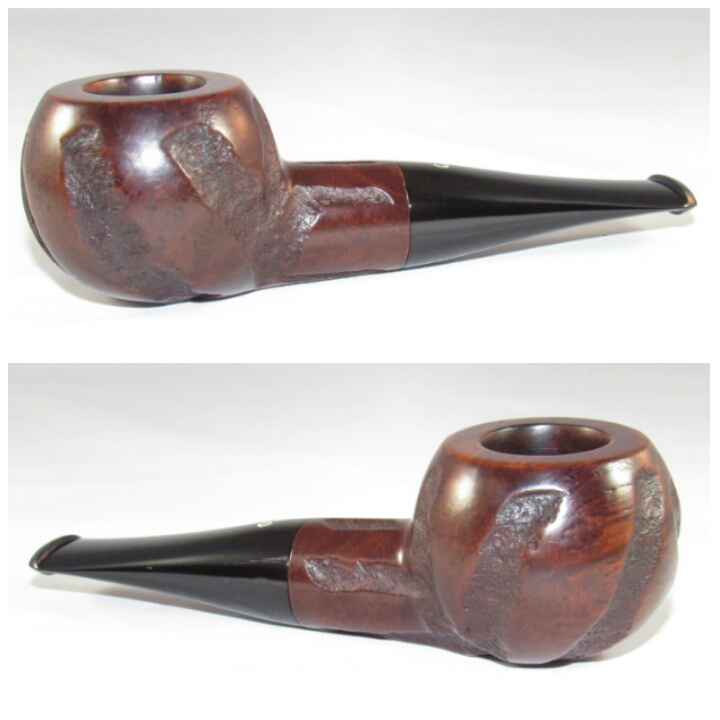
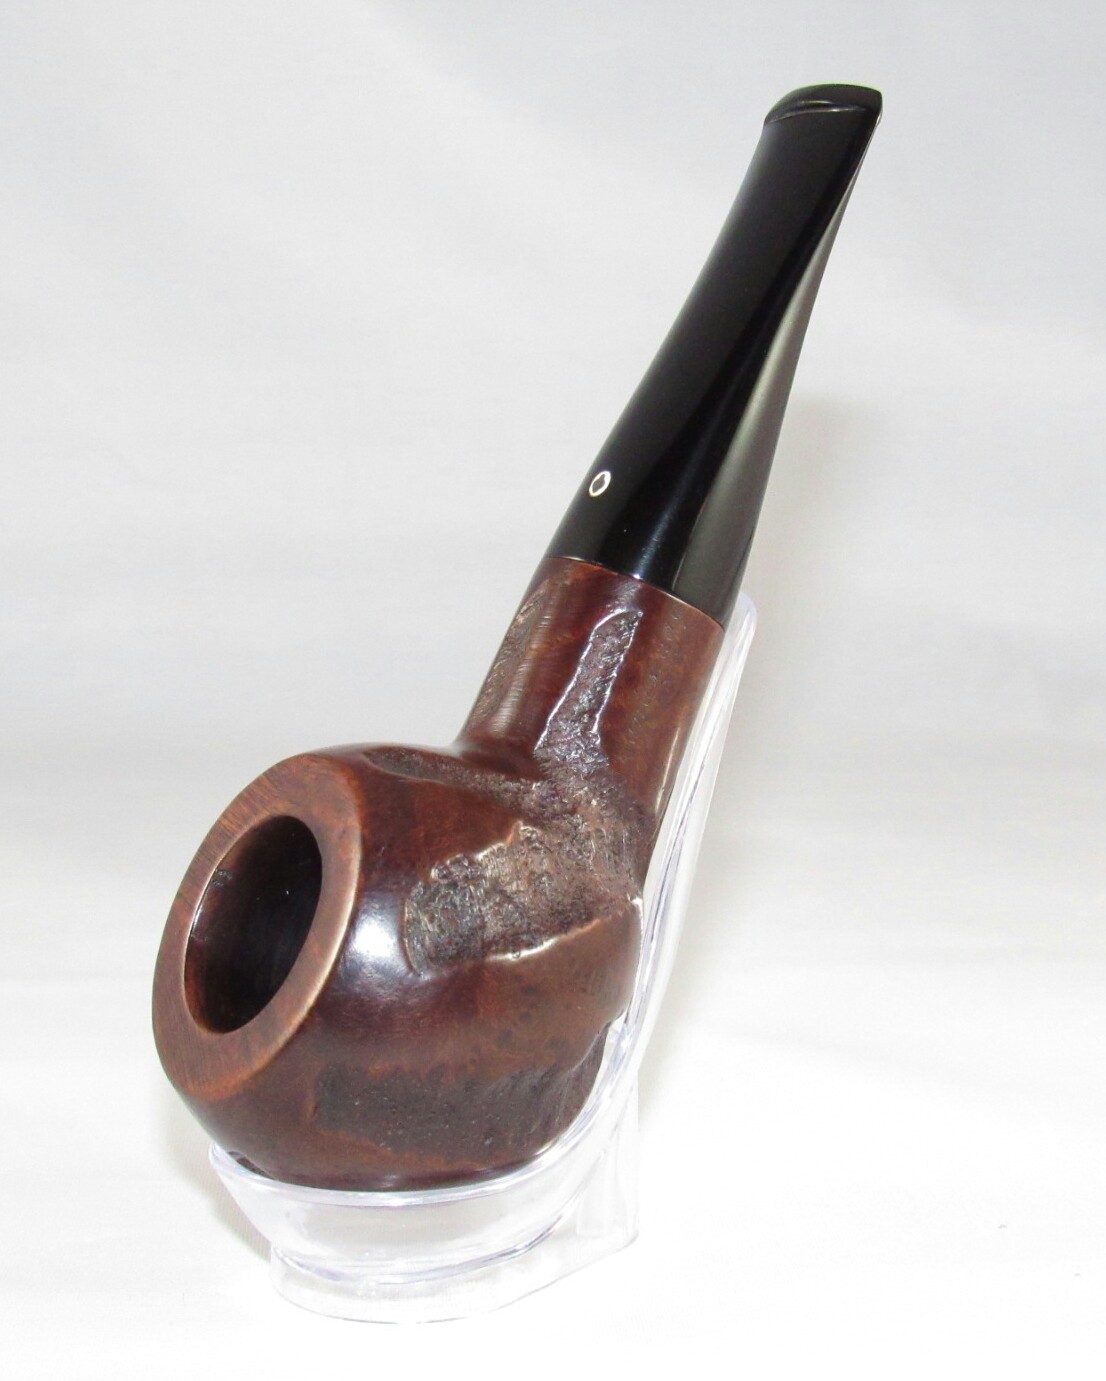


Finished up on the wheel with white diamond, a few coats of carnauba and a microfiber hand buffing, buffing the stem with blue compound & carnauba.

You nailed that one. That is one of my favourite shapes and the KW shape with that rustication is really nice. Great work on that one.
LikeLike
Thank you Steve-
Its definitely one of my favorites as well, I just wish the Over-Size line of Kaywoodie would pop up more often.
LikeLike
Same here.
LikeLike
Reblogged this on rebornpipes and commented:
Love this chubby apple shape. This is a great clean up. Good work.
LikeLike
Where do you buy the activated charcoal powder? I did a quick search and discovered there are several brands and seems to be a few types.
A great post for this site would be one highlighting the different tools, products, etc. that y’all use.
LikeLike
I ordered mine though Amazon- Nature’s Way Activated Charcoal 100 capsules. I empty the capsules into an old pill bottle.
It would definitely be helpful, I will put together a list of products and tools over the weekend.
LikeLike
I’m looking forward to reading more!
LikeLike
That came out great. The Hand Mades pop up every once in a while and sometimes seem to go unnoticed.
LikeLike
That’s exactly what happened with this one, my eyes are always peeled.The smooth Hand-Made Kaywoodies are the hardest, just can’t get my hands on one.
LikeLike