


Many of the Custom-Bilt pipes in my collection are on the larger side but lately the medium size Bilts have caught my eye. This billiard is the first I’ve seen and I couldn’t wait to see her finished.
As Received.

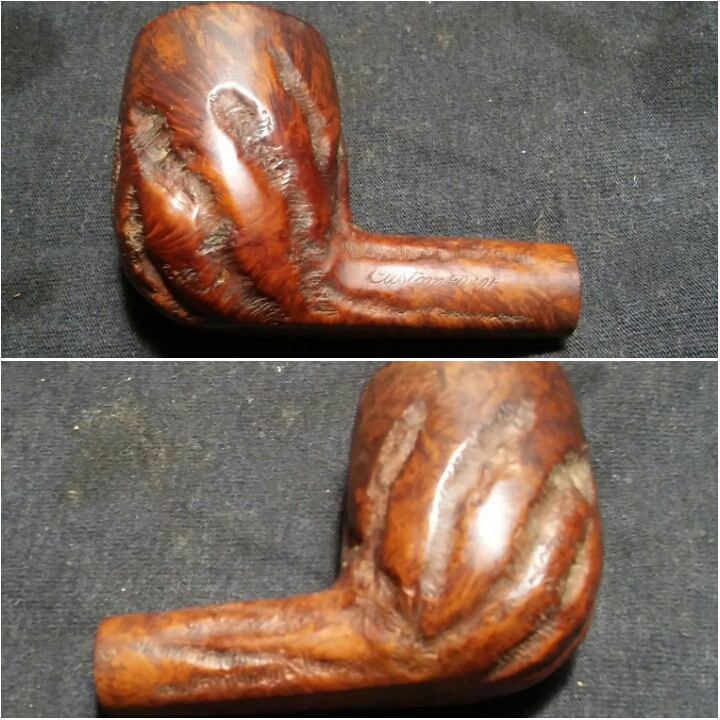

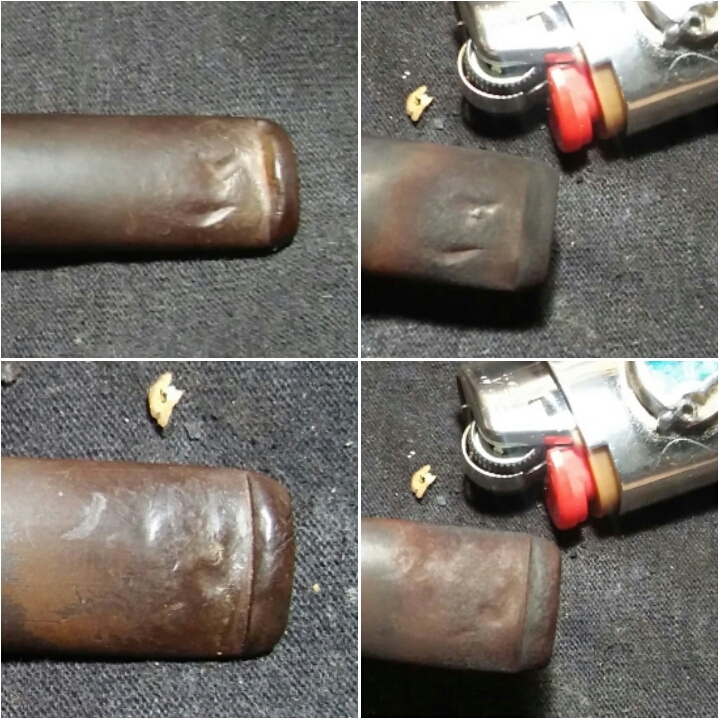
She was in rough shape when I received her. Most disappointing was the cracked tennon, thankfully it still had its little rubber filter insert and I thought it might be salvageable. The bit had deep tooth impressions that almost punched through. The button was worn down and the stem was oxidized. The rim was caked with dirt,oils and char. The chamber had a thick crumbling cake and the mortise was plugged with old tobacco and tars.

I started with my Pipnet Reamer and the smallest attachment working up to the second largest, finishing up with 400 grit sandpaper wrapped around a finger. The chamber was well-preserved from the thick cake.

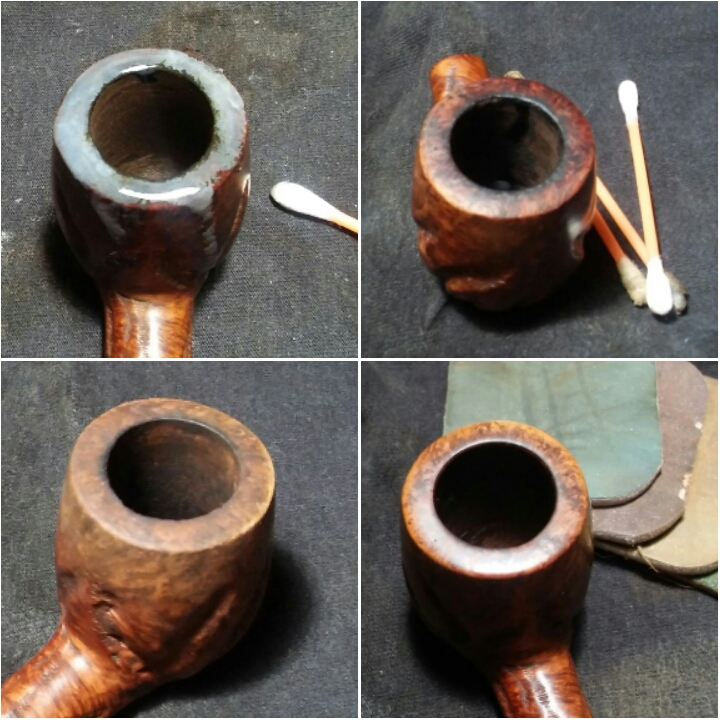
Next I tackled the caked rim. I applied a generous amount of Method Good For Wood Polish to the rim and set it aside to penetrate the build-up for a few minutes removing the build-up with Q-tips , I would repeat this process a few times. After the removal of the rim build-up There were a few dings in the rim. Using a household iron on medium high/ heat and a damp rag I steamed out the imperfections working in intervals until the imperfections were almost gone. I finished up with worn micro-mesh until the rim was free of darkening and dings.

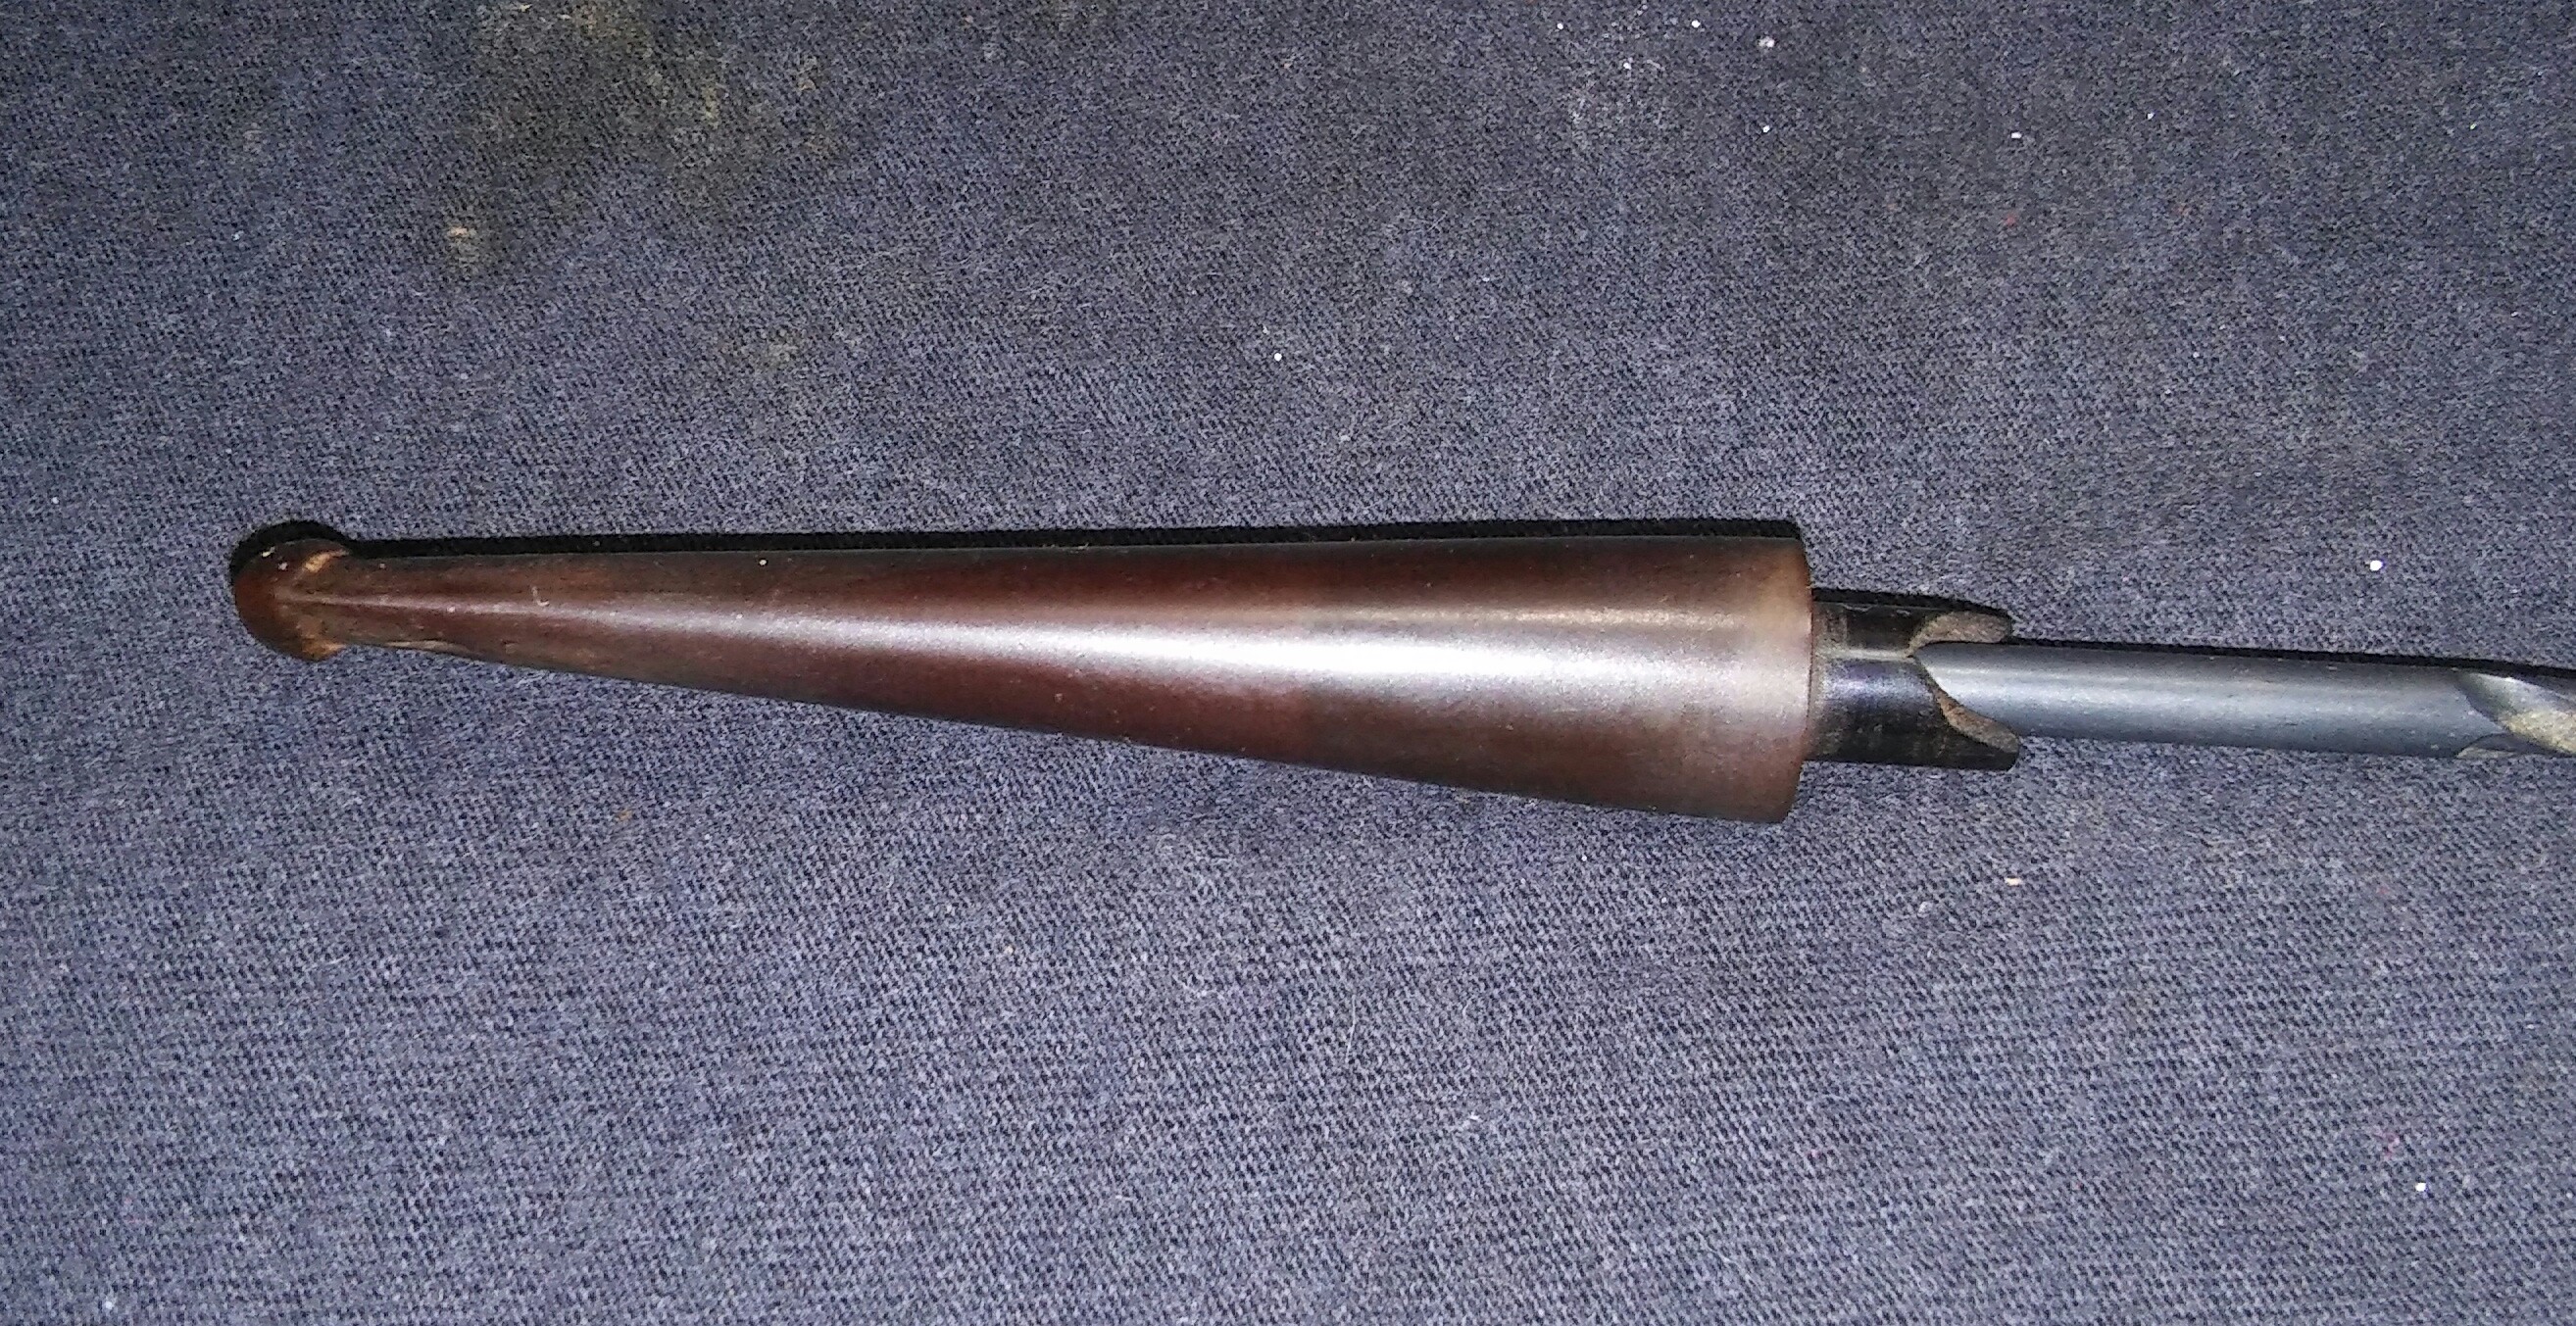
Next was the cracked tennon, I fit The opposite end of a 3/16 inch drill bit into the tennon, making sure I had a tight fit.I mixed thick black CA Glue and activated charcoal power into a paste I then applied a generous amount of chapstick to the drill bit end so the CA Glue would not adhere to the bit but would adhere to the tennon only. I applied a thin layer of the CA Glue mixture to bridge the gap where the missing tennon piece was , hitting it with accelerator to set up the glue, I removed the drill bit at this time.

With the drill bit removed I now applied several layers of the CA Glue mixture to build up the missing section of the tennon, spraying with accelerator in between each layer I added, until I had a close match to thickness of the existing tennon.
Once my thickness goal was reached I left the tennon to cure for a few hours. After curing I worked the new tennon with needle files carefully removing the excess glue until I had a close match to the remaining section of the tennon.

I now worked the new tennon with 400 grit sandpaper until I had a close fit between mortise and tennon, making my finishing adjustments with 1000 grit sandpaper until I had a snug fit between mortise and tennon. I then re-worked the inner of the tennon with a round needle file and rolled-up 1000 grit sandpaper so I could re-fit the rubber filter insert.

This Custom-Bilt had two spots of pretty visible filler. Using Method Wood For Good Polish to soften up the filler and a X-ACTO knife, I removed the filler.

I cleaned the area to be repaired with EverClear and Q-tips. I filled the pits with Gorilla Glue and briar dust and left aside to dry. Once dry I removed the excess glue and dust with worn micro-mesh until the repair disappeared into the rustication.

I used a dark furniture marker to darken the rusticated area’s of the stummel to further guarantee my repair would stay hidden.

With the outer of the stummel complete I moved to the internals, cleaning the mortise and chamber with EverClear, Q-tips, shank brushes and stiff/soft pipe cleaners, cleaning until the last pipe cleaner came out as it went in.
I attempted to raise some of the deep tooth impressions with heat, some of the button raised but most of the impressions would still have to be filled.

Next the stem oxidation, I applied a generous amount of non-bleach Soft Scrub to the stem with a children’s toothbrush and left it aside to penetrate the oxidation. Once the Soft Scrub turns from white to a brownish color its time to scrub vigorously with a rag until the oxidation is removed.

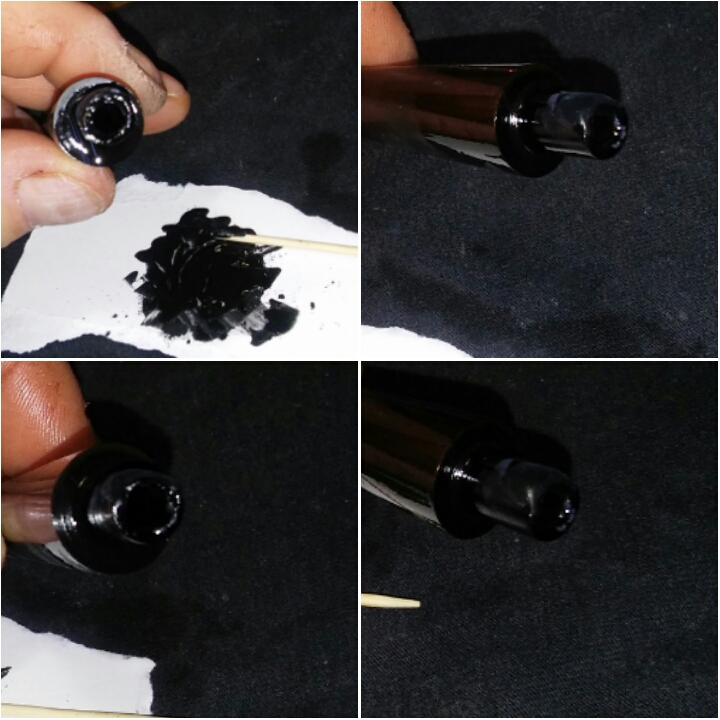
The deep tooth impressions had to be repaired, I roughly sanded the area of repair with 400 grit sandpaper and wiped down with EverClear. I mixed thick black CA Glue and activated charcoal power into a paste .

I applied the paste to the impressions and worn button using a toothpick hitting it with accelerator to set the patch, I set the stem aside now to cure overnight. The following morning after the paste had time to cure, I used needle files and sandpaper to remove the excess glue until I had a uniformed shape.

I sanded the entire stem with 400 grit sandpaper wet to remove the file marks and then moved on to the various grits of sandpaper and micro-mesh. 1000 grit sandpaper wet, 1500 mesh wet, 1800 mesh wet, 2000 grit sandpaper wet and 2400 mesh wet. Runing though the remaining micro-mesh pads dry 3200-12000.

My final step for all my Custombilt pipes is to apply Howard’s butcher block conditioner to the stummel before buffing. I apply Howard’s butcher block conditioner with a rag and allow it to penetrate for a few minutes hand buffing off the excess with a clean rag.
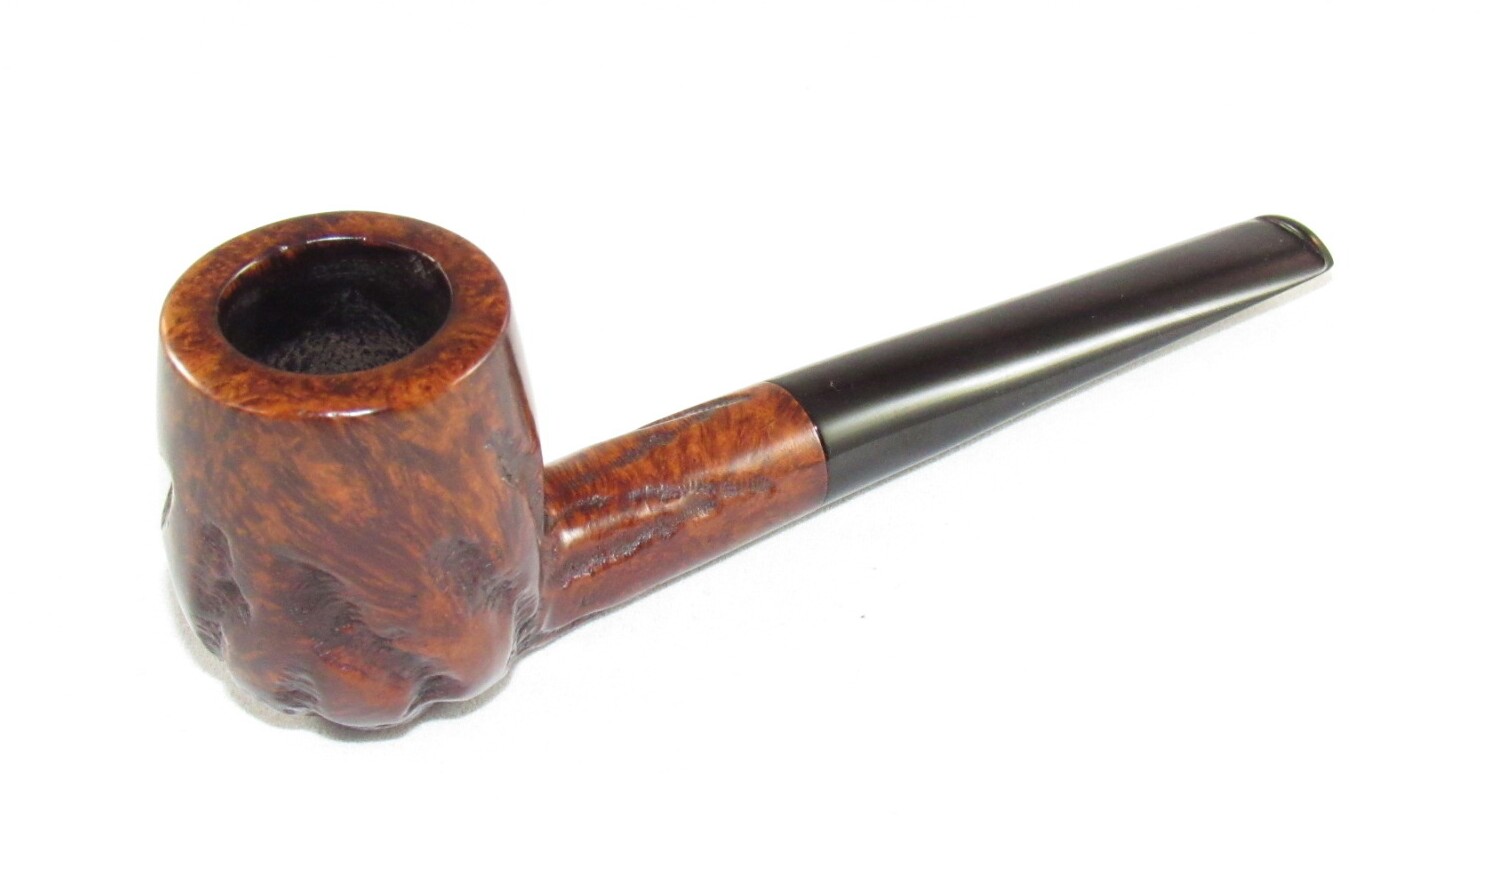
Complete.


Outstanding stem repairs on this one! Great work all round – that’s a good looking pipe now.
LikeLike