Karl Erik.
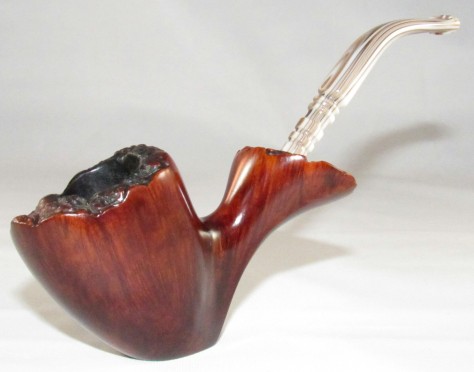
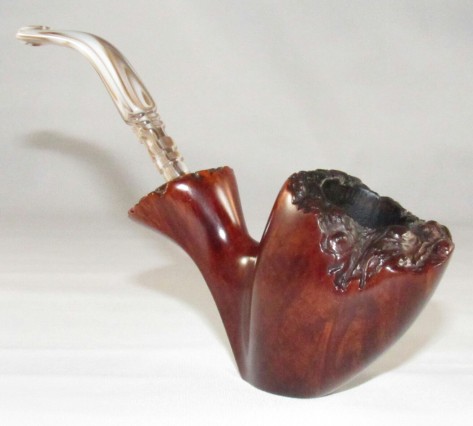
My free hand pipes can be counted on one hand , I’m not the biggest fan but once and a while one catches my eye .Erik Nording, Preben Holm, Ben Wade, Karl Erik Ottendahl and W.O. Larsen pipes are a few I keep an eye out for but they have to be the right shape and preferably smooth , so as luck would have it I found just that a Karl Erik and at a price I couldn’t refuse thirteen bucks. Now for thirteen bucks your not getting mint condition , some work would be involved . The stamping reads Karl Erik over Hand Cut In Denmark and below that the number 5. I’ve read the grading of his pipes but was unable to find the use of the number 5. To my eye the pipe is flawless not an ounce of filler. The stem on the other hand may not be original to the pipe there are no markings of any kind but I have also seen a few examples considered original without the KE stamped on the stem .
The Restoration.
The cracked stummal was the biggest issue , I couldn’t tell from the auction photos how deep or how far the crack had run. Once the pipe itself was in my hands I was happy to see it was a stress crack and not due to a drop. As the briar dried it twisted and formed the crack. The stem was worn , oxidized and the lip was nonexistent. The rest of the pipe was in decent shape.
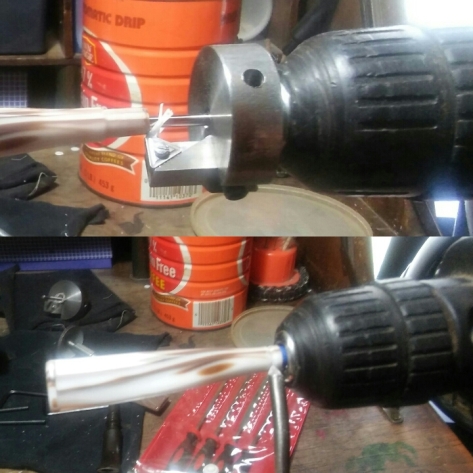
A few years ago my wife had picked up a couple of stem blanks on clearance from Pipe Smokers Emporium , I decided to re-stem the pipe and save the original stem to work on later. Using the Pimo tenon turning tool I cut down the tenon until it almost fit the mortise finishing with 400 grit sandpaper to get the snug fit required . I now taped off the tenon with painters tape and tightened the tenon in my mounted drills chuck. I set the drill to auto run and began to shape the stem with wood carving chisels.
I cleaned up the rough edges with a needle file and rounded some of the sharp corners with 1000 grit sandpaper.
Using a sanding drum mounted in my drill I began to shape the stem , once I had the basic shape I was looking for I sanded the stem with 150, 220, 400 and 800 grit sandpaper.
Before the final sanding and polishing I put a bend in the stem using my Wagner heat gun and bending it over a pill bottle.
With the bend in the stem I could now run the stem through the various grits of micro-mesh 1500-2400 wet and 3200-12000 dry.
With the stem complete I could now focus on the stummel, Using my PipNet reamer starting from smallest to largest I reamed back the cake to a suitable thickness.
I now cleaned the internals using EverClear , shank brushes , Q-Tips and stiff/soft pipe cleaners , cleaning until my final pipe cleaner came out as it went in.
Now to address the cracked stummel, I cleaned the area with an EverClear dipped Q-Tip and removed the embedded debris with a X-Acto knife.
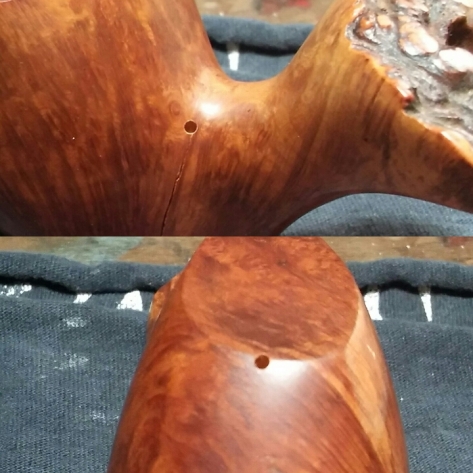
Using a jewelers loop I looked carefully for each end of the crack. One end started just at the top of the shank and the other end of the crack ended at the bottom front of the stummel. Using a 1/16 drill bit I drilled a shallow hole at each end of the crack, to prevent it from cracking any further.
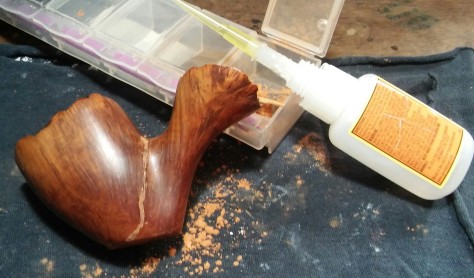
I then filled the crack and holes I drilled with Gorilla Glue and briar dust.
I sanded the area of repair first with 220 grit sandpaper, it seems I should start with a less abrasive grit but the crack was raised at one side due to the twisting as the briar dried. Once the cracked area was sanded flush with 220 grit sandpaper I moved to 400, 800 and finally 1000. At this time I lightly sanded the entire stummel with 1000 grit sandpaper then wiping down the stummel with an EverClear dampened rag to remove the fine sanding dust.
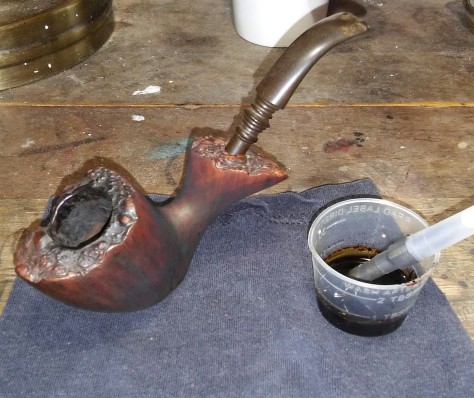
I now mixed dark brown Fiebings leather dye with EverClear to lighten it a bit. I coated the stummel with a few coats of the dye hitting it with a Bic lighter to set the stain. The stummel was substantially darker then it was when originally received but in order to hide the repair it would in turn need to be darker. I removed the excess stain with an EverClear dampened rag.
Complete.
I finished up on the wheel with white diamond , carnauba and a micro-fiber hand buff. Buffing the stem with carnauba.
Thanks For Taking A Look.
Tim.









Reblogged this on rebornpipes and commented:
Tim that is great work. Well done. I especially like the way you improvised with the drill to turn the stem… that gave me some great ideas. I appreciate the creativity on that – well done. that pipe and stem are amazing. Just had to reblog it so the rebornpipes family get a chance to see the innovation and the beauty.
LikeLiked by 1 person
I like you am not the biggest fan of Freehand’s , i own two . That said though all i can say is WOW. That turned out spectacular! Very nice job on the restoration.
LikeLiked by 1 person
I’m another not so much a fan of free hands. The crack repair is excellent. Really nice finish work as well. I’ve had a Ben Wade estate for about a year now with a mortise crack. You may have given me inspiration.
LikeLiked by 1 person
I neglected to say that your use of the drill to carve the stem was awesome.
LikeLiked by 1 person
Thank you-
I’ve had the uncut stems for a long time but I didn’t have a match for them until now. I played around with a few ideas befor coming up with the drill method, really wasn’t sure if it would work, I worried the tenon would crack as it was tightened in the chuck but it was a success.
LikeLiked by 1 person
Excellent work all around, Tim! The pipe looks great. Inspiring stem work!
LikeLiked by 1 person