

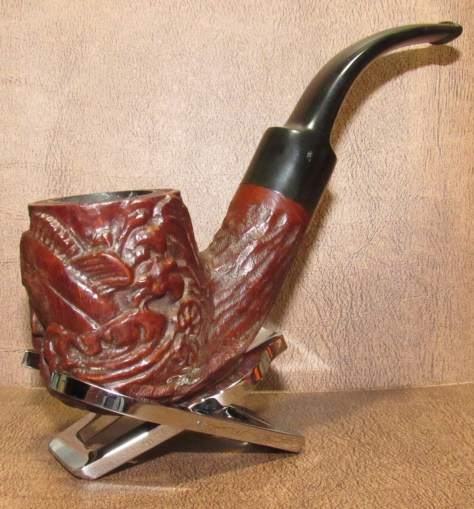
The Custombilt Masterpieces and Sculptured Bowls were produced during the Eugene Rich years 1946-1952, each one beautifully carved and surrounded by chunky Custombilt rustication. The Hooked Bass I believe is one of thirteen, I have one other in my collection the Shriner’s Emblem that I have yet to restore. The Hooked Bass is the largest full bent Custombilt in my collection, with a generous 25mm by 47mm deep chamber and an overall length of 6 inches, a hardy yet surprisingly light weight pipe. This saddle bit Bilt was designed for a long relaxing smoke.
-The Restore-
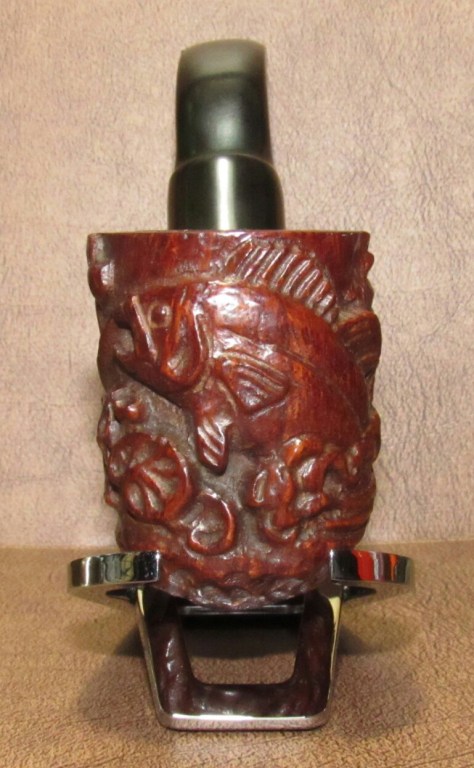


The pipe was immaculate, the nomenclature crisp- Custombilt (Rich Era s) over Imported Briar and a shape stamp I have not seen before. Very lightly smoked, the chamber still held some of its original bowl coating. The stem, light oxidation, faint chatter and metal flecks thought out the vulcanite, I have many war time pipes with recycled rubber stems.

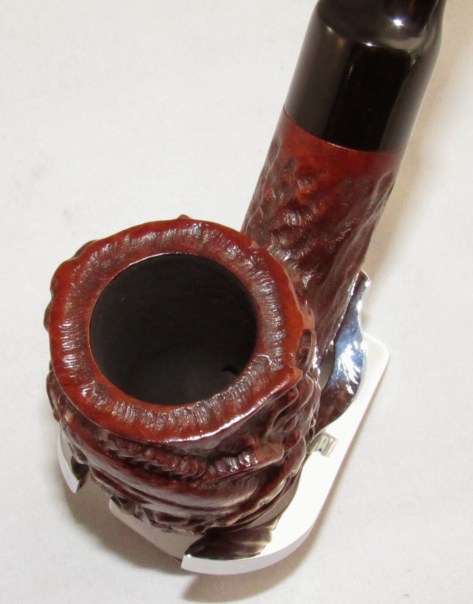
I started with the chamber and its light cake. The largest PipNet reamer attachment was still to small for the massive chamber, I used the largest attachment and worked slowly around the inside wall of the chamber until I was back to briar. I uncovered a pit at the back of the chamber wall.

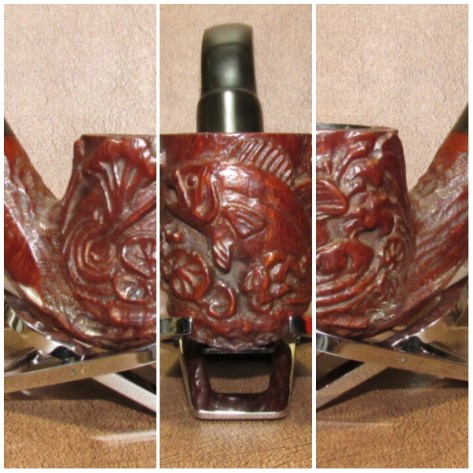
Next the rim and one scorched area, I applied Method Wood For Good to the scorch and scrubbed with Q-Tips to try and lighten the area. When finished the rim blended pretty well. I wiped down the stummel with a rag and Method Good For Wood, getting into the deeper carving with a soft children’s toothbrush.

Next I moved to the internal cleaning of the stummel and stem. Using EverClear, mortise/shank brushes, stiff/soft pipe cleaners and Q-Tips cleaning until my finial pipe cleaner came out as it went in.

After the internal cleaning of the chamber I could see the sand pit better. The original filler that had been packed in the pit was crumbling away, using a pick I removed any loose debris from the cavity, cleaning the area one more time with EverClear and let dry. I mixed some pipe mud using cigar ash, a little water and then repacked the pit. I left it to set, once dry I removed the excess with a rag.

With the pit refilled I decided to use a bowl coating to give the chamber a line of defense while braking the pipe in. I had some premixed bowl coating in a lock&lock leftover from a previous pipe. I have cut and pasted my process for applying the bowl coating from a past post below.
Prepping the chamber before applying the bowl coat, the chamber was scrubbed thoroughly with EverClear during my internal cleaning but I gave it one more round with an EverClear dipped Q-Tip and allowed it to dry, removing any the loose debris from the crack with a pick. I then mixed a little cigar ash and water together to make pipe mud to fill the crack, I applied it with a finger and left to dry. Once the mud was hardened in the crack I wiped the excess from the chamber with a rag. The bowl coating is a three step process starting first with mixing the primer coat. (Step One)- I start with honey about 2.5 ml in an old medicine cup, I add activated charcoal powder a little at a time to the honey and stir with a toothpick until I get the right constancy (it will ball up on its self as the charcoal coasts the honey but continued mixing will combined the two) basically your looking for the toothpick to stand on its own for a few seconds before falling to the side of the cup. I let the mixture settle until the bubbles rise to the top. (Step Two)-I apply a thin layer of the mixture to the chamber with a small flat paint brush, starting from the bottom of the chamber and working up the side walls being careful not to get it on the rim (If you do get it on the rim warm water and a Q-Tip will remove it just try not to get water in the chamber itself). There will be quite a bit of primer coating leftover, I store it in a lock&lock and will keep for a while for reuse.
I let the coating set in the chamber for a few minutes just so it looses some of its shine, I then insert a folded pipe cleaner into the airway and lay down a piece of printer paper on my desk top before moving to the next step.(Step Three)- I add a little charcoal powder to the bottom of the chamber and slowly turn the stummel in hand to coat the entire chamber any excess charcoal powder that falls to the paper can be reused. I leave the stummel aside to dry, the chamber should be a dark gray color when completely coated if any dark wet spots reappear repeat step three. When the chamber is well coated and wet spots have not re-emerge I tap the stummel lightly on the side of my finger to remove any leftover charcoal powder. In warm dry conditions I leave the chamber to cure for a couple of days before buffing the stummel, in high humidity it could take up to a week or longer. Once the coating has cured for a few days and is dry to the touch and doesn’t smear (If it does smear and appears wet again repeat step three and let dry) I’ll remove the pipe cleaner, blow out any leftover powder and wait an additional week before packing and puffing. To be honest its a pain and takes a long time to fully cure which is why I avoid it if I can but I believe the clean smooth finish is worth it. All I can say is if you decide to try this bowl coating take your time and be patient, its all trial and error.

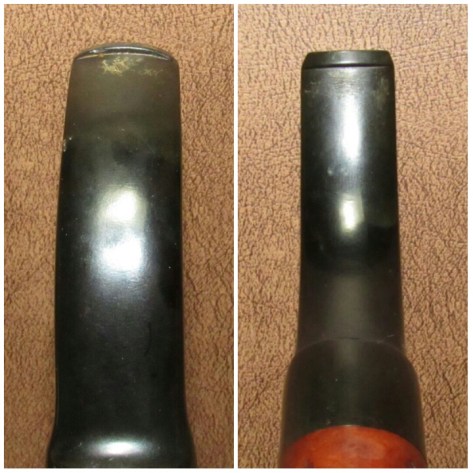
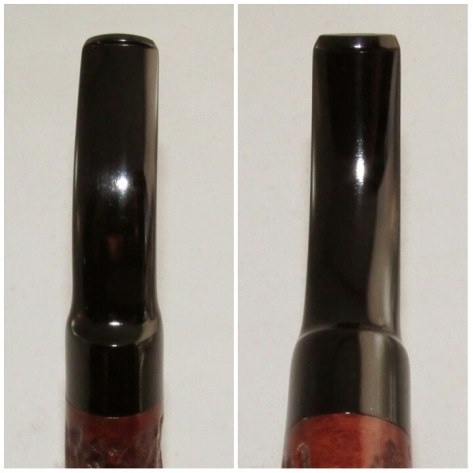
Before oxidation removal I addressed the light chatter.
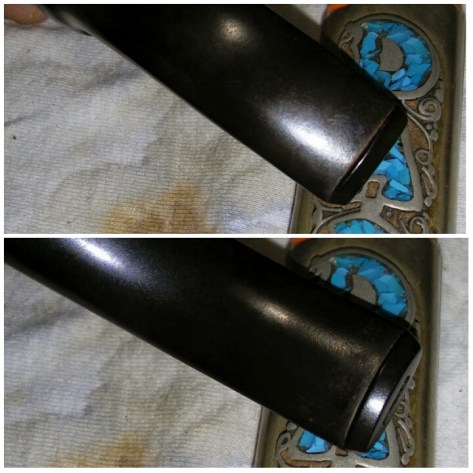
Using a Bic lighter I lightly brushed the bit with the flame to raise some of the chatter. Most of the shallow chatter raised what remained could be lightly sanded away.

With chatter reduced I moved to the stems oxidation. I applied non-bleach Soft Scrub to the stem a left aside so the Soft Scrub could begin to penetrate the oxidation. Once the Soft Scrub turns from white to a brownish color its time to scrub vigorously with a rag adding more Soft Scrub as needed until all oxidation has been removed. (Holding the stem under natural light will help to see if all oxidation has been removed.) It took a few rounds to remove all oxidation.
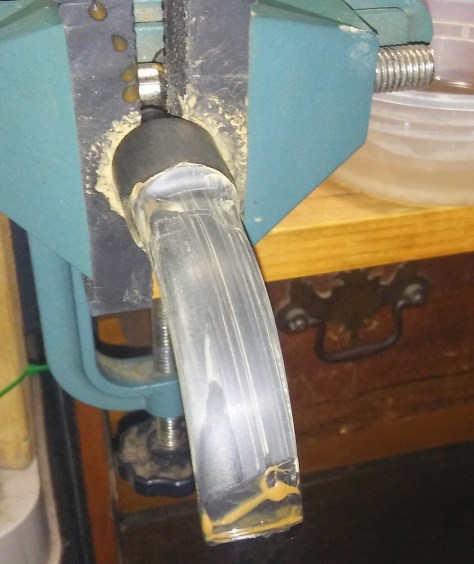
Many war time stems were made with recycled rubber and contain small bits of metal spread throughout the stems material, it cannot be removed and I’ve come to except that. After raising most of the chatter there were a few spots that needed attention. I sanded the deeper impressions with 400 grit sandpaper wet and then ran the stem though 800,1000 and 1500 grit sandpaper wet until the stems surface was smooth. I locked the tenon into my vice so I wouldn’t round out the edge of the stem face and would still have a smooth fit between stem and shank.
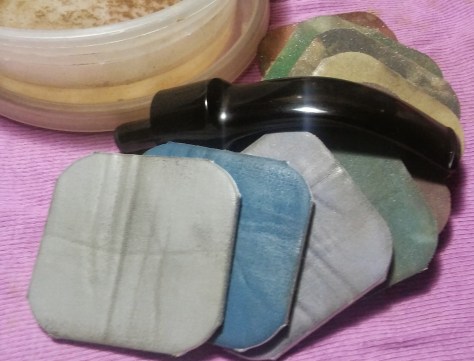
After the rough sanding I ran the stem through the various grits of micro-mesh pads 1500-3200 wet and 3600- 12000 dry.
Complete


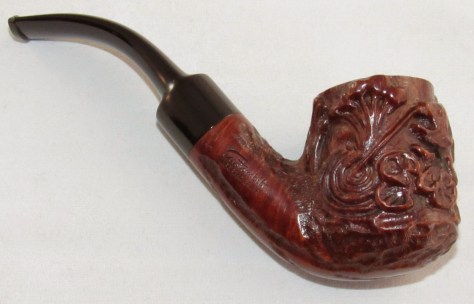
I used Howard’s Butcher Block Conditioner and a Q-Tip to get into the deeper rusticated areas where the buffing wheel couldn’t reach.I then buffed the stummel on the wheel with a few coats of carnauba and a round on a nude wheel. Buffing the stem with white diamond and carnauba. Hand buffing the pipe as a whole with a microfiber cloth before the photos.

Nice job, Tim. Those theme carved Custombilts are great lookers.
LikeLiked by 1 person