Honestly I think the Devil gets kind of a bad wrap sometimes. Sure there is the whole “pure evil” thing but lets be honest… The Devil has contributed some pretty cool stuff to society, heavy metal music being a great example of this. So even if he is the embodiment of all that is unholy Satan sure knows how to make some kick ass tunes. Ironically in addition to shredding guitar solos and barely intelligible lyrics he apparently also has hellish good taste in pipe tobacco. A few weeks ago a friend of mine suggested Devil’s Holiday to me and being the gullible sort I thought I would give it a try. Ironically when I started to plan for this review Devil’s Holiday wasn’t at the top of my list of tobaccos so…
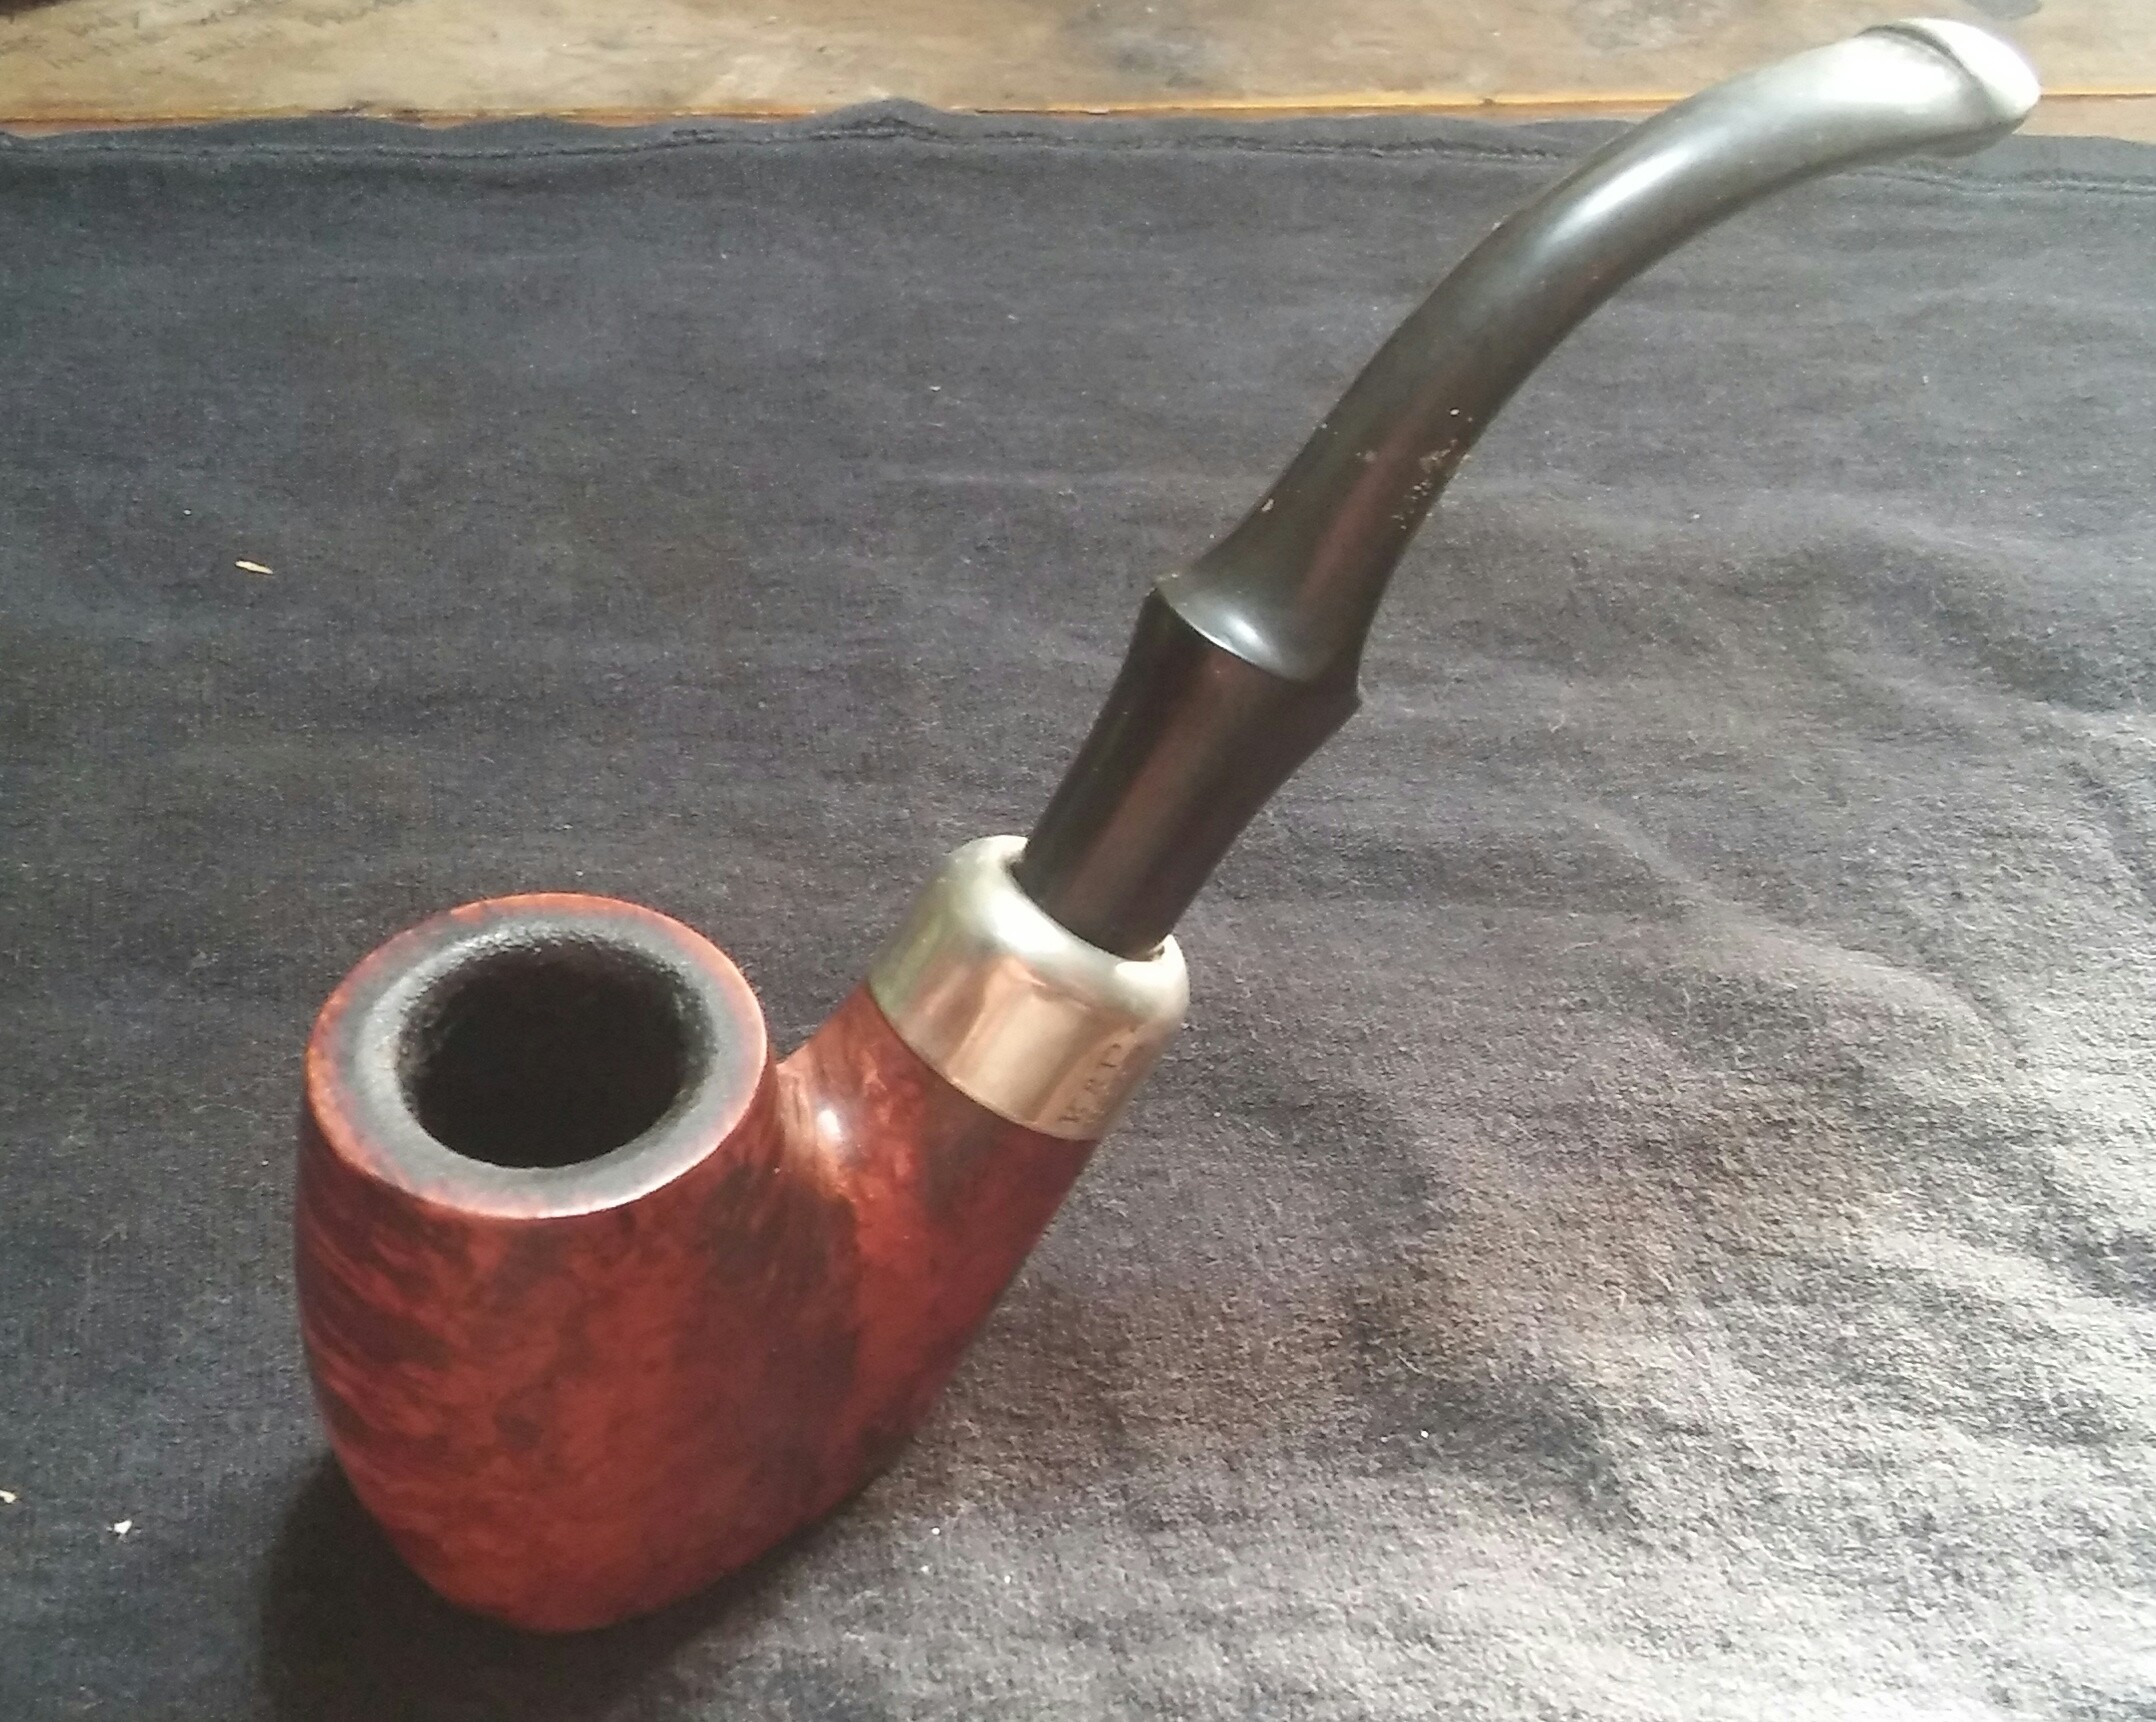
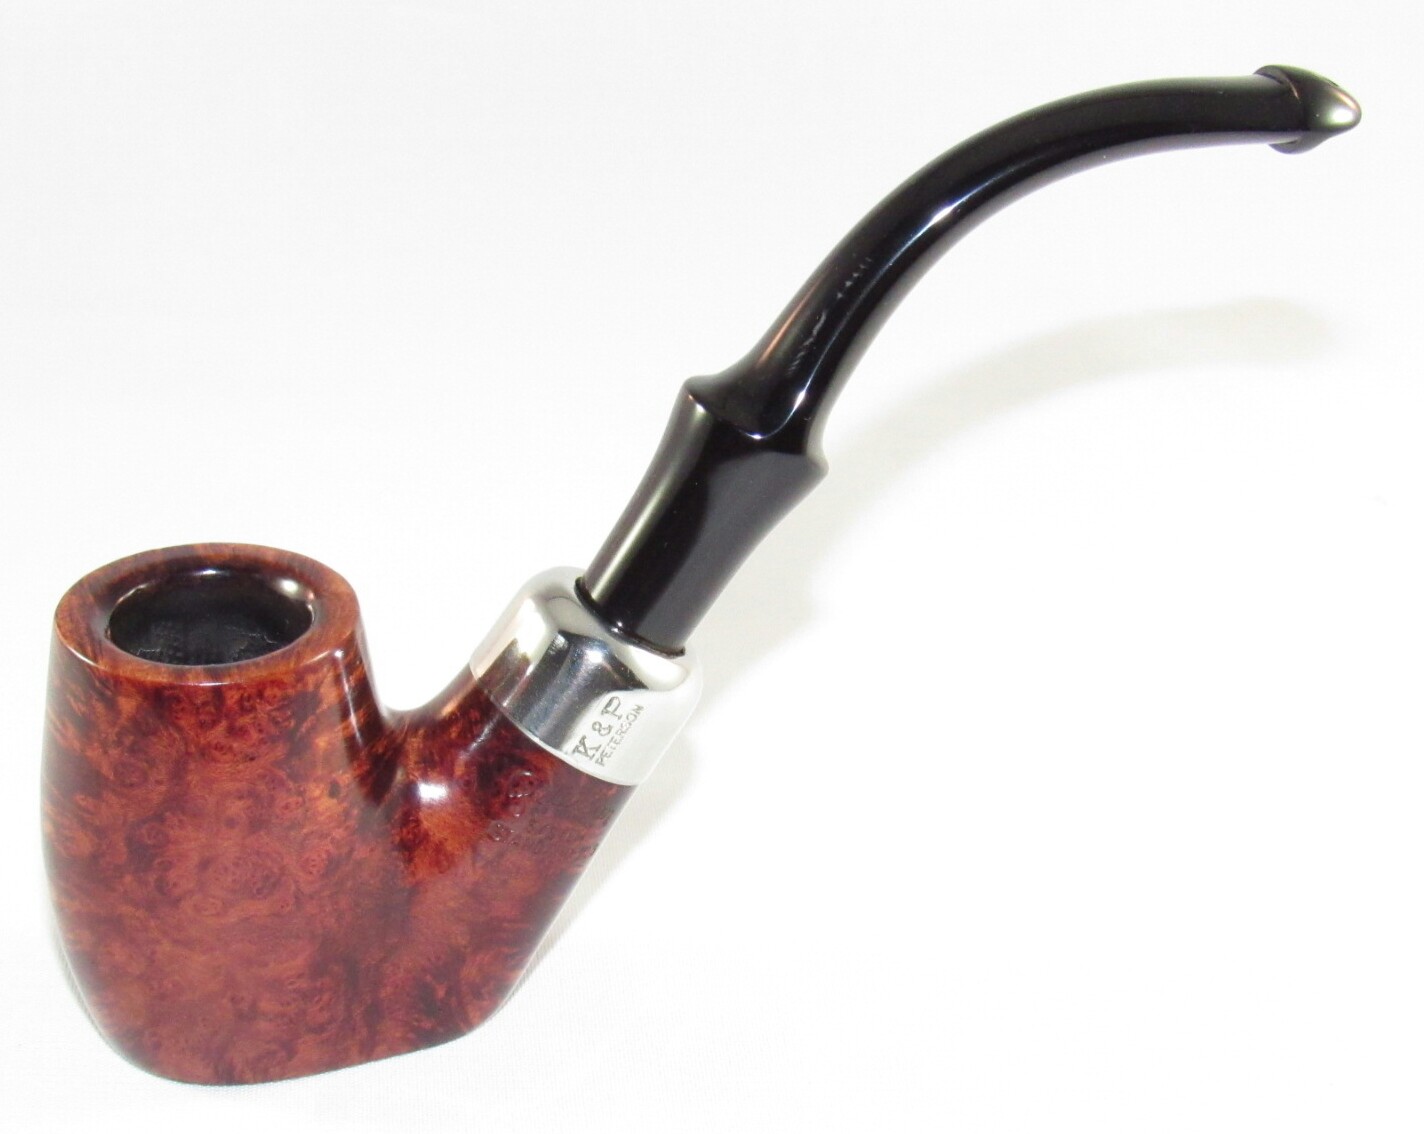
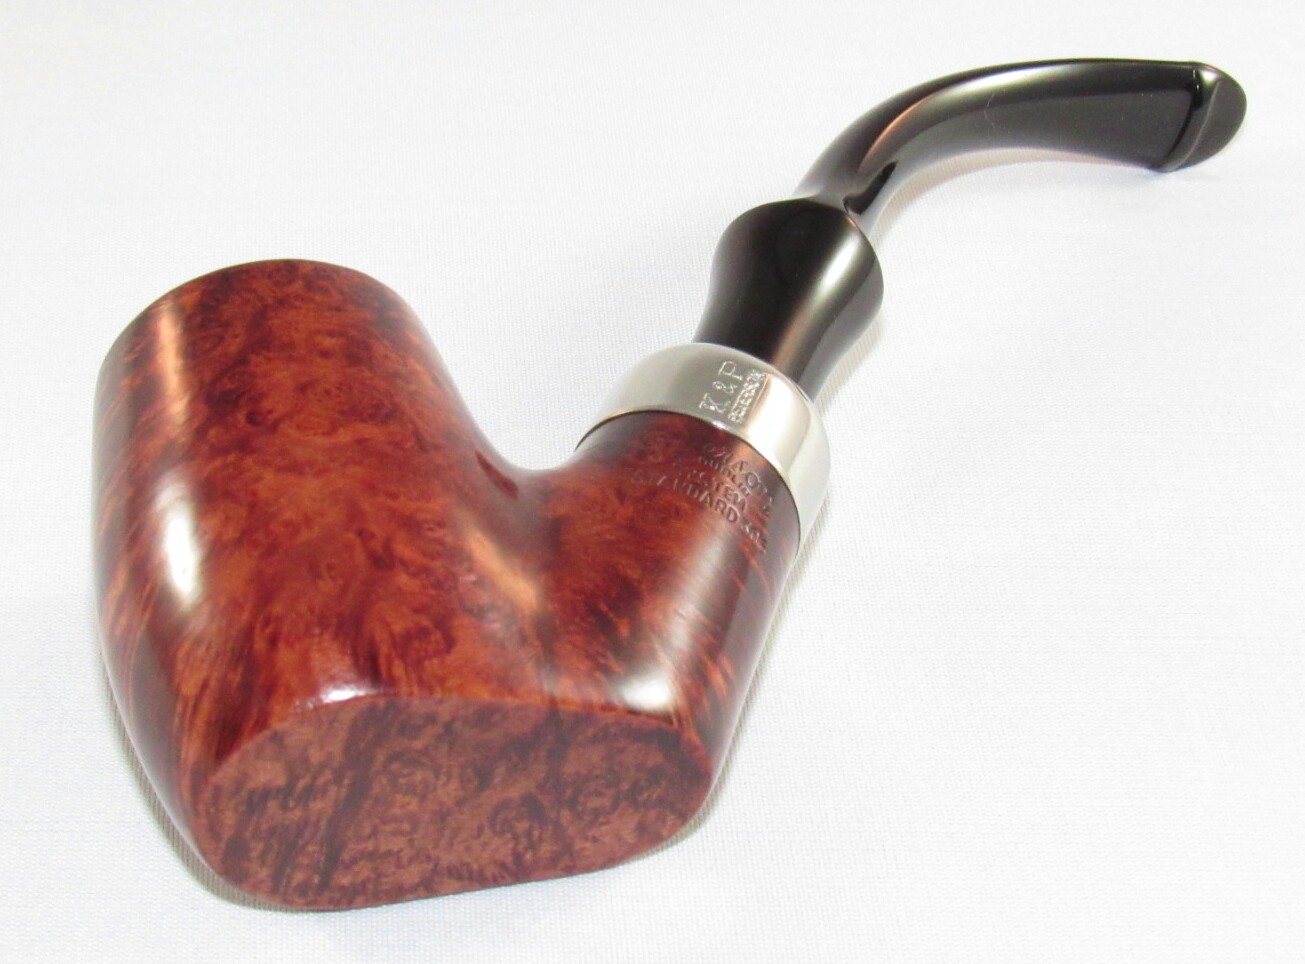
This is the first of eleven pipes I recently acquired. The Peterson System Standard 306 is the first sitter in my small Peterson collection. I am unsure of its age as it does not have a made in or hallmarks, which I found odd as all my other Petes have some sort of way to date them. The only markings on the pipe is Peterson of Dublin System Standard 306 and K&P Peterson on the band.
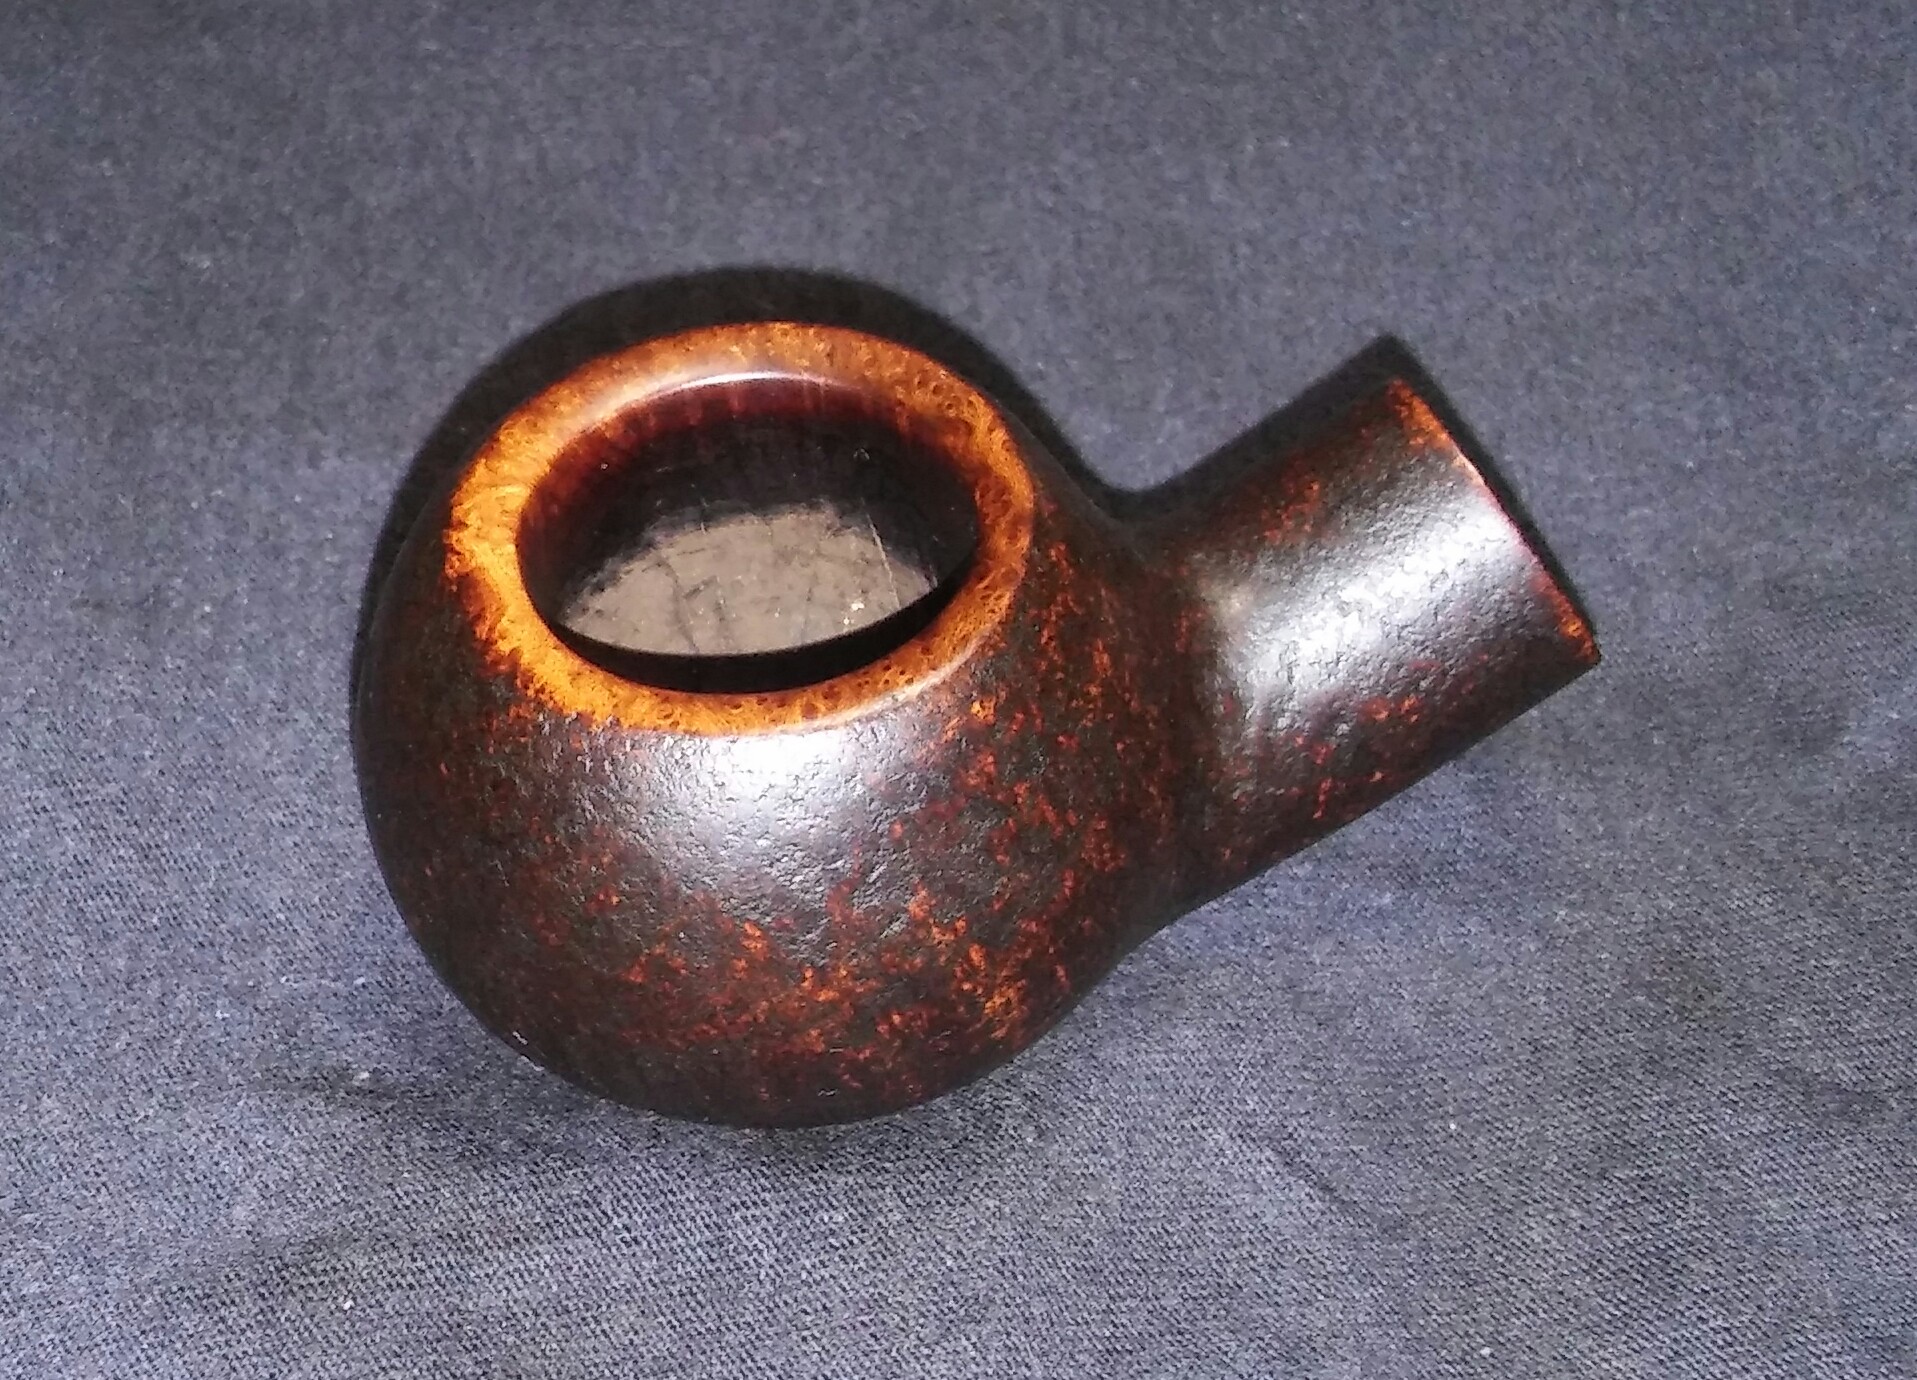
As Received.
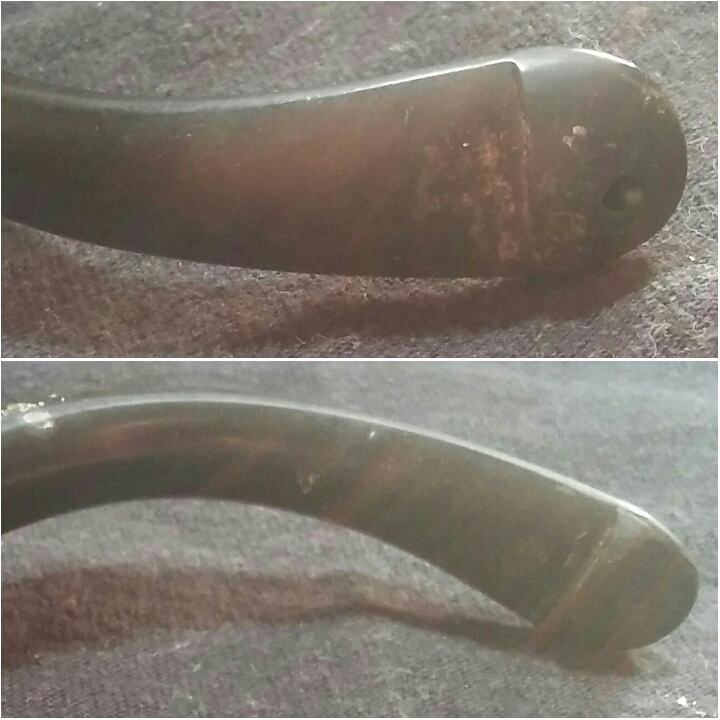
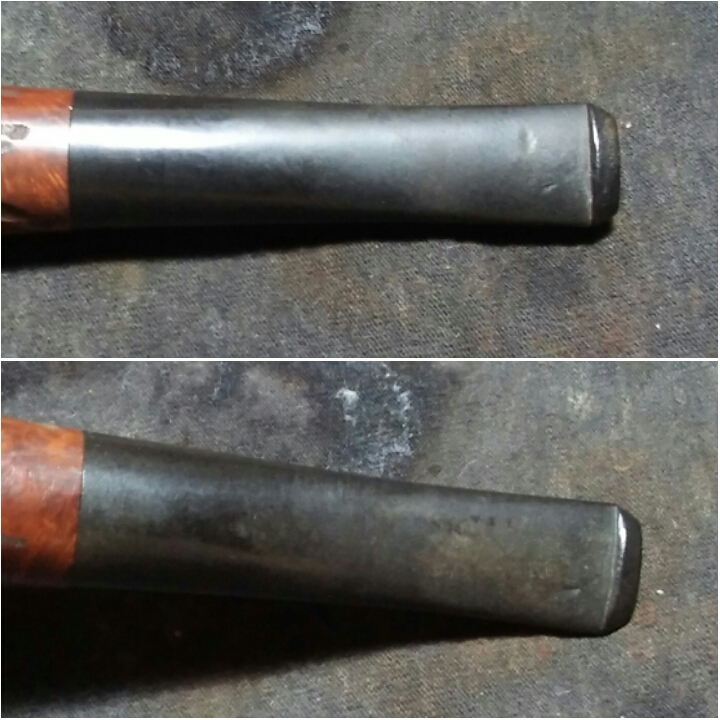
Over all in pretty descent shape, the stem was oxidized and a few tooth impressions. The chamber had an uneven crumbling cake and the rim was built up with old tar/oils, there is also charring around the inside edge of the rim. The finnish was worn and tired and one small spot of filler. The biggest hurdle was the Lakeland ghost.
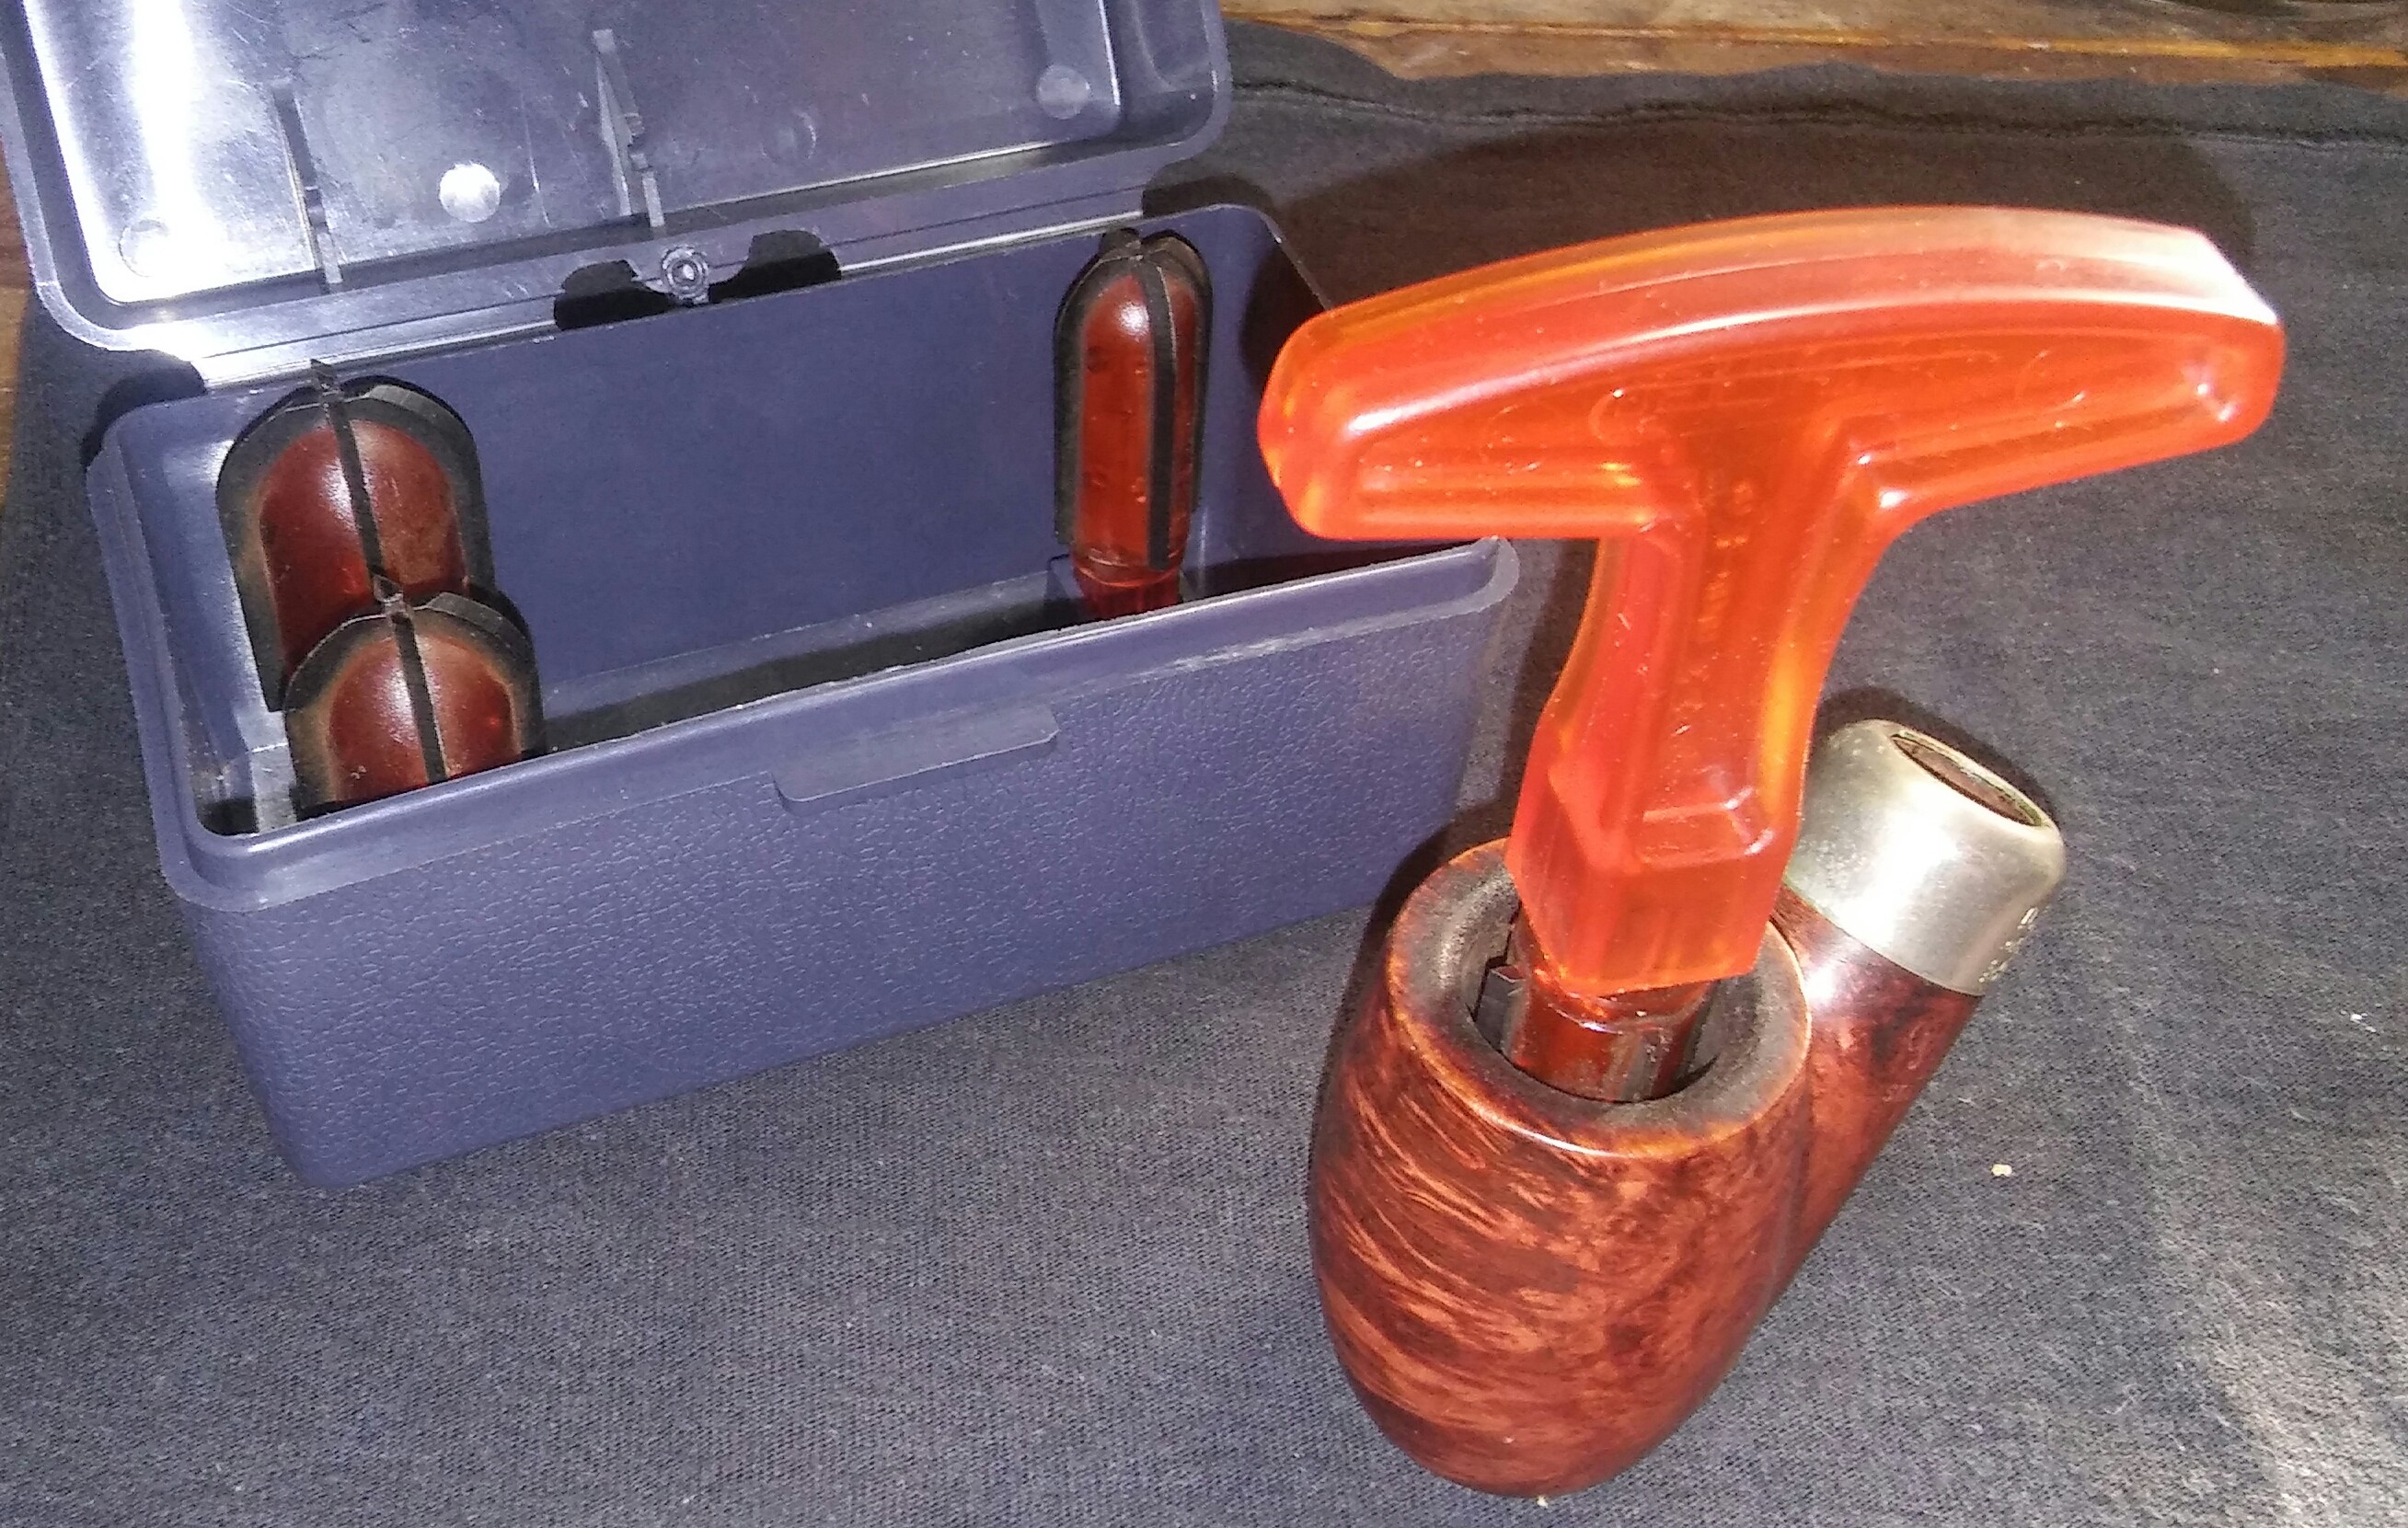
I started with the stummel and my Pipnet Reamer. Starting with the smallest attachment and working up to the second largest, I brought the chamber back to briar, it was free of burn or pitting. I smoothed things out with 400 grit sandpaper wrapped around a finger .
Next I could tackle the caked and charred rim. I applied a generous amount of Method Good For Wood Polish to the rim and set it aside to penetrate the build-up for a few minutes. Using Q-tips I removed the rim build-up, I would repeat this process a few times to remove all the debris. After the build-up was removed the rim darkening was still present, using worn micro-mesh I was able to fade most of the darker spots of the rim.
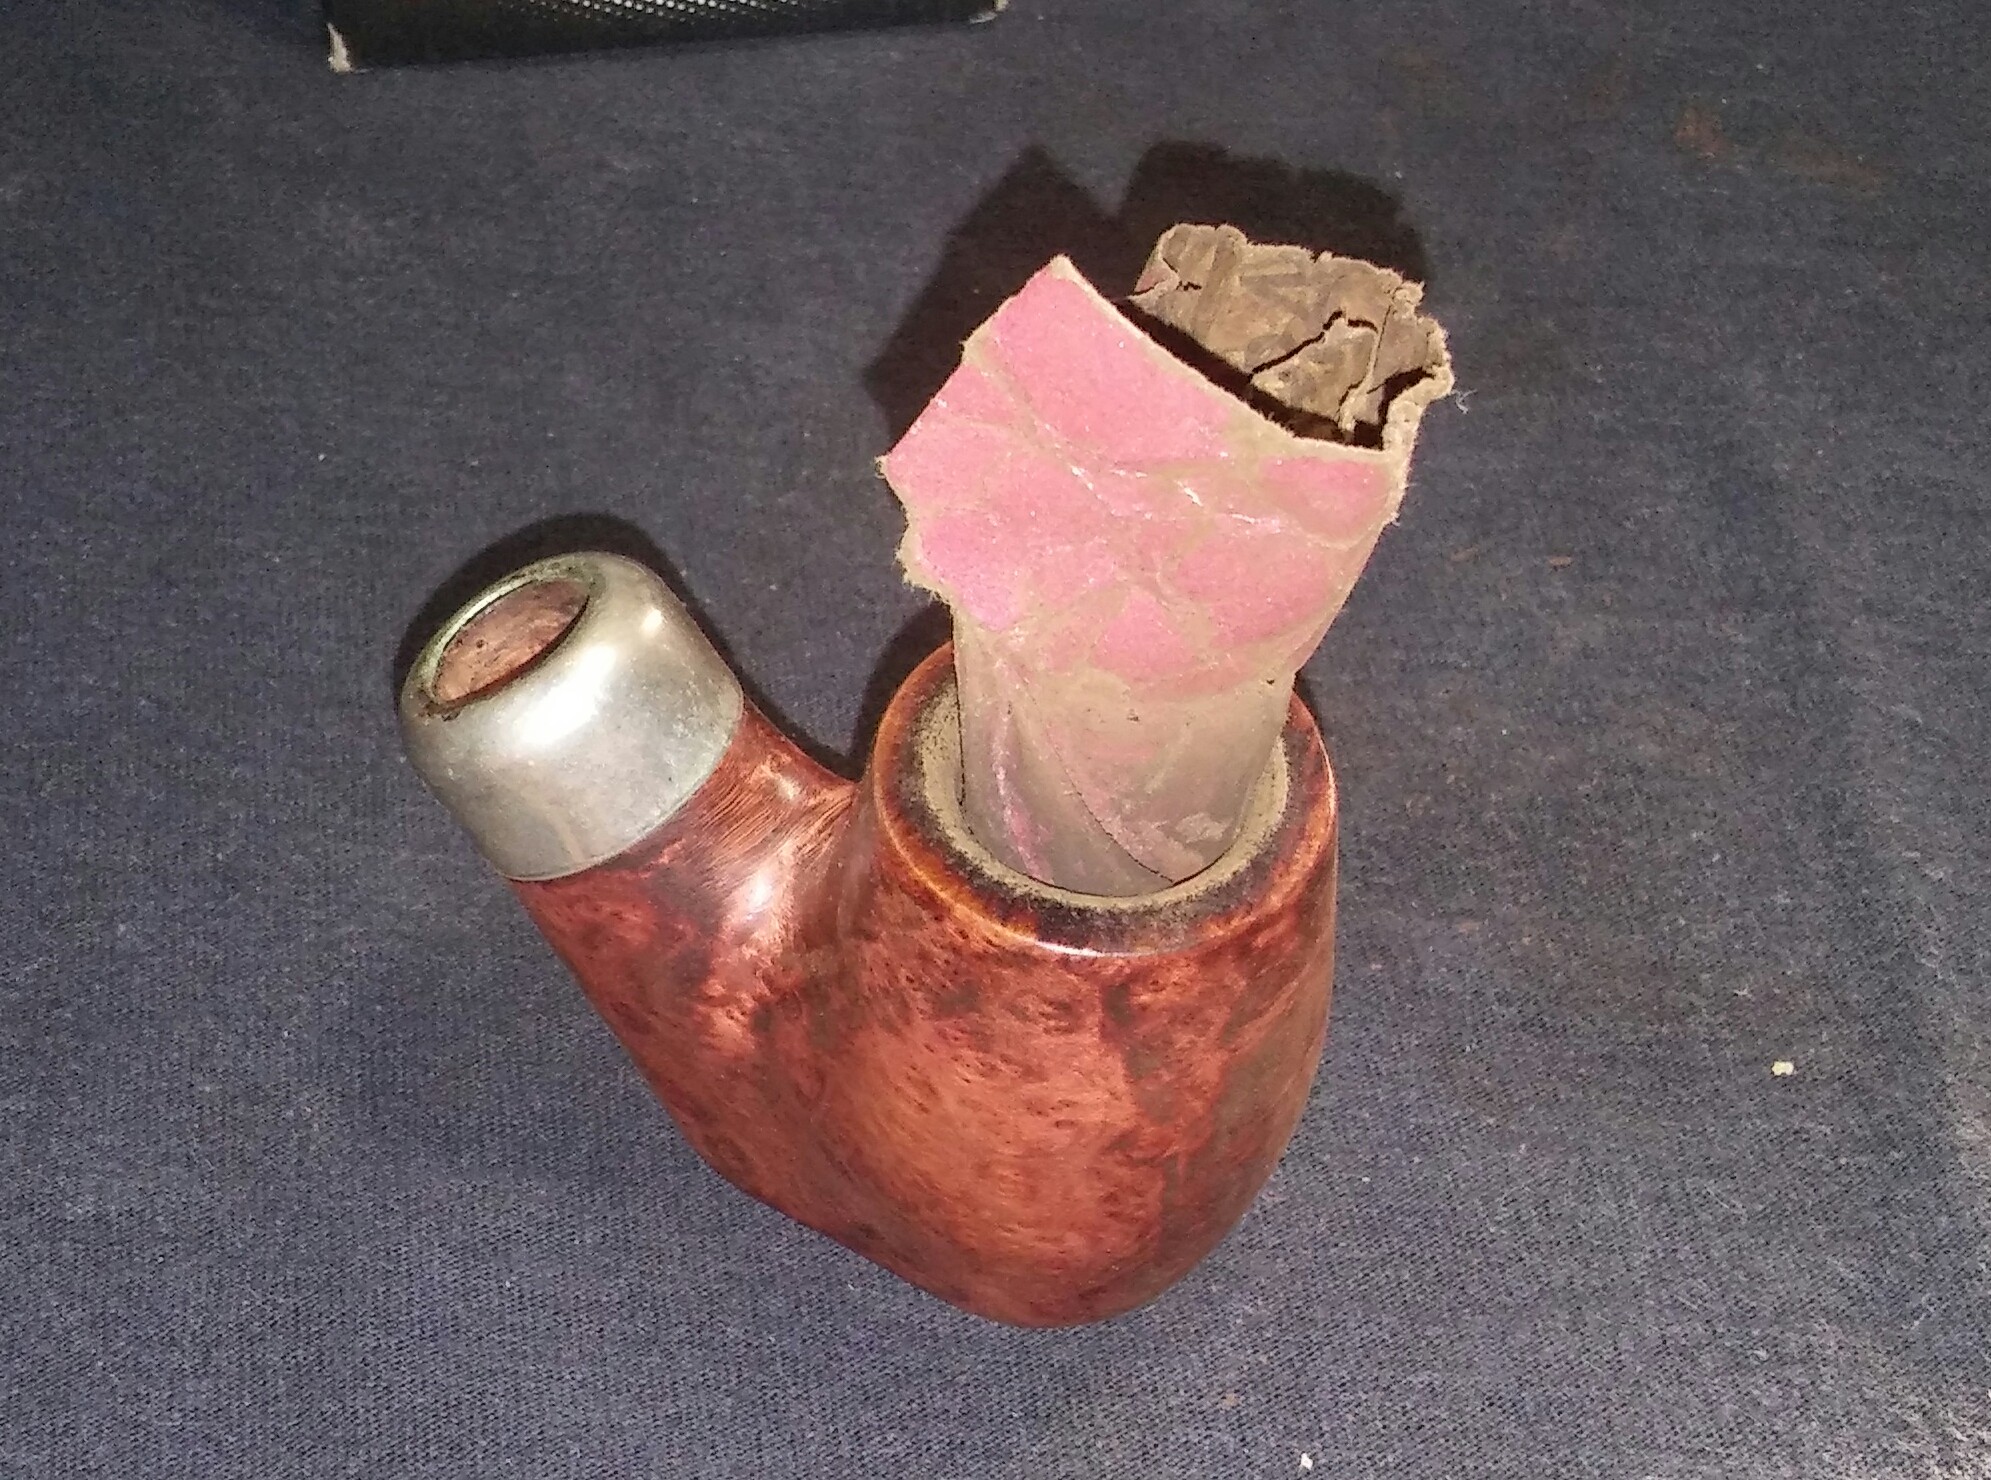
Next I gave the internals a good cleaning. Using EverClear, shank brushes, Q-tips and stiff/soft pipe cleaners. Cleaning until the last pipe cleaner came out as it went in. I now filled the chamber and mortise with cotton balls and added EverClear until the cotton balls were saturated and set it aside for a few hours to absorb the tars and oils. The Lakeland ghost would not give up, the stummel was left over night with EverClear and cotton balls and hopefully did the trick.
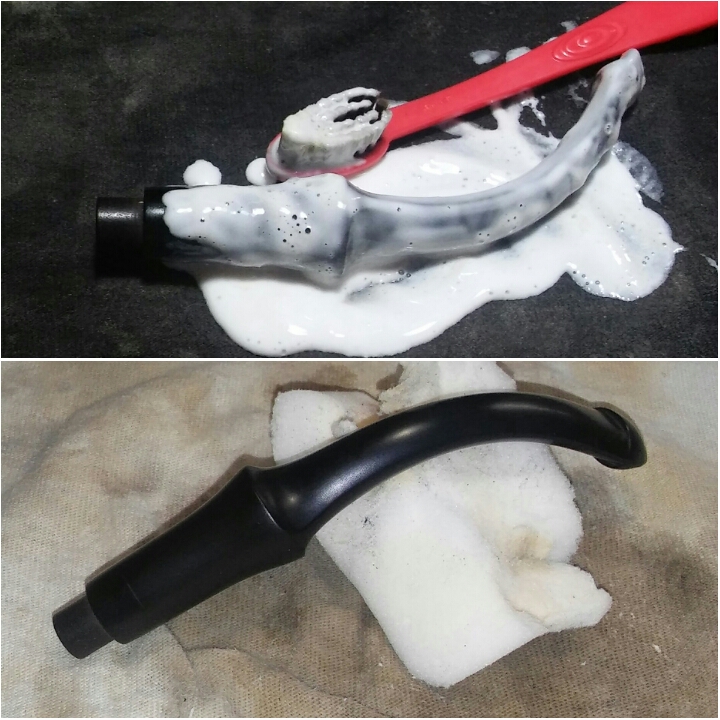
My attention now turned to the oxidized stem. I applied non-bleach Soft Scrub to the stem with a children’s toothbrush and left it aside to penetrate the oxidation. Once the Soft Scrub turns from white to a brownish color its time to introduce the old elbow grease and scrub vigorously with a rag until the oxidation is removed. I finished up with a damp Magic Eraser to remove the leftover oxidation.
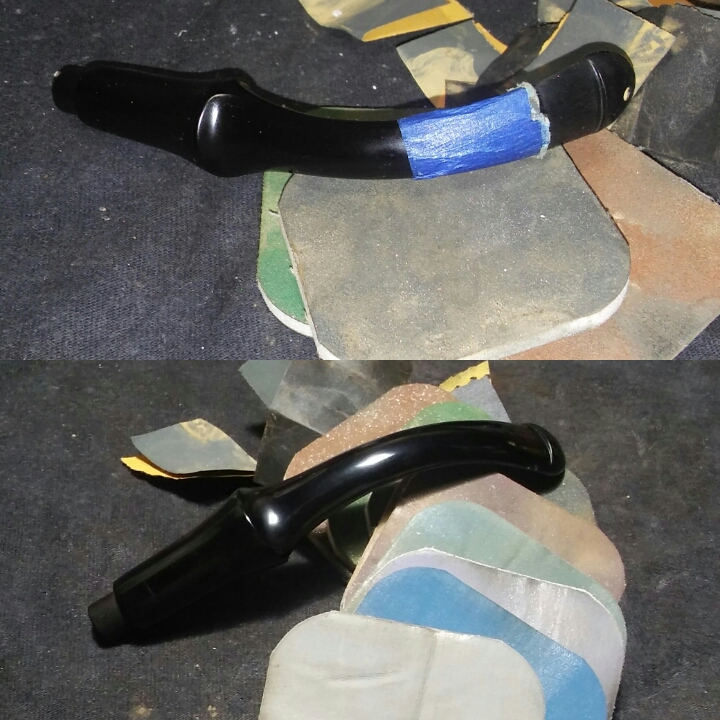
With the oxidation removed I could begin removing the impressions at the bit. I tapped off the stem with blue painters tape just before the P-lip so my rough sanding would remain in one area, the rest of the stem would not need as abrasive grit. Starting with 400 grit sandpaper wet I removed the deep impressions, then working through 800, 1000 grit sandpaper wet, 1500, 1800 micro-mesh wet, 2000 grit sandpaper wet and finally 2400 micro-mesh wet until smooth. Before sanding with the finial six micro-mesh pads I removed the painters tape and dry sanded the entire stem 3200-12000.
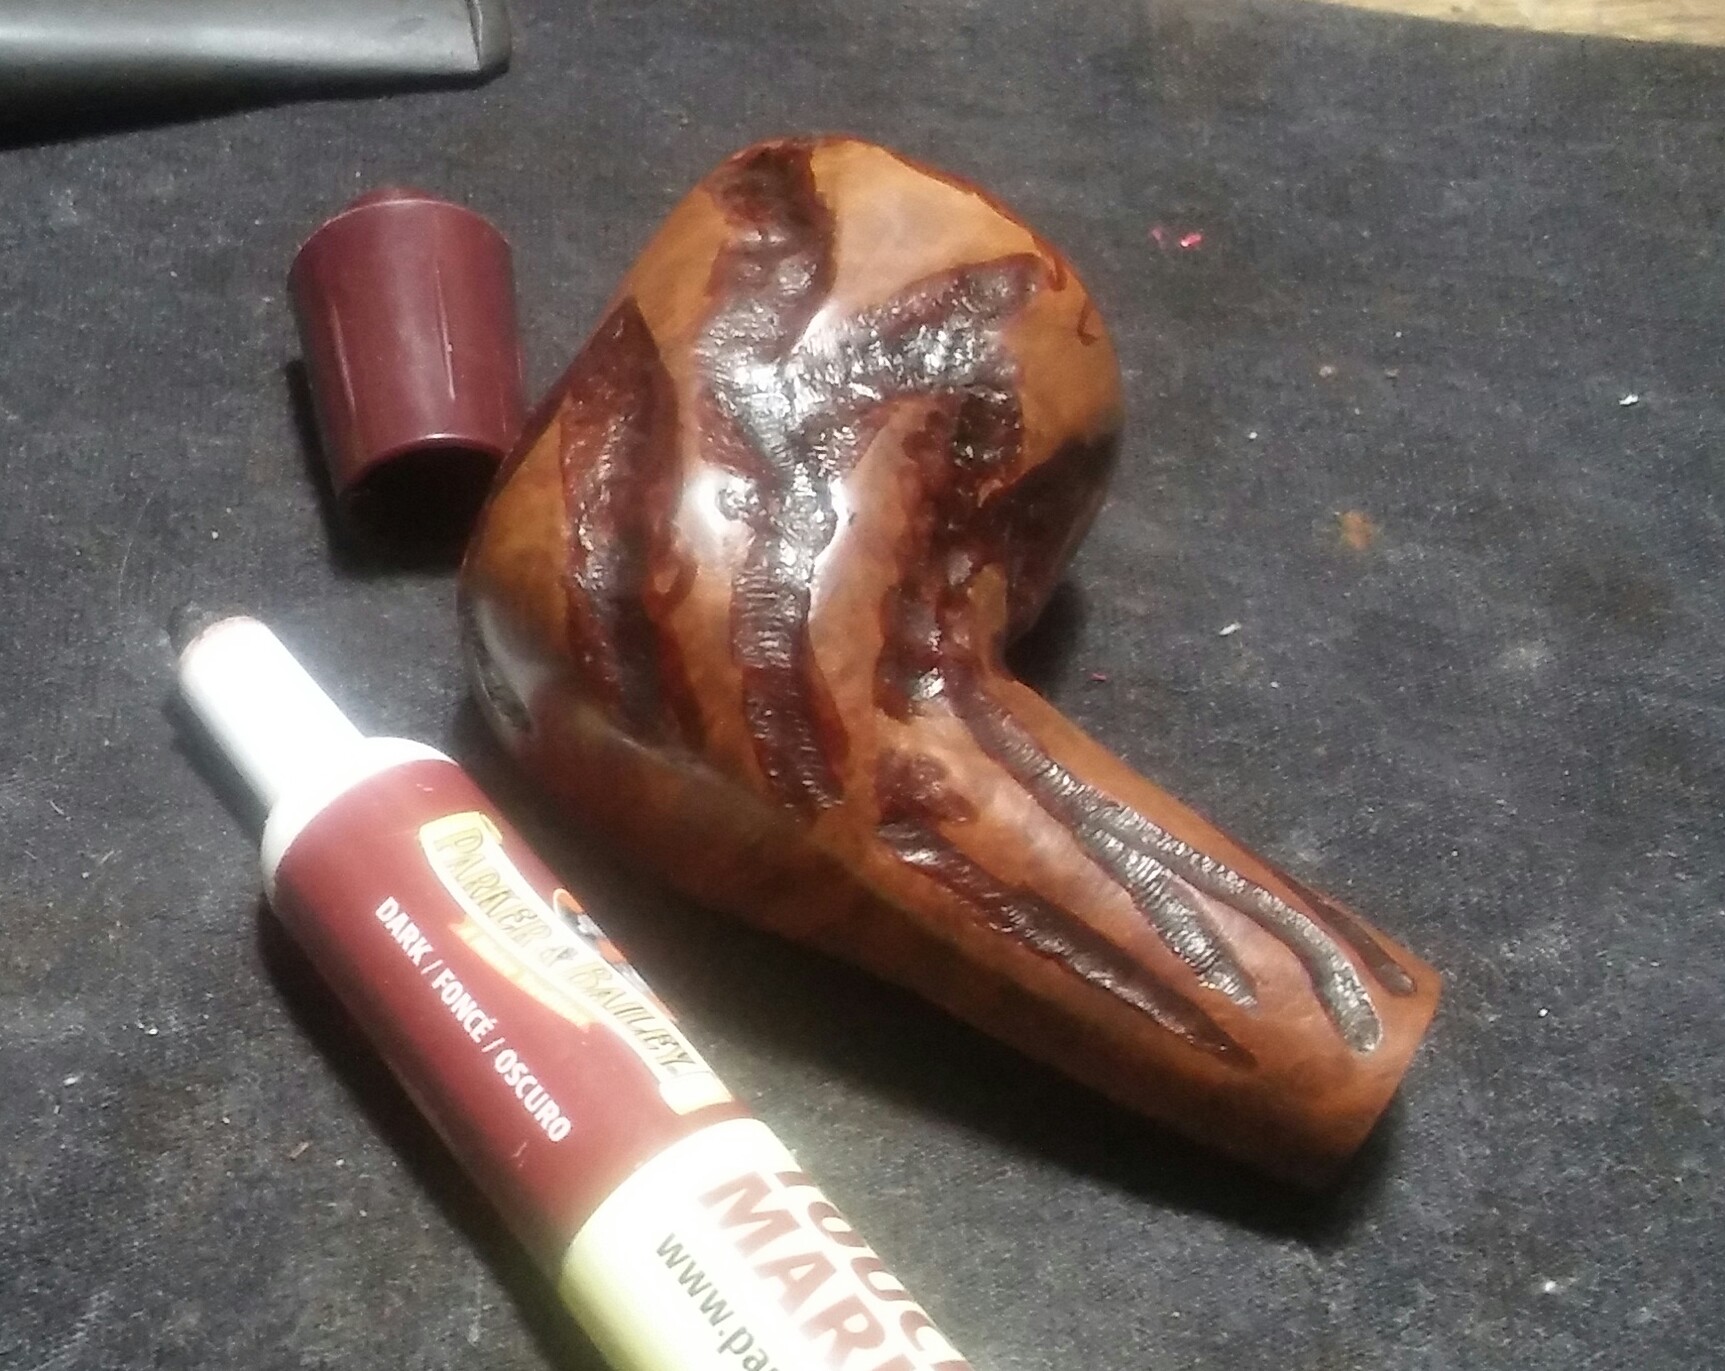
There was one small spot of filler that would need to be removed. To remove I used Method Good For Wood Polish, an X-ACTO knife and a Q-tip, I applied a small amount of the polish with a Q-tip to the filler and left it aside to soften up. Once softened I removed the filler with the X-ACTO knife, I then cleaned the area with a Q-tip and EverClear to remove any oils or debris. I filled the pit with Gorilla Glue and briar dust and allowed it to dry. Once dry I sanded the area with worn micro-mesh until the repair was flush.
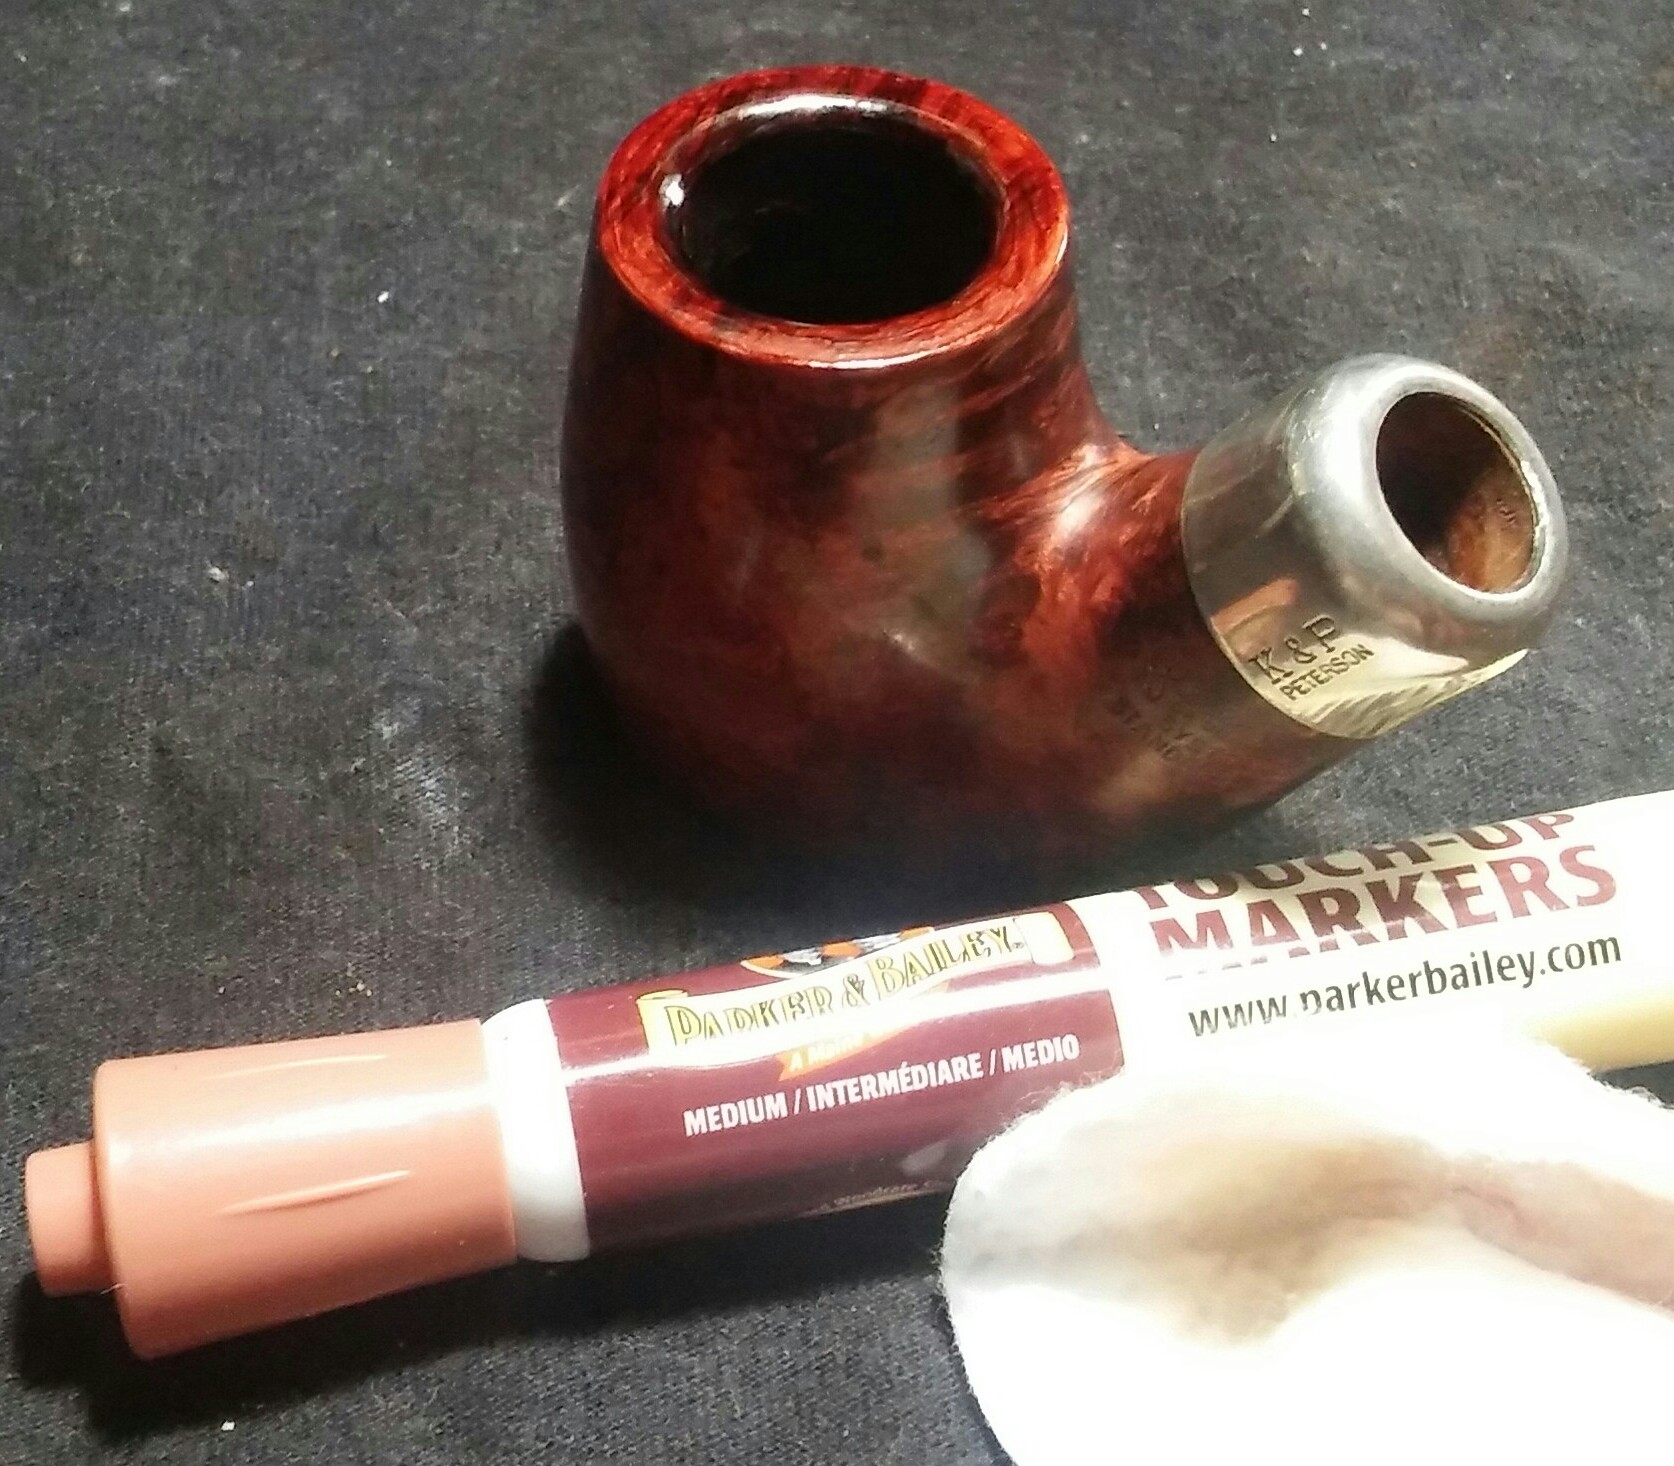
The rim and filler spot was left lighter after sanding with the micro-mesh, using a touch up marker I was able to blend the faded rim and filler spot into the rest of the finnish. Coloring in the rim and filler spot with the marker allowing to dry and removing the excess with an alcohol dampened rag. In the end I could not exserminate the Lakeland ghost completely but with smoking it will likely dissipate.
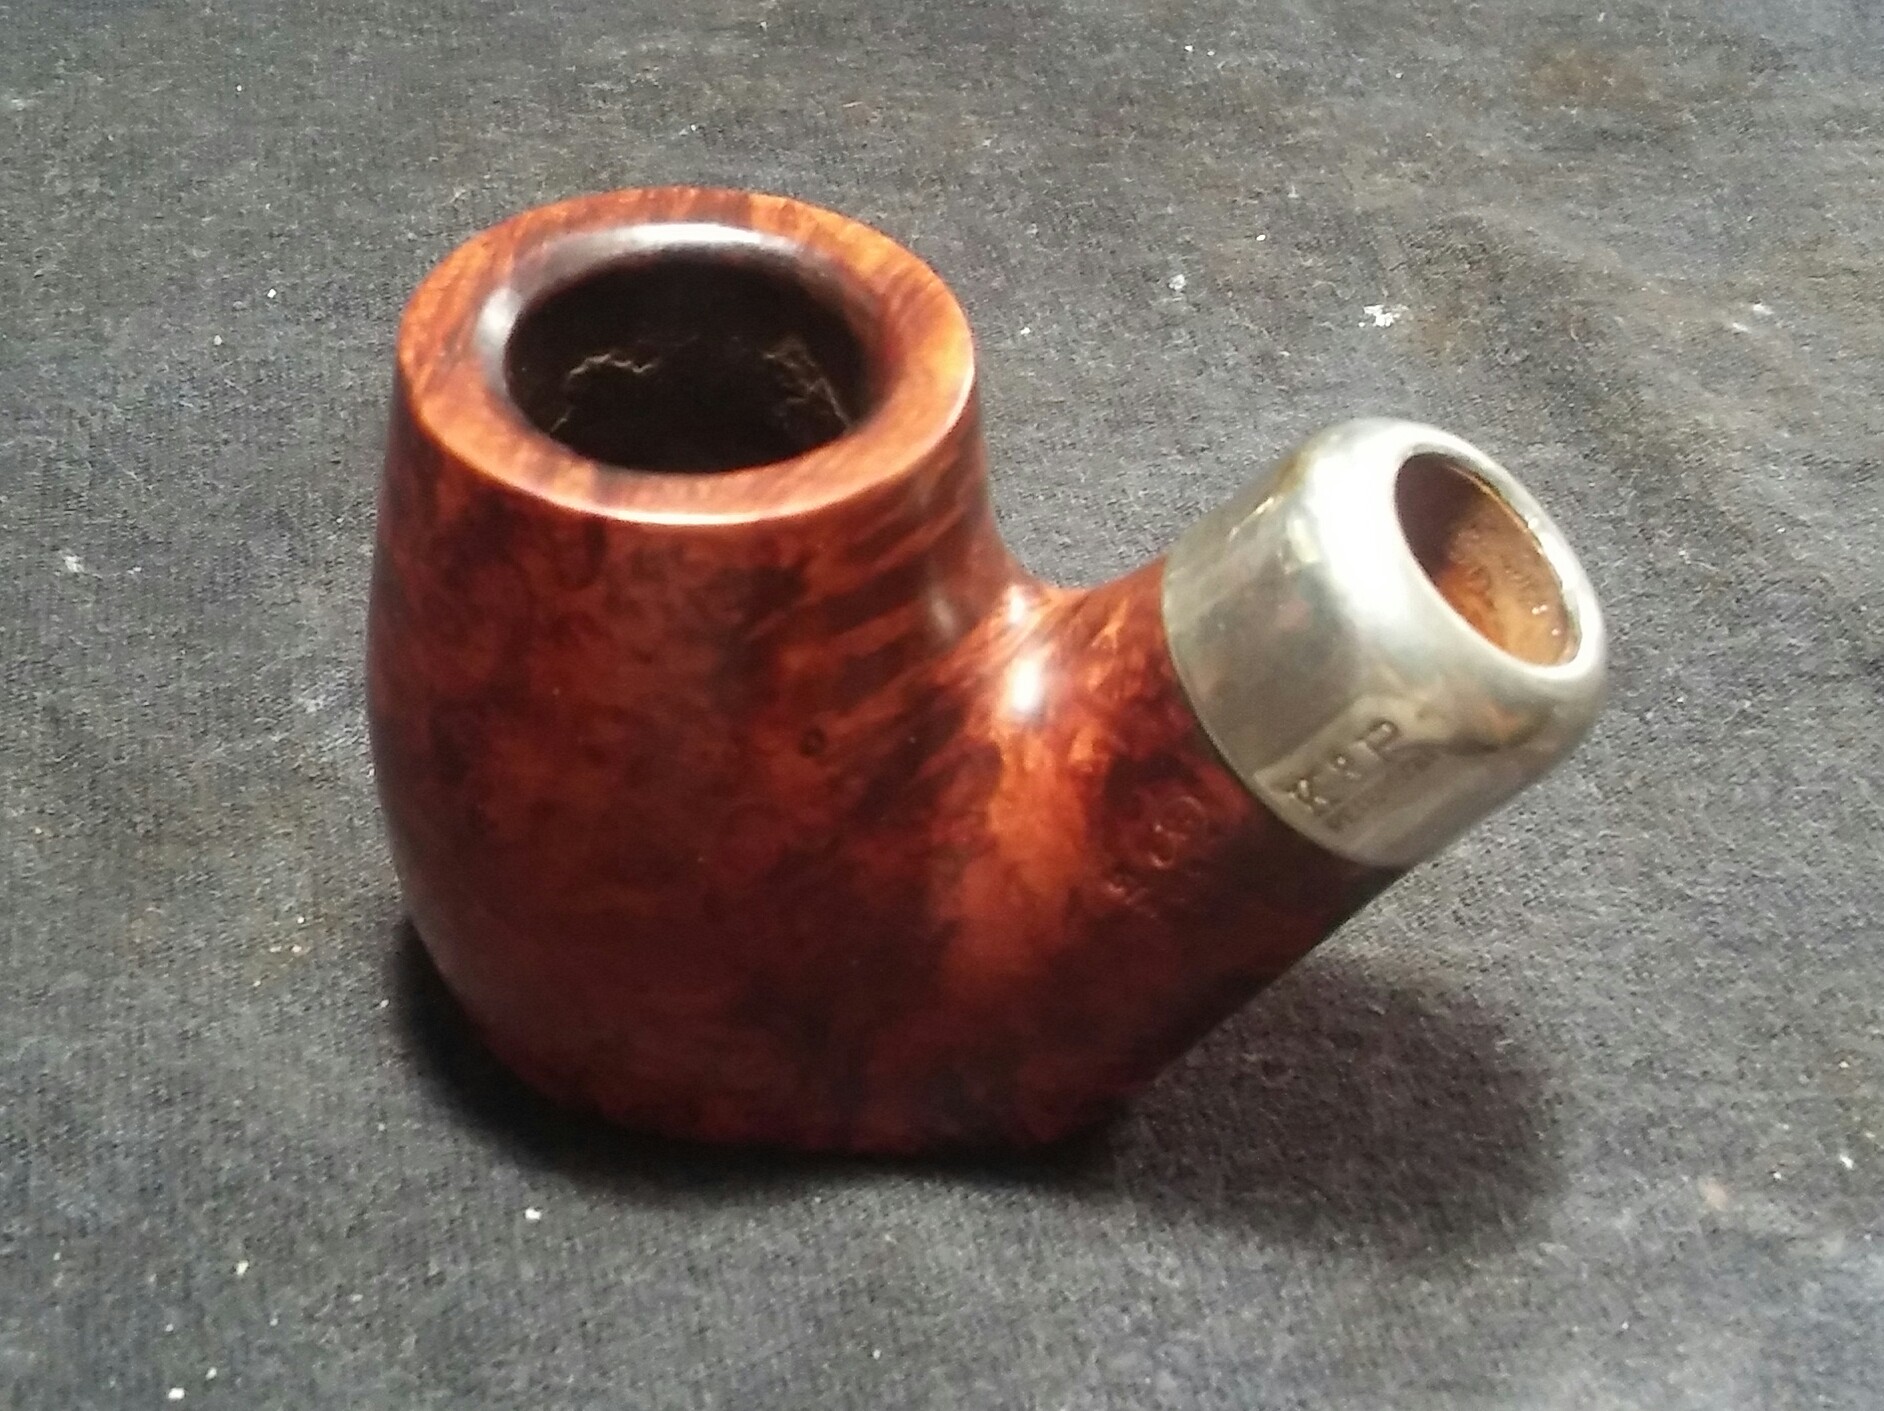
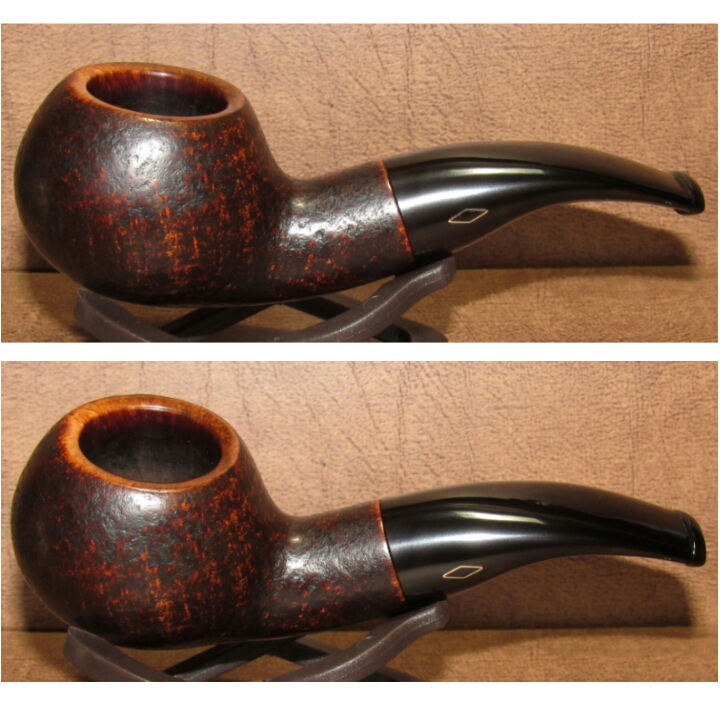
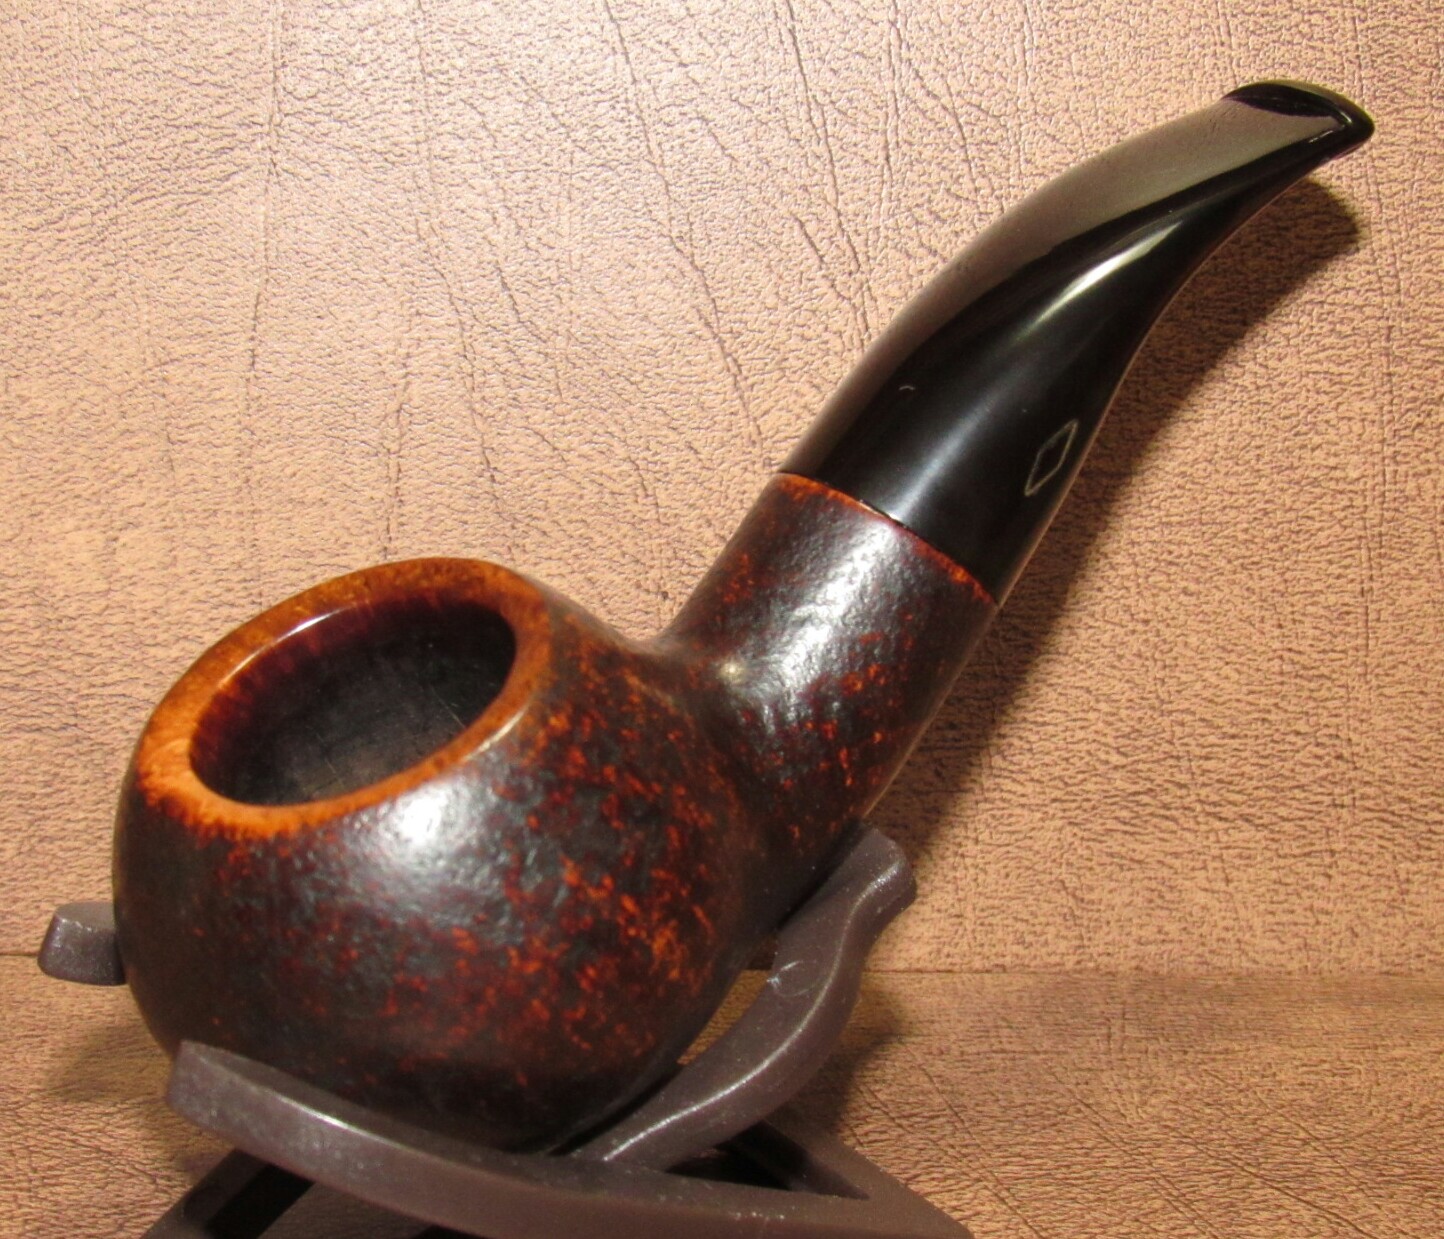
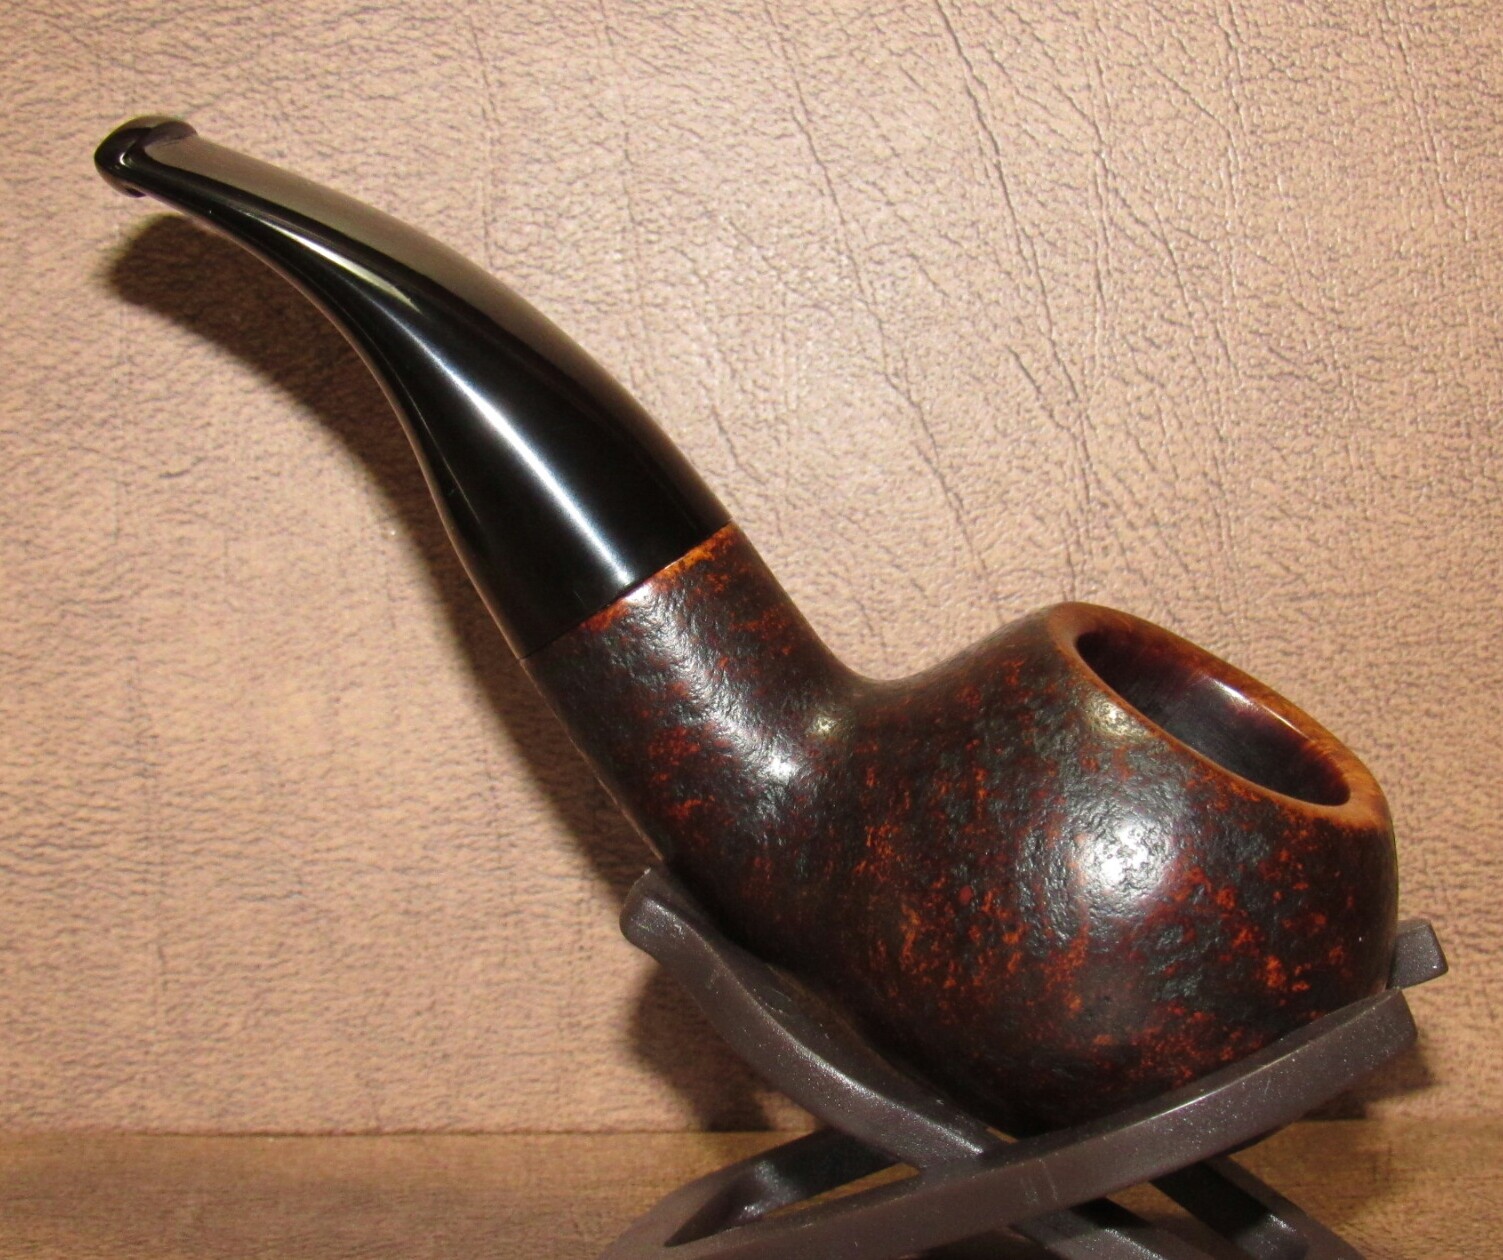
Complete.
I finished up on the wheel with white diamond, a few coats of carnauba and a microfiber hand buffing. Buffing the stem with blue compound.
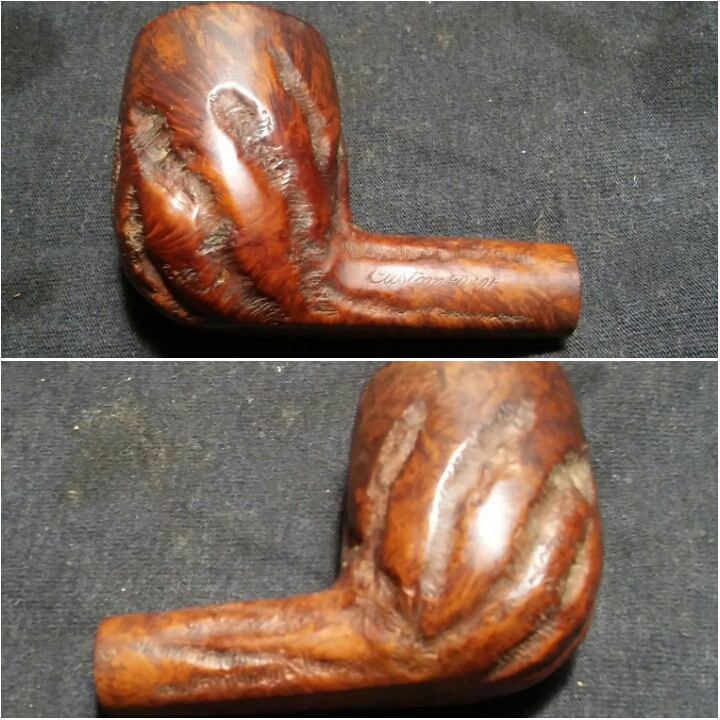
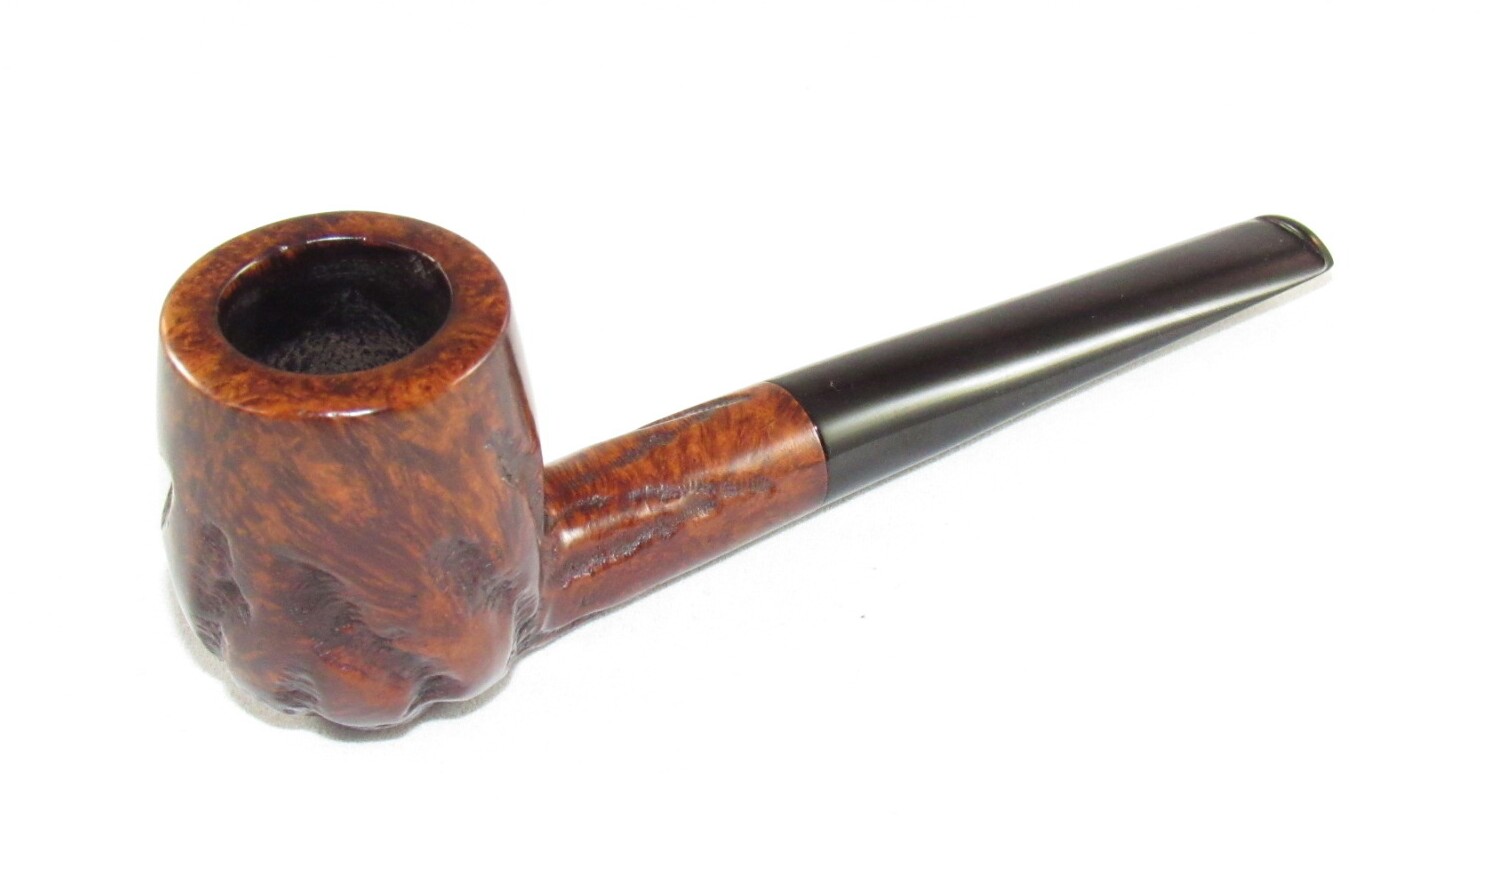
The last of my medium Custom-Bilt refurbs . I have always enjoy the Dublin shape and in the Custom-Bilt carving it looks even better.
As Received.
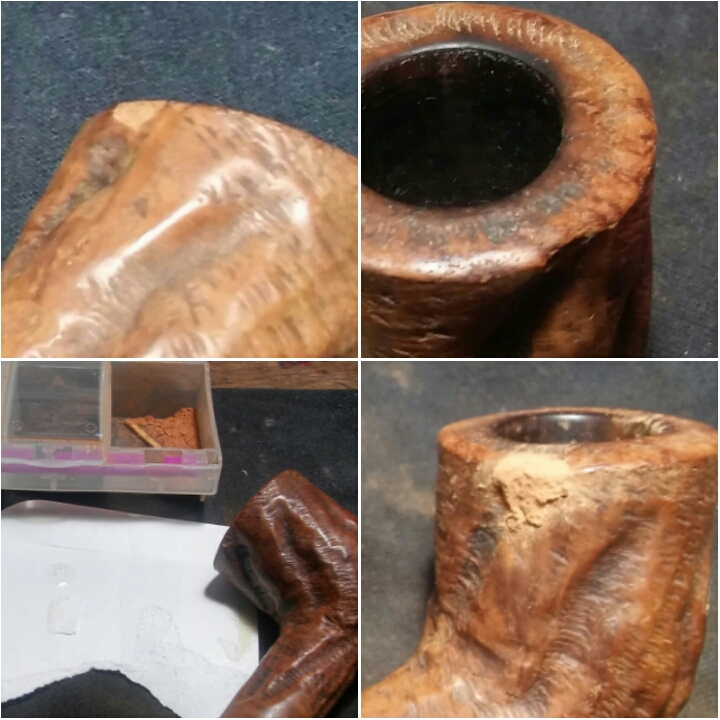
She was in well-loved condition, chatter, a couple of deep tooth impressions, rim tar and char and the nomenclature was worn to almost non-existent. The tell tail Custom is all that’s left .
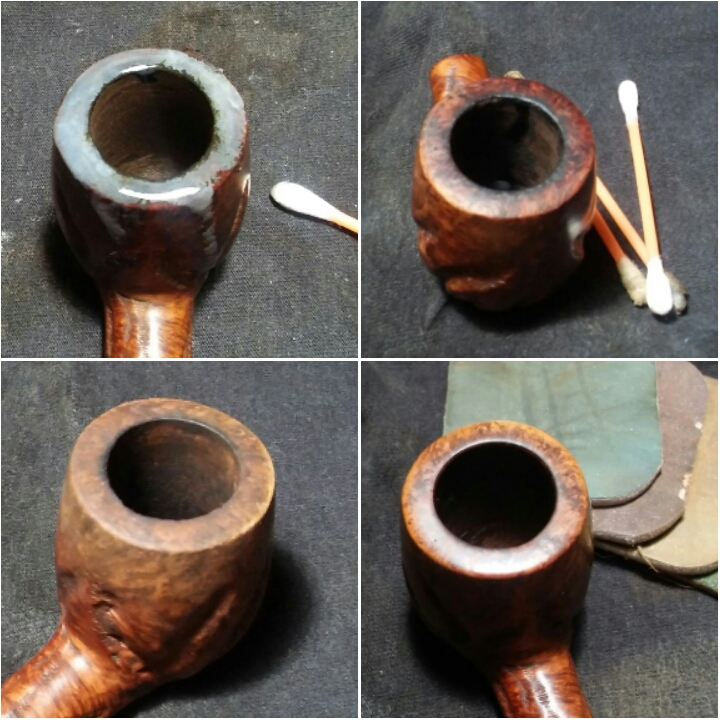
The chamber was pre-reamed by the previous owner/seller, I smoothed things out with 400 grit sandpaper wrapped around a finger. The chamber was free of damage.
Next I tackled the caked rim I applied a generous amount of Method Good For Wood Polish to the rim with a Q-tip and allowed it to penetrate for a few minutes, removing the build-up with Q-tips and makeup pads. I would repeat this process a few times.
The internals needed attention. Using EverClear, Q-tips , shank brushes and stiff soft pipe I cleaned the internals of the mortise and chamber ,until the pipe cleaners came out as they went in.
Using an alcohol dampened makeup pad, I wiped down the stummel to remove the dirt and debris.
With the stummel clear of dirt and grime, I used a dark touch up marker to highlight the deep gouges, removing the excess with an alcohol dampened makeup pad. I could now move on to the stem
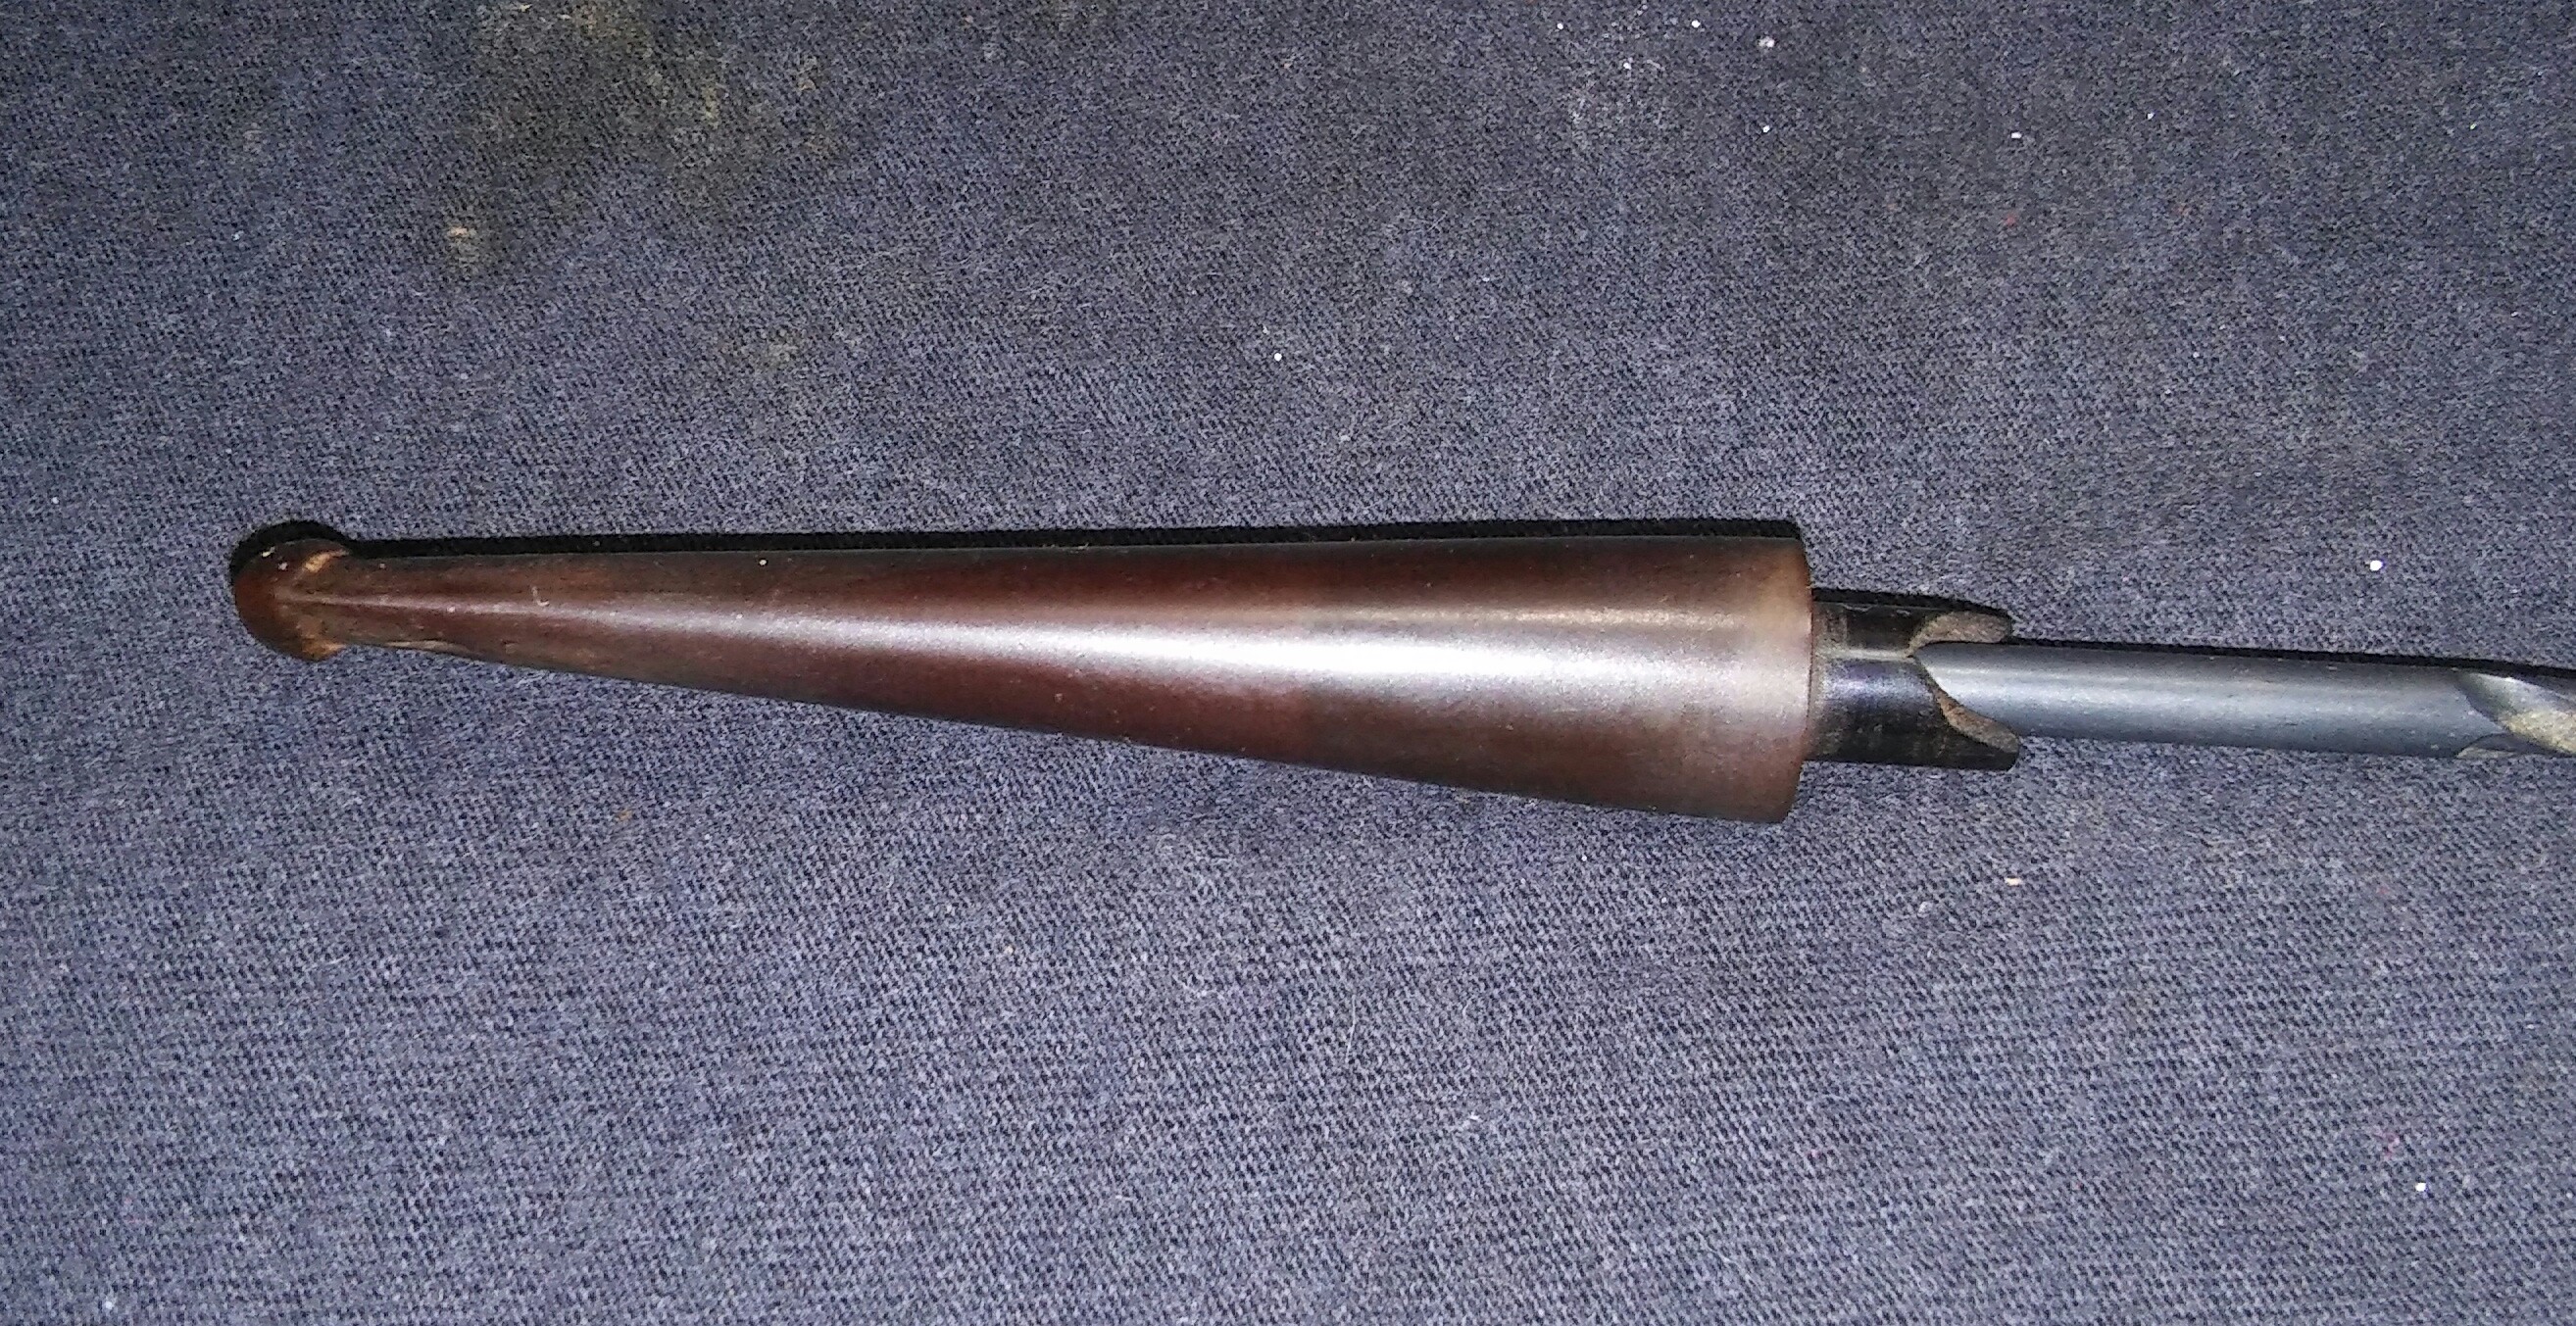
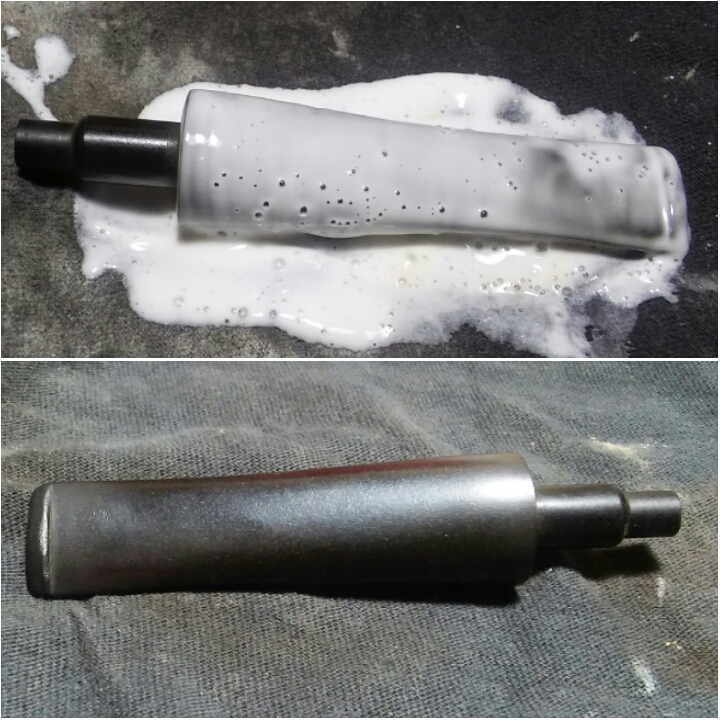
I applied non-bleach Soft Scrub to the stem with a children’s toothbrush and left it aside to allow the Soft Scrub to penetrate the oxidation. Once the Soft Scrub turns from white to a brownish color its time to scrub vigorously with a rag until the oxidation is removed.
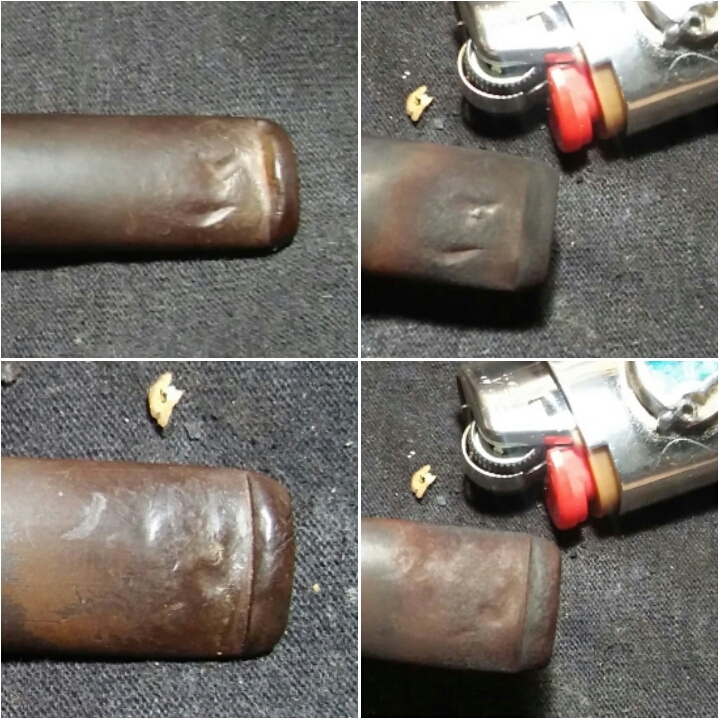
After the removal of the oxidation there were deep tooth impressions left. I attemped to raise some of the impressions with heat( moving the lighter at all times never leaving it in one spot too long ) to no avail. Instead they would need to be filled.
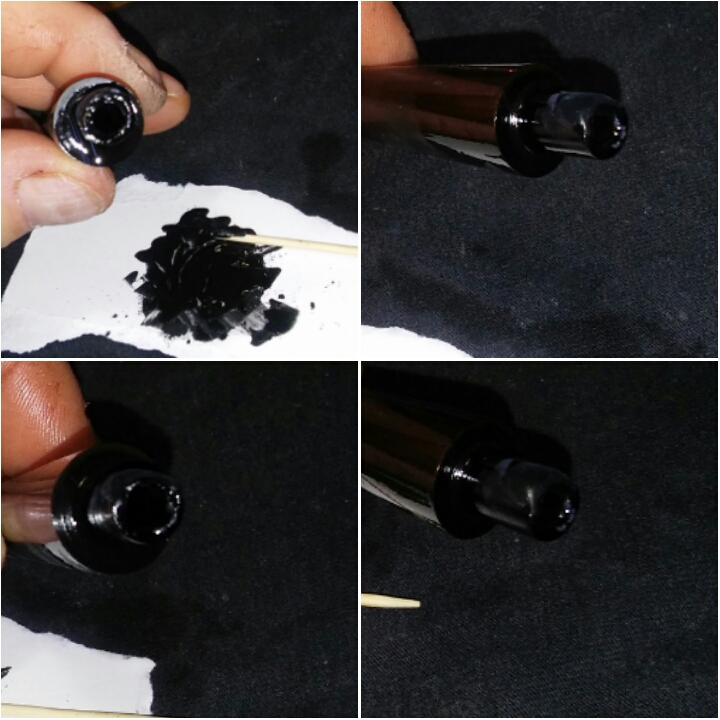
Using thick black CA glue and activated charcoal powder I made a paste. I roughly sanded the area to be repaired with 400 grit sandpaper then wiped down with EverClear. I applied the paste with a toothpick to the impressions and hit it with accelerator to set the repair, I applied pressure with my finger to the patch pressing it into the impression just before it set. I now left it aside to cure overnight.
The following morning I began sanding the repair with 400 grit sandpaper wet , with the patch blended into the stem I could move on to the various grits of sandpaper and micro-mesh pads.
Using a washer between the stummel and stem to keep my sanding in one area, I now ran the stem through the various grits of sandpaper and micro-mesh pads starting with 800 grit sandpaper wet, 1000 grit sandpaper wet, 1500 mesh wet, 1800 mesh wet, 2000 grit sandpaper wet and 2400 mesh wet , then 3200- 12000 micro-mesh dry.
Before hitting the wheel I applied Howard’s Butcher Block Conditioner with a rag and let it penetrate for a few minutes, removing the excess with a clean rag.
Complete
I finished up on the wheel with white diamond, a few coats of carnauba and a microfiber hand buffing. Buffing the stem with blue compound.
Happy International Pipe Smoking Day to all my friends, readers and fellow bloggers. For the day I wanted something new, well new to me . She came in on Friday just in time for a Saturday puff. The Brebbia Fat Bob is a pipe I’ve been in search of in my price range for two year’s. Now I’m unsure if that’s what I have here but if it’s not it’s a close match. The pipe itself is unmarked but the stem has the Brebbia inlay. I have seen other unmarked Brebbia’s in the past made for private B&M’s.
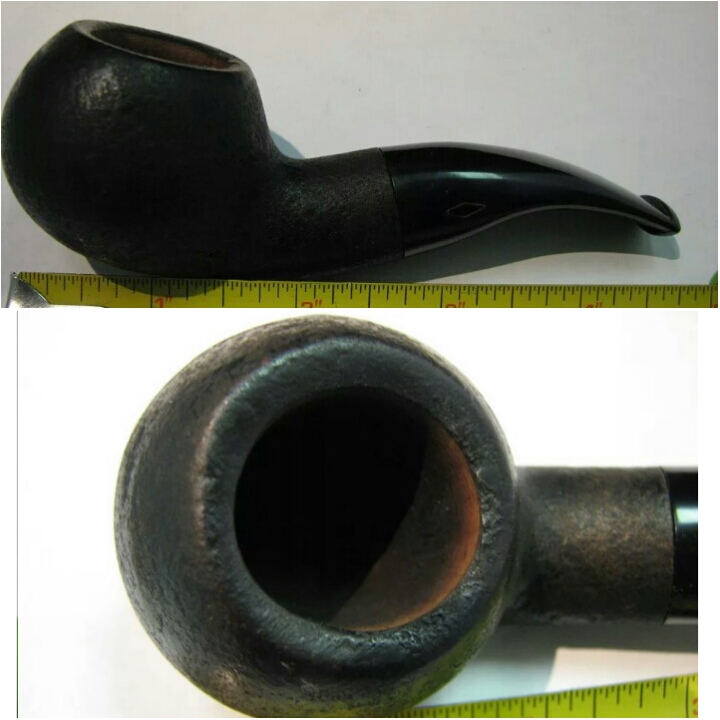
As Received
I got a little ahead of myself with this refurb and began working without stopping to take before and after photos, the photo above is from the auction. It was listed as clean and ready to smoke apparently my standard’s are a little higher than others. The pipe was badly reamed ( out of round ) and the chamber had the start of a burn out. The chamber and mortise were still holding tars and oils, the black finish was worn in spots. The stem on the other hand was spotless.
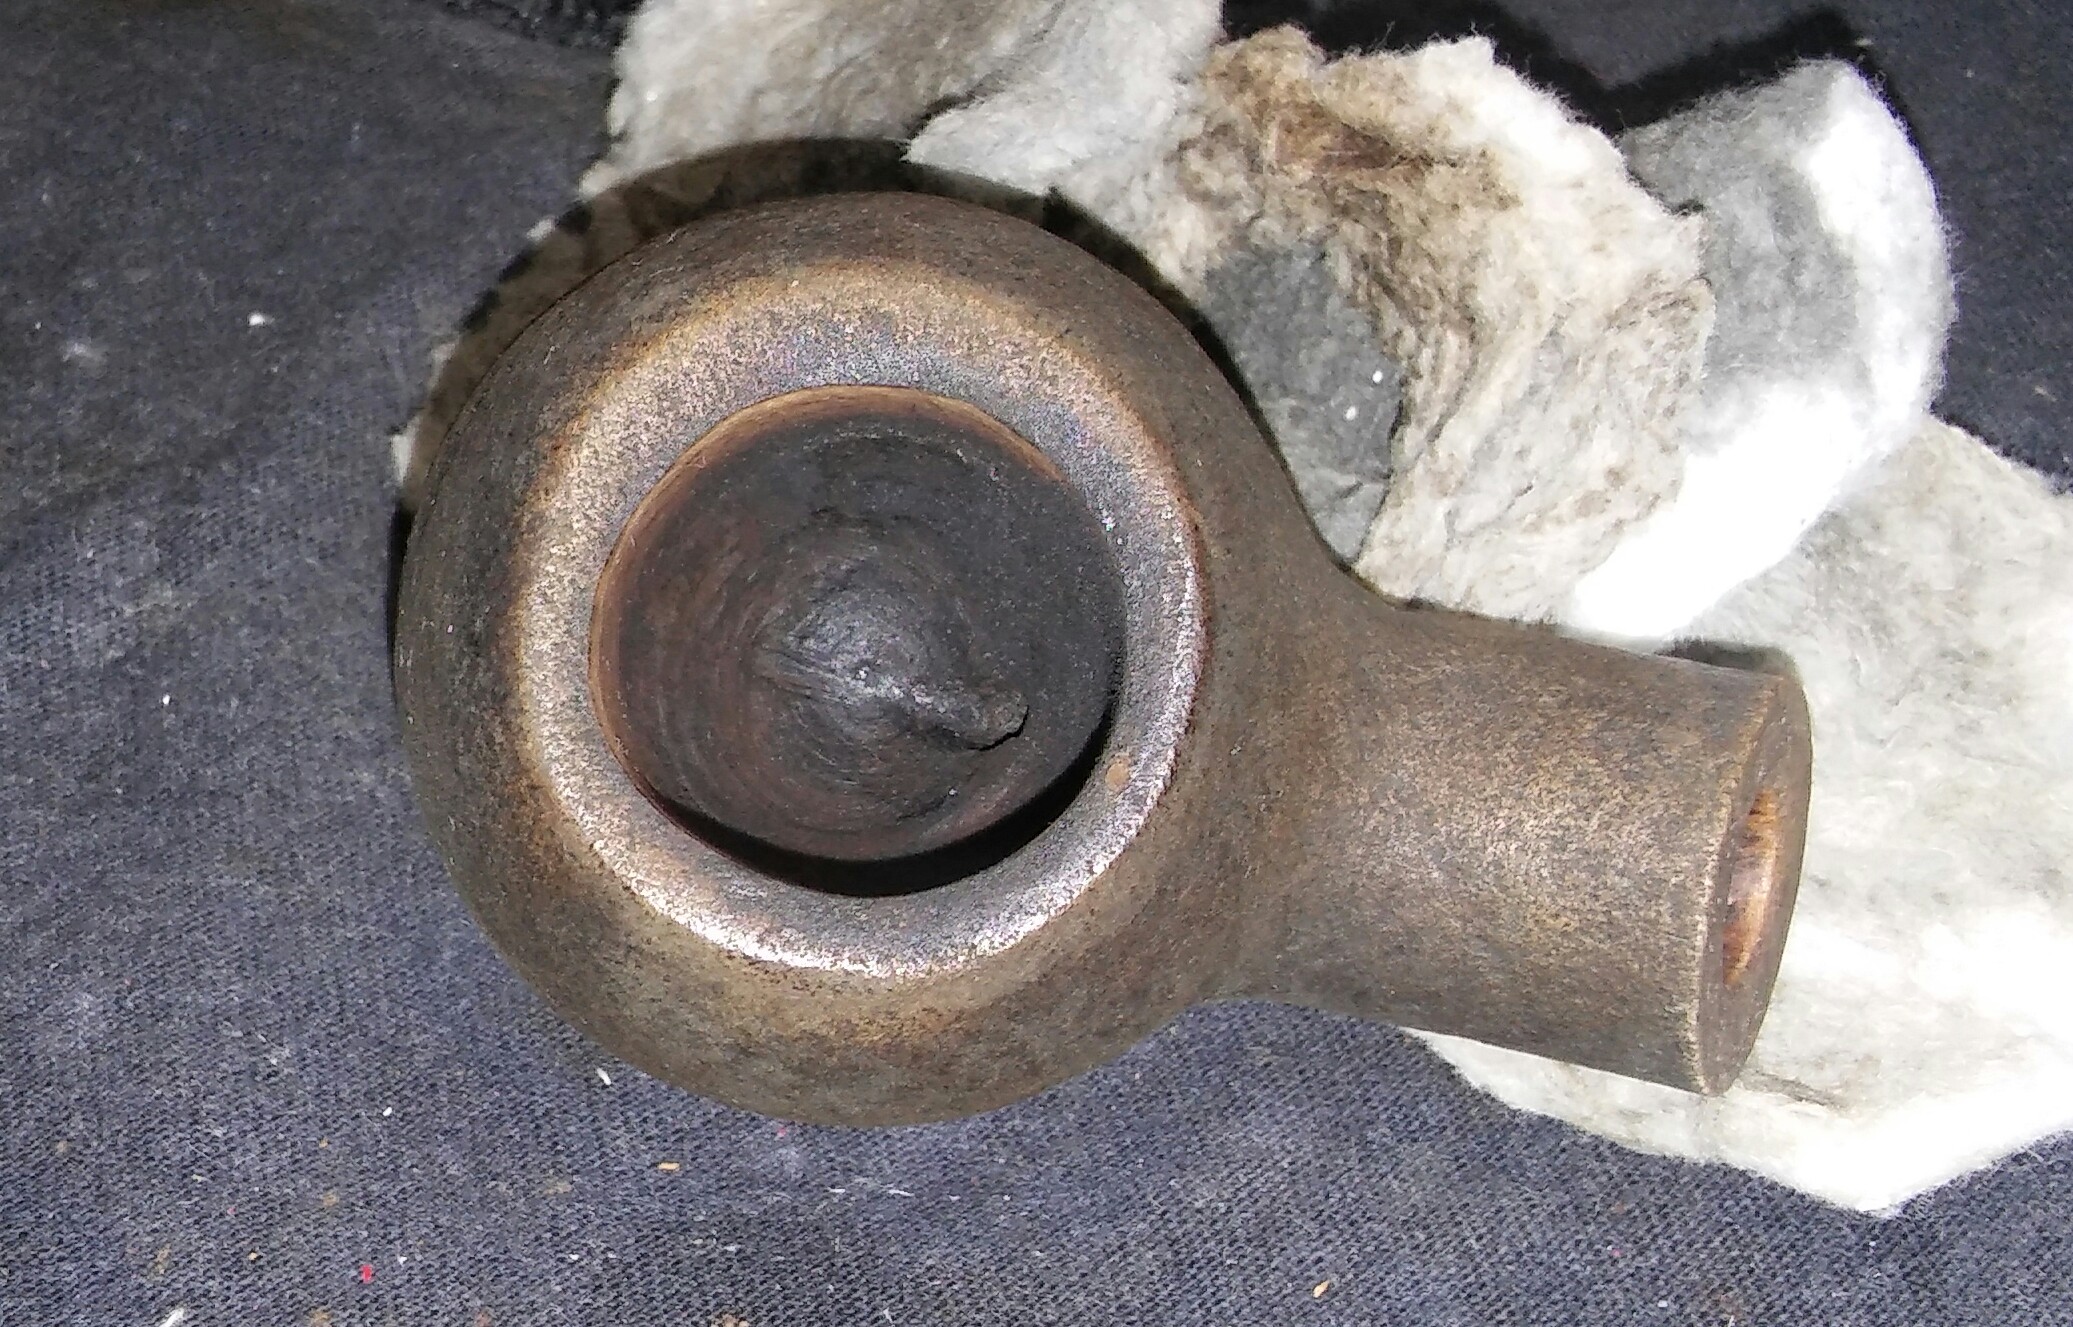
The above two photos are of the rim and chamber burn. The right side of the rim was thicker then the left side and the chamber was reamed into an oblong shape. I had already begun removing the worn finish in my excitement starting with EverClear and then moving to acetone, I would normally ream the chamber first.
The chamber was reamed by the seller for the most part back to briar exposing the burn in the right side of the chamber. I sanded the chamber instead of reaming with 220 grit sandpaper and then 400 grit sandpaper, sanding the right side of the chamber and removing the burnt area completely. There was more than enough chamber thickness to do so.
Next I moved onto the uneven rim. Using a round side needle file and 220/400 grit sandpaper I began reshaping the rim.
I decided the rim would pop more if it were smooth and natural, I sanded the rim with 400 grit sandpaper and finished with 800 grit sandpaper.
I now cleaned the internals of the chamber, mortise and stem with EverClear, Q-tips, shank brushes and stiff soft pipe cleaning until the pipe cleaners came out as they went in.
With the old Finnish removed I re-stainded the stummel with dark brown Fiebing’s leather dye hitting with a lighter to set the set the stain. Now this is where I got over focused and did not take photos of my process. I removed the excess stain with an alcohol dampened rag and then sanded the high spots to lighten the stain, leaving the darker stain in the lower blasted areas of the stummel, wiping the stummel down with an alcohol dampened rag once more .
I gave the stummel a coating of Howard’s butcher block conditioner before hitting the wheel, removing the excess with a clean rag.
Ready For IPSD
Finished her up on the wheel with white diamond, a few coats of carnauba and a microfiber hand buffing. Buffing the stem with blue compound.
Now with a beautiful 54 degree February afternoon in N.Y. I’ll sit and enjoy my work and celebrate my wife’s birthday as well. Keep your chambers full and your hearts happy.
“May your matches always light and your tongue never bite”
An impressive piece of work from Clint of http://pipescoundrel.com . Check out his blog to see his work from conception to completion. Looking forward to seeing more from him.
Well here it is… The final product of about 20+ hours of drawing dots. After having been away from doing anything “artistic” for a number of years I think it turned out pretty well. I had a lot of fun with this one and I’m already starting on my next project. I’m hoping in the next few months I can also sit down with some oil paints and see how much I’ve forgotten about that as well.
I picked up a frame for this over the weekend and despite the crappy picture it looks pretty damn nice in the frame if I do say so myself. I’m going to have a hi-rez scan done so that I can make a few prints but I’m probably going to give the original to a friend. Just thought I would share here for anyone who is interested in how it turned out.
I had to reblog this.Clint’s review’s are never boring, imaginative and hysterical. This tobacco review is byfar my favorite, this is the way every tobacco comparison review should be written.
I’m gonna do something a little different for this review. Typically I would dedicate a lot of time to one tobacco blend and then tell you a bunch of bullshit about it that we both know won’t effect your opinion in any way, shape or form… But I’m feeling a little wily this week so I thought I would shake things up a bit.
A few weeks ago I picked up a giant bag of Smokers Pride Vanilla Cavendish pipe tobacco at Cheap Tobacco. While I was there I also grabbed a bag of Prince Albert’s Soft Vanilla… Apparently I’m going through a vanilla phase or something and wasn’t even aware of it. Anyway, I had seen the massive bags of Smokers Pride before but never picked one up because I just assumed it was tobacco flavored mulch. The Prince Albert I picked up because I actually hadn’t see it there before and…
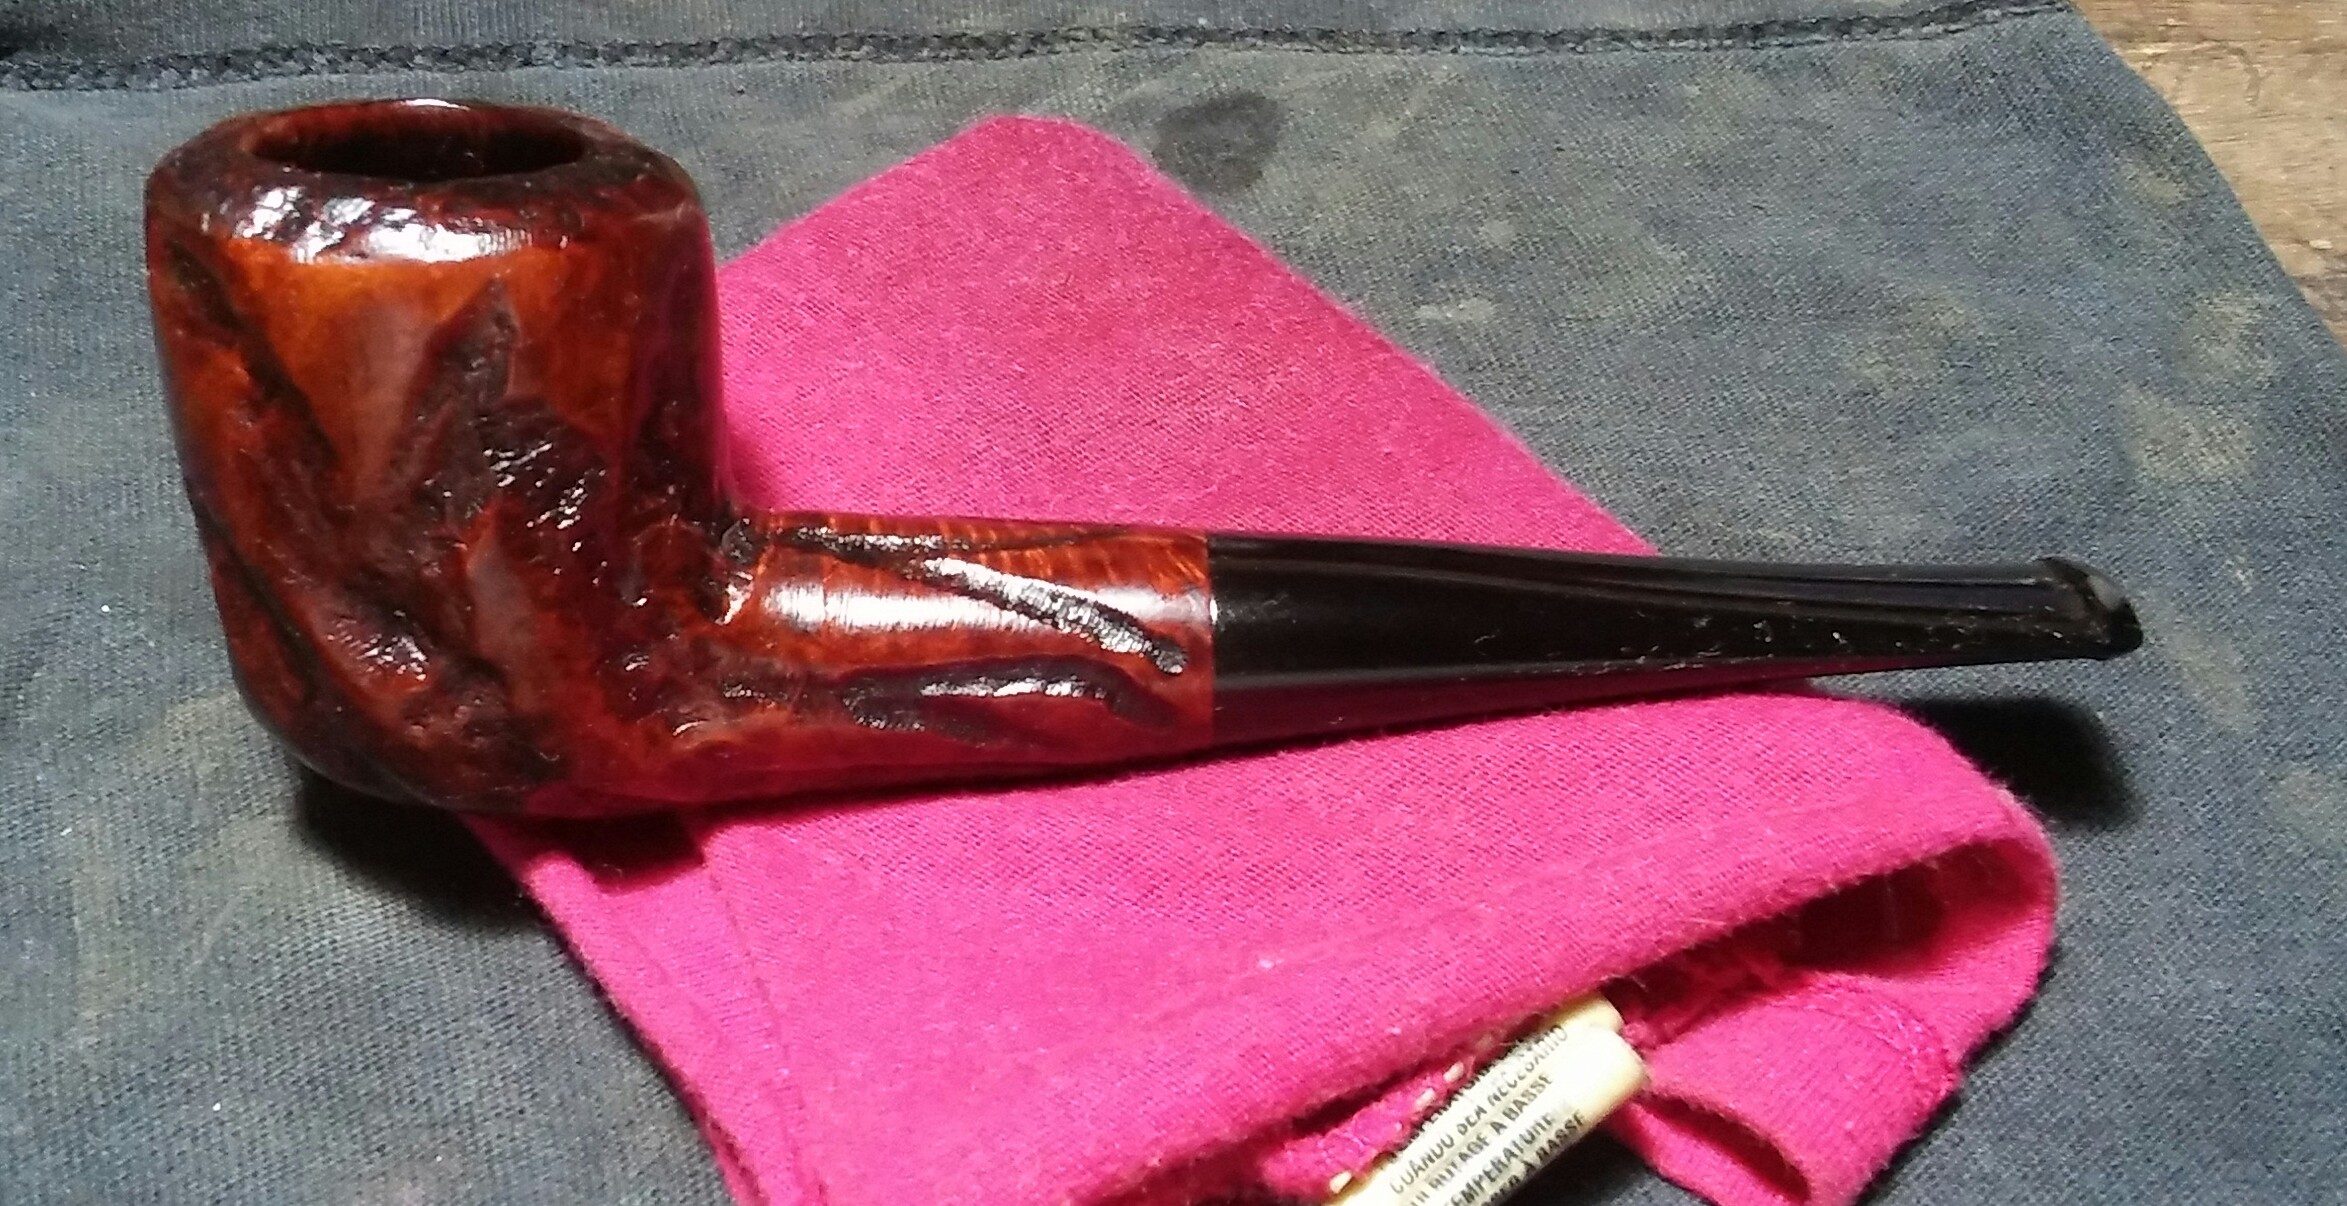
Many of the Custom-Bilt pipes in my collection are on the larger side but lately the medium size Bilts have caught my eye. This billiard is the first I’ve seen and I couldn’t wait to see her finished.
As Received.
She was in rough shape when I received her. Most disappointing was the cracked tennon, thankfully it still had its little rubber filter insert and I thought it might be salvageable. The bit had deep tooth impressions that almost punched through. The button was worn down and the stem was oxidized. The rim was caked with dirt,oils and char. The chamber had a thick crumbling cake and the mortise was plugged with old tobacco and tars.
I started with my Pipnet Reamer and the smallest attachment working up to the second largest, finishing up with 400 grit sandpaper wrapped around a finger. The chamber was well-preserved from the thick cake.
Next I tackled the caked rim. I applied a generous amount of Method Good For Wood Polish to the rim and set it aside to penetrate the build-up for a few minutes removing the build-up with Q-tips , I would repeat this process a few times. After the removal of the rim build-up There were a few dings in the rim. Using a household iron on medium high/ heat and a damp rag I steamed out the imperfections working in intervals until the imperfections were almost gone. I finished up with worn micro-mesh until the rim was free of darkening and dings.
Next was the cracked tennon, I fit The opposite end of a 3/16 inch drill bit into the tennon, making sure I had a tight fit.I mixed thick black CA Glue and activated charcoal power into a paste I then applied a generous amount of chapstick to the drill bit end so the CA Glue would not adhere to the bit but would adhere to the tennon only. I applied a thin layer of the CA Glue mixture to bridge the gap where the missing tennon piece was , hitting it with accelerator to set up the glue, I removed the drill bit at this time.
With the drill bit removed I now applied several layers of the CA Glue mixture to build up the missing section of the tennon, spraying with accelerator in between each layer I added, until I had a close match to thickness of the existing tennon.
Once my thickness goal was reached I left the tennon to cure for a few hours. After curing I worked the new tennon with needle files carefully removing the excess glue until I had a close match to the remaining section of the tennon.
I now worked the new tennon with 400 grit sandpaper until I had a close fit between mortise and tennon, making my finishing adjustments with 1000 grit sandpaper until I had a snug fit between mortise and tennon. I then re-worked the inner of the tennon with a round needle file and rolled-up 1000 grit sandpaper so I could re-fit the rubber filter insert.
This Custom-Bilt had two spots of pretty visible filler. Using Method Wood For Good Polish to soften up the filler and a X-ACTO knife, I removed the filler.
I cleaned the area to be repaired with EverClear and Q-tips. I filled the pits with Gorilla Glue and briar dust and left aside to dry. Once dry I removed the excess glue and dust with worn micro-mesh until the repair disappeared into the rustication.
I used a dark furniture marker to darken the rusticated area’s of the stummel to further guarantee my repair would stay hidden.
With the outer of the stummel complete I moved to the internals, cleaning the mortise and chamber with EverClear, Q-tips, shank brushes and stiff/soft pipe cleaners, cleaning until the last pipe cleaner came out as it went in.
I attempted to raise some of the deep tooth impressions with heat, some of the button raised but most of the impressions would still have to be filled.
Next the stem oxidation, I applied a generous amount of non-bleach Soft Scrub to the stem with a children’s toothbrush and left it aside to penetrate the oxidation. Once the Soft Scrub turns from white to a brownish color its time to scrub vigorously with a rag until the oxidation is removed.
The deep tooth impressions had to be repaired, I roughly sanded the area of repair with 400 grit sandpaper and wiped down with EverClear. I mixed thick black CA Glue and activated charcoal power into a paste .
I applied the paste to the impressions and worn button using a toothpick hitting it with accelerator to set the patch, I set the stem aside now to cure overnight. The following morning after the paste had time to cure, I used needle files and sandpaper to remove the excess glue until I had a uniformed shape.
I sanded the entire stem with 400 grit sandpaper wet to remove the file marks and then moved on to the various grits of sandpaper and micro-mesh. 1000 grit sandpaper wet, 1500 mesh wet, 1800 mesh wet, 2000 grit sandpaper wet and 2400 mesh wet. Runing though the remaining micro-mesh pads dry 3200-12000.
My final step for all my Custombilt pipes is to apply Howard’s butcher block conditioner to the stummel before buffing. I apply Howard’s butcher block conditioner with a rag and allow it to penetrate for a few minutes hand buffing off the excess with a clean rag.
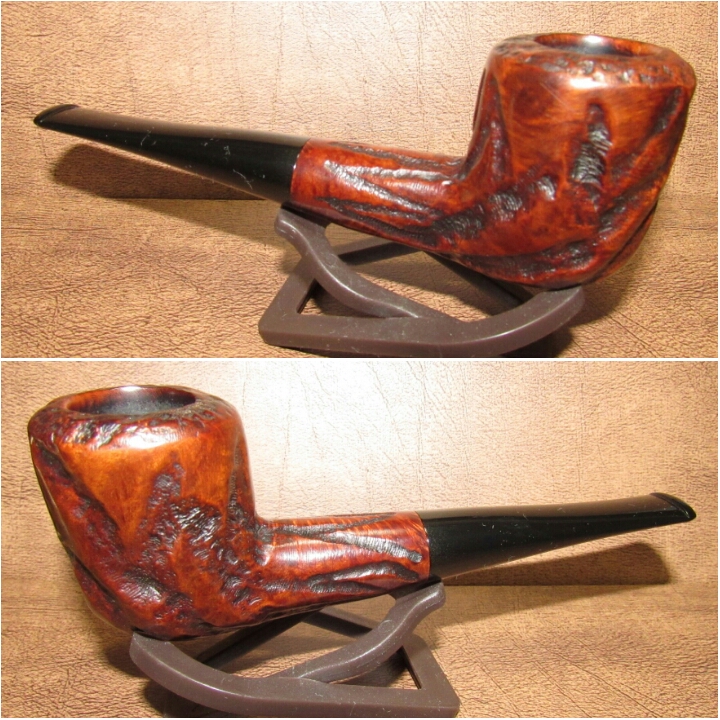
Complete.
I finished her up on the wheel with white diamond, a few coats of carnauba and a microfiber hand buffing Buffing the stem with blue compound.
Collecting focus- everyone needs one, right ? I’ll be the first to admit I might have a problem, but when I first started I had no direction, just buying up lots of estate pipes Willy Nilly. Two years ago I had over 300 hundred pipes, a few of them Custombilt ( before the bug really bit ) but nothing to right home about, nothing eye-catching, no real attachment. So my first step was to unload the clutter, donating and selling off what didn’t belong. I’ve never been a fan of dainty pipes, I’m a big guy and well it just looks silly, its kinda like
So smaller pipes would go first. What was left was starting to grab me. My introduction into large pipes began with Ropp cherrywood pipes, the rustic look originally sold me, being from the Adirondacks it seemed fitting but with time things loosened up at the shank and bowl. I have one un-somoked large cherrywood Ropp left. Than came Tom Howard and B P Jum pipes, this was the turning point, large and interesting, fit my face pipes. The only draw back was the overuse of filler in both Howard’s and Jum pipes, riddled like bullet holes. Then finely Custom-Bilt it was like being a kid again I couldn’t resist large, ugly and roughly carved. I had to get them all, each one no mater how closely they resemble one another are completely different. The next few refurbs will be Custombilt pipes as I have many waiting in line to be revived. I need to take photos of my complete collection, I’m not really sure how many I have at this point.
Heres one more.
Overall she was in good condition, uneven cake, a chip out of the side of the bowl, stem oxidation and faded finish.
I started with my Pipnet Reamer and the smallest attachment and working up to the second largest. The chamber was free of burn out or pitting, I smoothed things out with 400 grit sandpaper wrapped around a finger.
With the chamber reamed I moved to the rim build up, the rim was built up with tars and char. I applied a generous amount of Method Good For Wood Polish to the rim and set aside to penetrate the build-up for a few minutes. Using Q-tips I removed the build-up, I would repeat this process a few times.
To remove the char and darkening I used worn micro-mesh until the rim darkening was faded. I now cleaned the internals of the stummel and stem with EverClear, Q-tips, shank brushes and stiff/ soft pipe cleaners. Cleaning the mortise and chamber until the pipe cleaners came out as they went in
I gave the stummel an alcohol wipe down with EverClear and makeup pads to remove the dirt and debris
The chip in the side of the bowl would be repaired with Gorilla Glue and briar dust. I cleaned the area of repair with EverClear, Q-tips and let dry. I filled the crack with Gorilla Glue and briar dust and allowed it to dry, I removed the excess glue and dust with worn micro-mesh.
I stained the repair patch with a dark furniture marker allowed it to dry and removed the excess stain with an alcohol dampened rag.
Now for the stem oxidation, I applied a generous amount of non-bleach Soft Scrub to the stem with a children’s toothbrush and set aside to penetrate the oxidation.Once the Soft Scrub turns from white to a brownish color its time to introduce the old elbow grease and scrub vigorously with a rag until the oxidation is removed.
With the oxidation removed I could now run it though the various grits of sandpaper and micro-mesh pads. 1000 grit sandpaper wet, 1500 mesh wet, 1800 mesh wet, 2000 grit sandpaper wet and 2400 mesh wet. The remaining micro-mesh pads dry 3200-12000.
I don’t typically stain my Custom-Bilt pipes but I thought I’d give it a go. Using a dark furniture marker for the rusticated area’s of the stummel and a lighter color marker for the rest of the stummel, removing the excess stain with an alcohol dampened rag.
Complete.
Finished her up on the wheel with white diamond, a few coats of carnauba and a microfiber hand buffing Buffing the stem with blue compound.
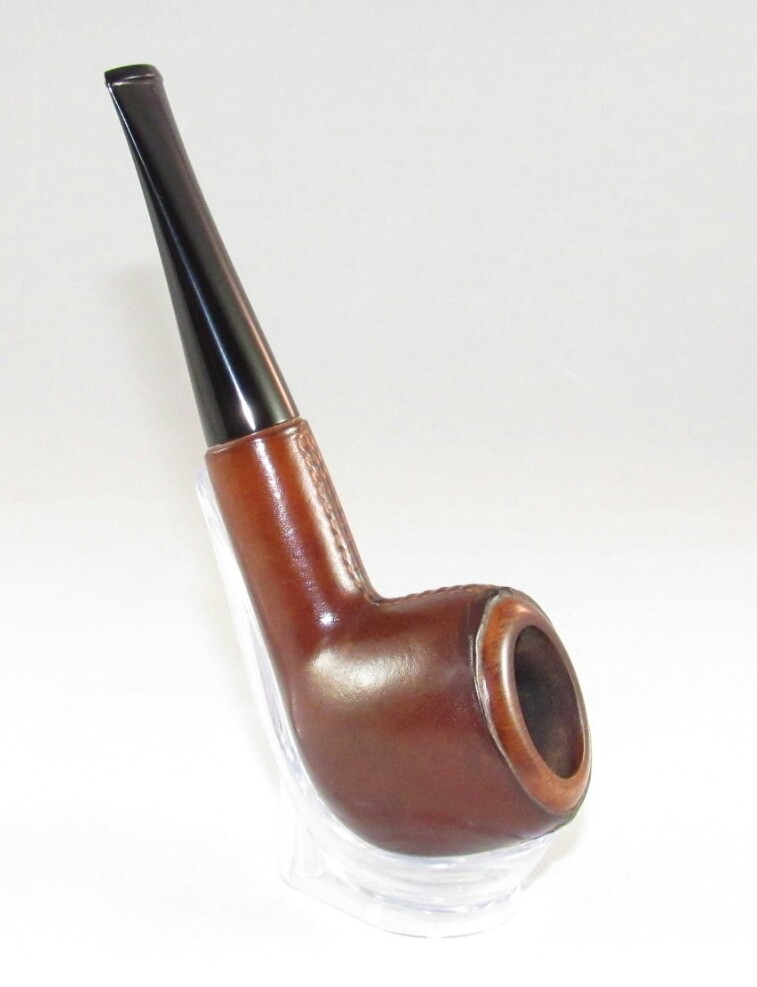
In 1948 Jean Cassegrain inherited a small shop near the French Theater on the Boulevard Poissonnière in Paris, called “Au Sultan”. Articles for smokers and fountain pens were offered there.
Now, the absolute bulk of the pipes Cassegrain found in the inventory was from war-time production and due to the sharp restrictions on pipe production the French government had enforced in 1940, these pipes were of very poor quality and showed large fills. Strictly speaking, they were not marketable now that the French pipe industry produced pipes of pre-war standards again. In this situation Cassegrain had the probably most enlightened moment in his life: he took some of these pipes to a leather worker who clad bowls and shanks in leather. Only the rims of the bowls and the shanks’ faces remained blank.
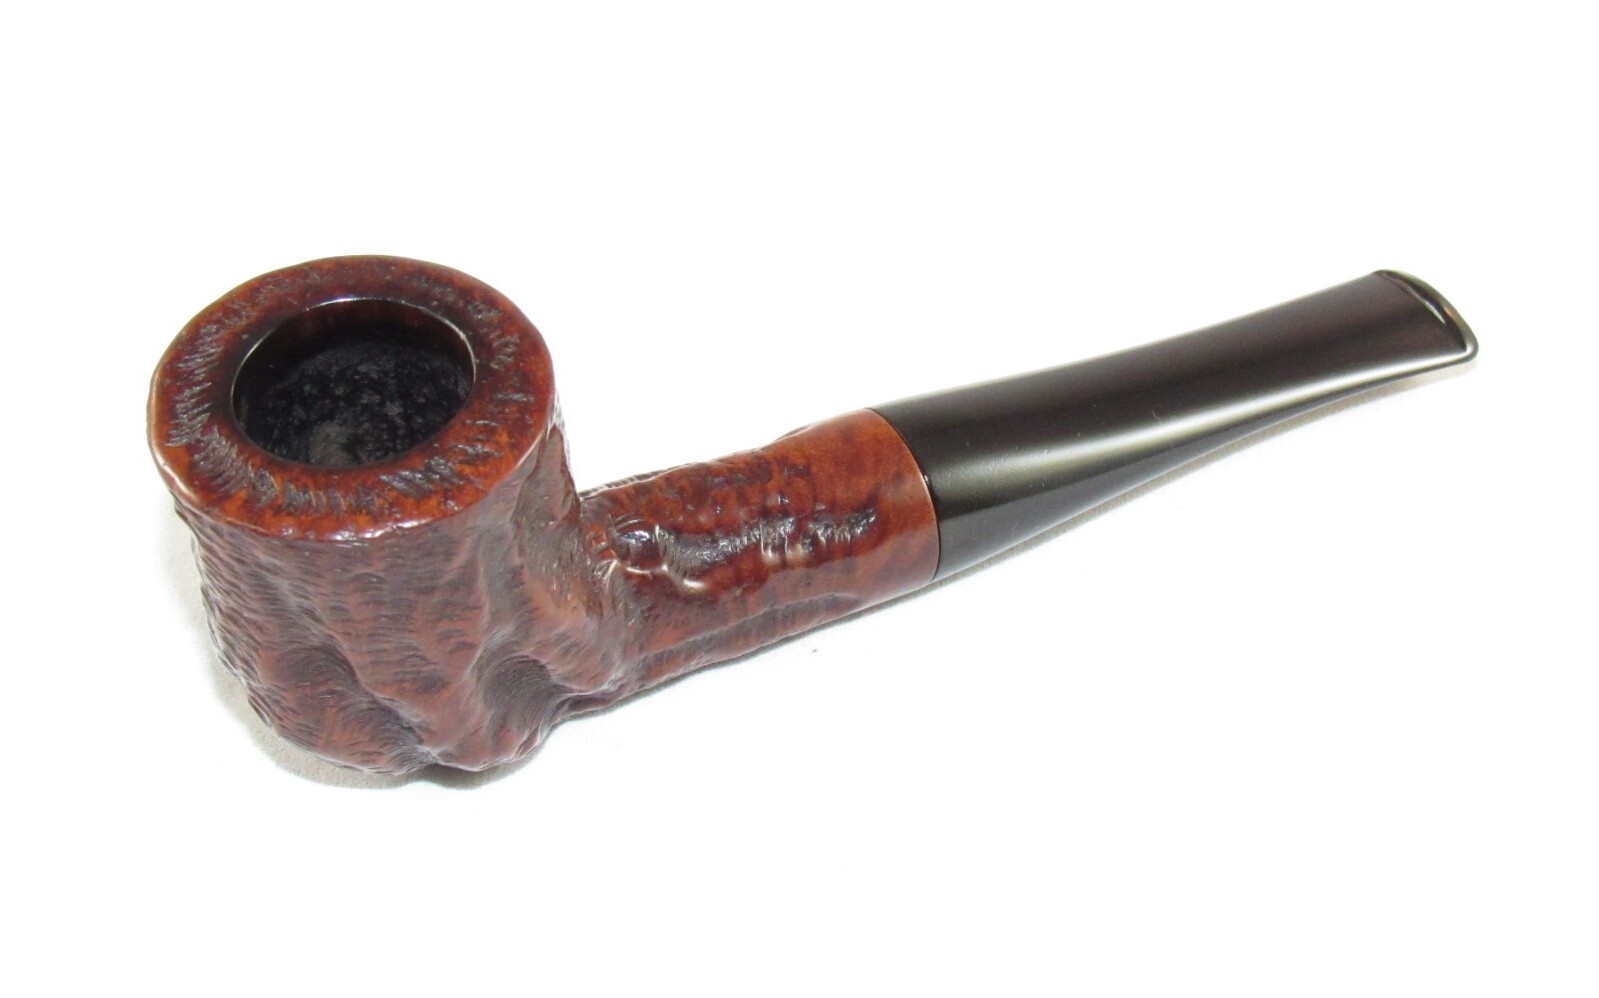
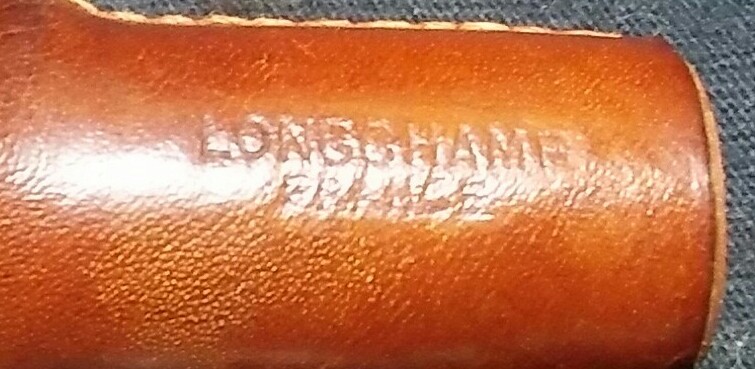
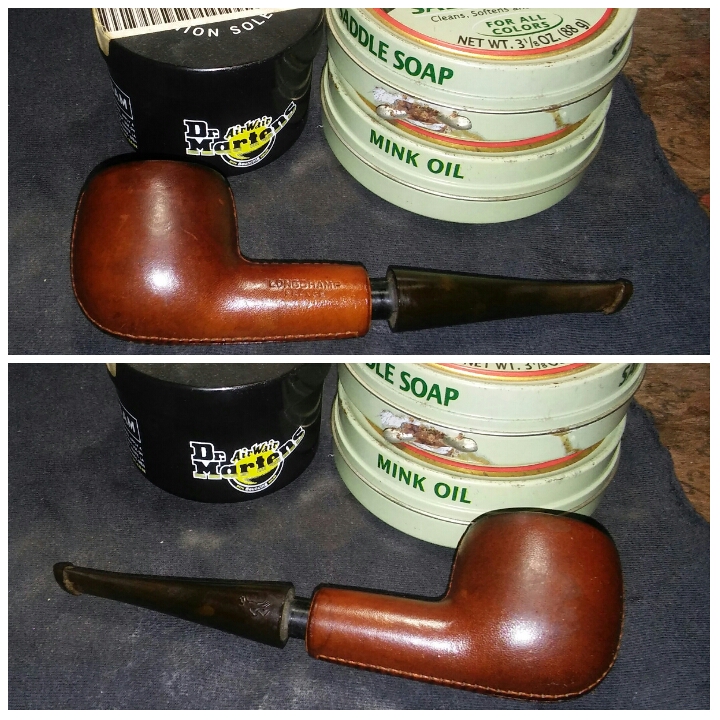
I like to get more bang for my buck, so I like to go after pipes listed in lots, keeping what I want and donating or selling off what doesn’t catch my eye. As the small flat rate box fills with extra pipes, I’ll take the box to my wife and daughter to see if anything catches their fancy. Usually it’s let em go to someone else but for some reason the leather-covered LONGCHAMP pipes my daughter found unique. She’s ten now and has taken an interest in some of my refurbishing projects. I have a few in my rotation that she wouldn’t let go, a red Color Duke by Dr.Grabow, a cheerywood Ropp and a BamBoo Briar.
Back Out Of The Box
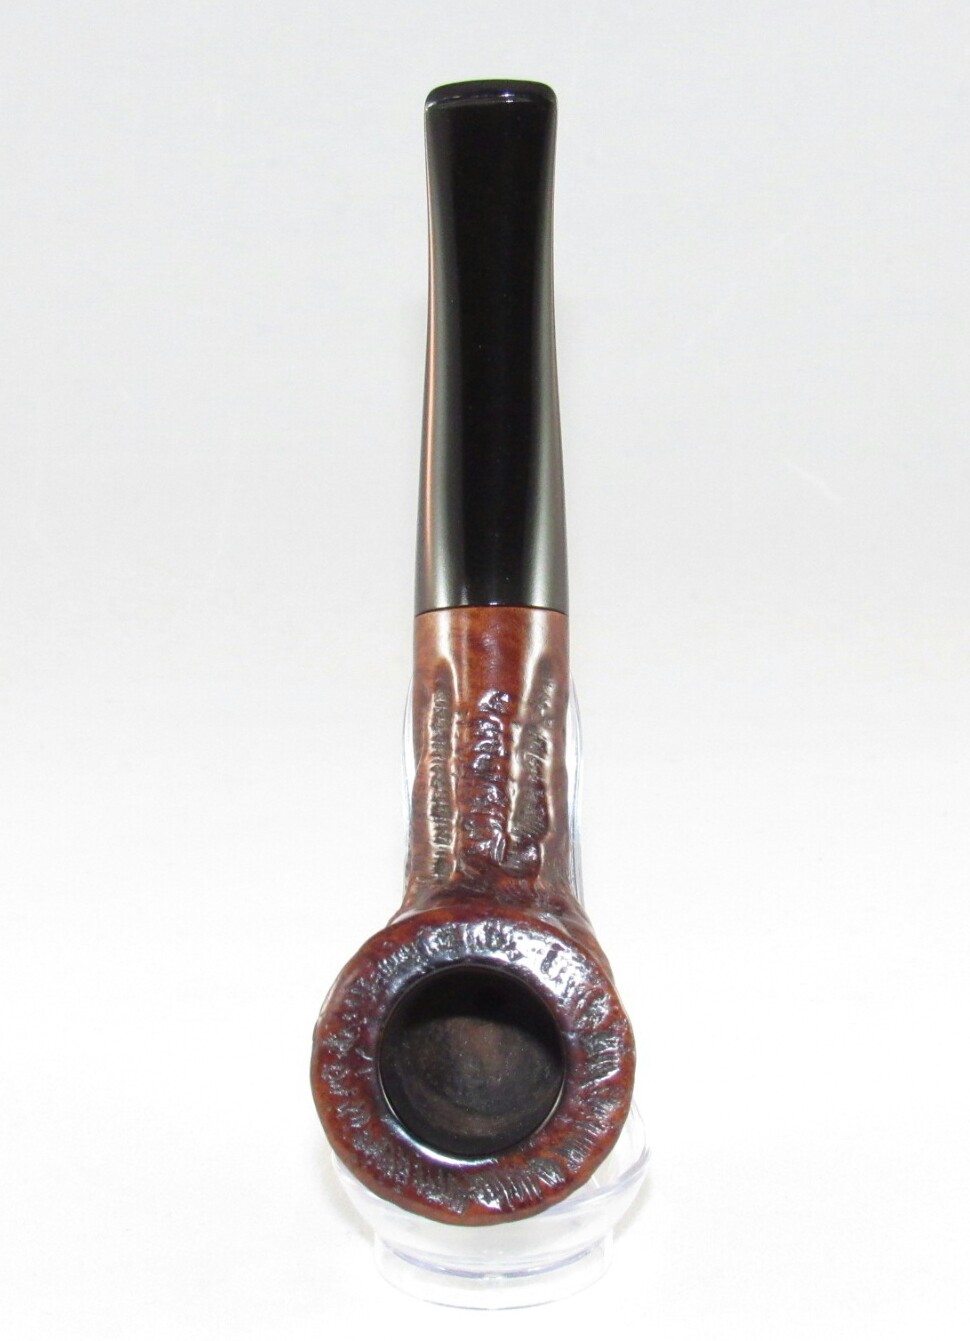
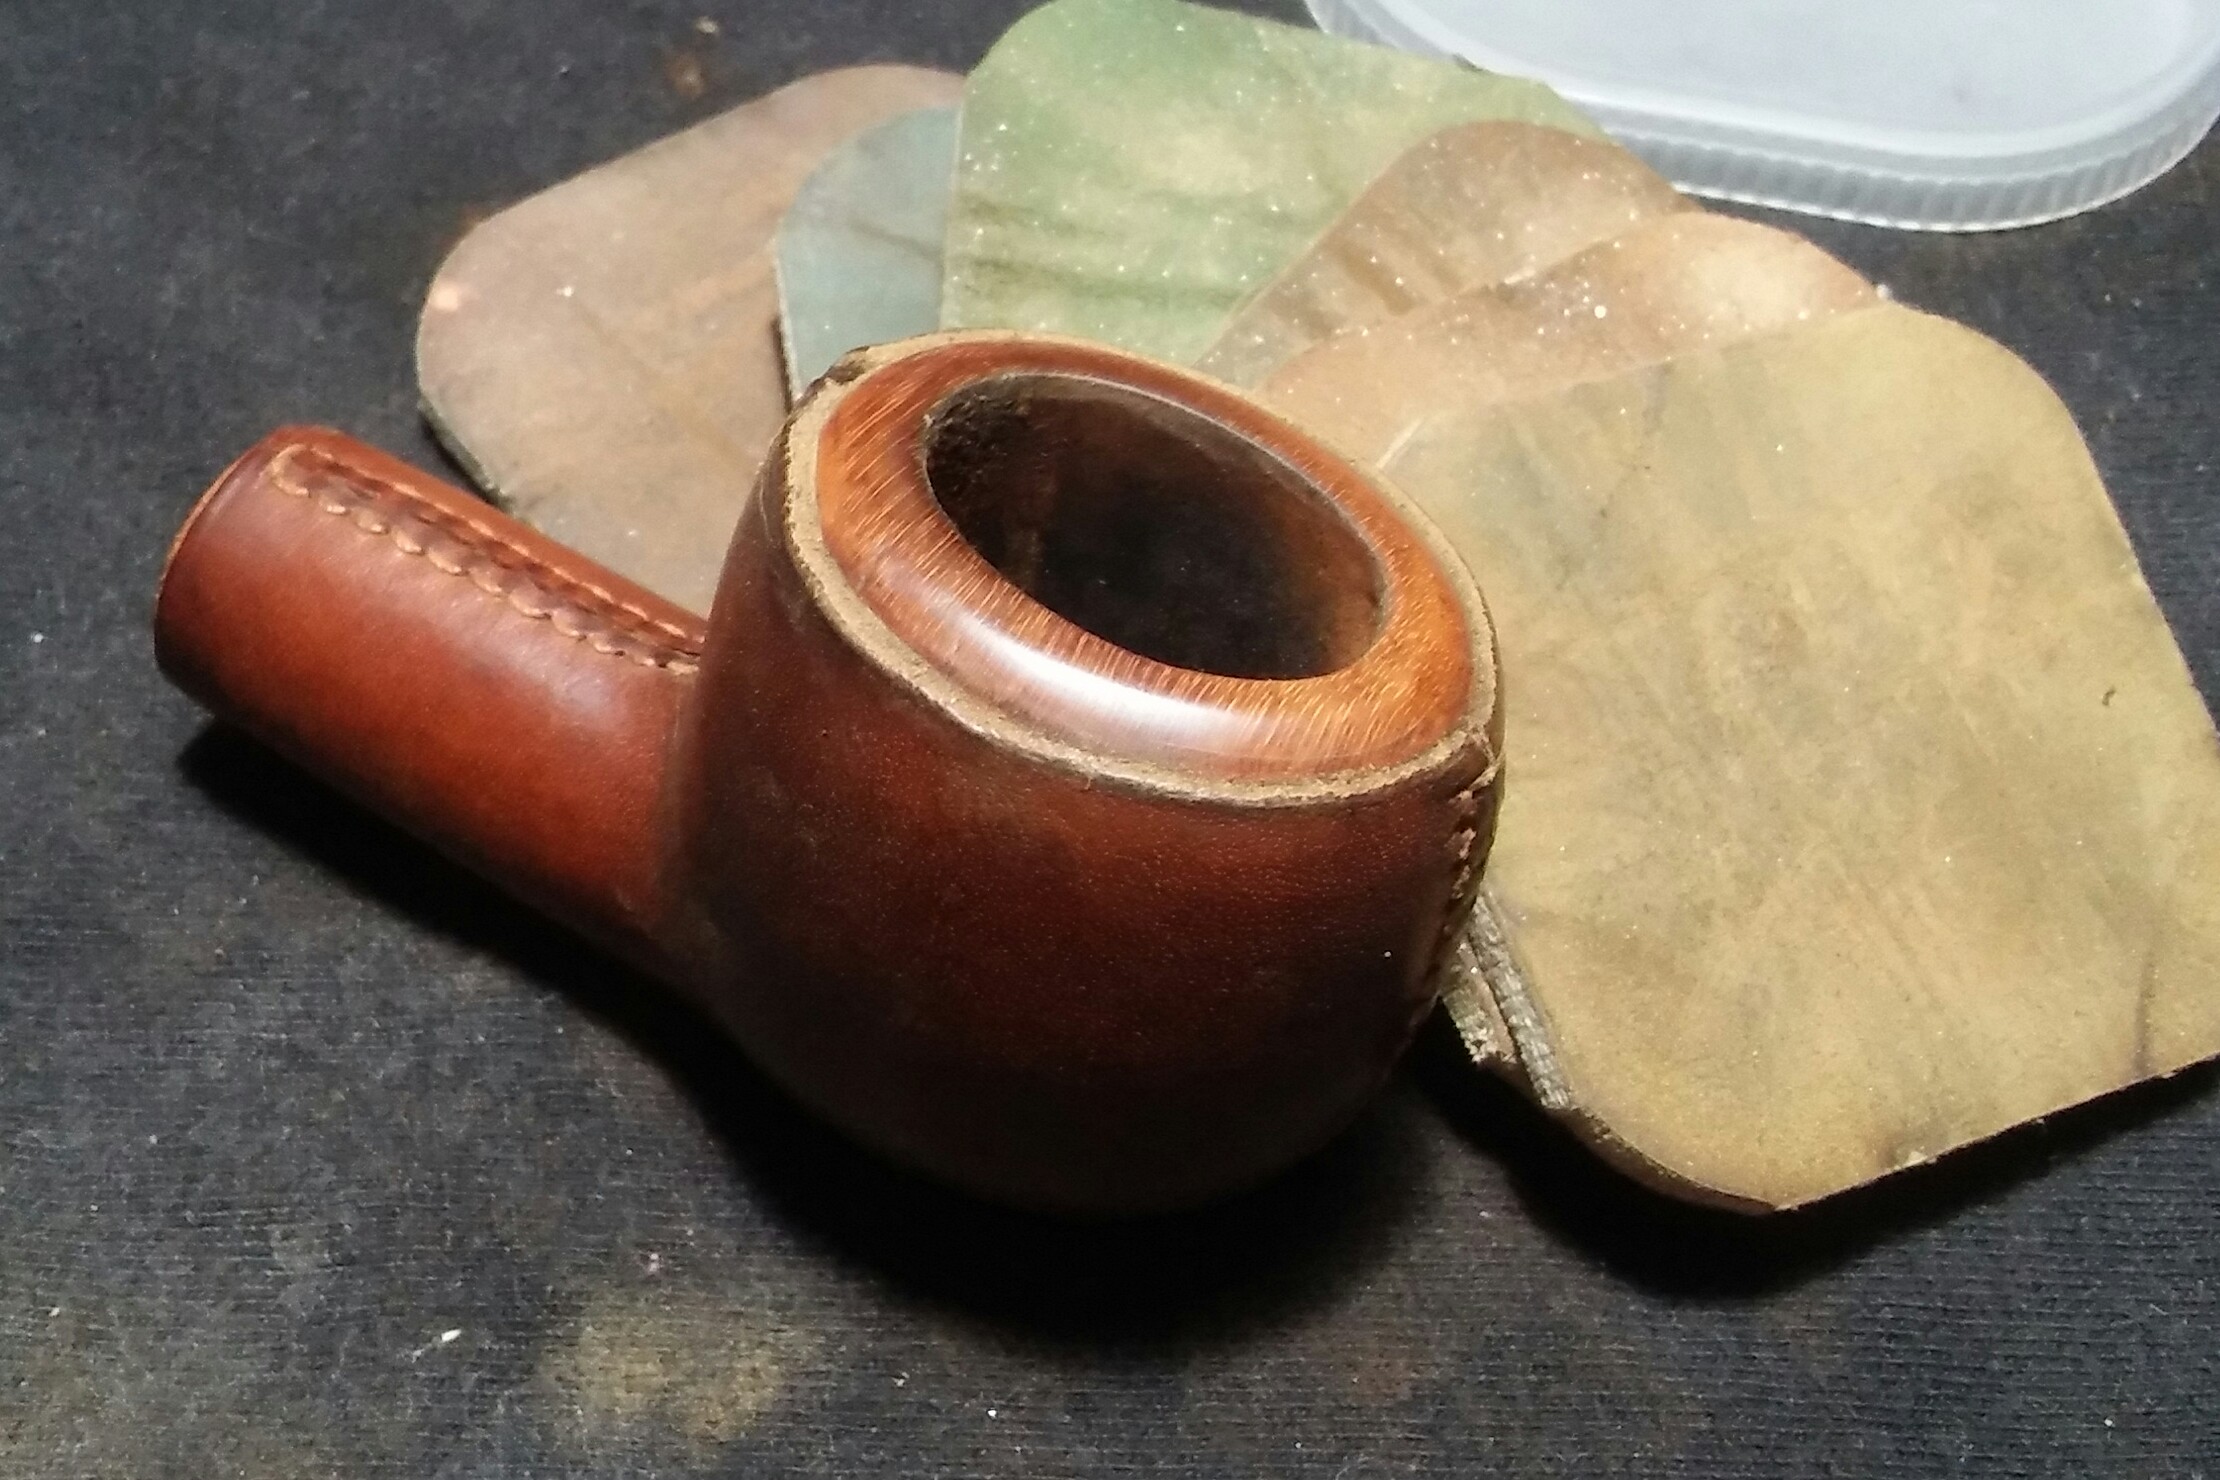
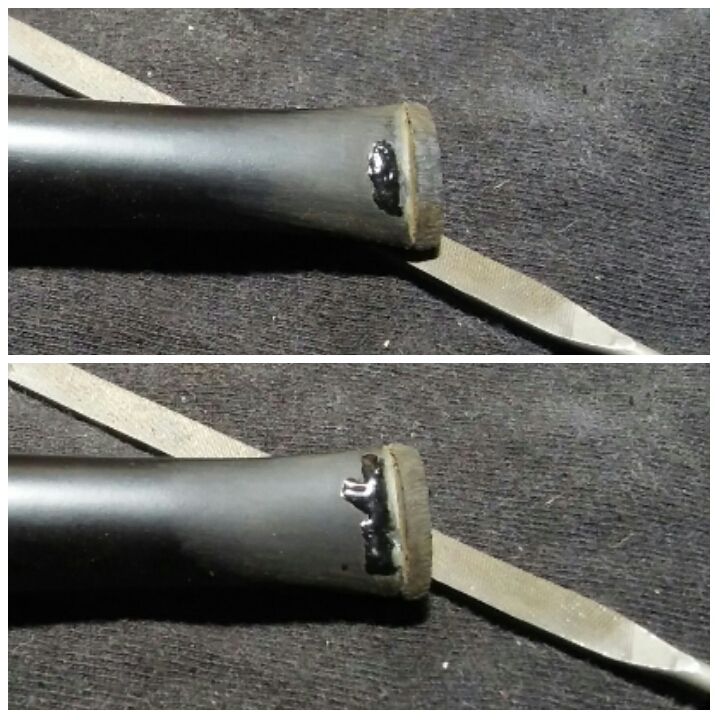
The pipe was in good shape, leather wrap was a little dry & dirty, worn button, deep tooth impressions, oxidation, rim darkening and brittle cake.
A conventional reamer would not work with a ovel bowl, instead I started with 220 grit sandpaper and finished with 400 grit sandpaper.
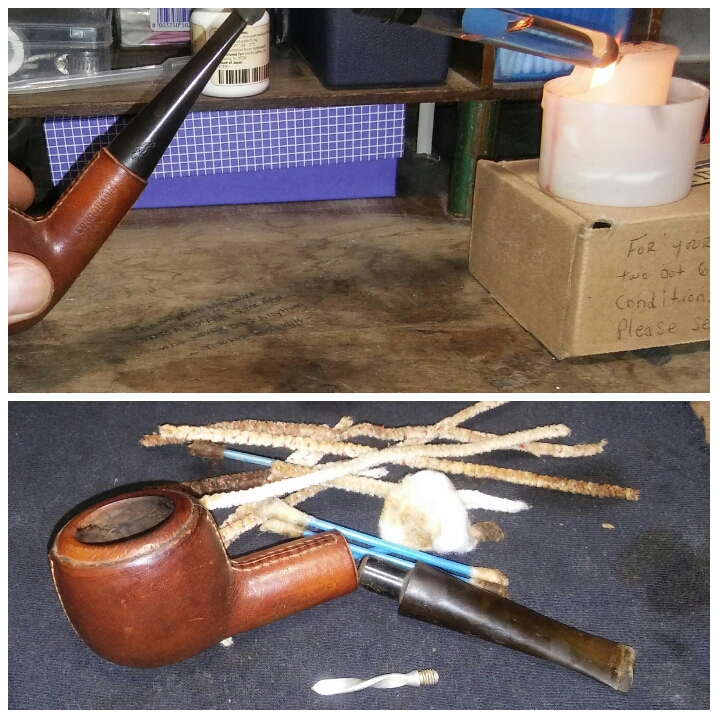
The internals were caked in old tars,oils and tobacco. I ran it though a retort using EverClear and cotton balls. I then did a thorough cleaning of the chamber, mortise and stem with EverClear, Q-tips and stiff /soft pipe cleaners. Cleaning until the last pipe cleaner came out as it went in.
There were a few dings in the rim, using a household iron on medium/ high heat and a damp rag I would steam out the imperfections. Covering the rim with the damp rag and applying it to the hot iron working in intervals until the imperfections were almost gone.
What was left of the imperfections and darkening, I removed with worn micro-mesh pads.
The leather covering was dry and grimy. I busted out my wife’s leather cleaning products. I started with saddle soap to clean away the grease and grime, being careful not to get it into the chamber or mortise. I then switched to Doc Martin’s leather conditioner and finally ended with mink oil. The leather was now soft and supple.
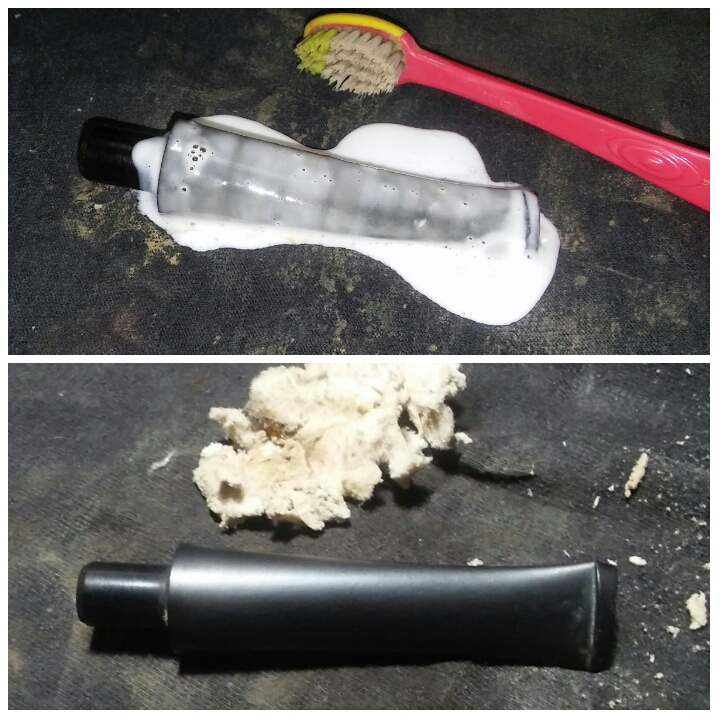
The oxidized stem, I applied a generous amount of non-bleach Soft Scrub to the stem with a children’s toothbrush and left it aside to penetrate the oxidation. Once the Soft Scrub turns from white to a brownish color its time to scrub vigorously with a rag until the oxidation is removed, finishing up with a damp Magic Eraser to remove the leftover oxidation.
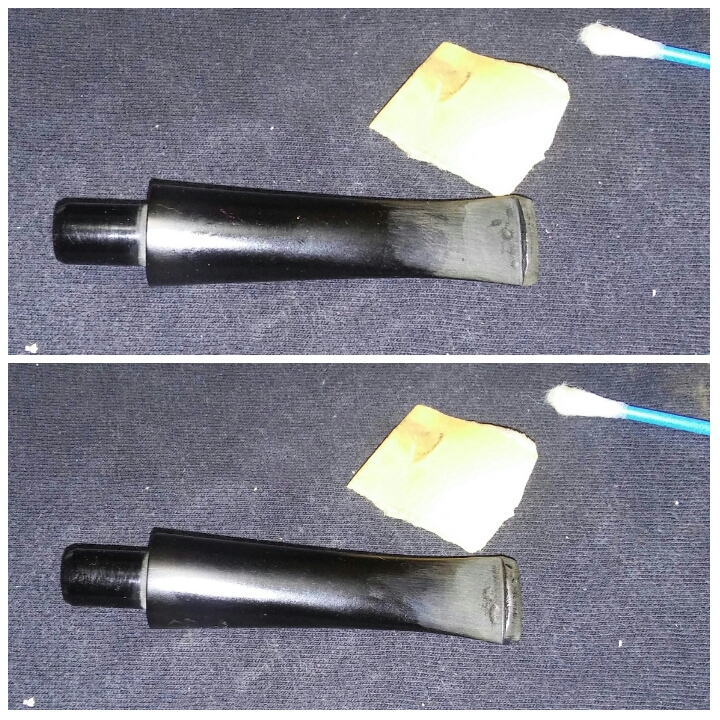
It was now time to address the tooth impressions, I first roughed up the area of repair with 400 grit sandpaper so my fill would have a good hold and then cleaning with EverClear to remove my sanding dust.
To fill the deep impressions and rebuild the worn button I mixed thick black CA glue and activated charcoal power into a paste and applied it to the impressions/button using a toothpick. I then hit it with accelerator to set the repair, leaving it aside to cure overnight.
Now that the repair had time to cure overnight, I could shape the new button. Using a flat needle file I removed the excess until I had an uniformed shape.
Once the new button was at a suitable thickness I moved to 400 grit sandpaper to remove the file marks.
Before hitting the micro-mesh, I re-touched the logo. I tried multiple applications Rub & Buff, White Out Pen and finally white nail polish, which was the winner.
I then sanded the whole stem with 1000 grit sandpaper wet, then ran it though the various grits of micro-mesh pads, 1500-2400 wet and 3200-12000 dry. Stummel and stem complete she was now ready for the final buffing.
Complete.
Finished up the rim on the wheel with white diamond, a few coats of carnauba and a microfiber hand buffing. I lightly buffed the leather covering with a clean buffing wheel. Buffing the stem with blue compound.


 Honestly I think the Devil gets kind of a bad wrap sometimes. Sure there is the whole “pure evil” thing but lets be honest… The Devil has contributed some pretty cool stuff to society, heavy metal music being a great example of this. So even if he is the embodiment of all that is unholy Satan sure knows how to make some kick ass tunes. Ironically in addition to shredding guitar solos and barely intelligible lyrics he apparently also has hellish good taste in pipe tobacco. A few weeks ago a friend of mine suggested Devil’s Holiday to me and being the gullible sort I thought I would give it a try. Ironically when I started to plan for this review Devil’s Holiday wasn’t at the top of my list of tobaccos so…


You must be logged in to post a comment.