Tag Archives: Custombilt pipe

Custom-Bilt patented filter system poker (Mincer era)

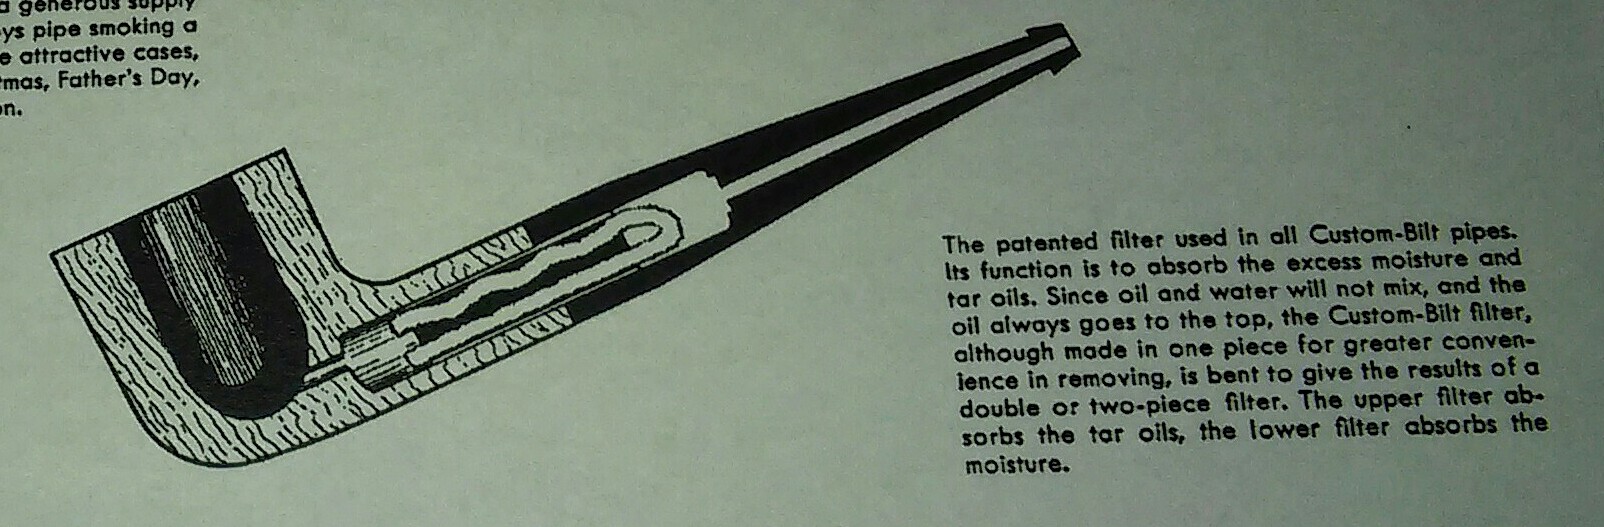
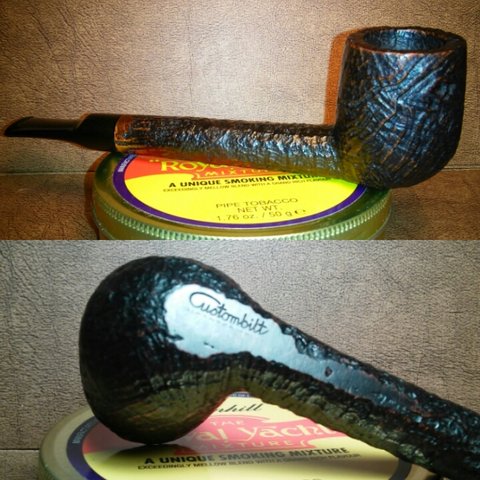
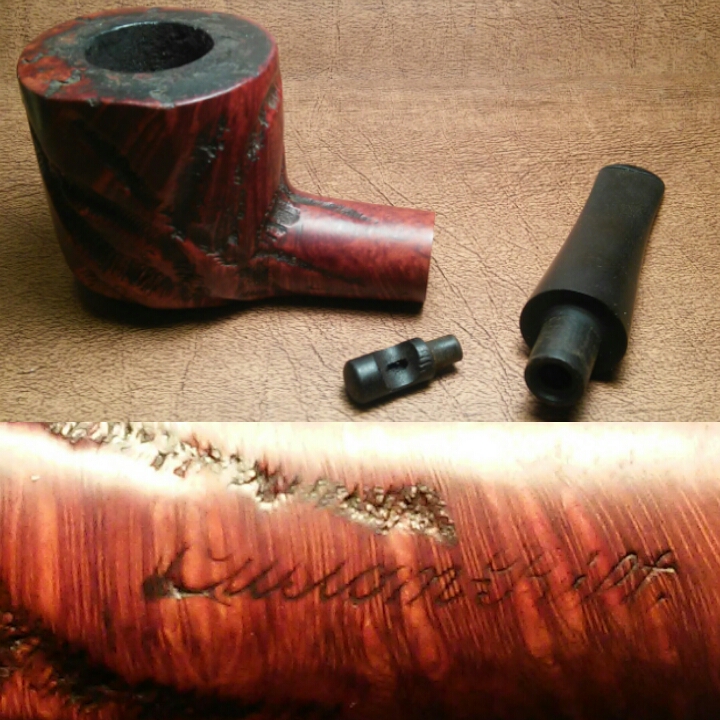
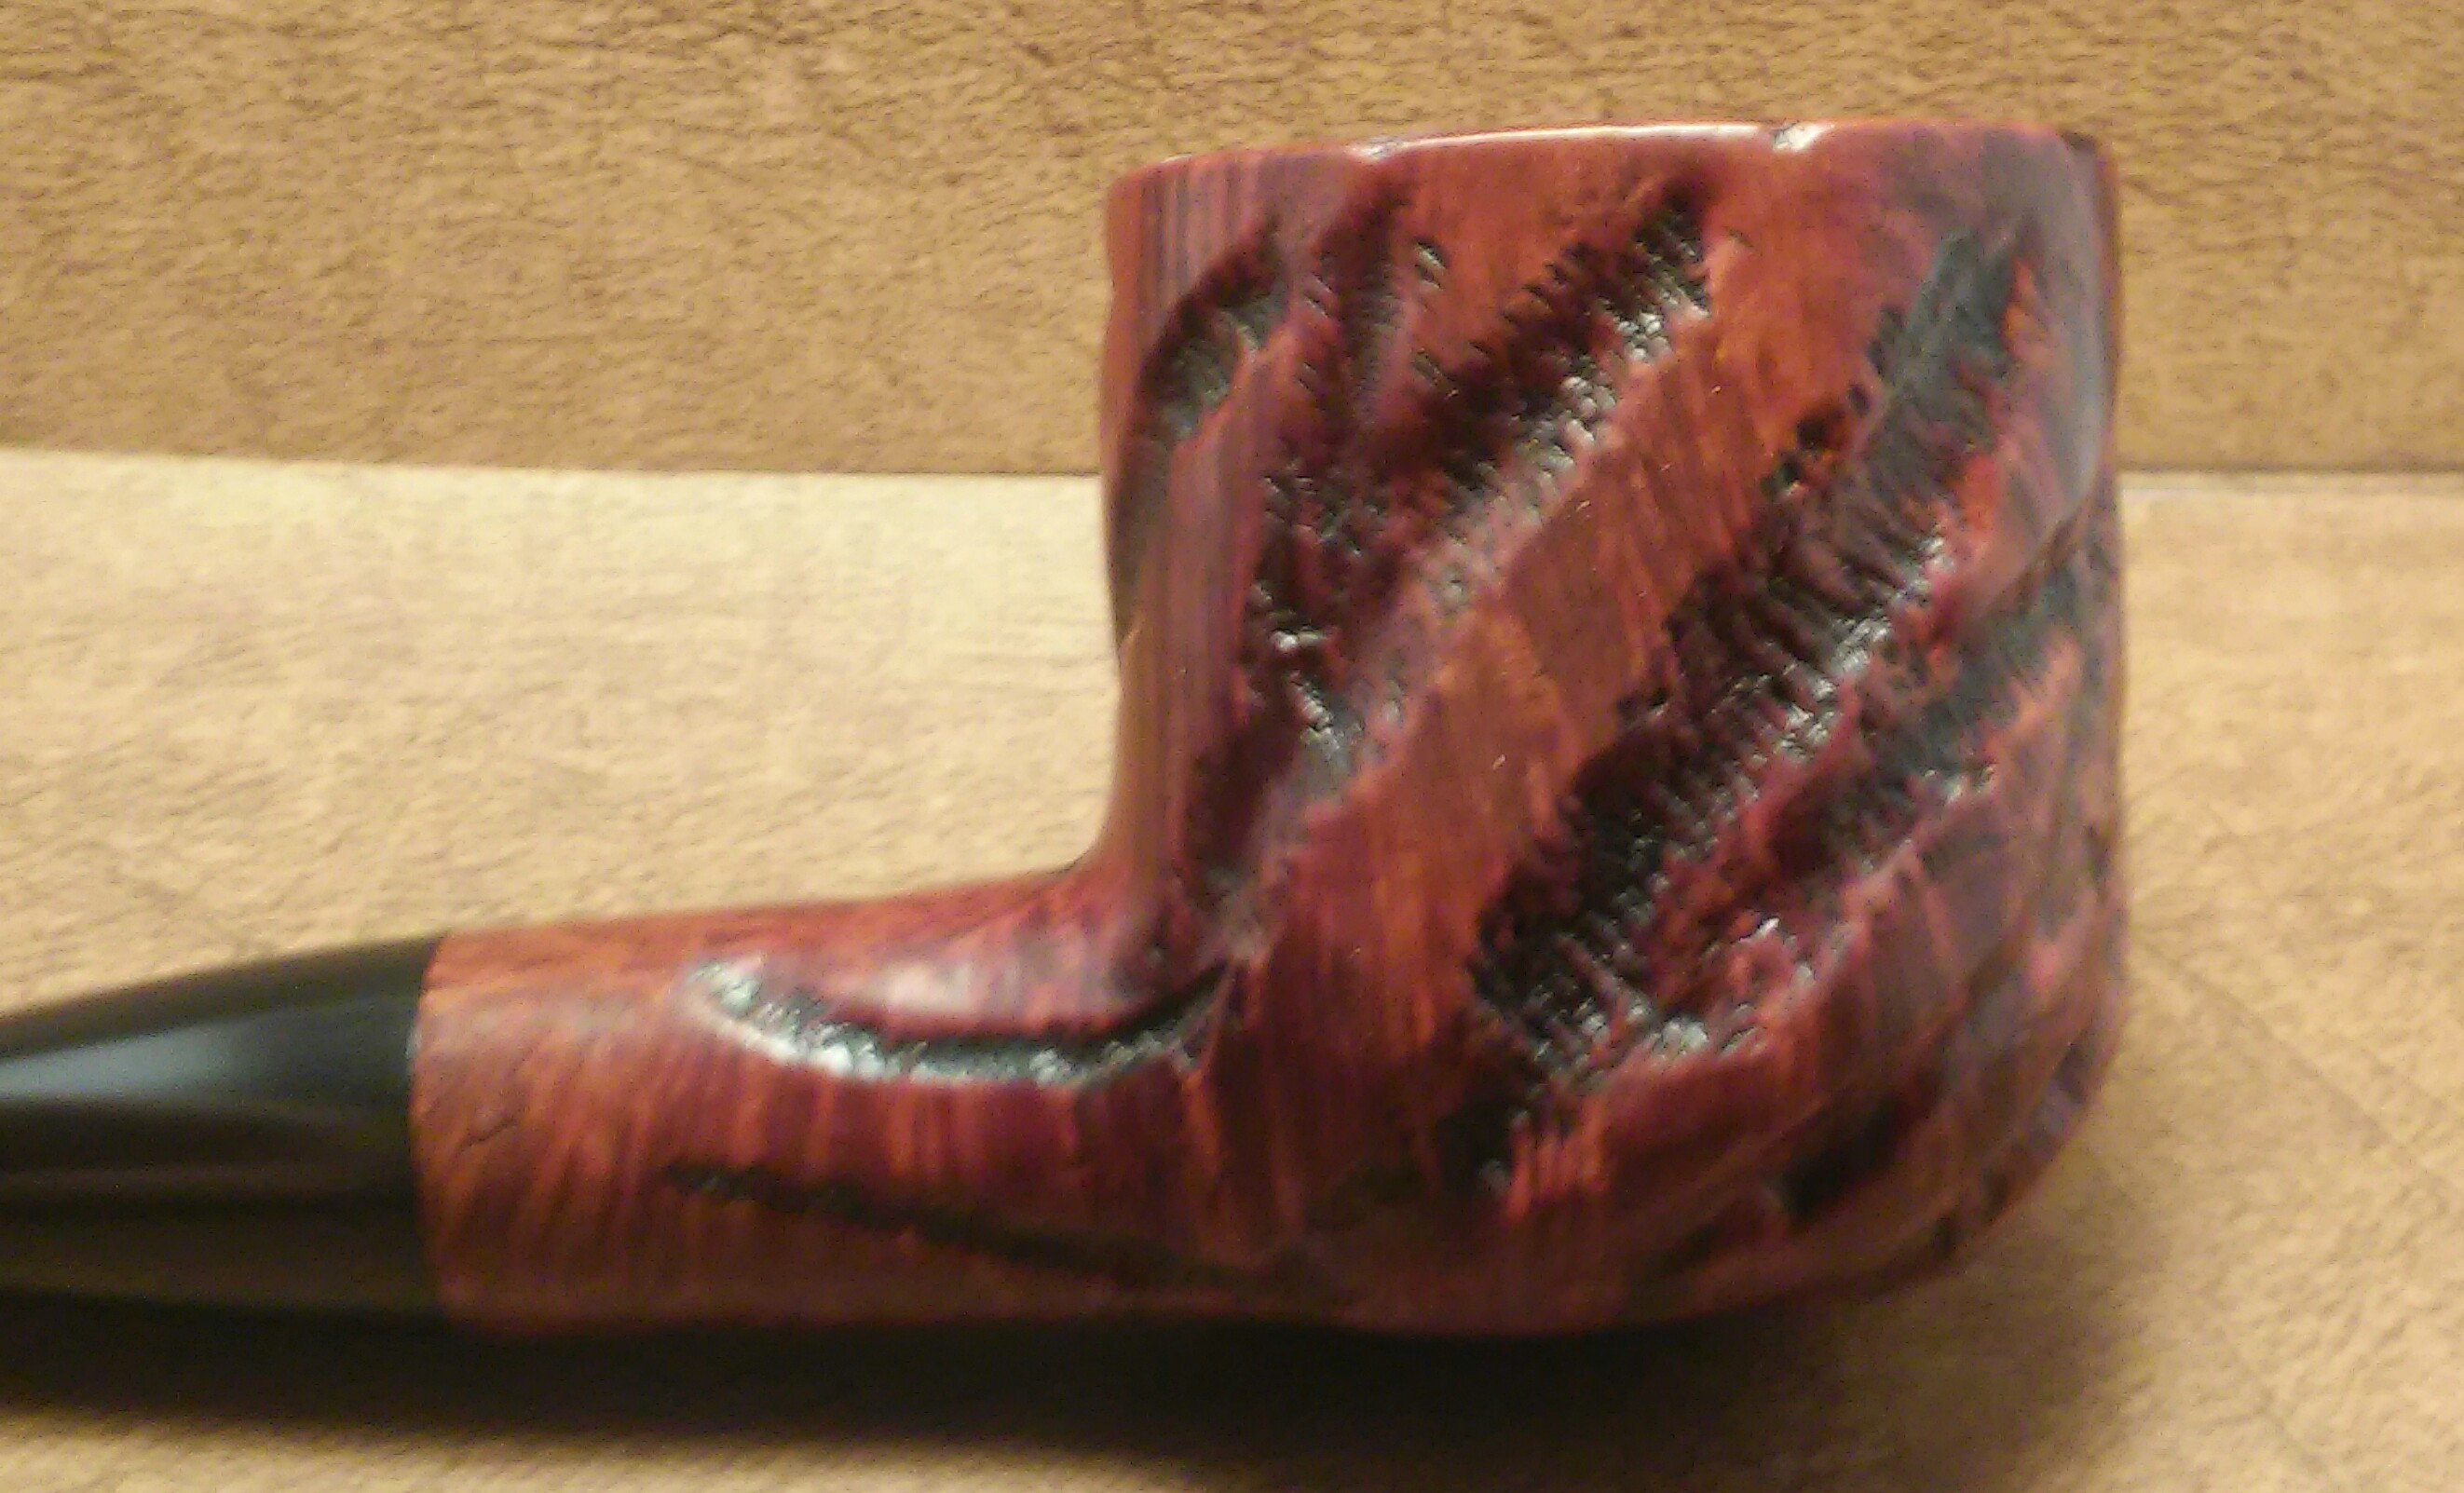
Custom-Bilt patented filter system 1935 to around 1941.


20160109_191300~2
The patented filter used in all Custom-bilt pipes. Its function is to absorb the excess moisture and tar oils. Since oil and water will not mix, and the oil always goes to the top, the Custom-bilt filter, although made in one piece for greater convenience in removing, is bent to give the results of a double or two-piece filter. The upper filler absorbs the tar oils, the lower filter absorbs the moisture.
20151025_1234352~2
Images & information courtesy of Bill Ungers As Individual As A Thumbprint-The Custombilt Pipe Story.


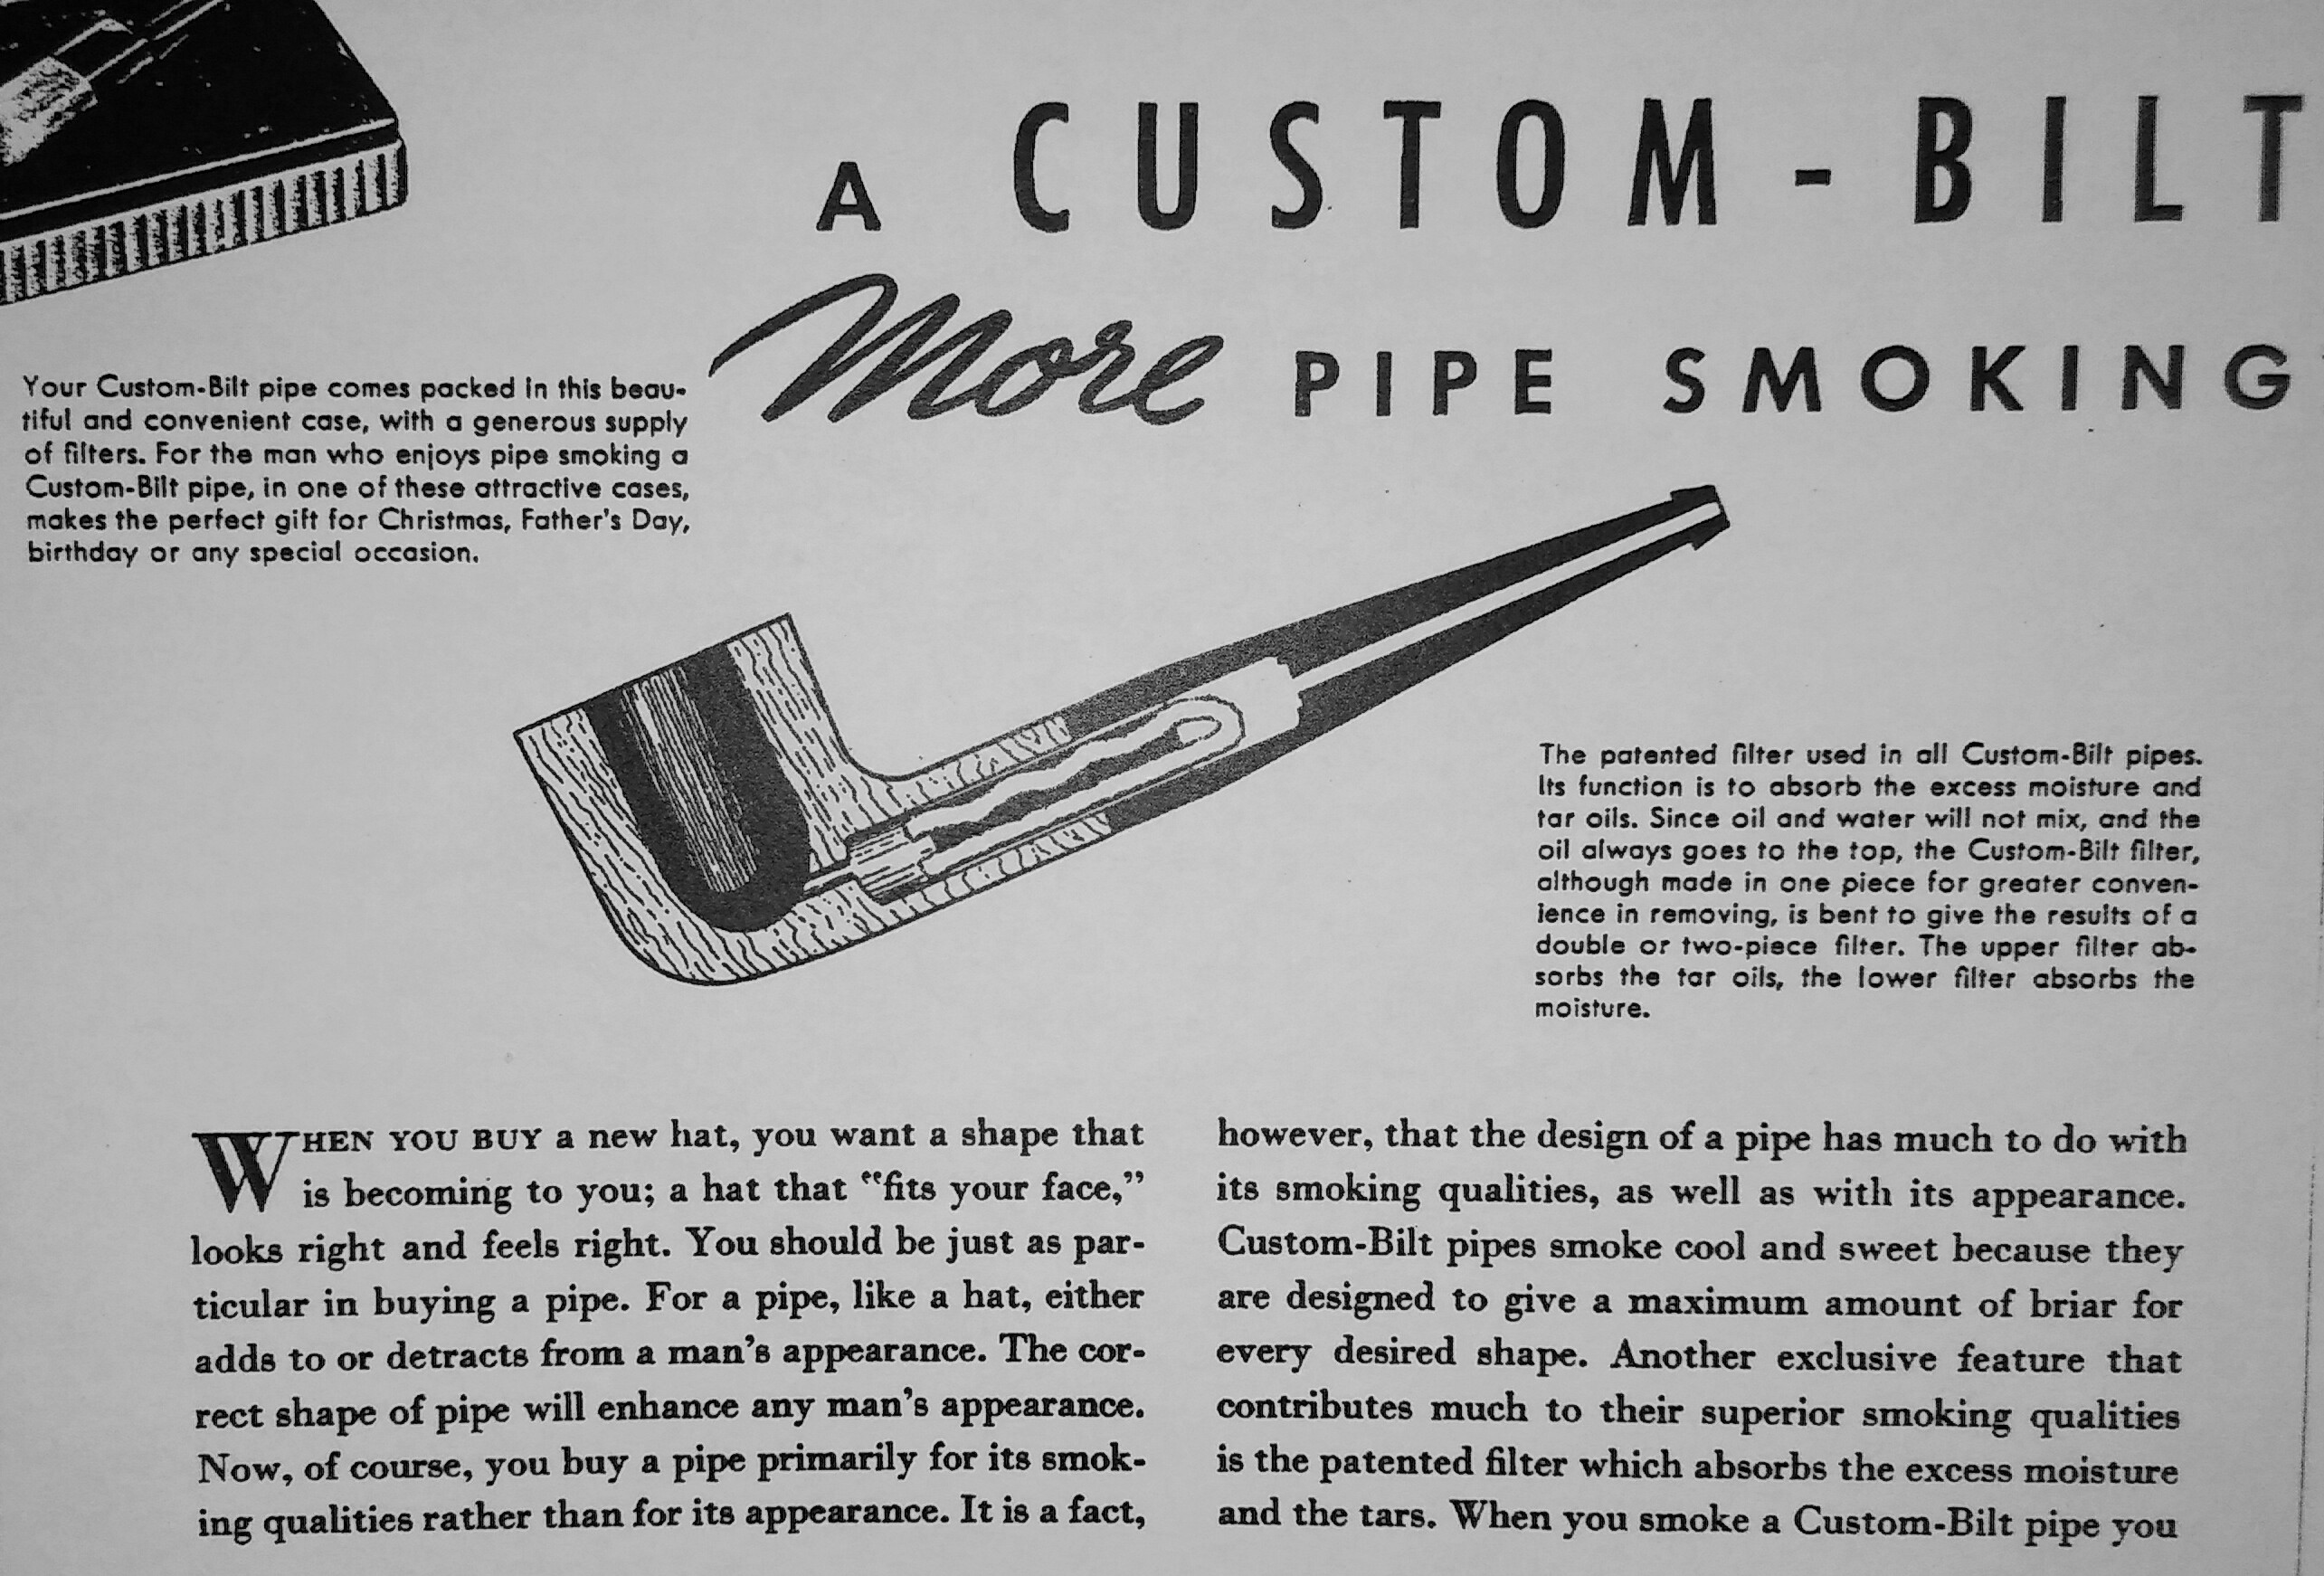
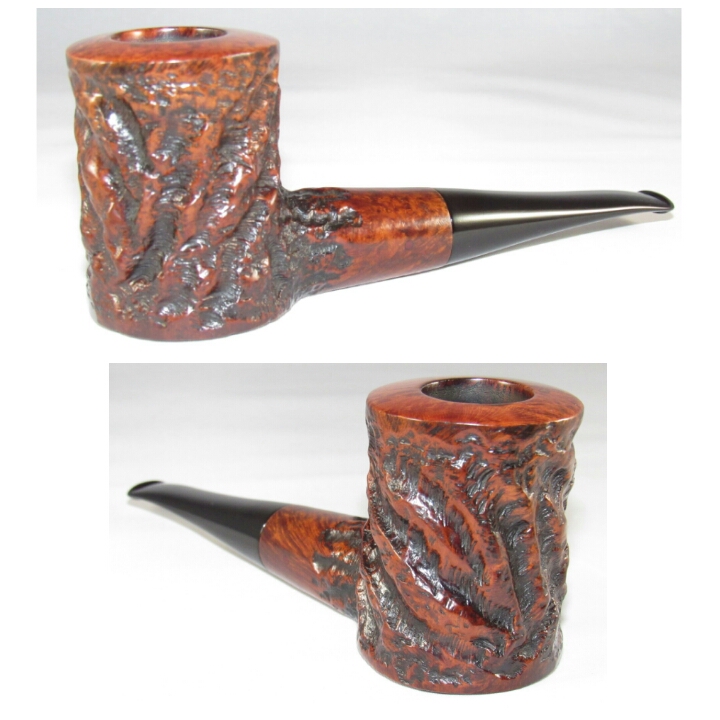
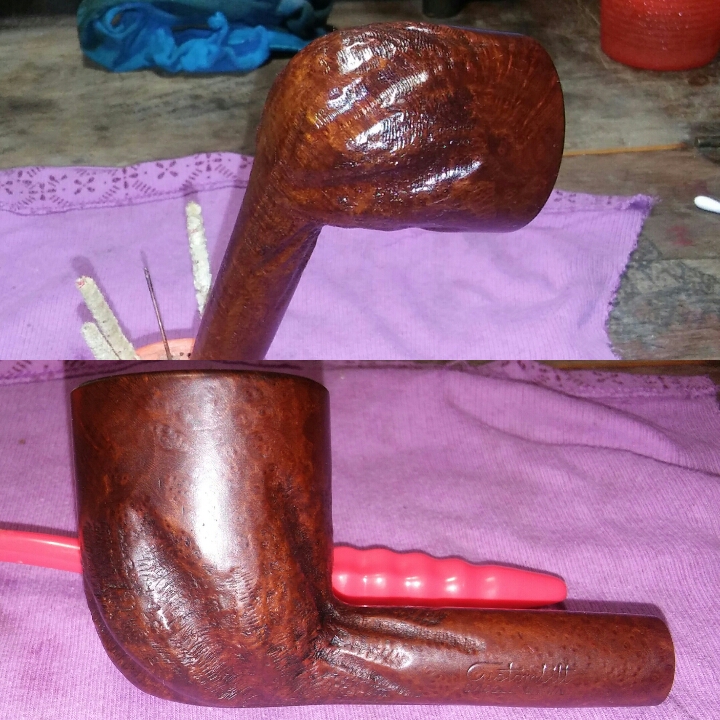
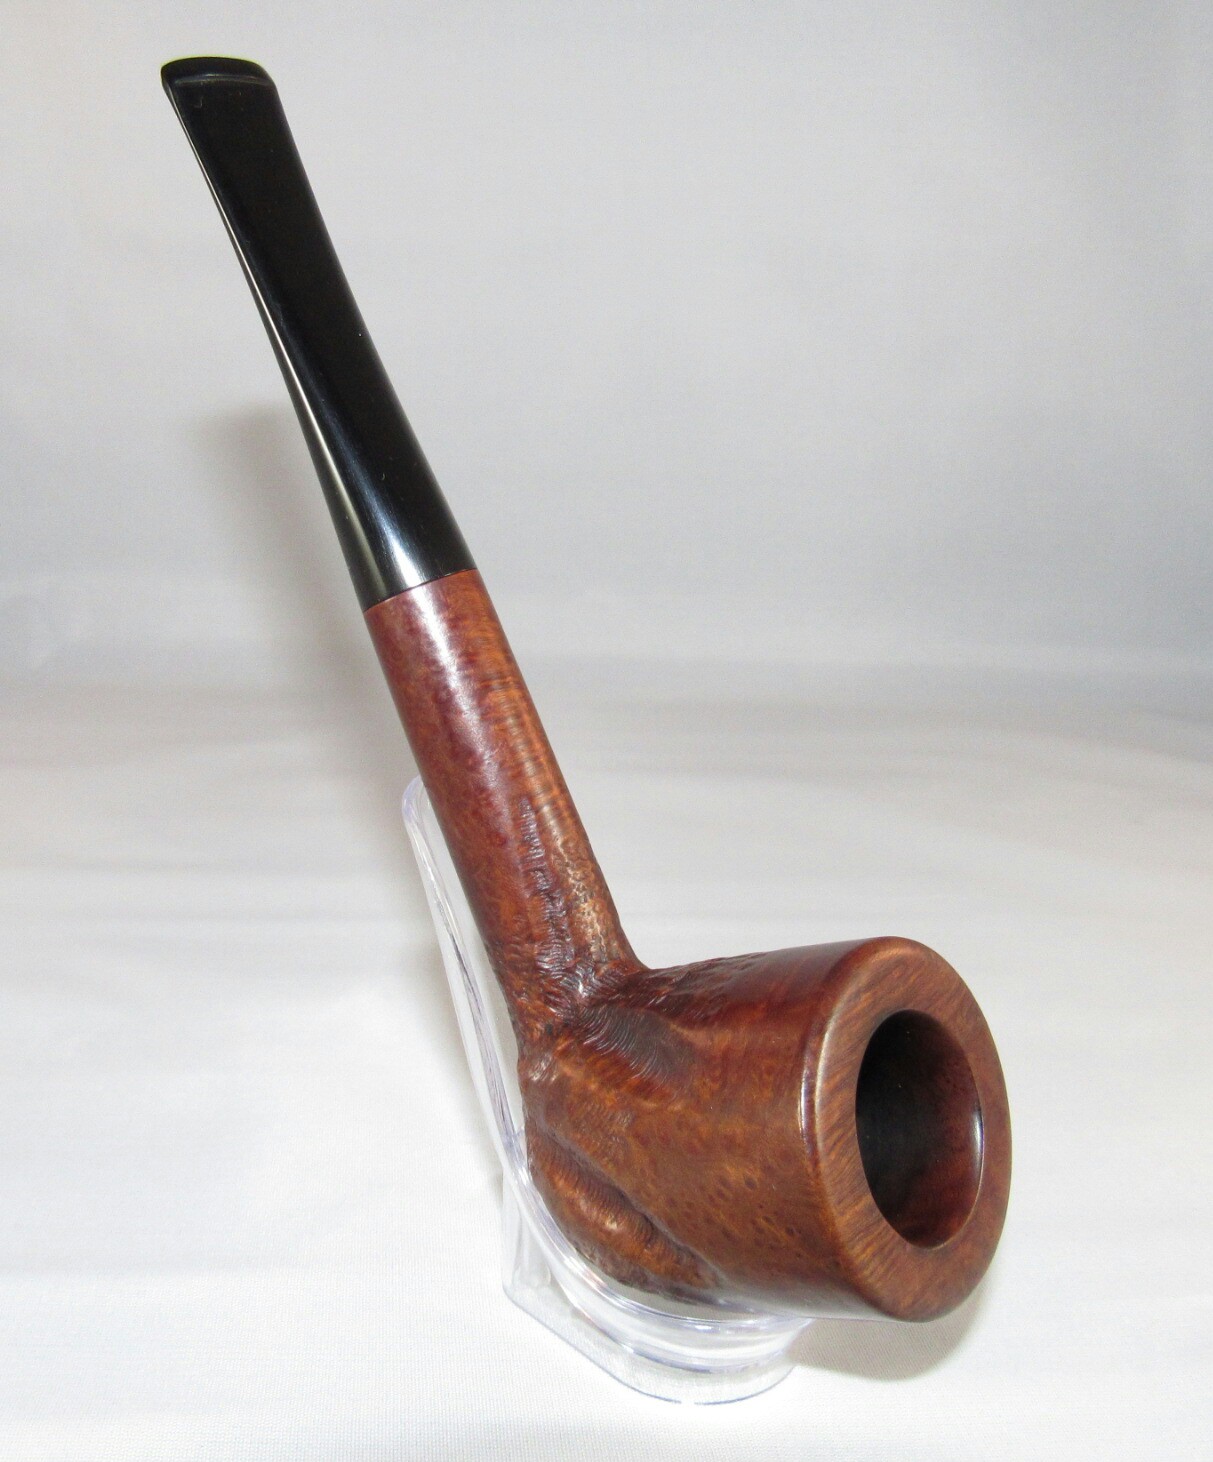
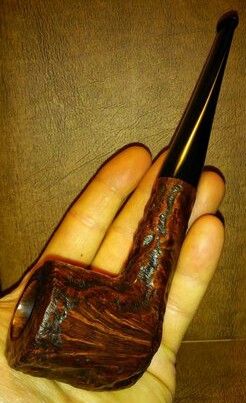
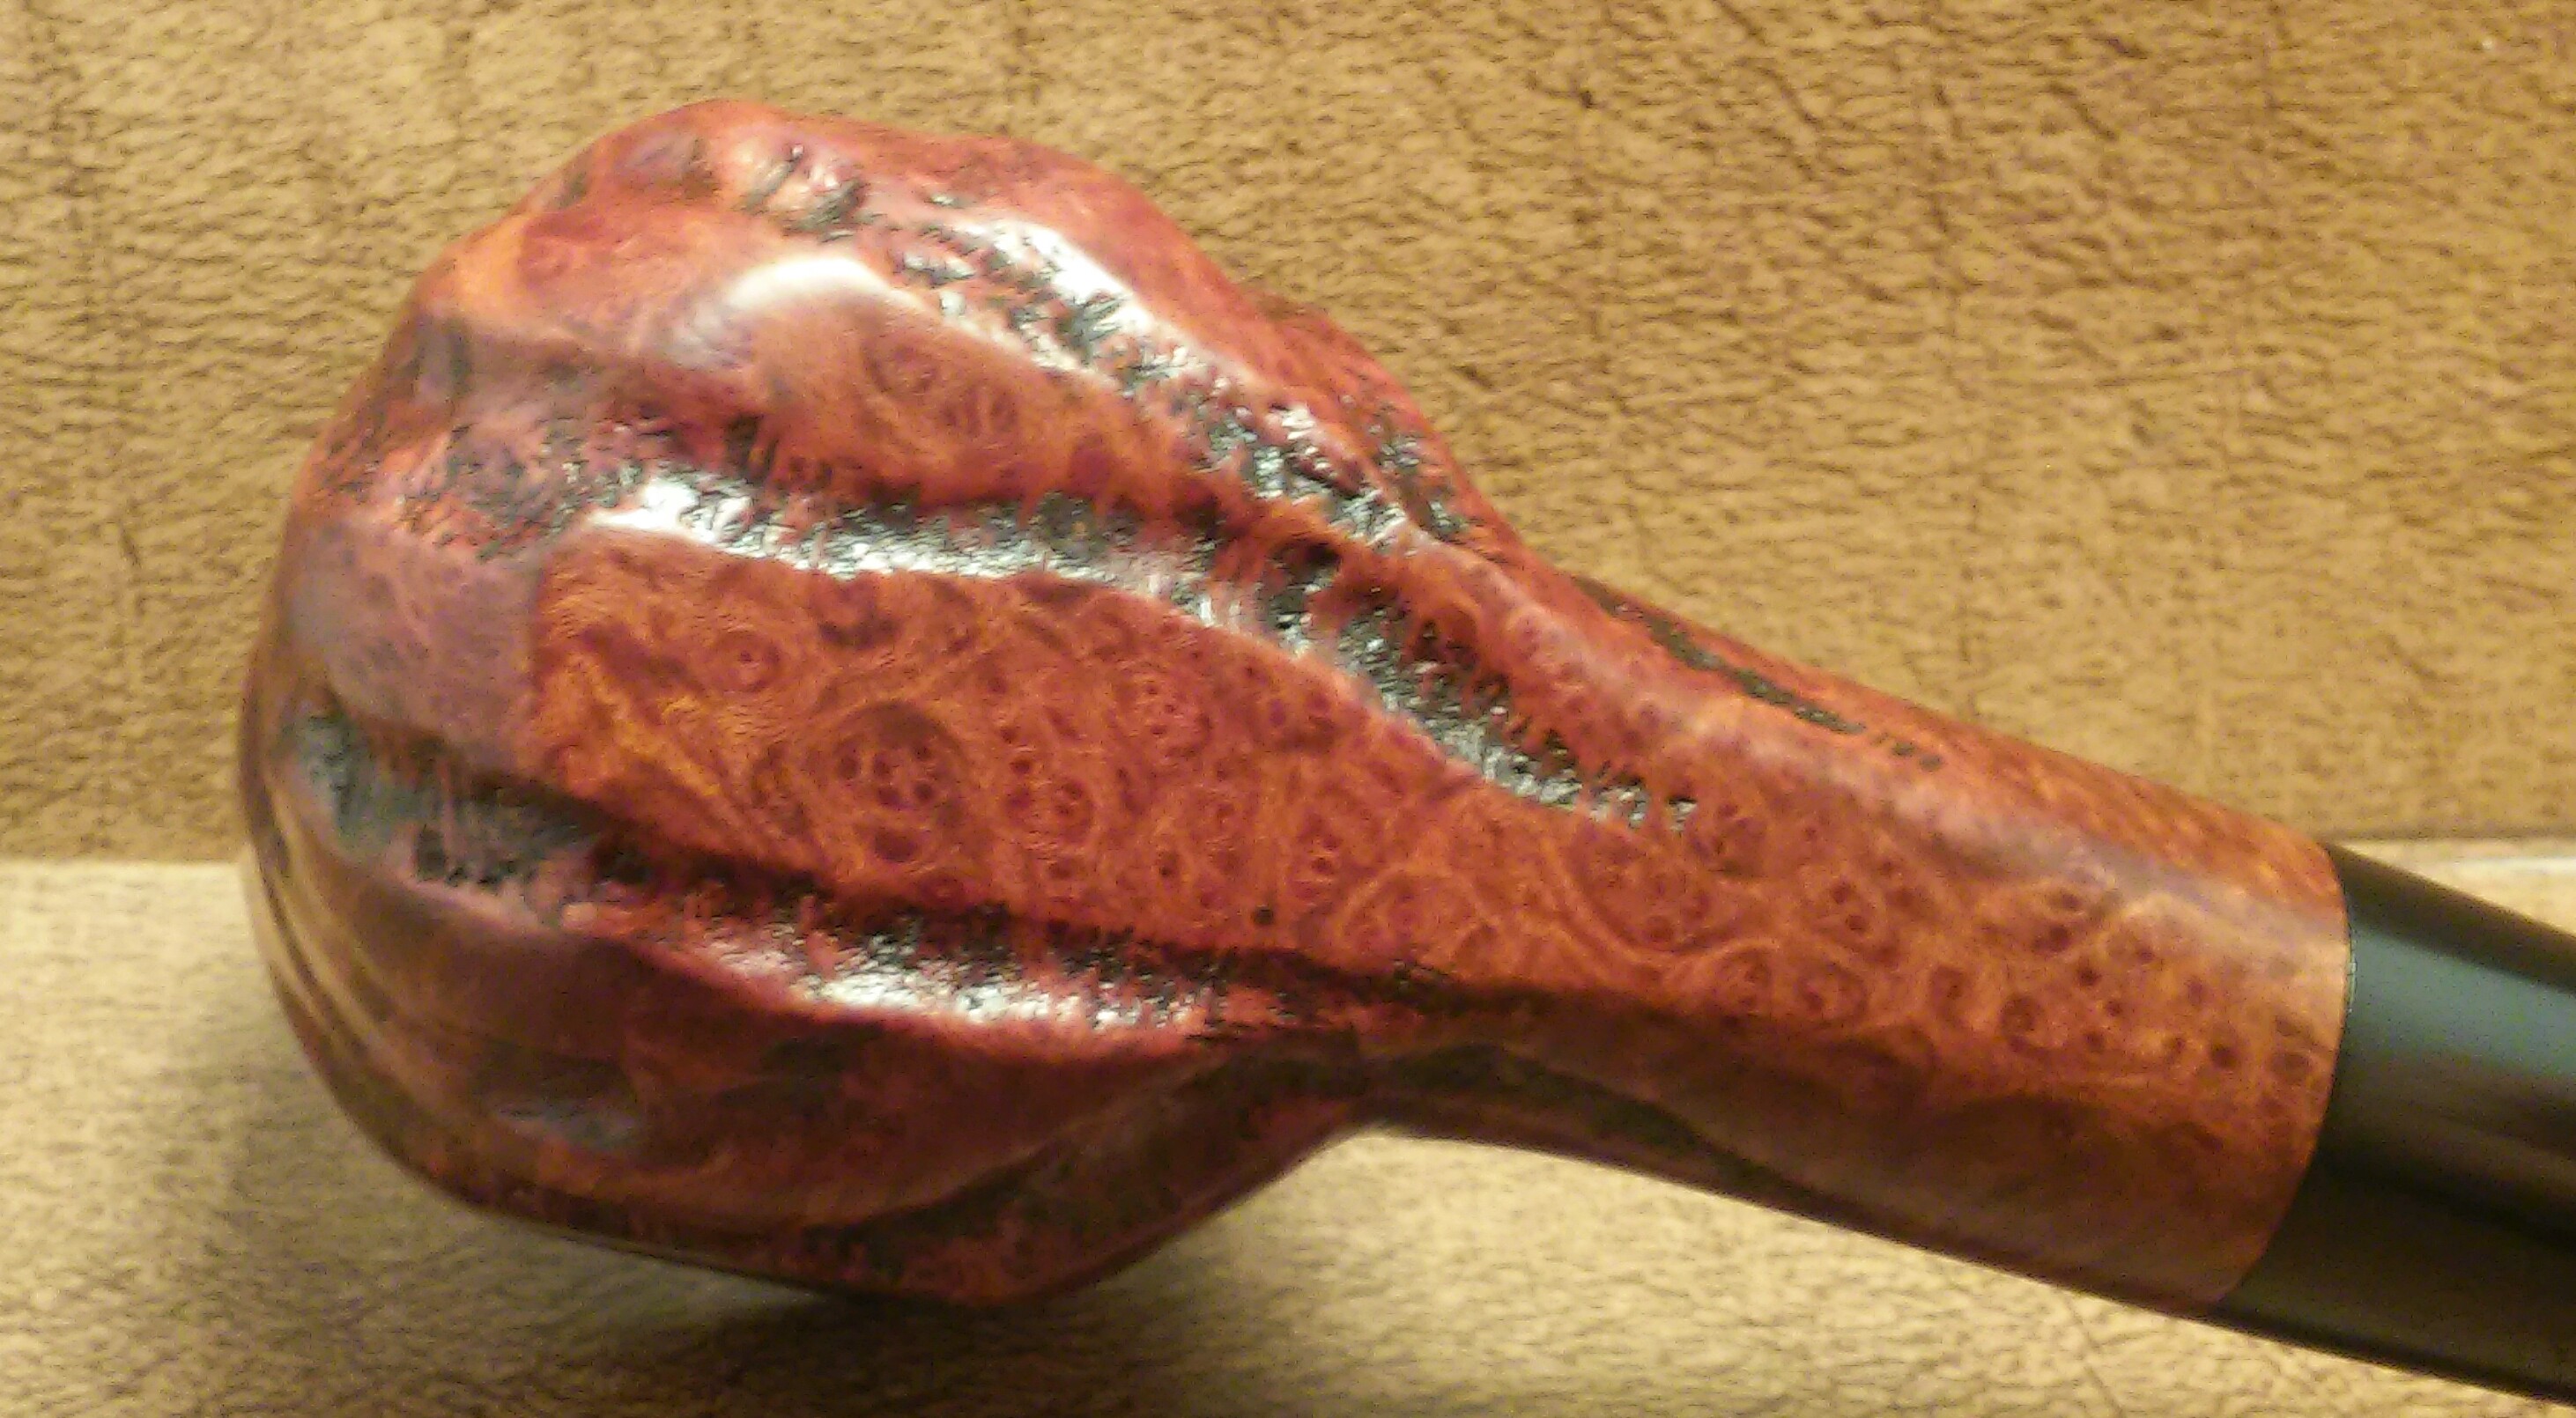
The Custom-bilt patented filler system is one more oddity that’s always on my radar, along with a list of many others I have yet to acquire. With the addition of this big and beautiful poker it brings the count to three in my collection each one more massive then the last. This example is by far the largest in my collection and also the first poker shape in the collection.
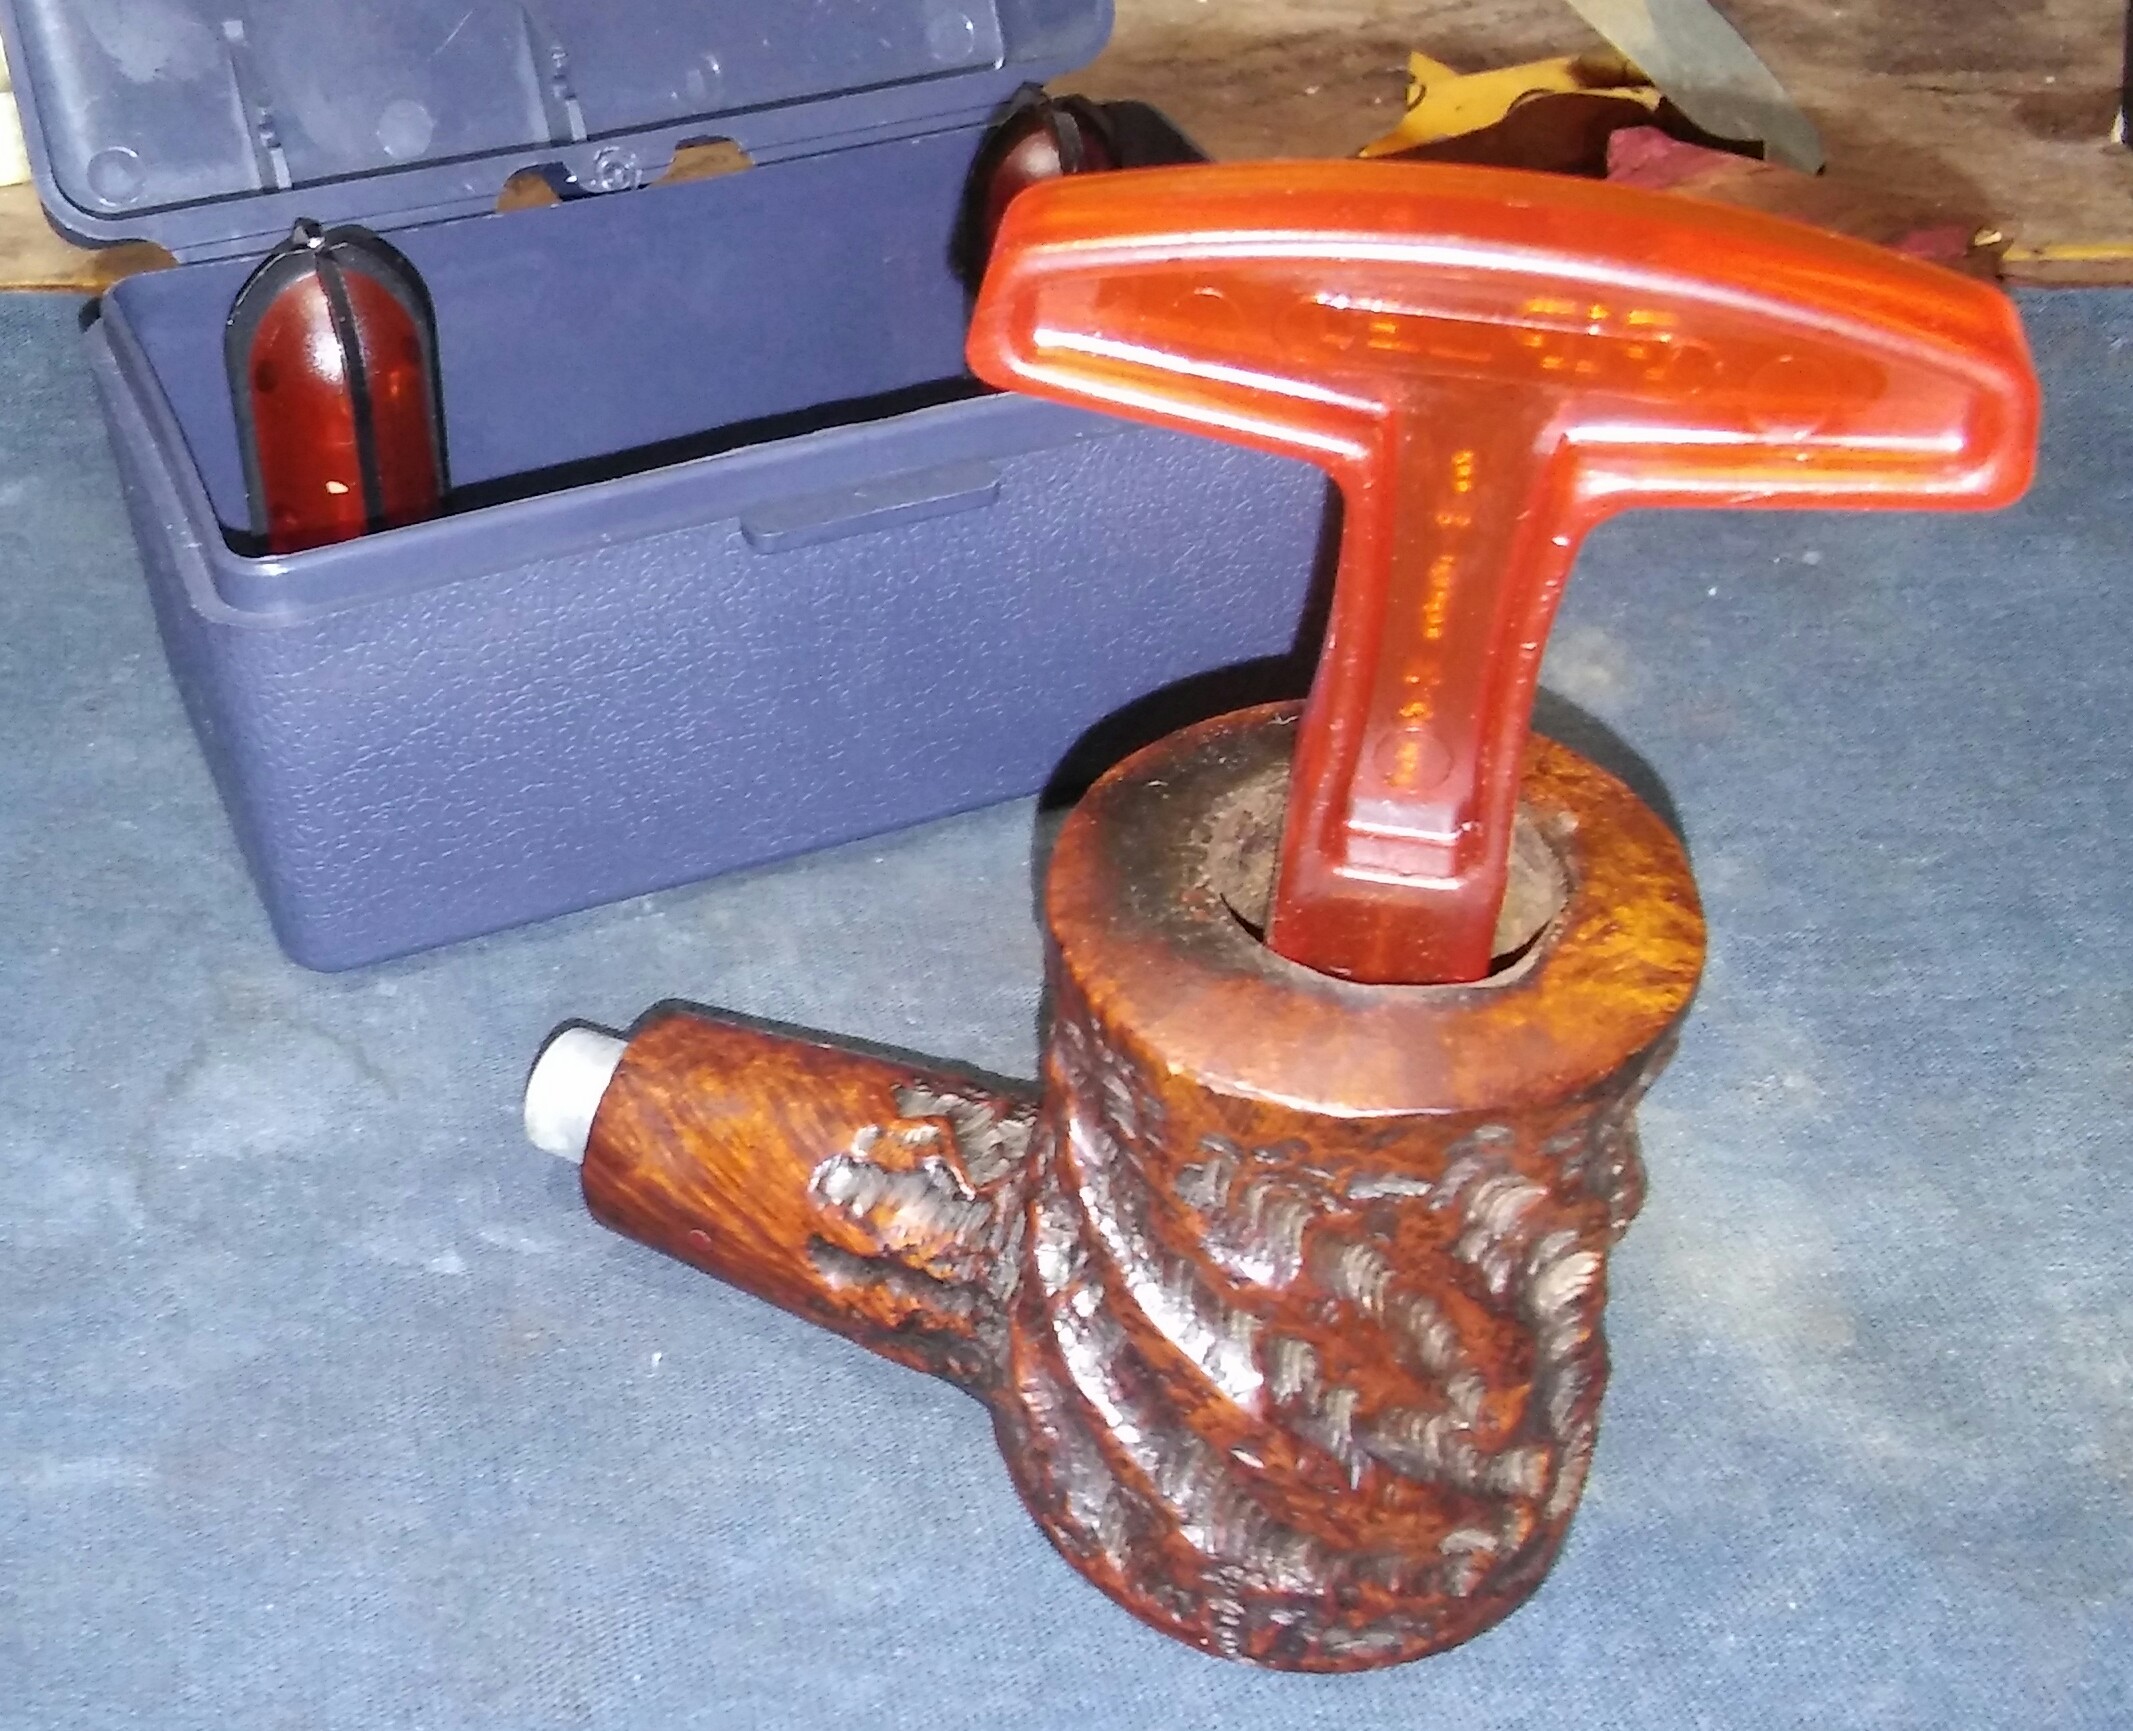
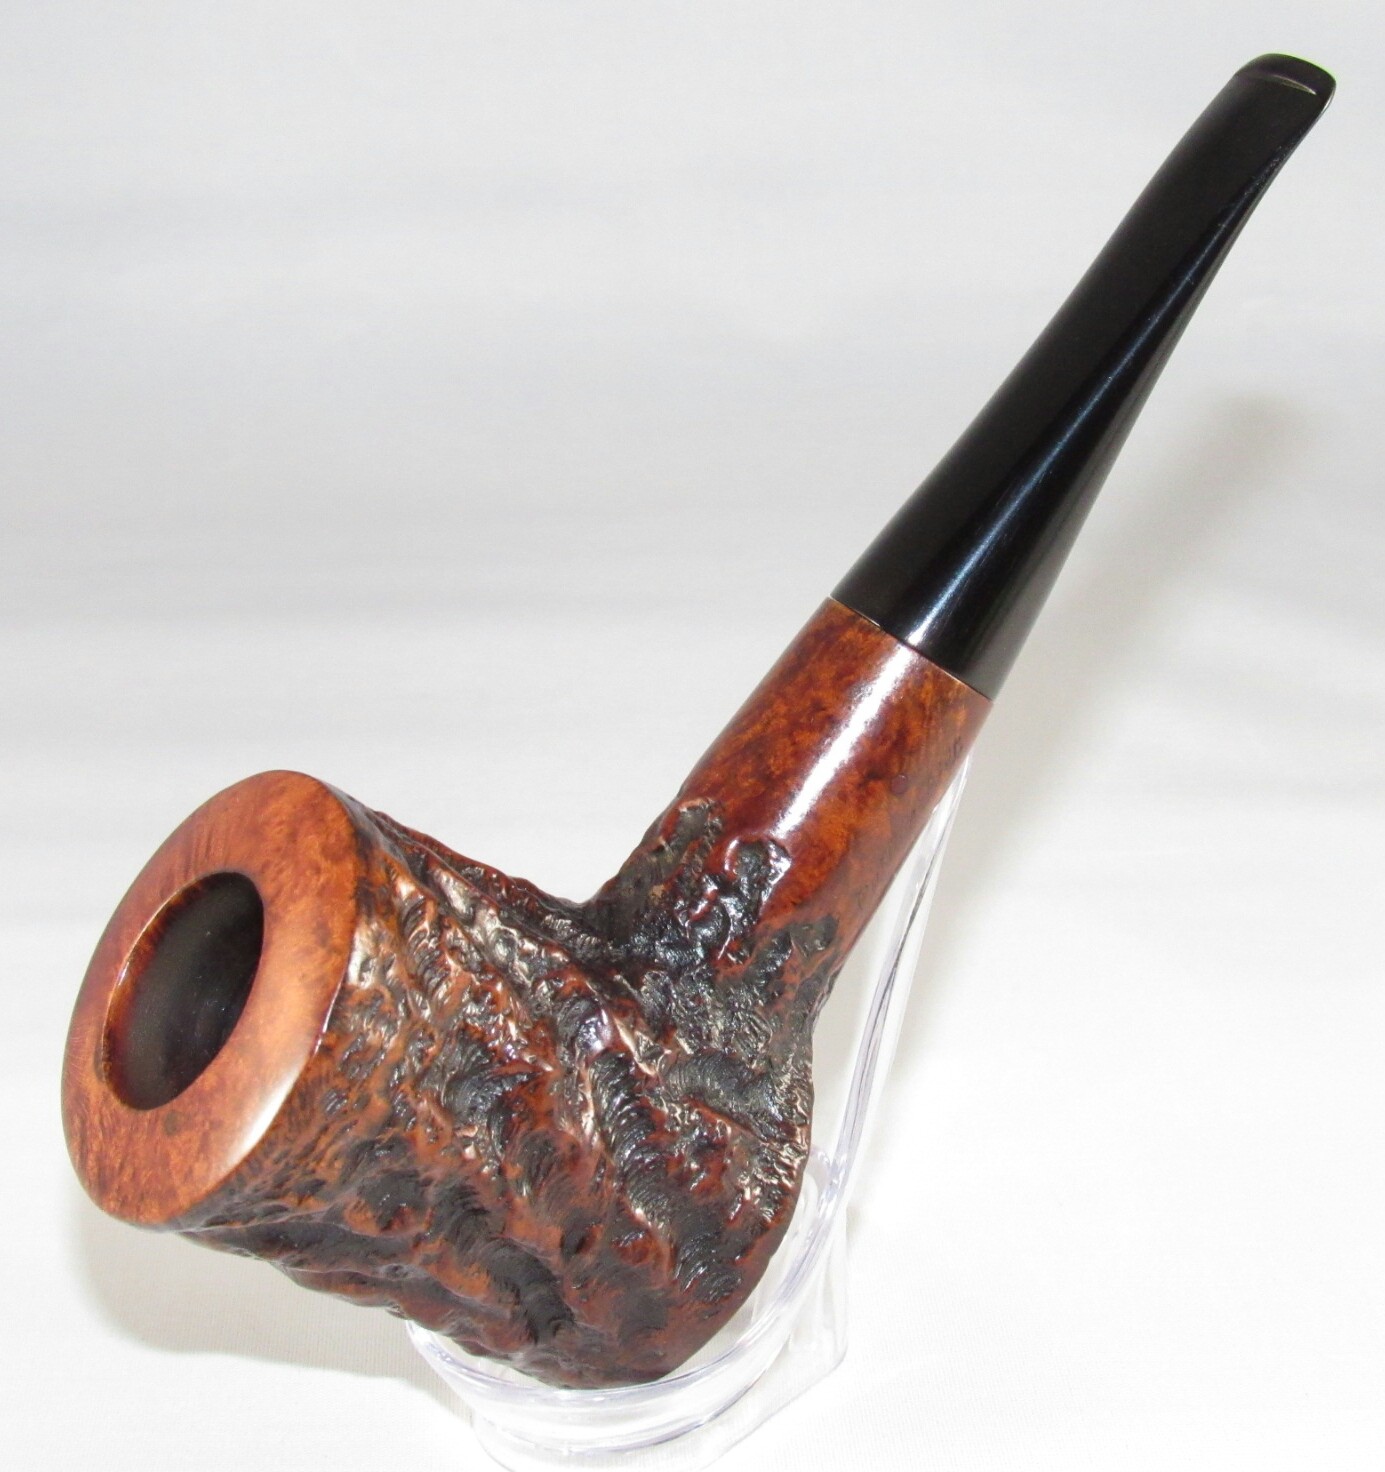
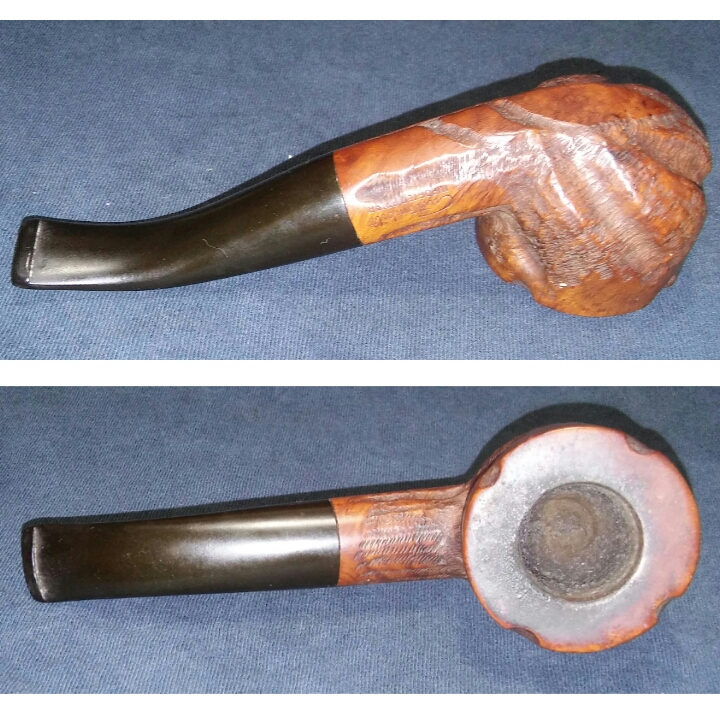
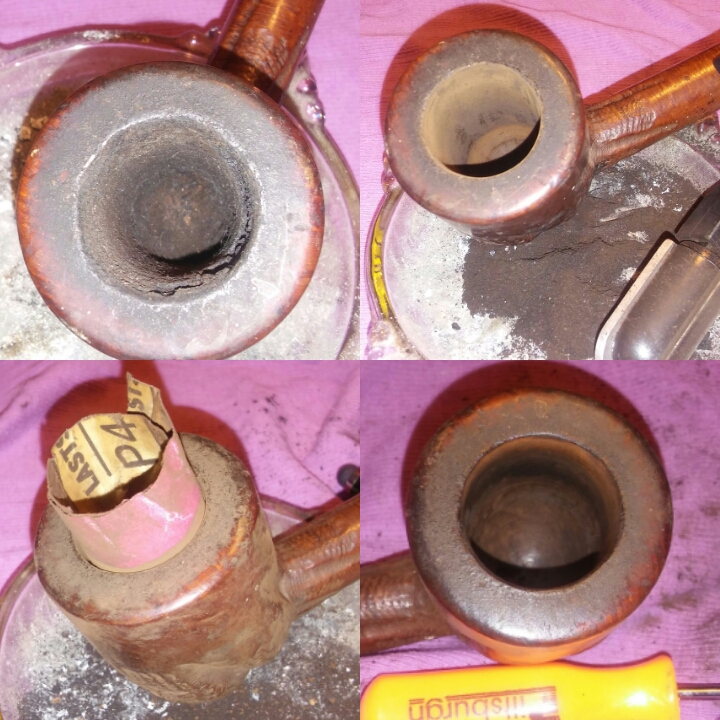
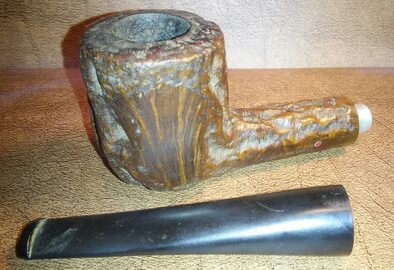
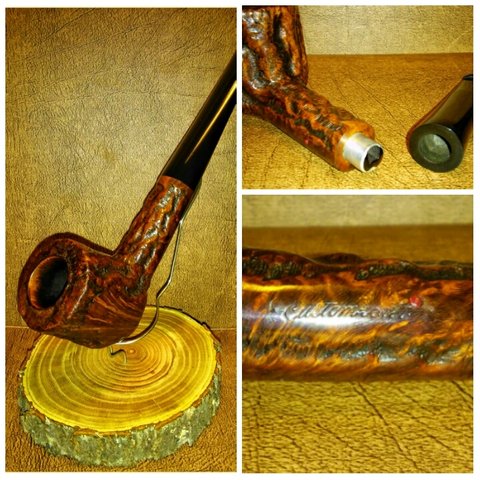
As Received

20160108_224440~2~2PhotoGrid_1452311630609PhotoGrid_145236449381220160108_224350~2PhotoGrid_1452311745271

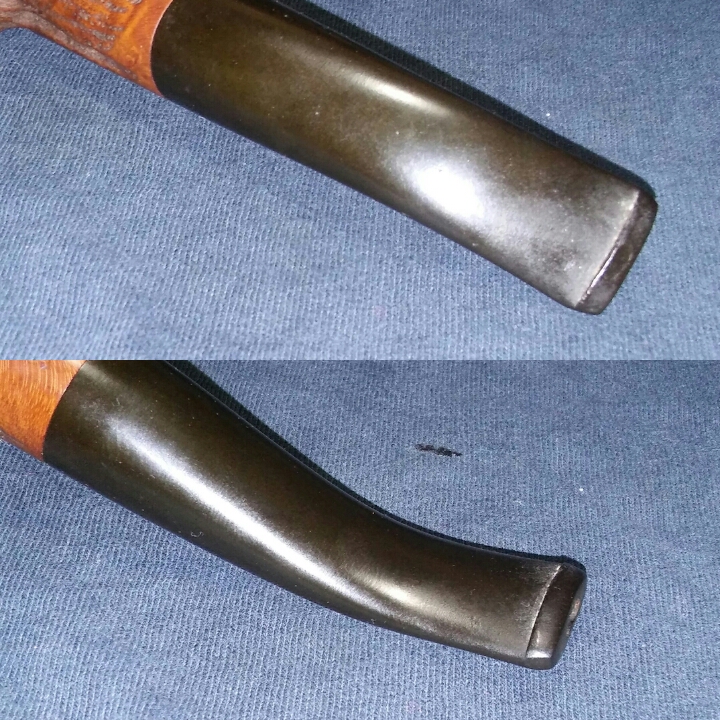
The seller removed the stem with pliers. At least there was no damage done to the filter system.

PhotoGrid_1452364565982

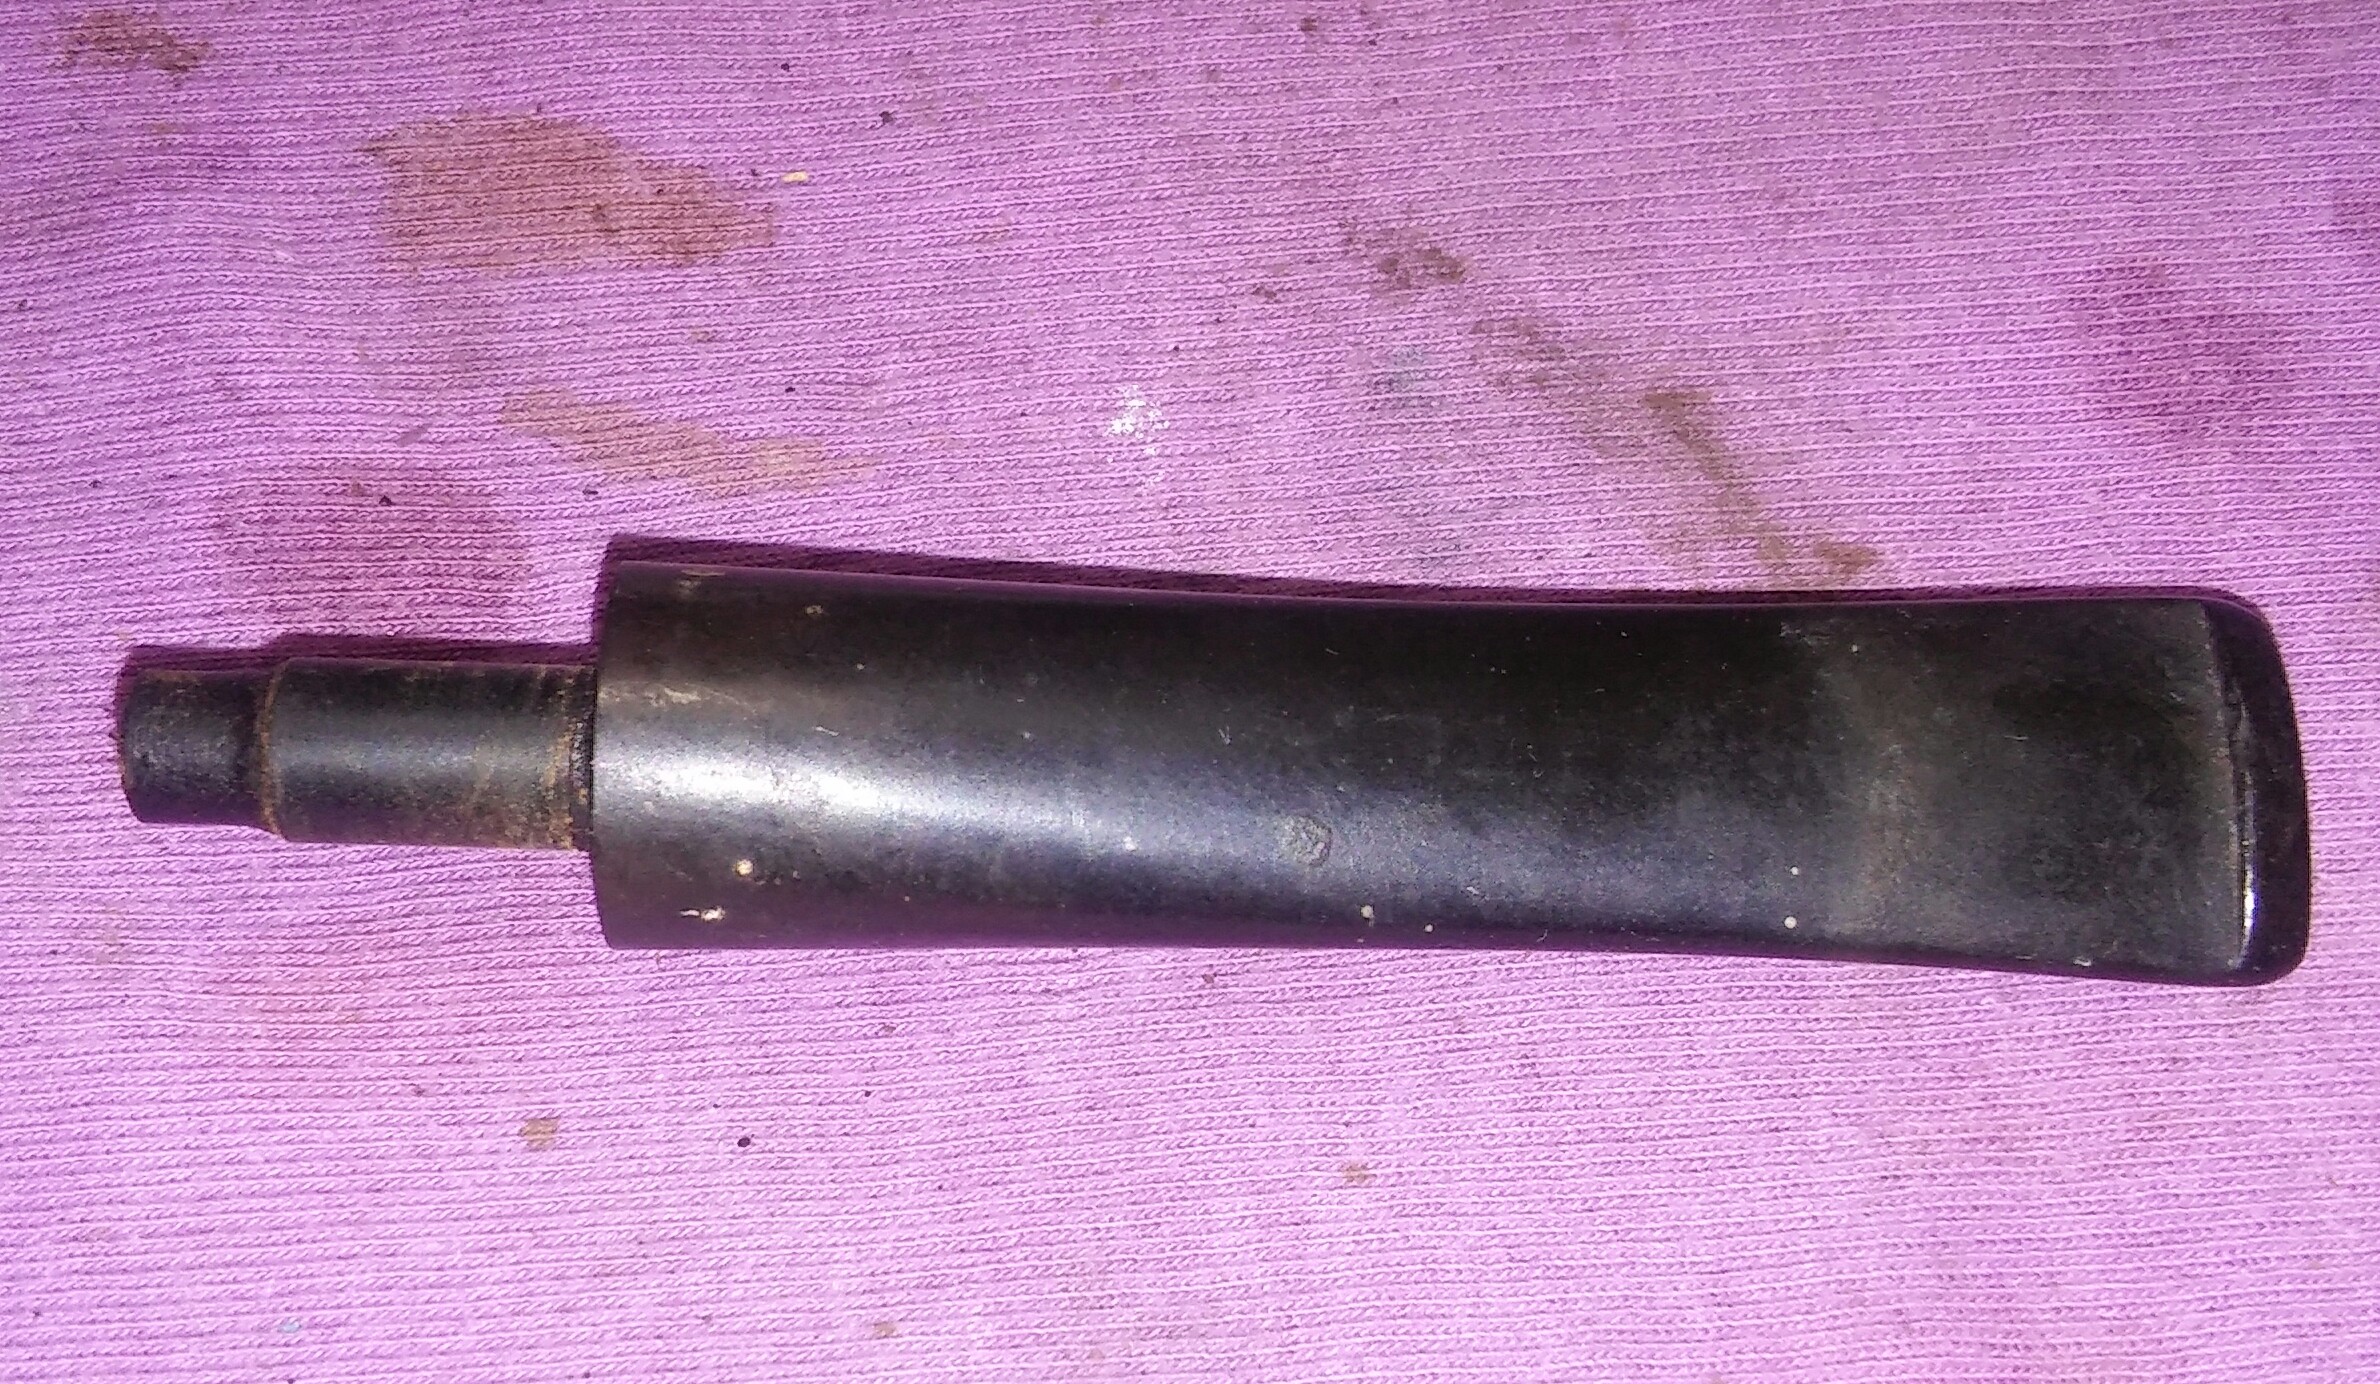
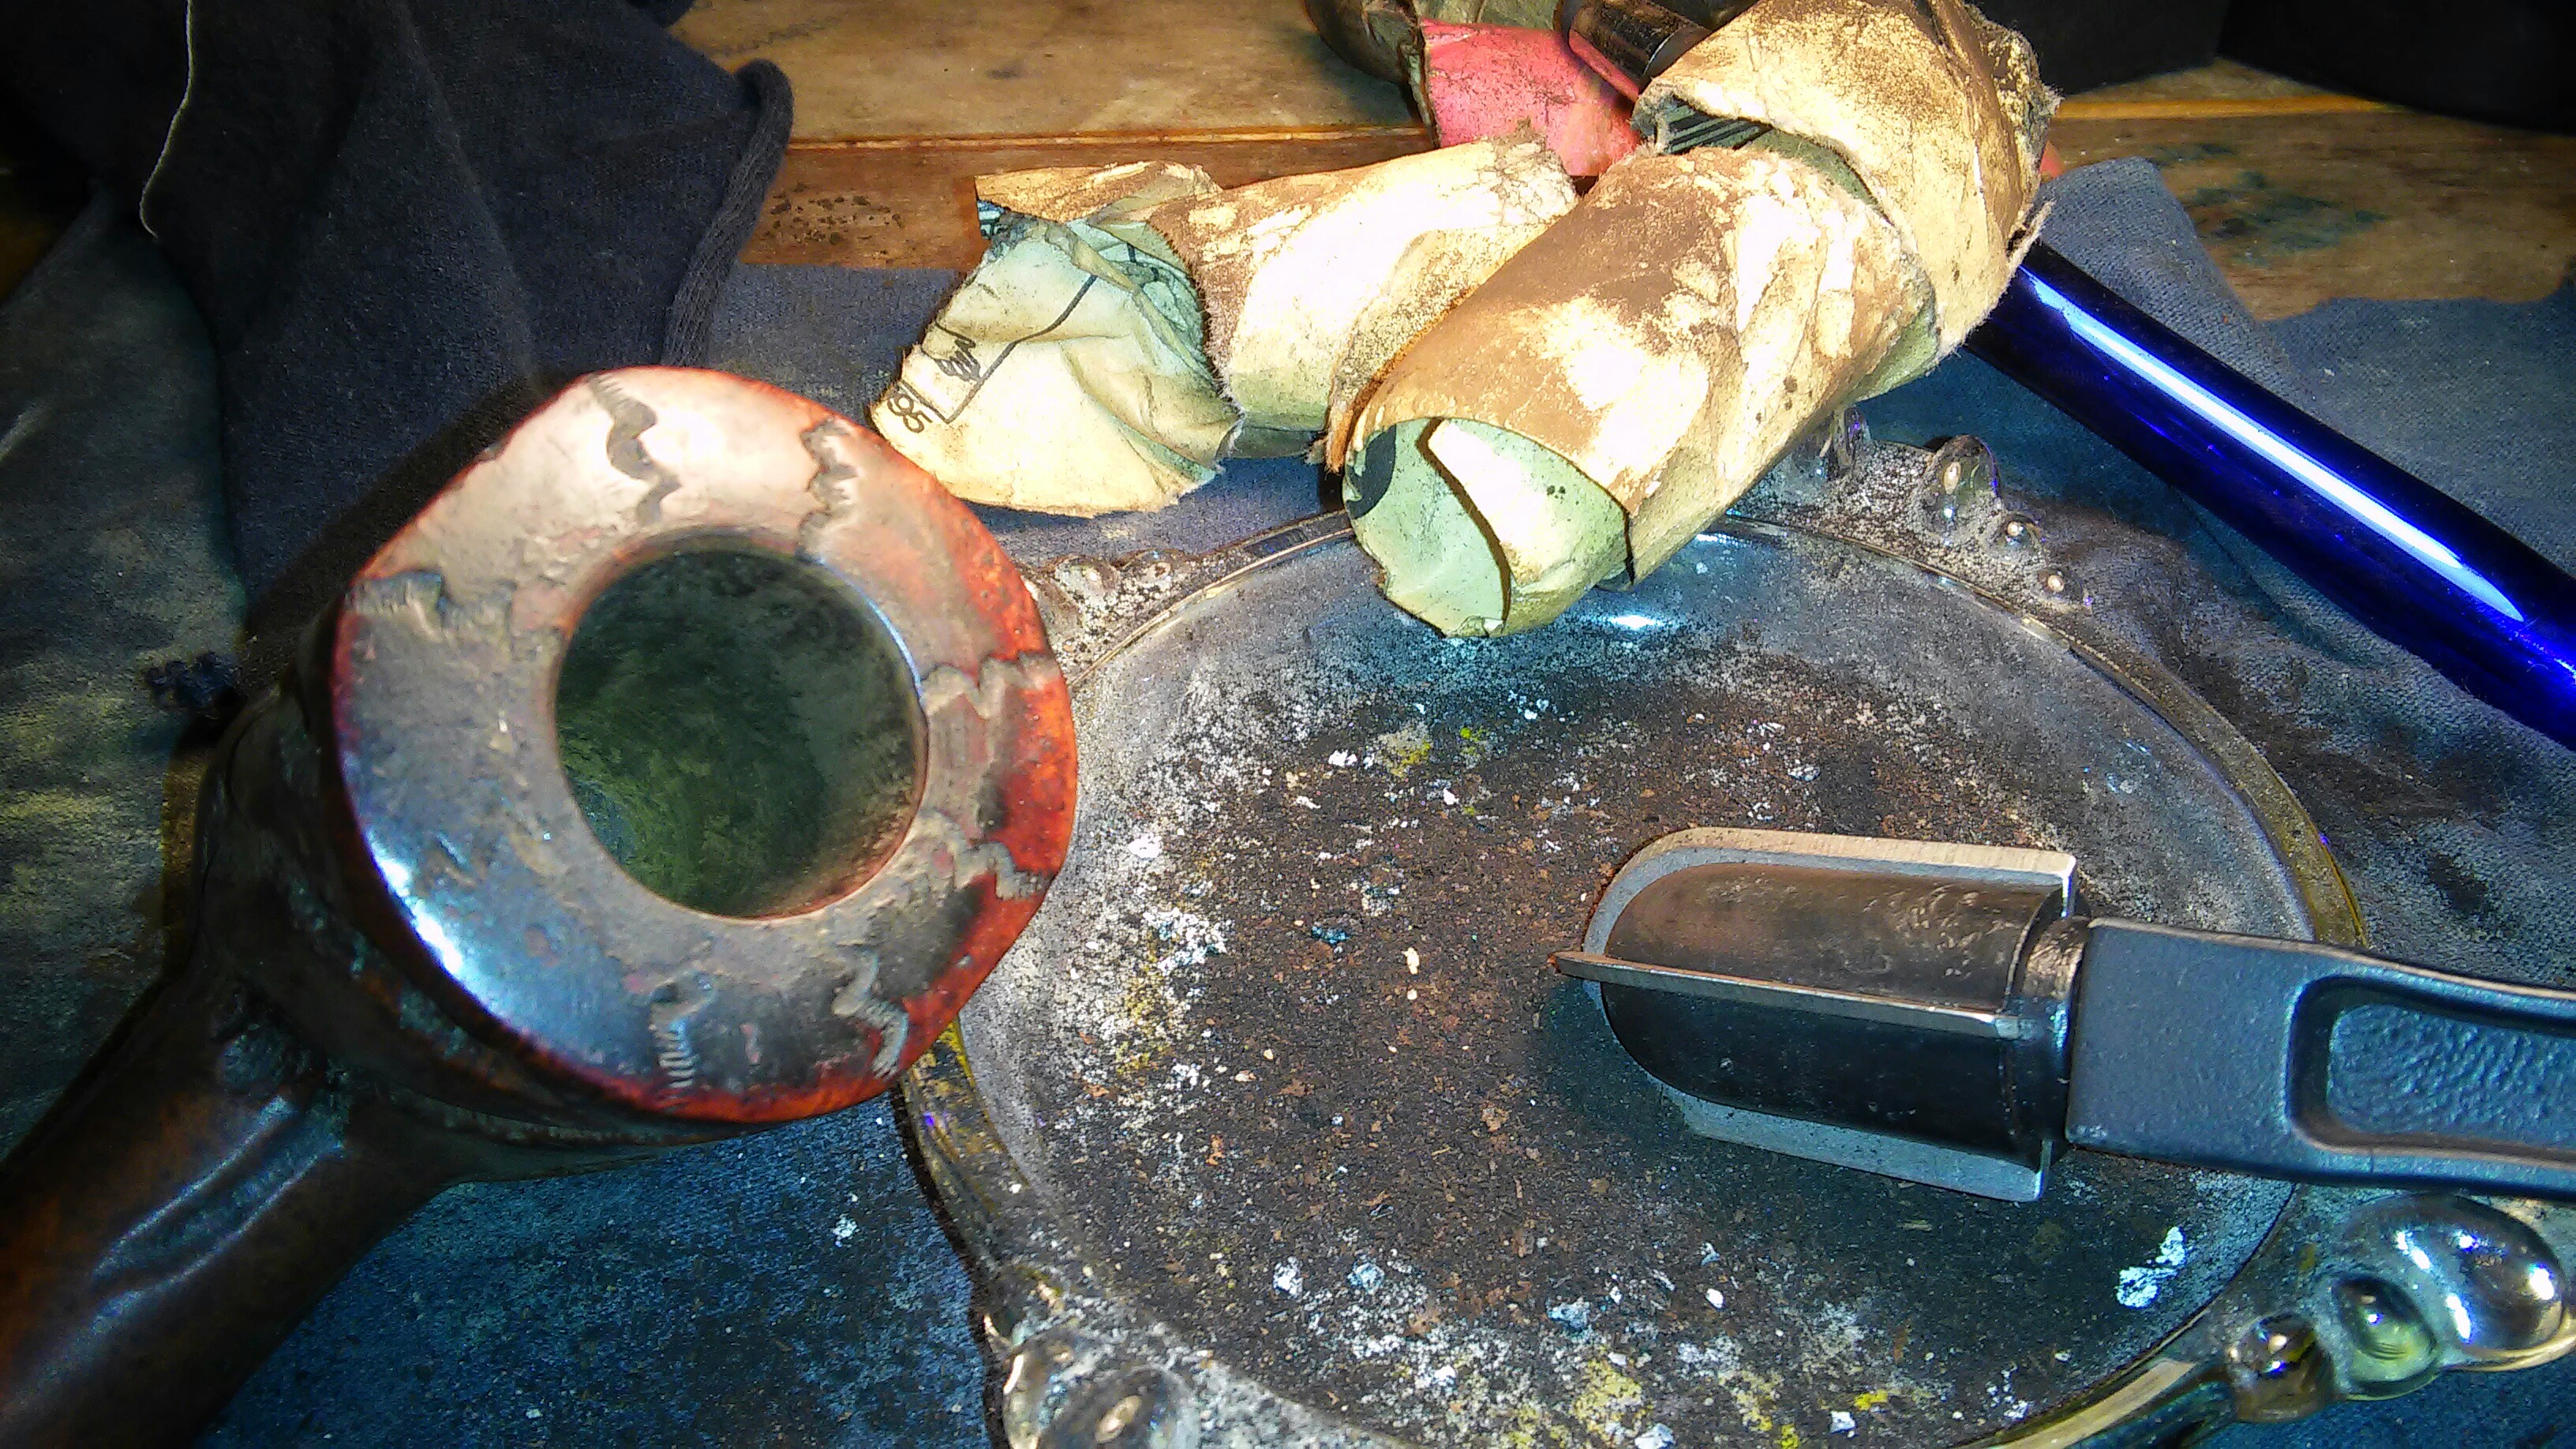
Aside from the tool marks on the stem, the pipe showed normal wear. Light chatter, rim tar&char and one good burn on the rim.

20160109_162452~2

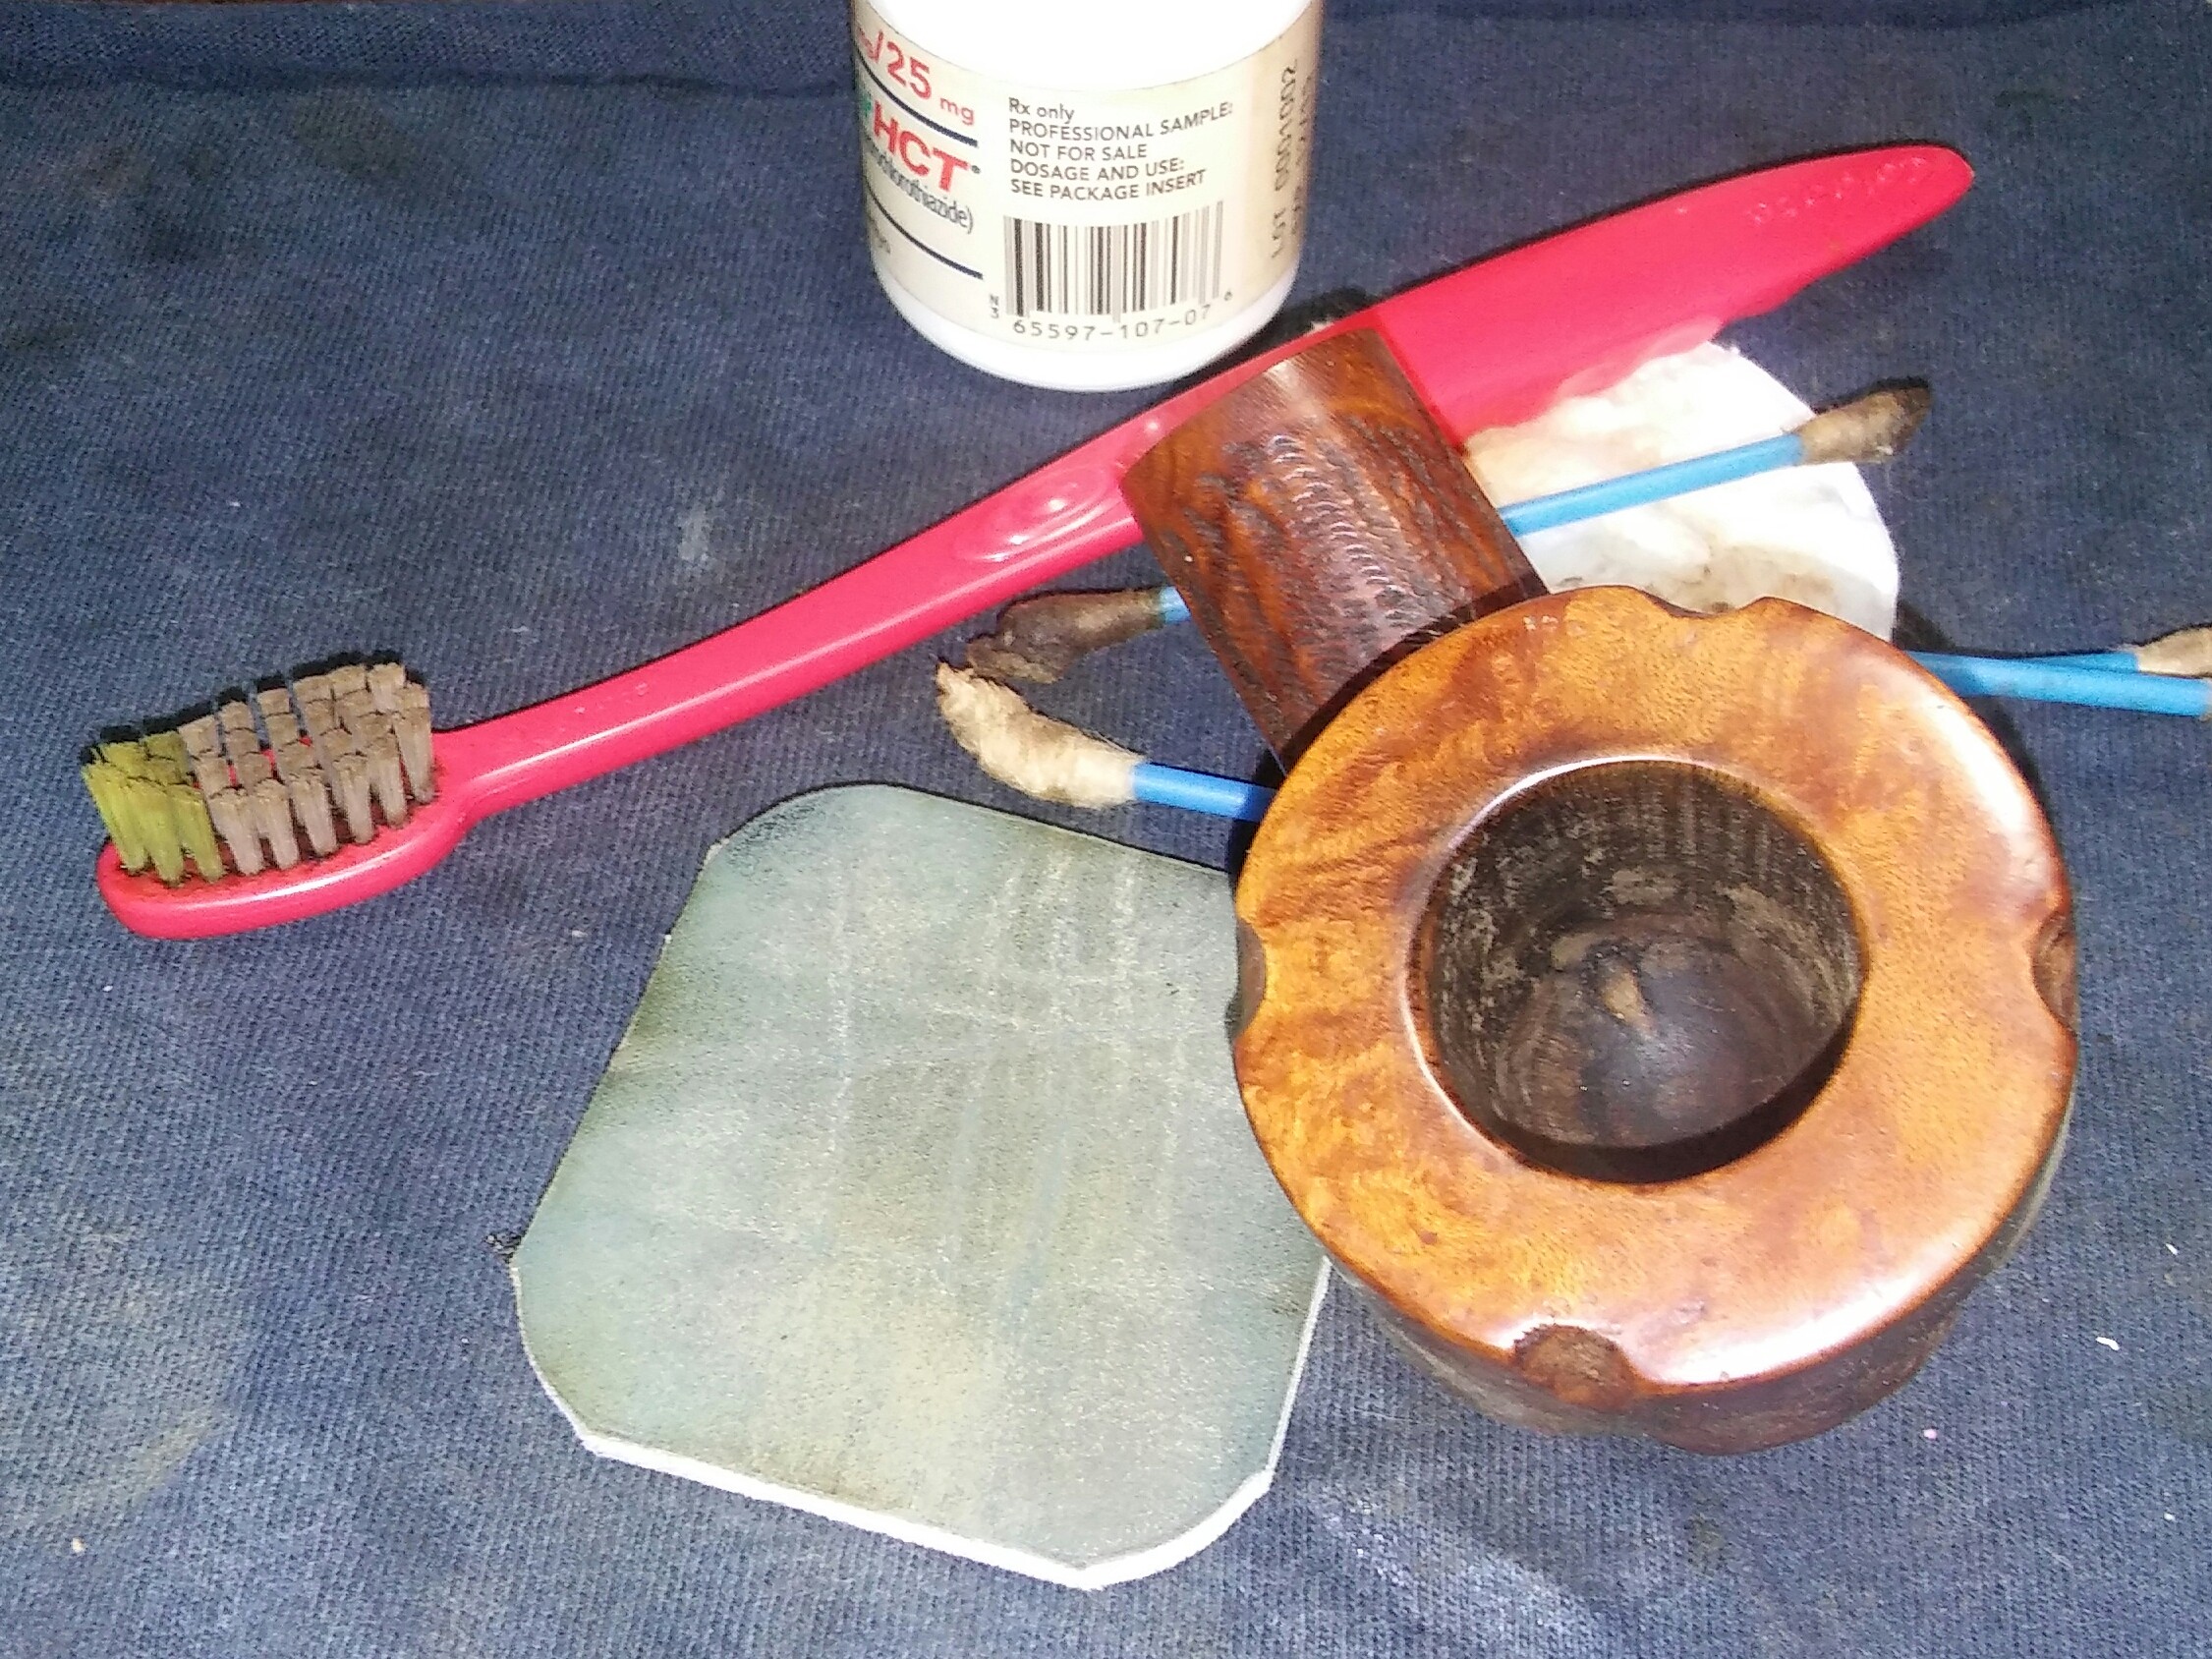
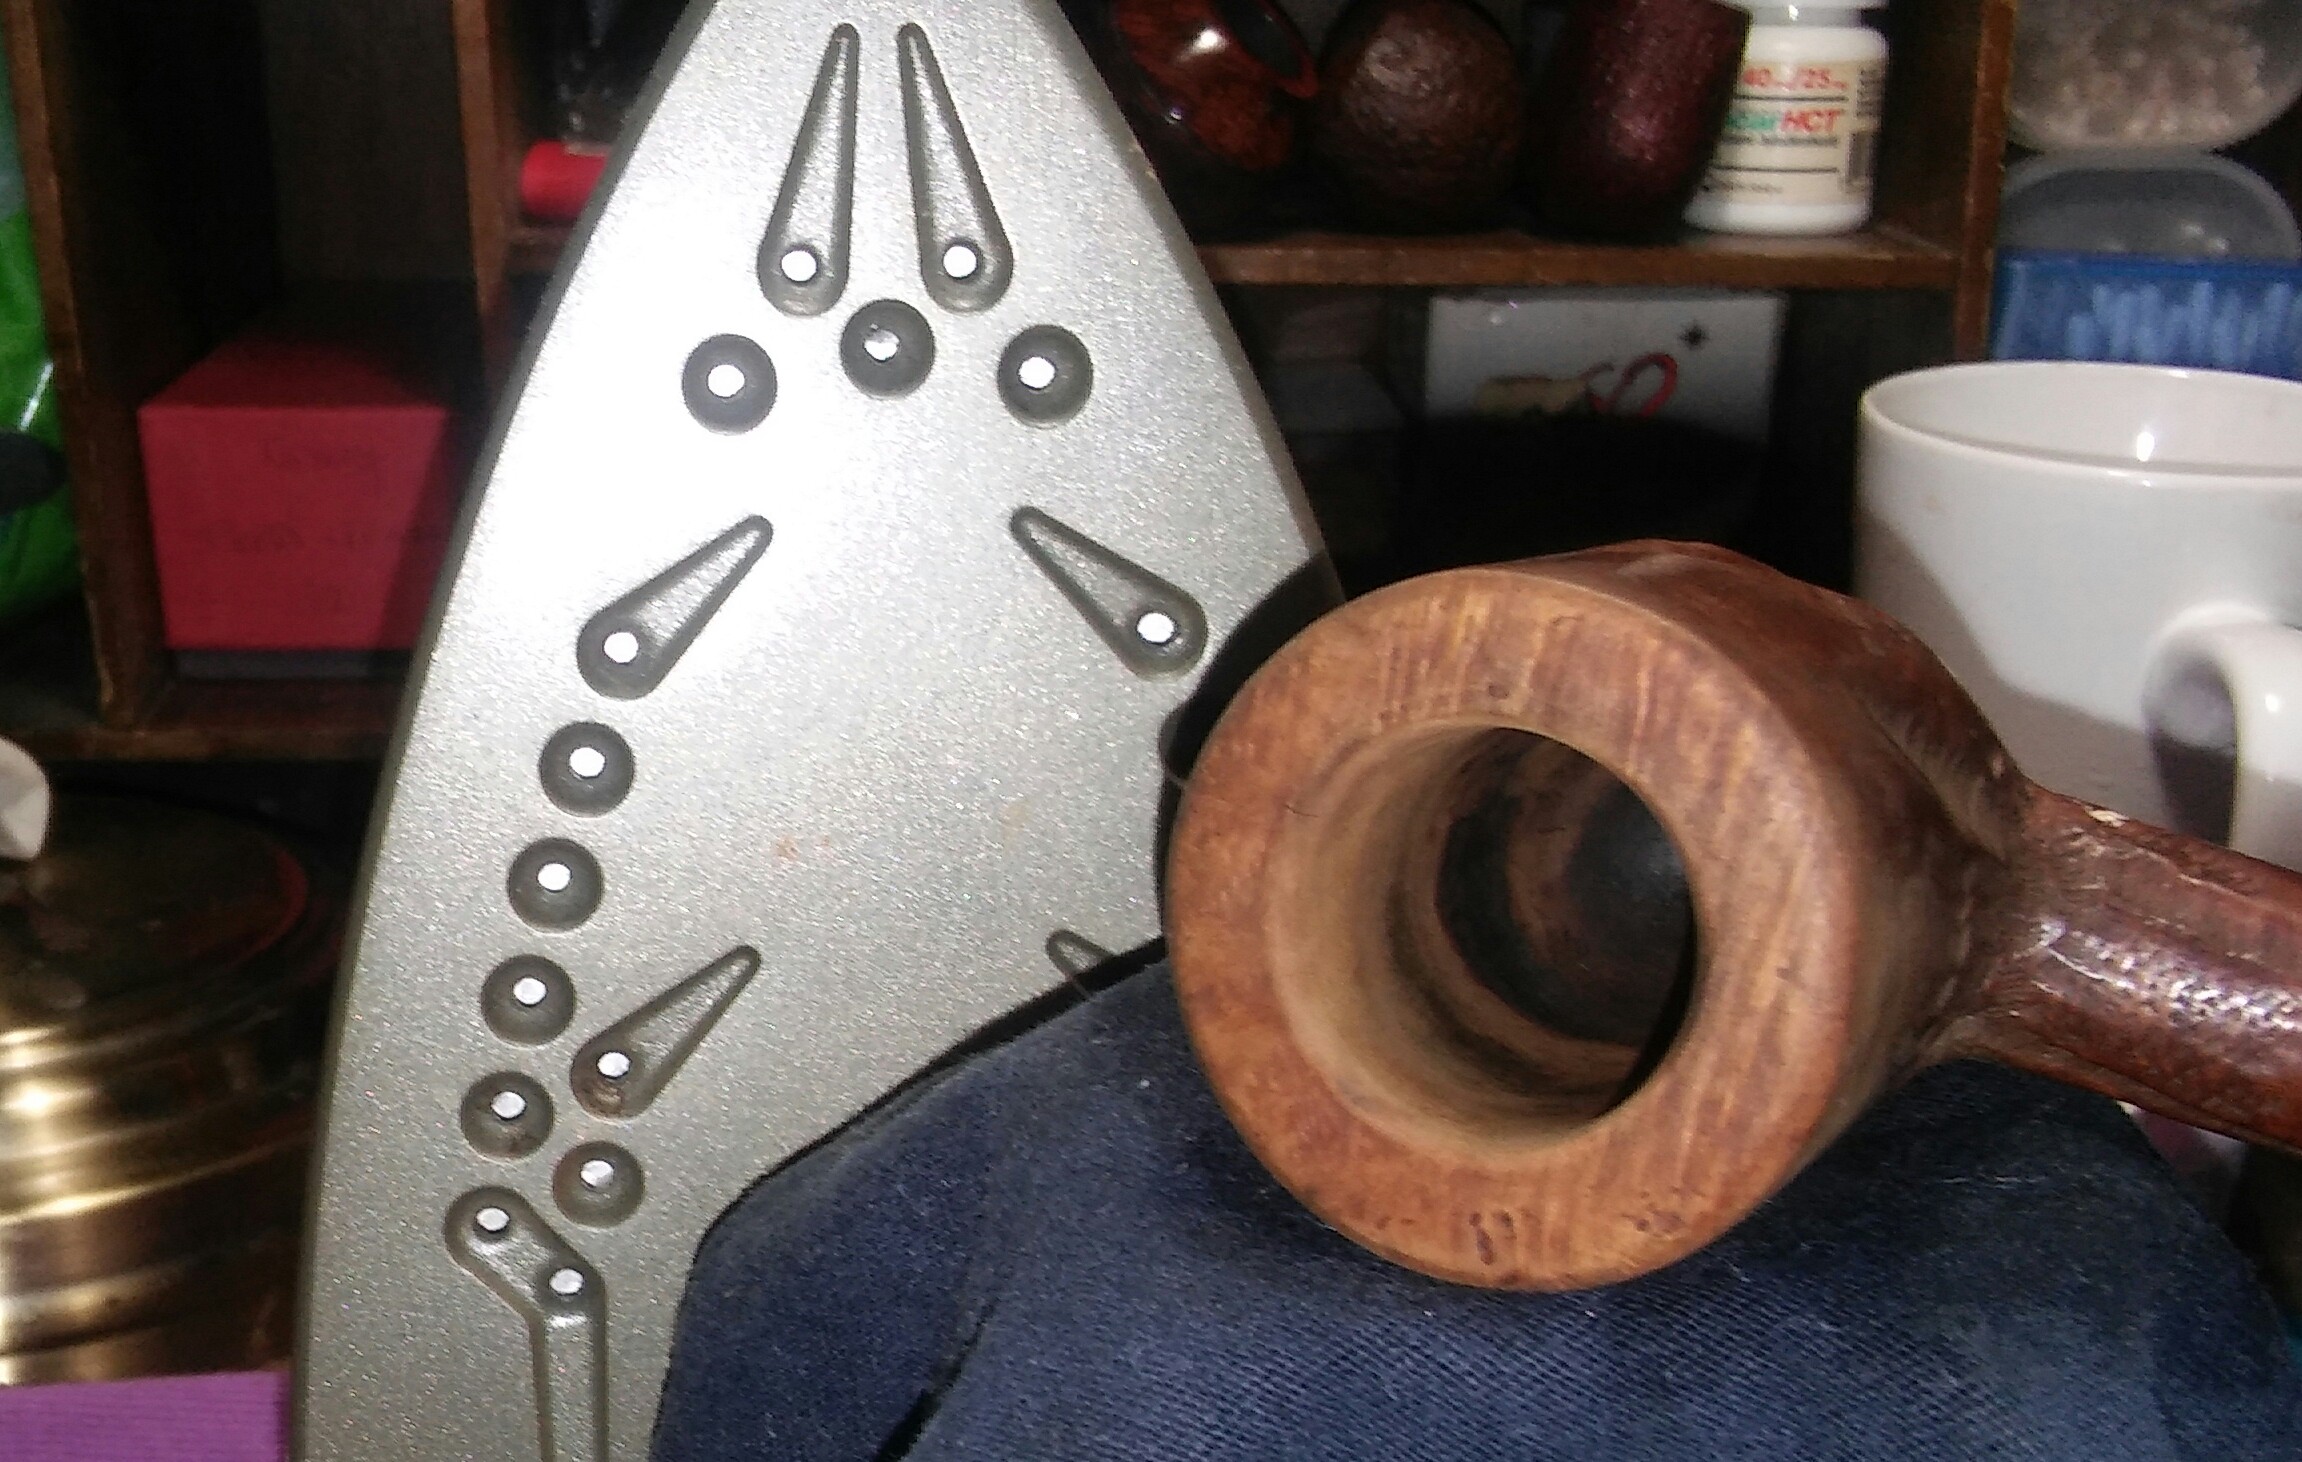
After disassembling the pipe I set aside the stem and started with stummel, reaming the chamber with my Pipnet reamer starting with the smallest attachment and working up to the third. Smoothing out the chamber with 1000 grit sandpaper wraped around a finger.

20160109_162815~2

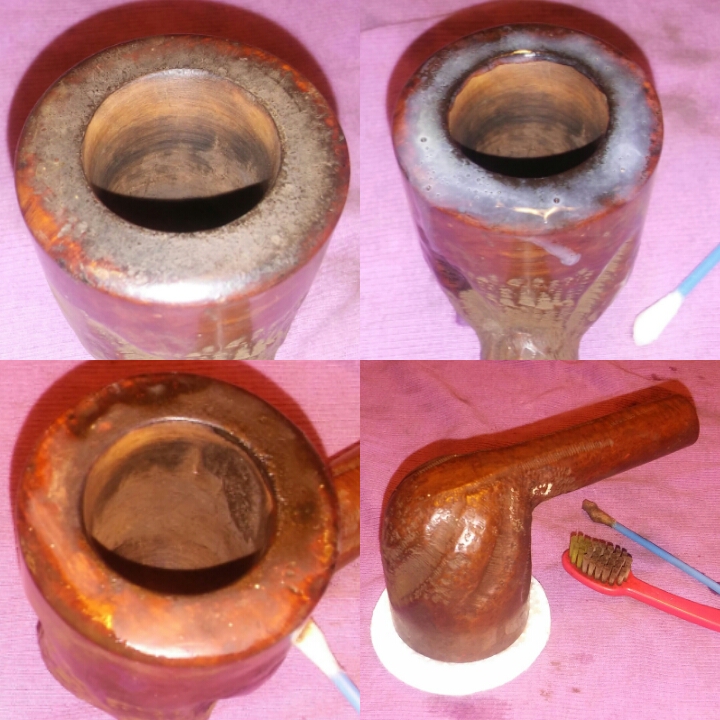
I applied a generous amount of Method Good For Wood Polish with a Q-tip to the rim tar&char and allowed it to soften the build up. It would prove more stubborn then first thought.

20160109_180950~2

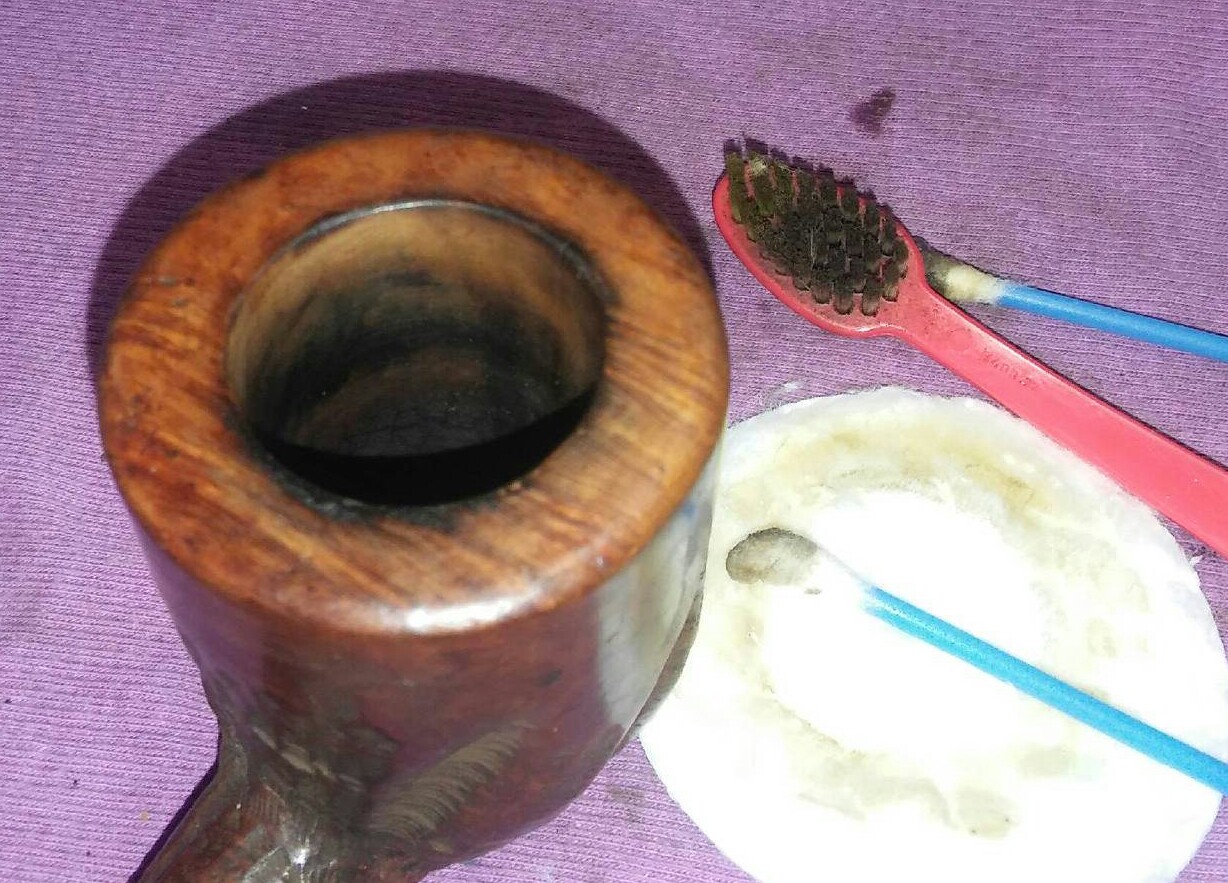
I would have to apply Method polish to a makeup pad and leave the stummel upside down for a few minutes at a time working at the build up in intervals with Q-tips and a rag until the rim was free of debris.

PhotoGrid_145251770452620160110_192520~2

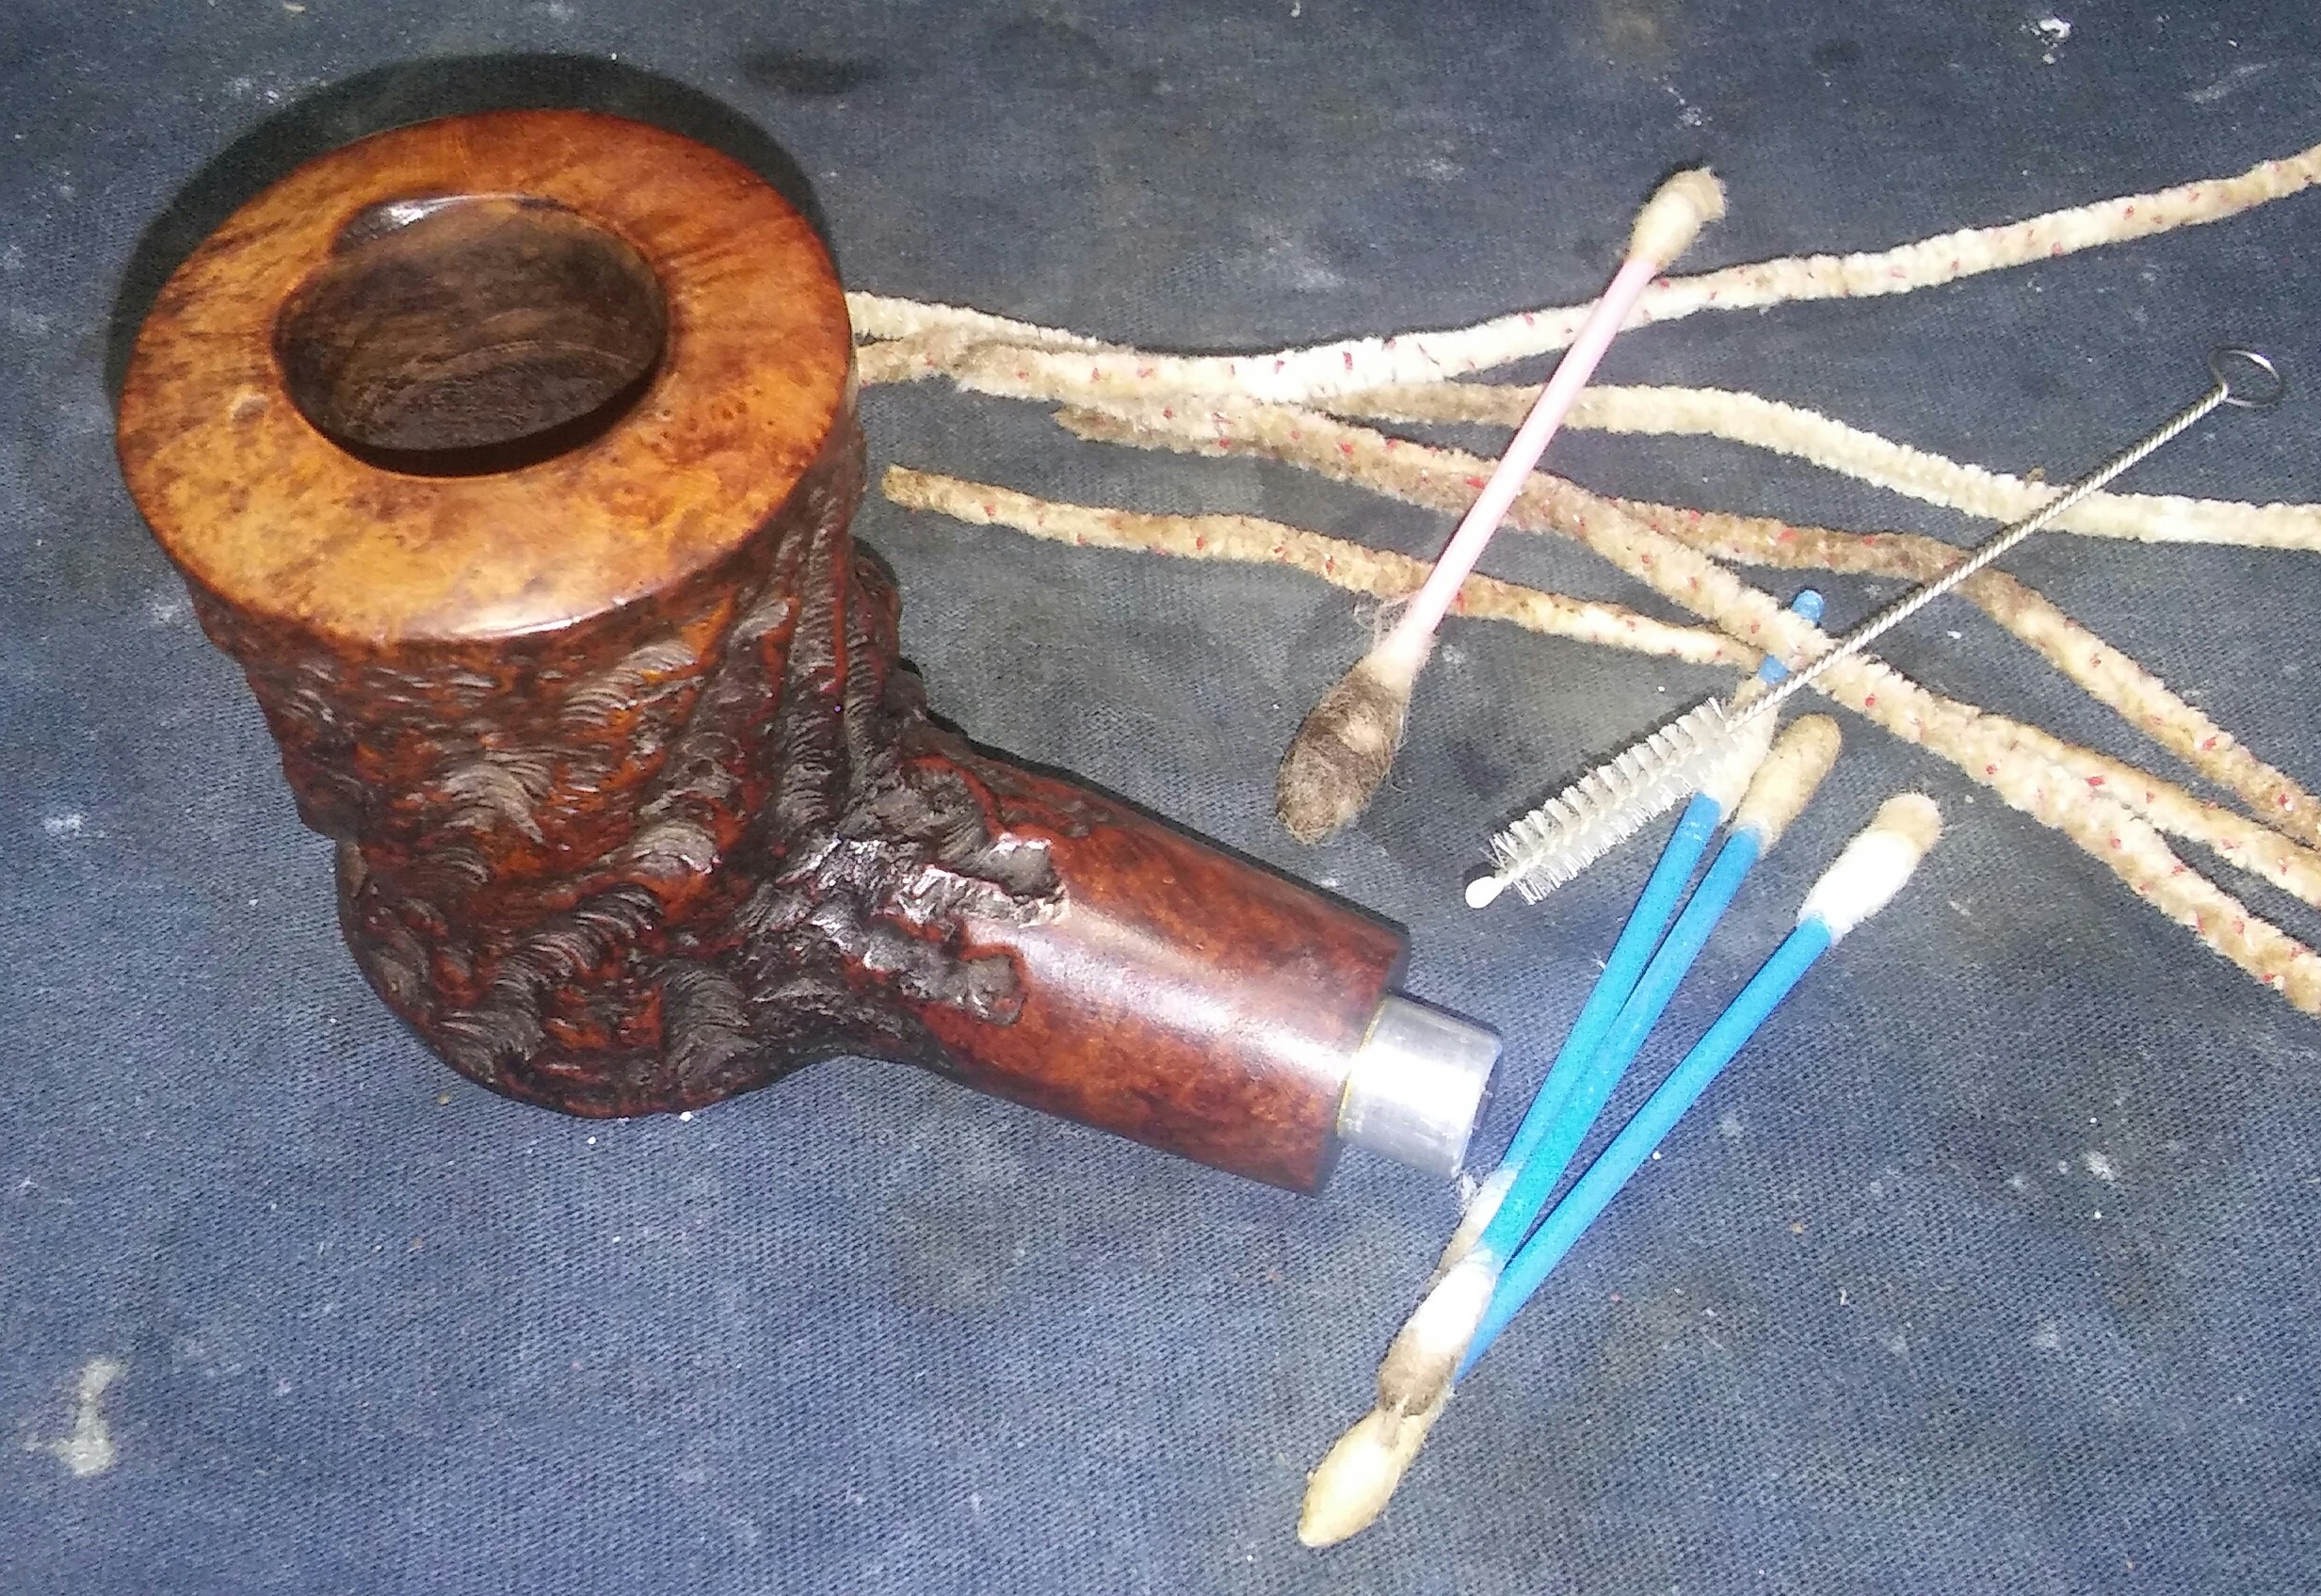
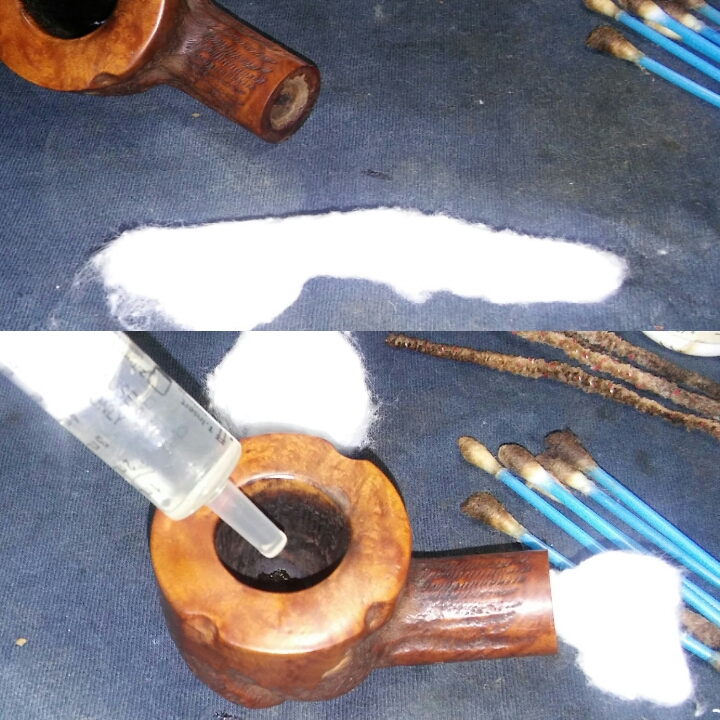
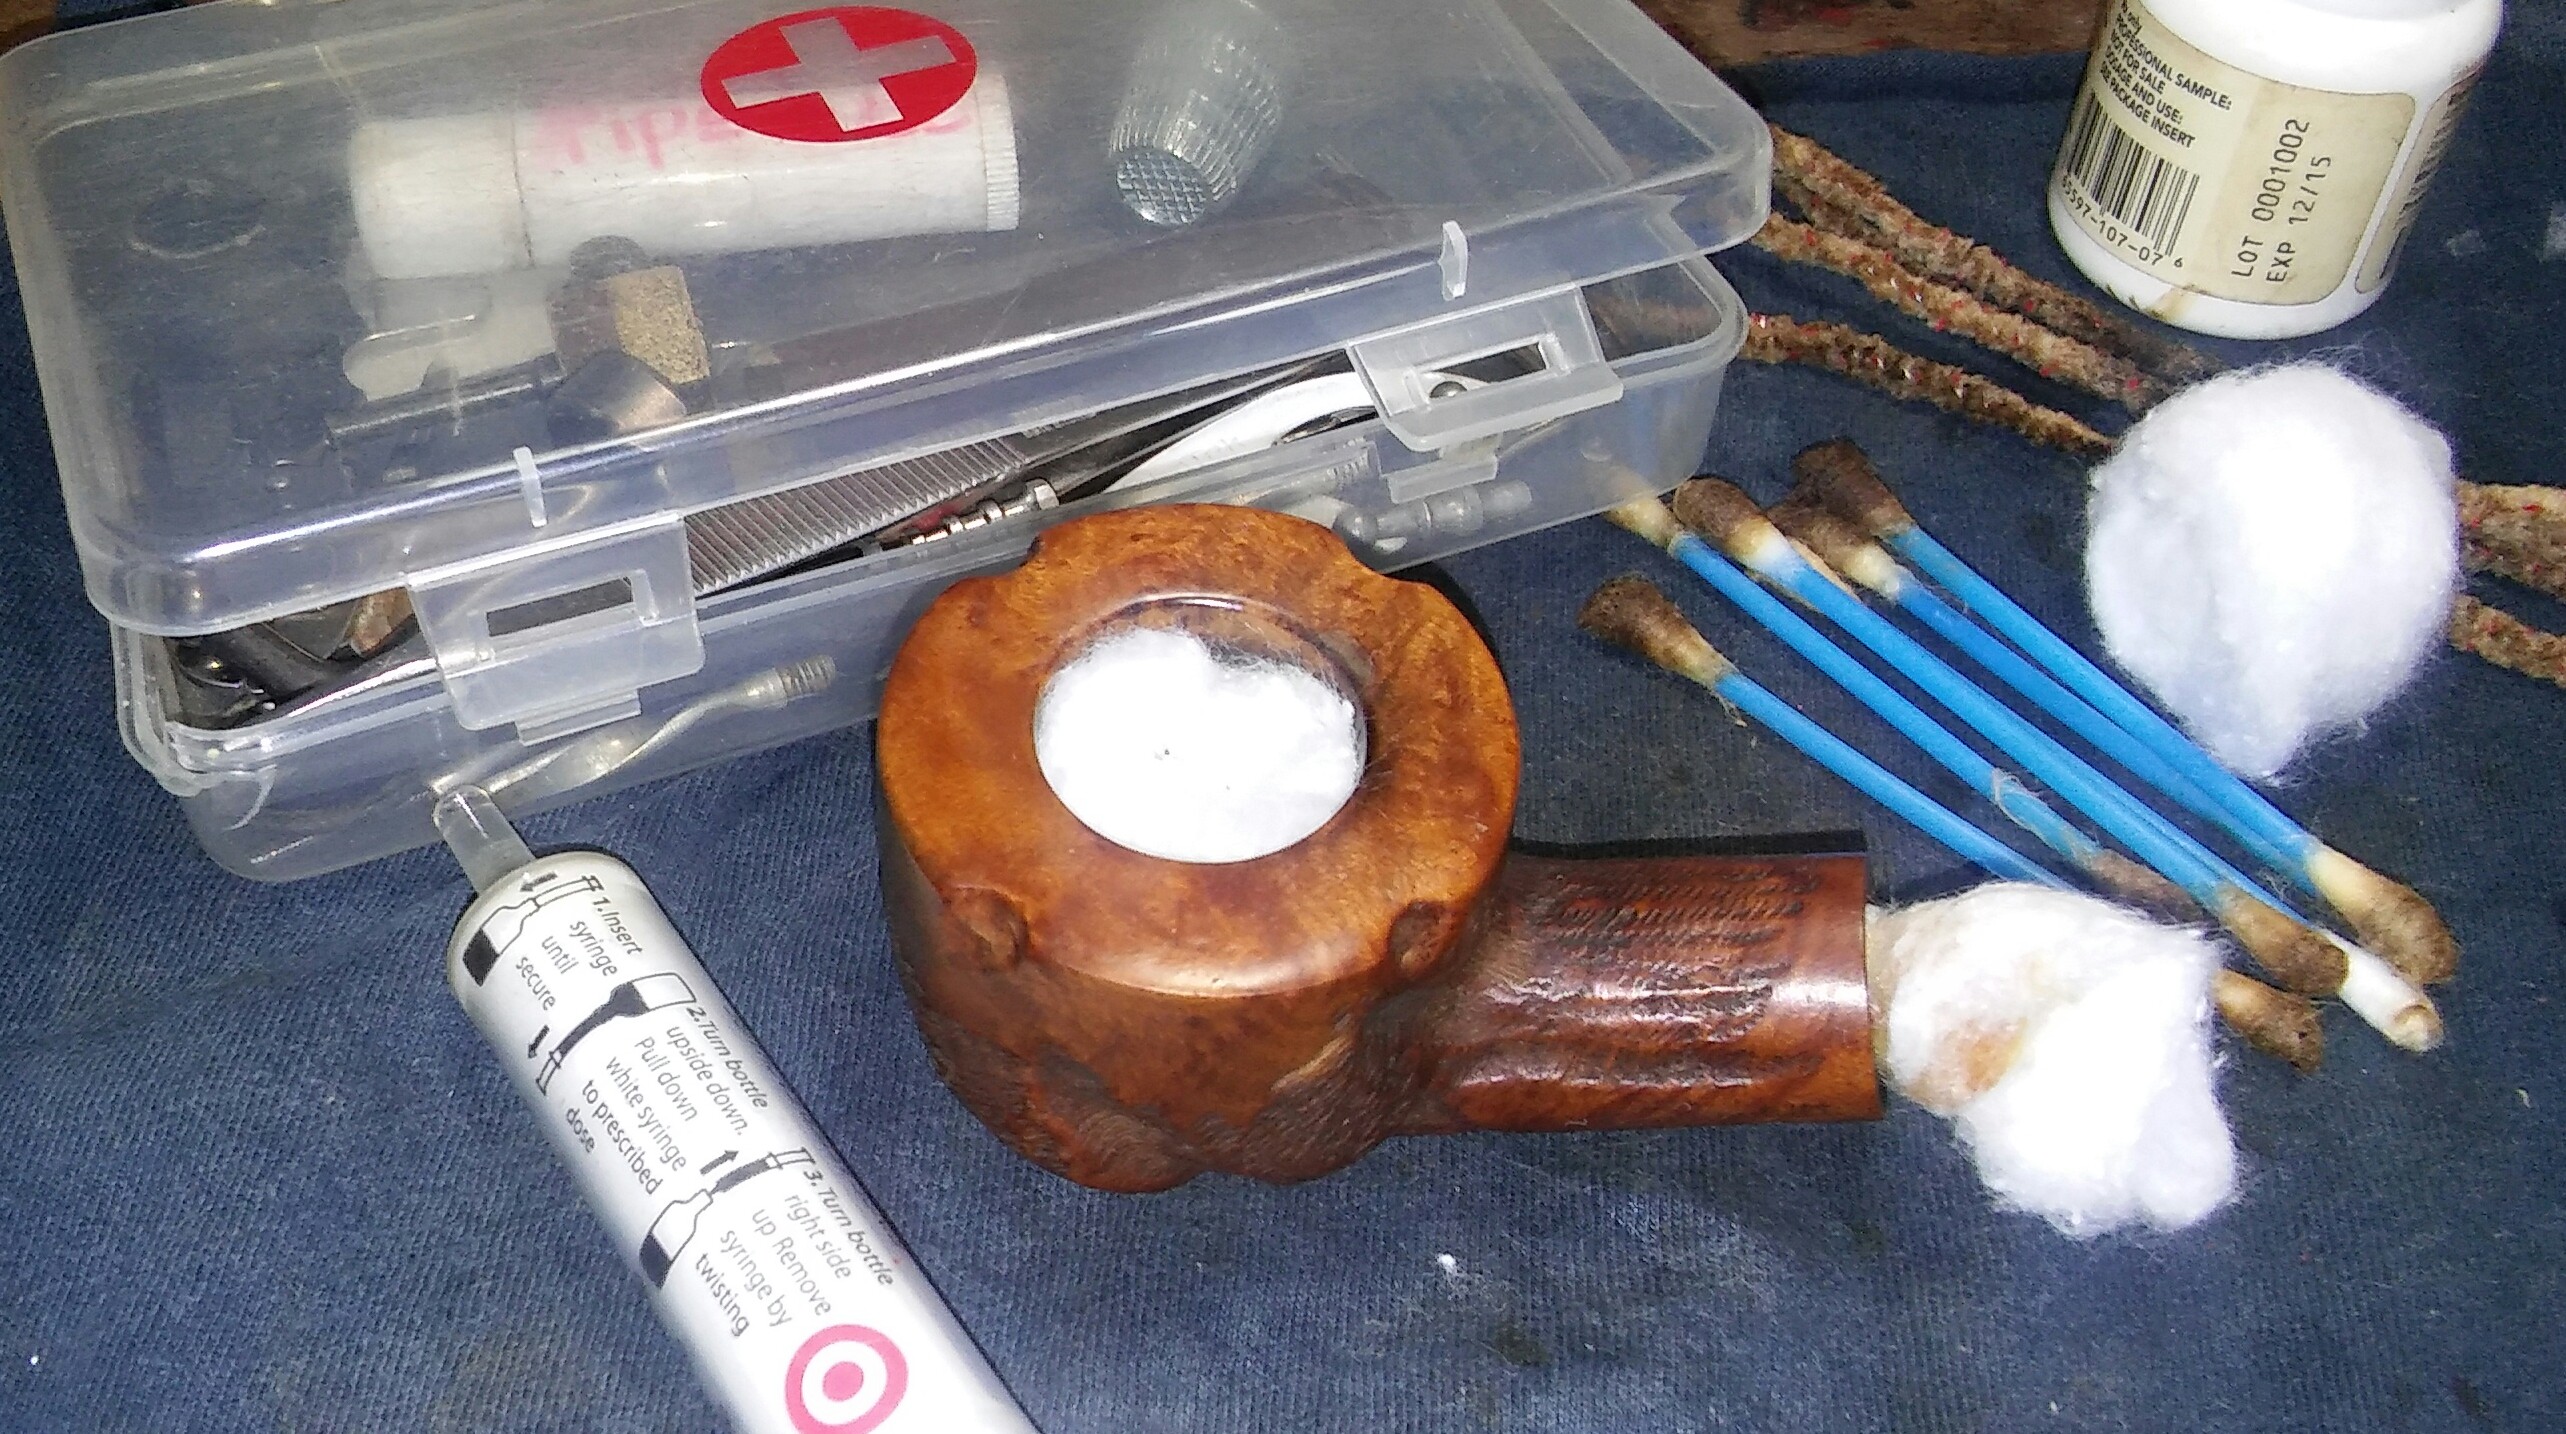
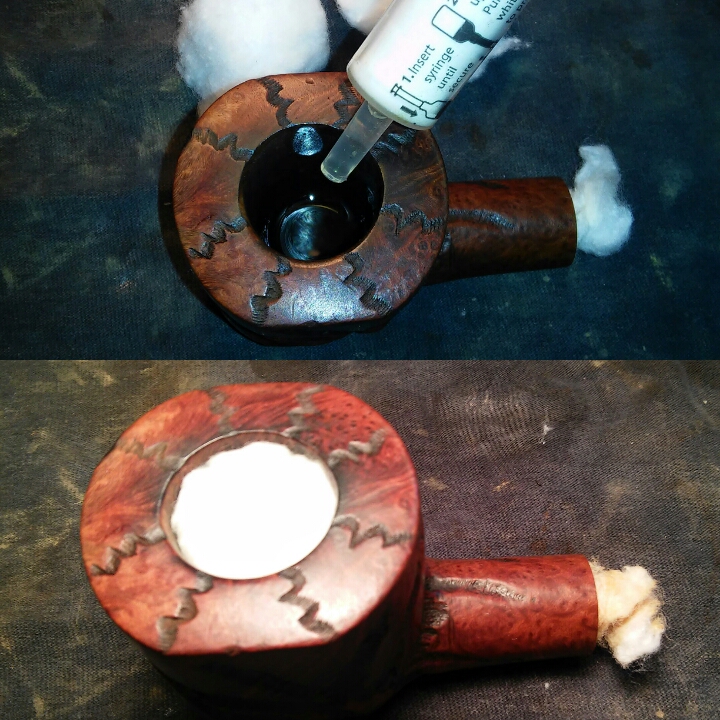
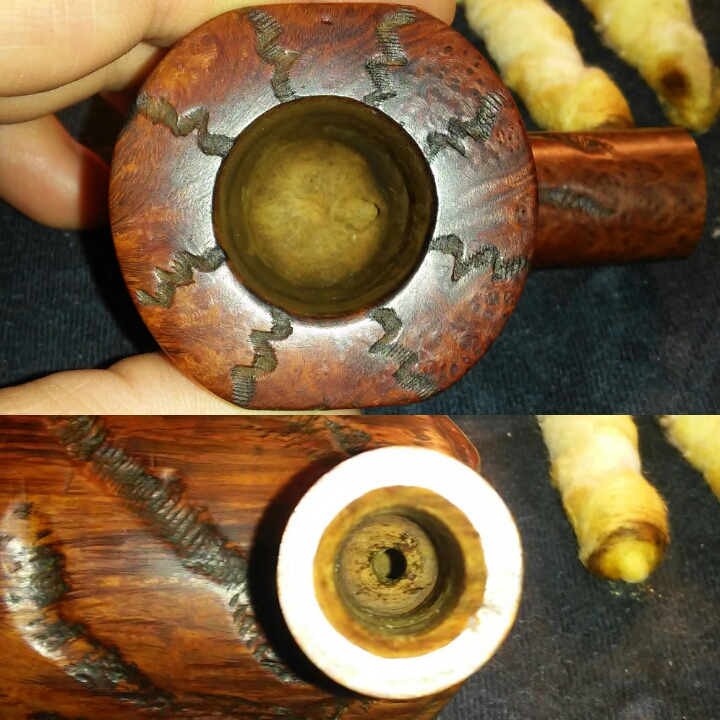
With the rim free of debris I could concentrate on the chamber and mortise. The filter system makes things a bit more difficult to clean and because the filter system is held by a red rod on either side of the shank I worry running a retort might damage the system. I did an initial internal cleaning of the mortise and chamber with EverClear, Q-tips and stiff/soft pipe cleaners to remove the loose debris. Then I inserted a pipe cleaner into the shank,  filled the chamber with cotton balls and added EverClear until saturated and left aside so the oils and tars could be absorb. Then one more good cleaning of the internals again with EverClear, Q-tips (long&short), shank brush and stiff/soft pipe cleaners, cleaning until the pipe cleaners came out as they went in.

PhotoGrid_1452516345203

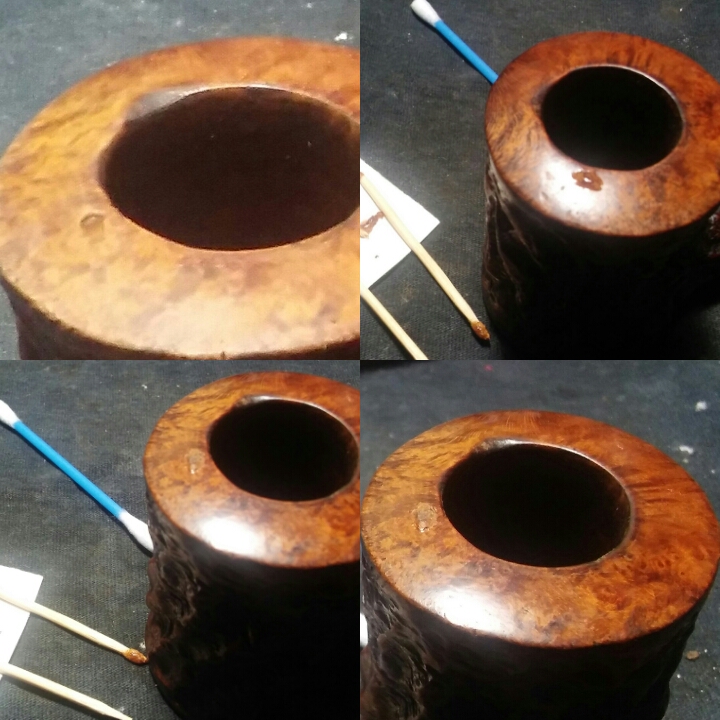
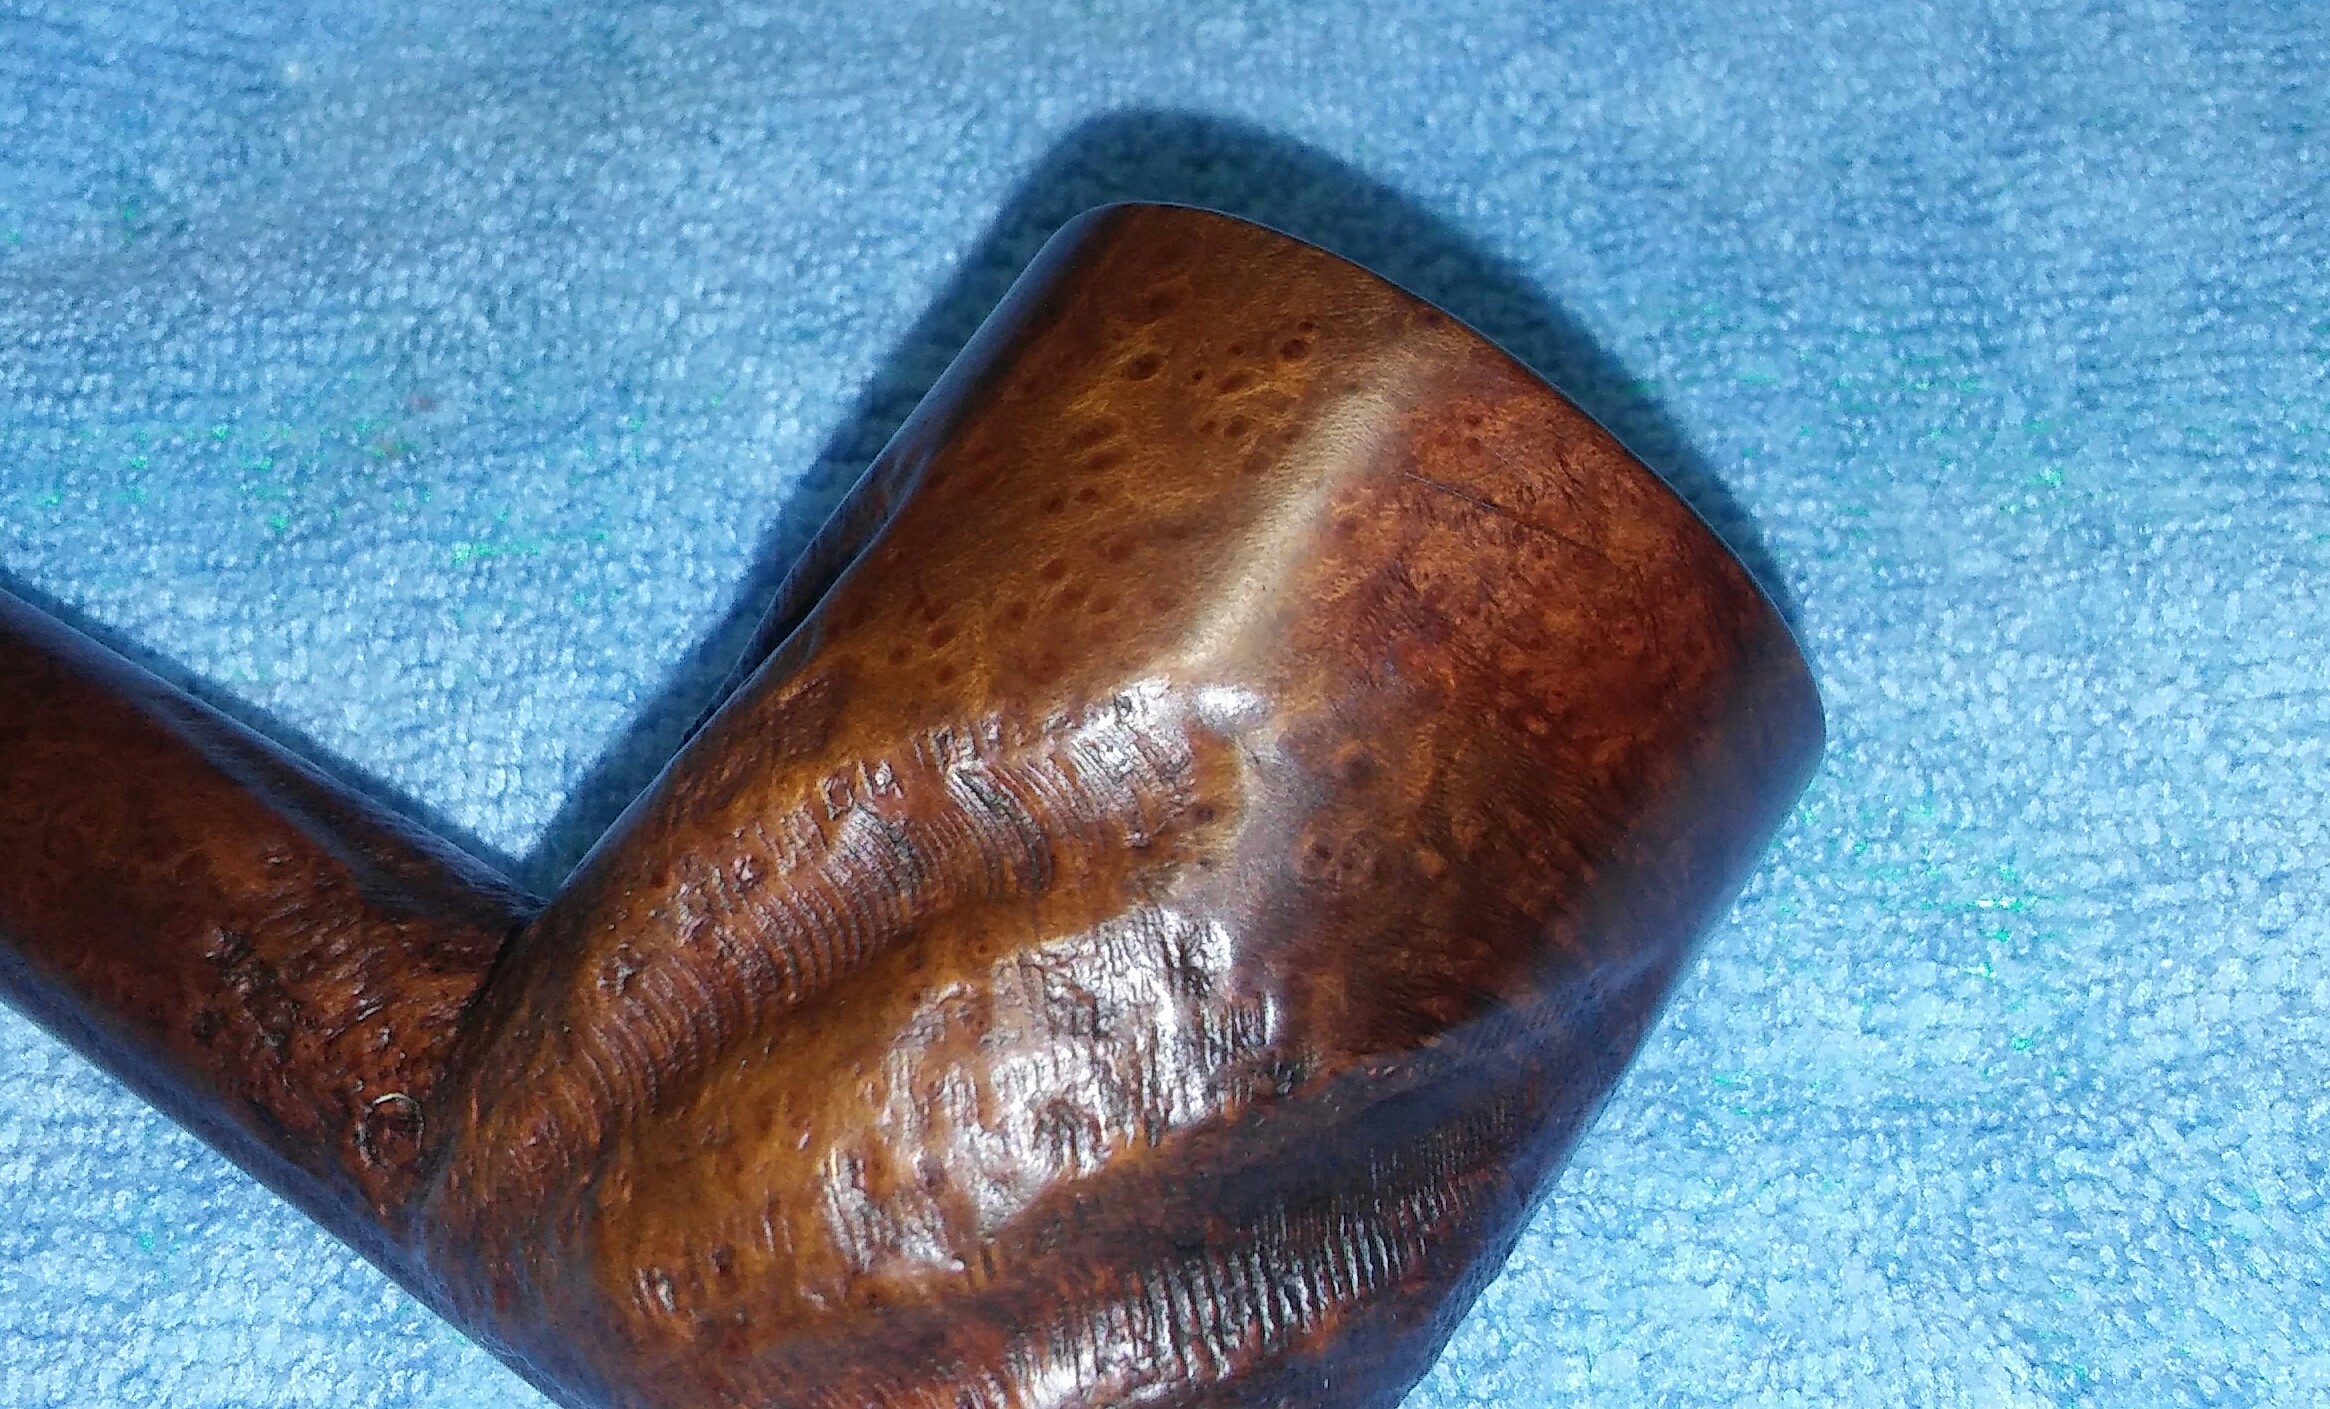
I uncovered one pit and a burn that went pretty deep. In fear of changing the shape I decided to try and fill the impressions.

PhotoGrid_1452516377009

I cleaned the area with EverClear and filled the pit with briar dust and Gorilla Glue then left to dry. I filed down the burnt area  of the rim with a needle file and cleaned with EverClear. I rolled up a piece of thin cardboard, put a little chapstick on the cardboard so the glue wouldn’t stick and slid it into the chamber. Now I filled the edge of the rim with briar dust and Gorilla Glue , removing the cardboard insert before the patch set.

PhotoGrid_1452560225428

I could now shape the rim and inner chamber edge with needle files and sandpaper. I didn’t disappear completely but it looked better the before.

PhotoGrid_1452544036415

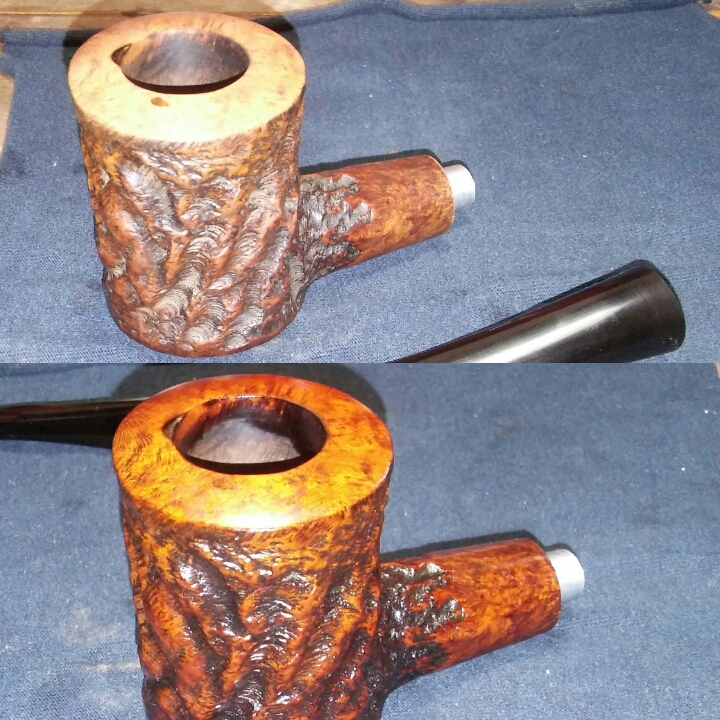
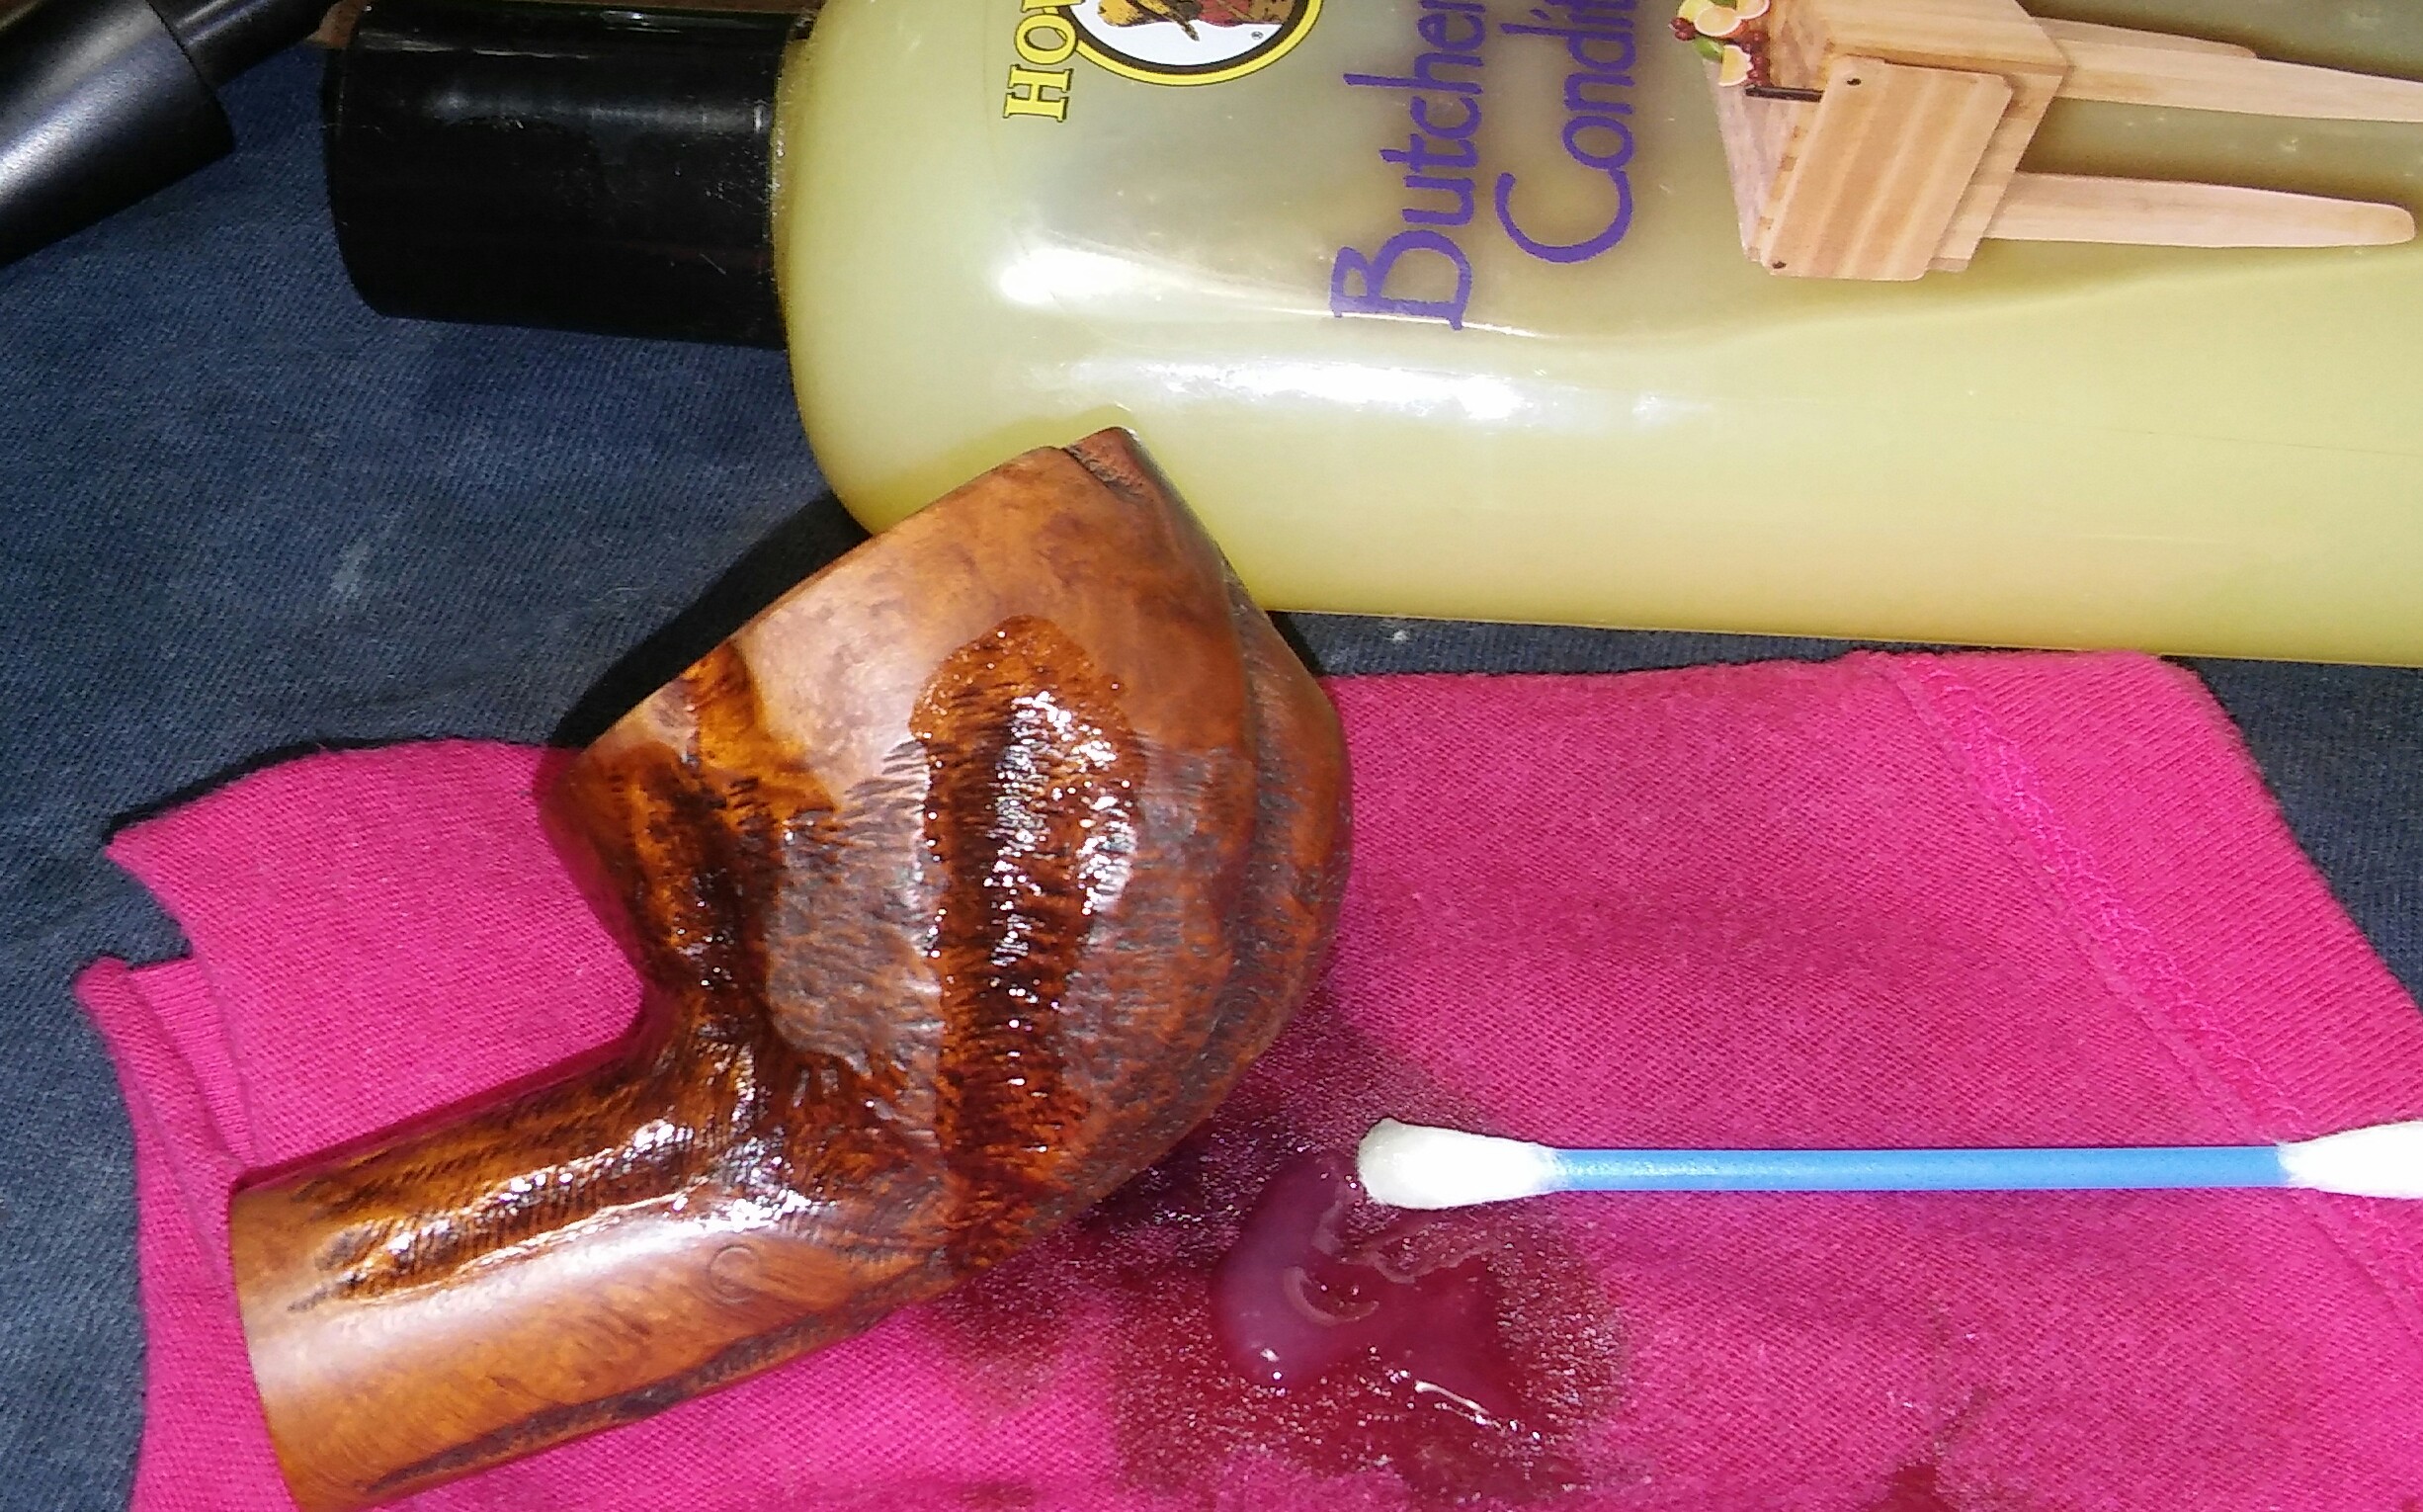
With the fill set I now wiped down the stummel with Method polish and left aside to dry. Once dry I gave the stummel a coating of Howard’s butcher block conditioner and let it penetrate for a few minutes, hand buffing off the excess. I did restain the rim after the repair was done I forgot to take a photo.

PhotoGrid_1452311745271PhotoGrid_1452529181712

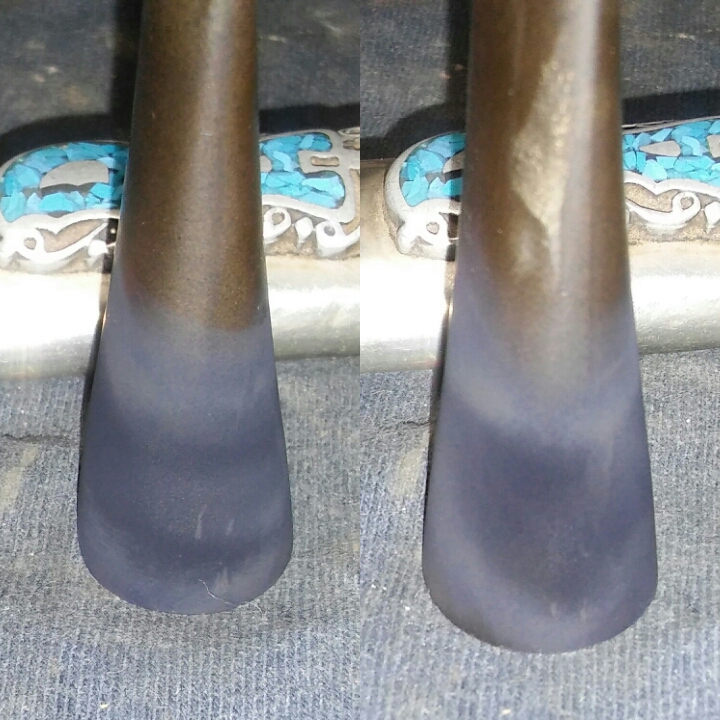
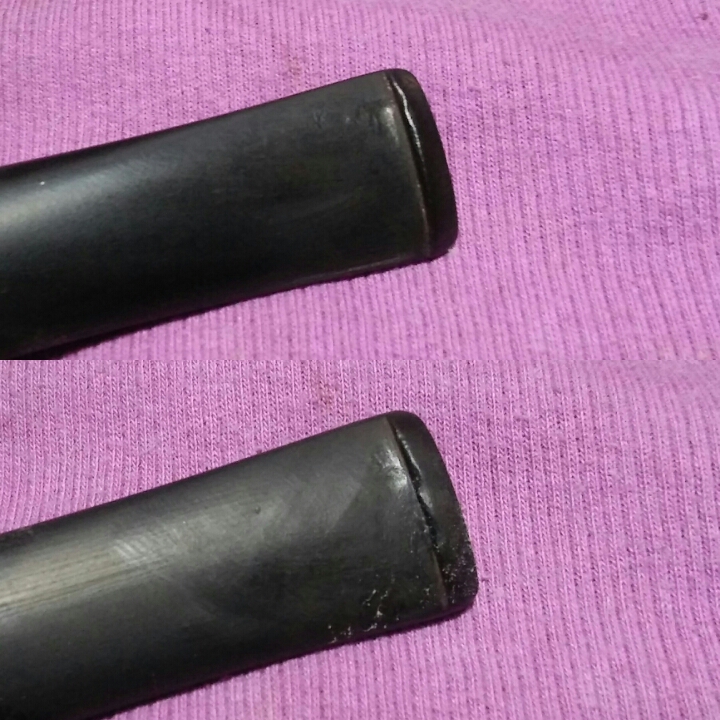
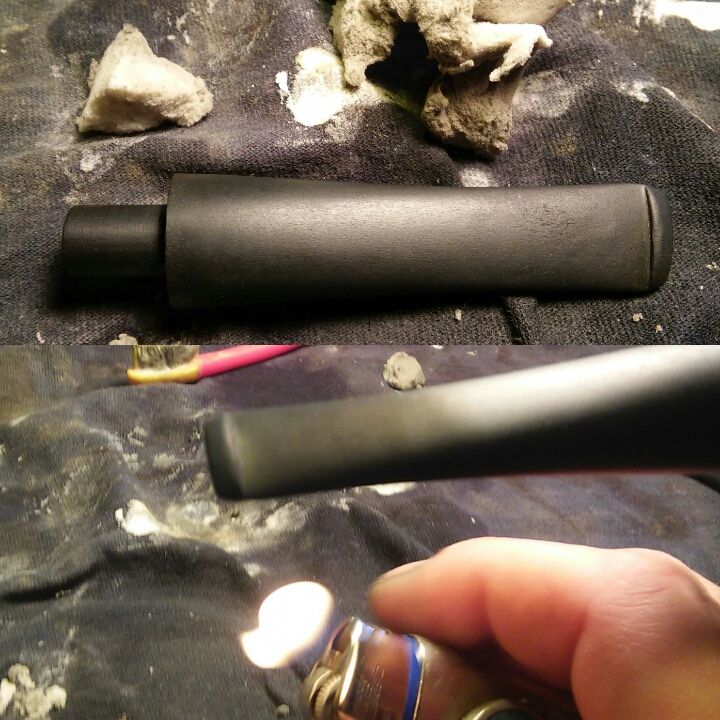
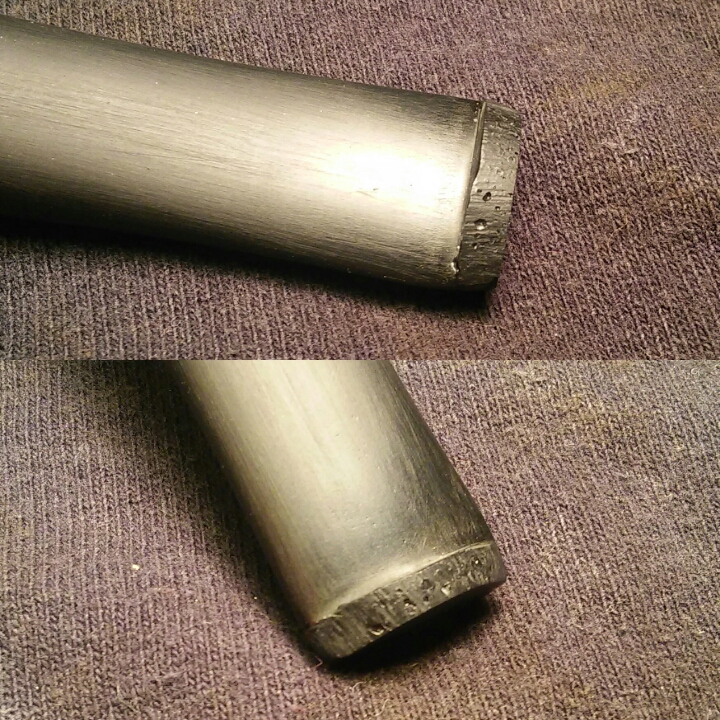
 The impressions left from the pliers would raise with heat, using a Bic Lighter I heated the area (moving the lighter at all times never leaving the flame in one spot too long).

PhotoGrid_1452529214797

The impressions were now at a suitable level for sanding.

PhotoGrid_1452529450823

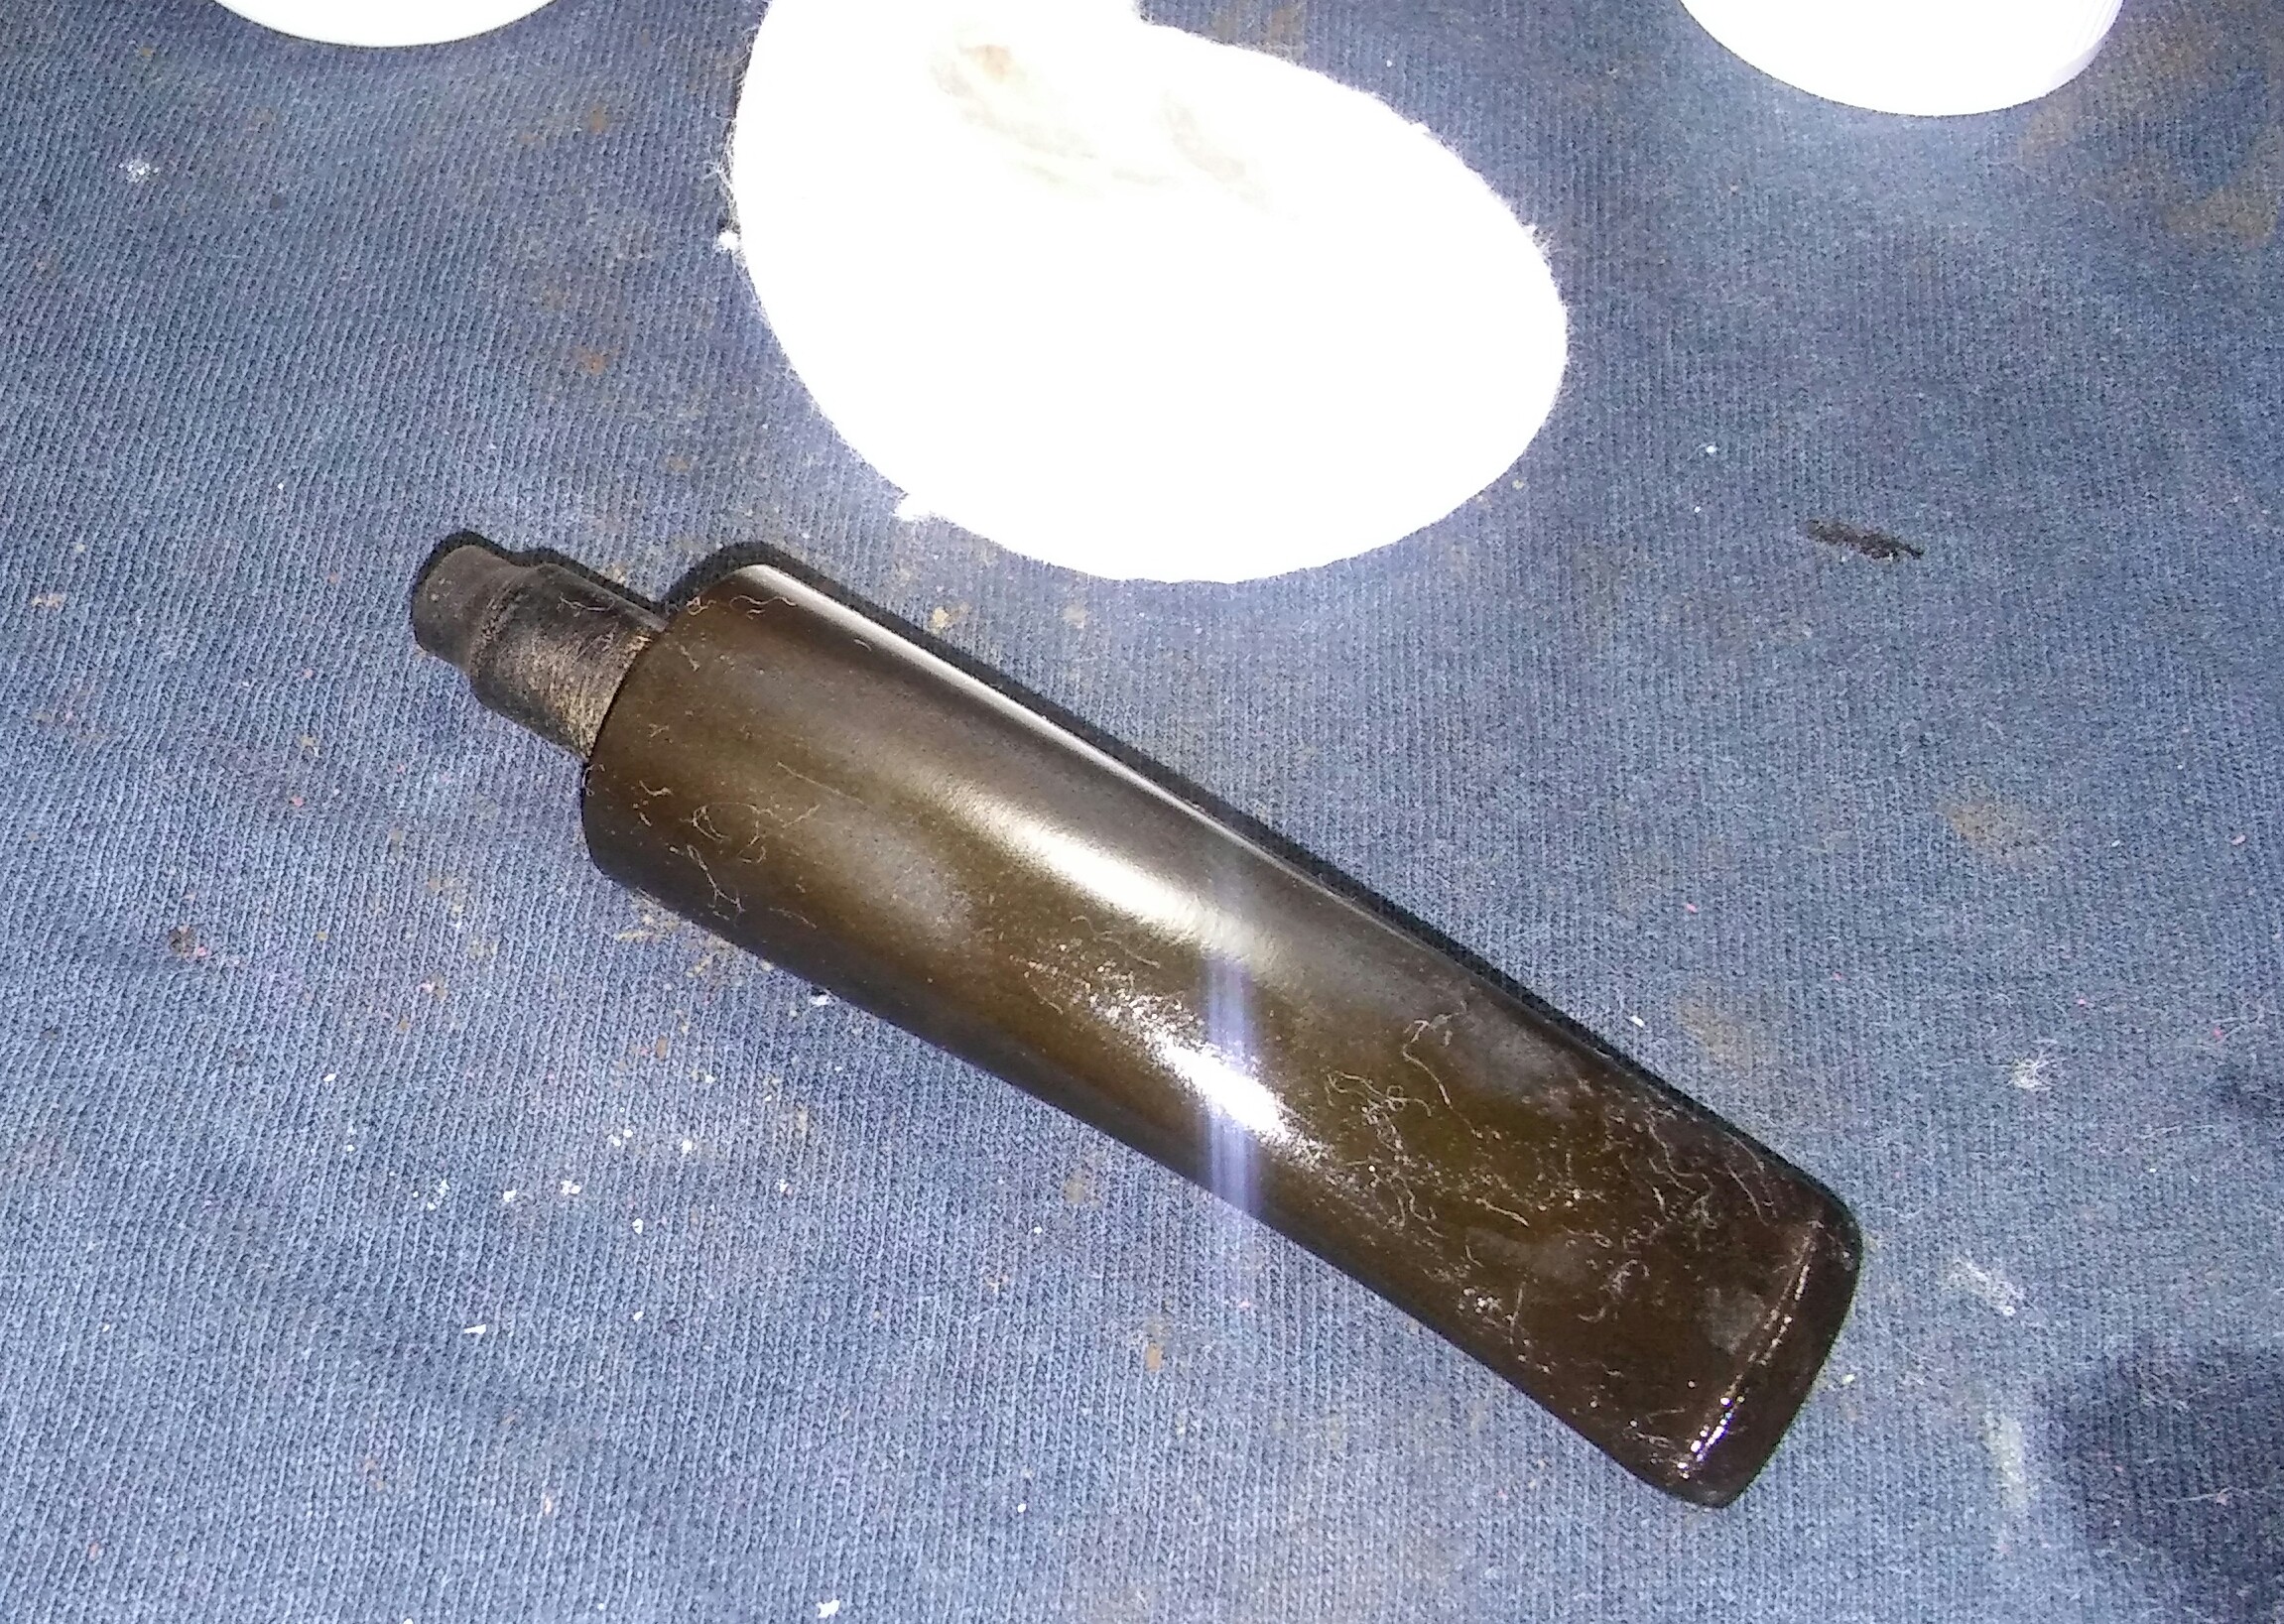
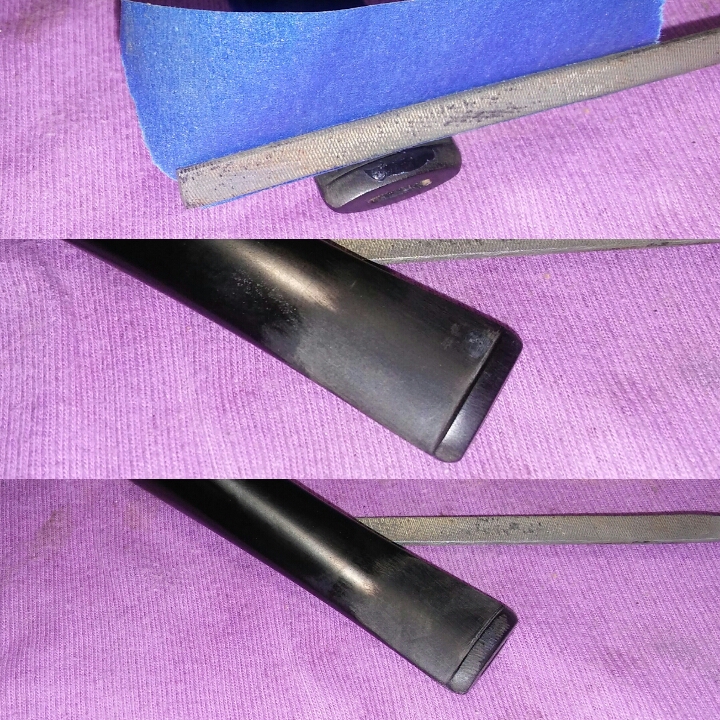
Now for the oxidation I applied a generous amount of non-bleach Soft Scrub to the stem with a children’s toothbrush and left it aside to work at the oxidation. Once the Soft Scrub turns from white to a brownish color, now its time to introduce the old elbow grease and scrub vigorously with a rag until the oxidation is removed, finishing up with a  damp Magic Eraser to remove the leftover oxidation.

PhotoGrid_145252947248920160111_140112~2

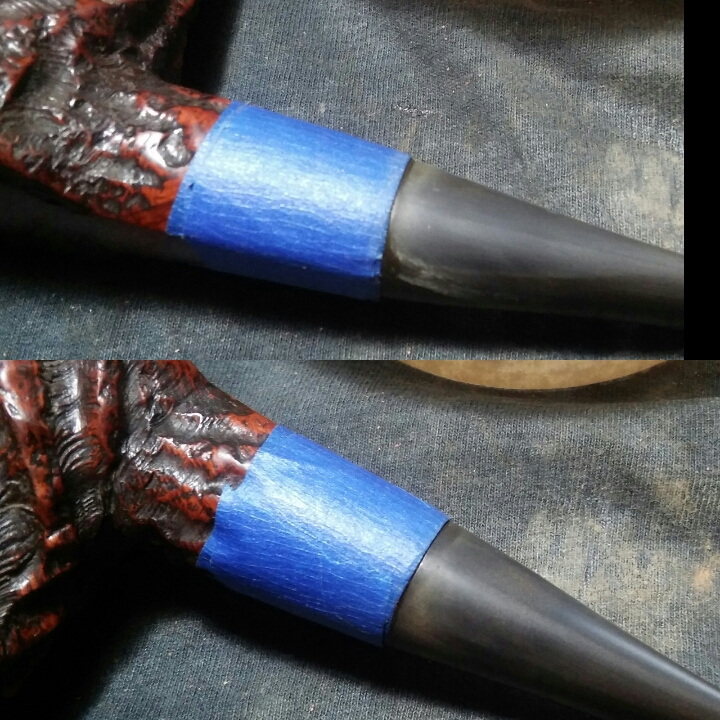
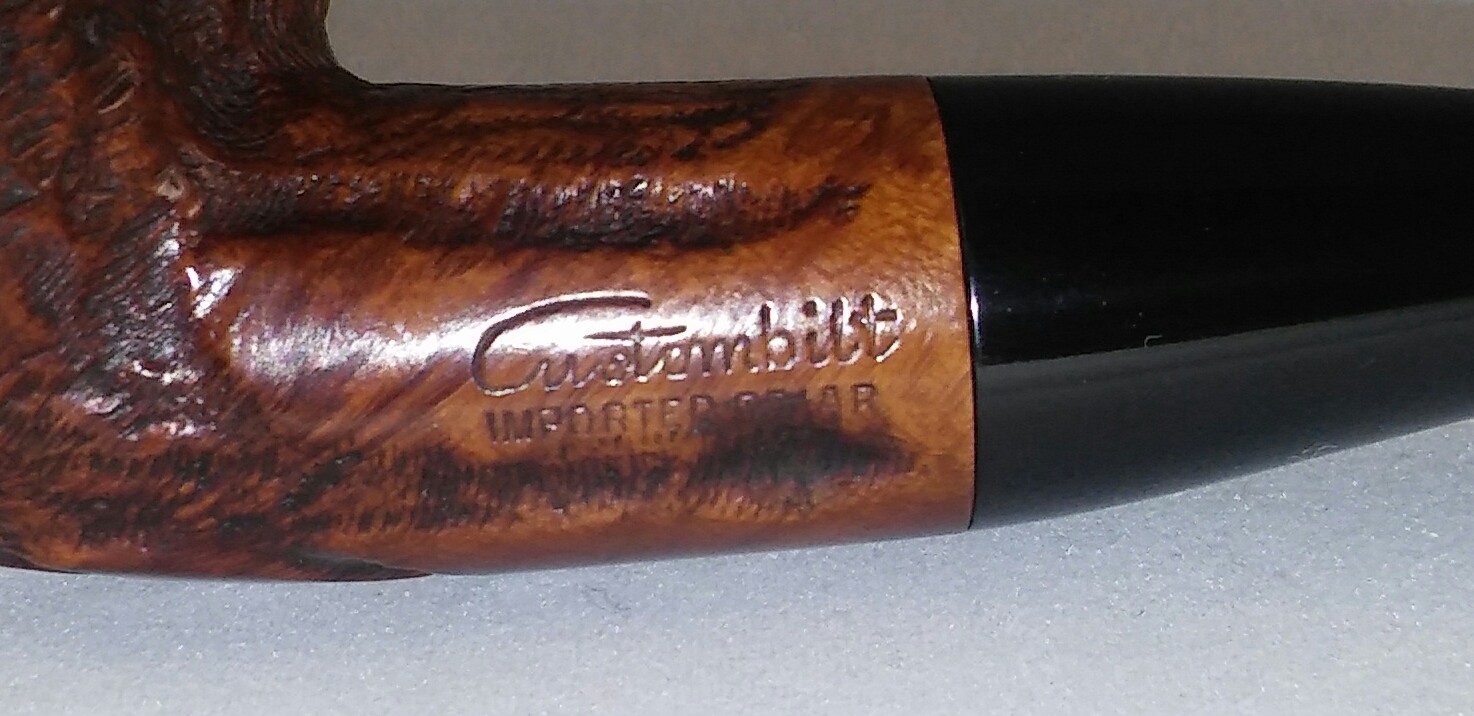
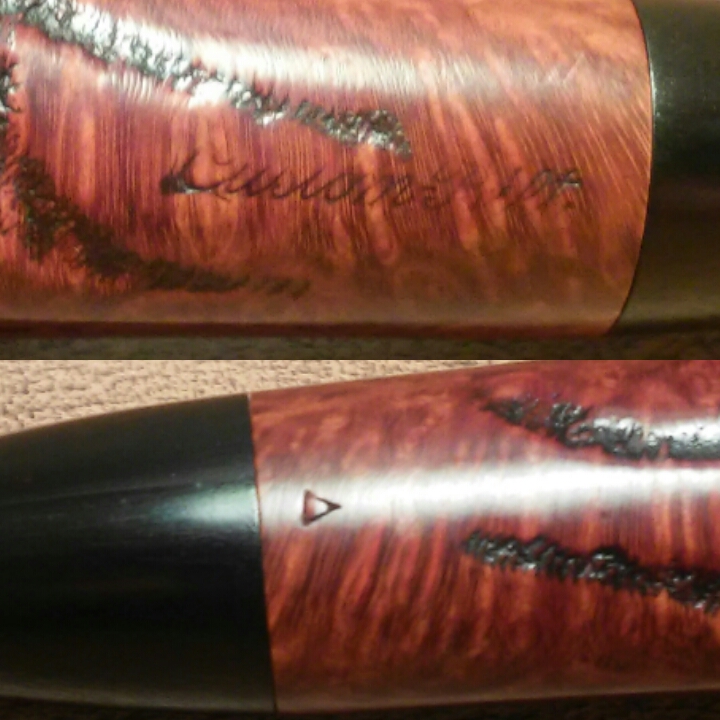
With the oxidation removed the stem was now ready to be sanded. I taped off the shank with blue painters tape before sanding so I wouldn’t scuff up the nomenclature. I removed what was left of the plier impressions with 1000 grit sandpaper wet and also the tooth impressions were removed with 1000 grit . I then ran it though the various grits of sandpaper and micro-mesh, 1000,1500,1800,2000 and 2400 wet and 3200-12000 dry. She was now ready for the wheel.
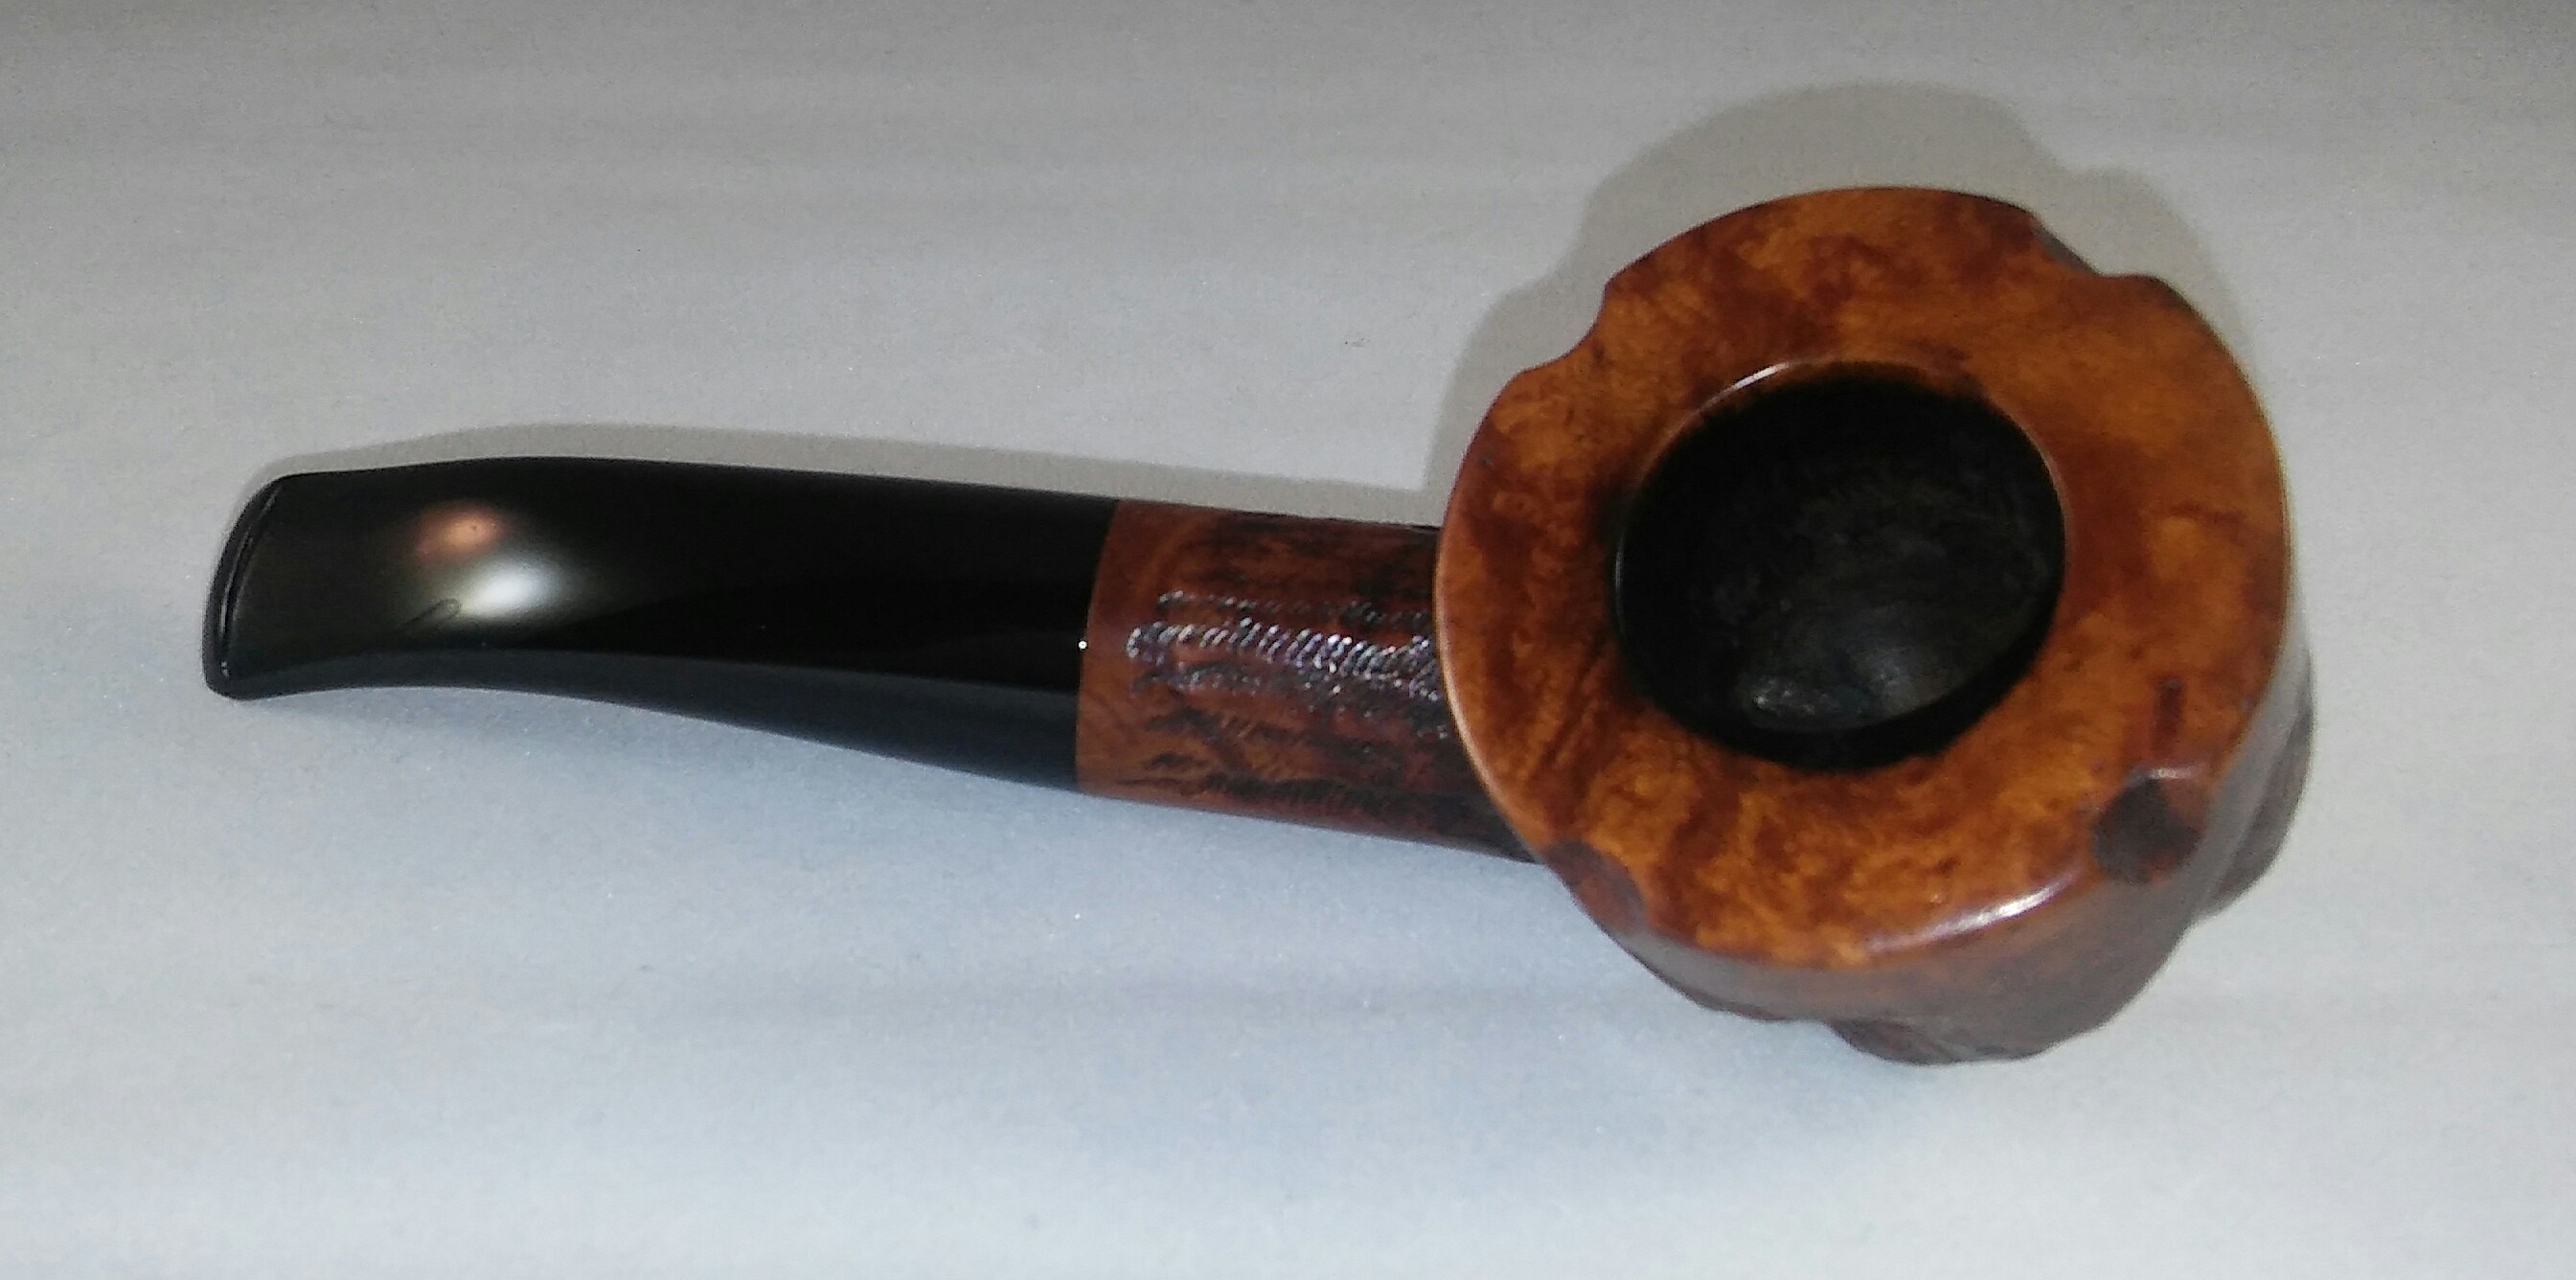
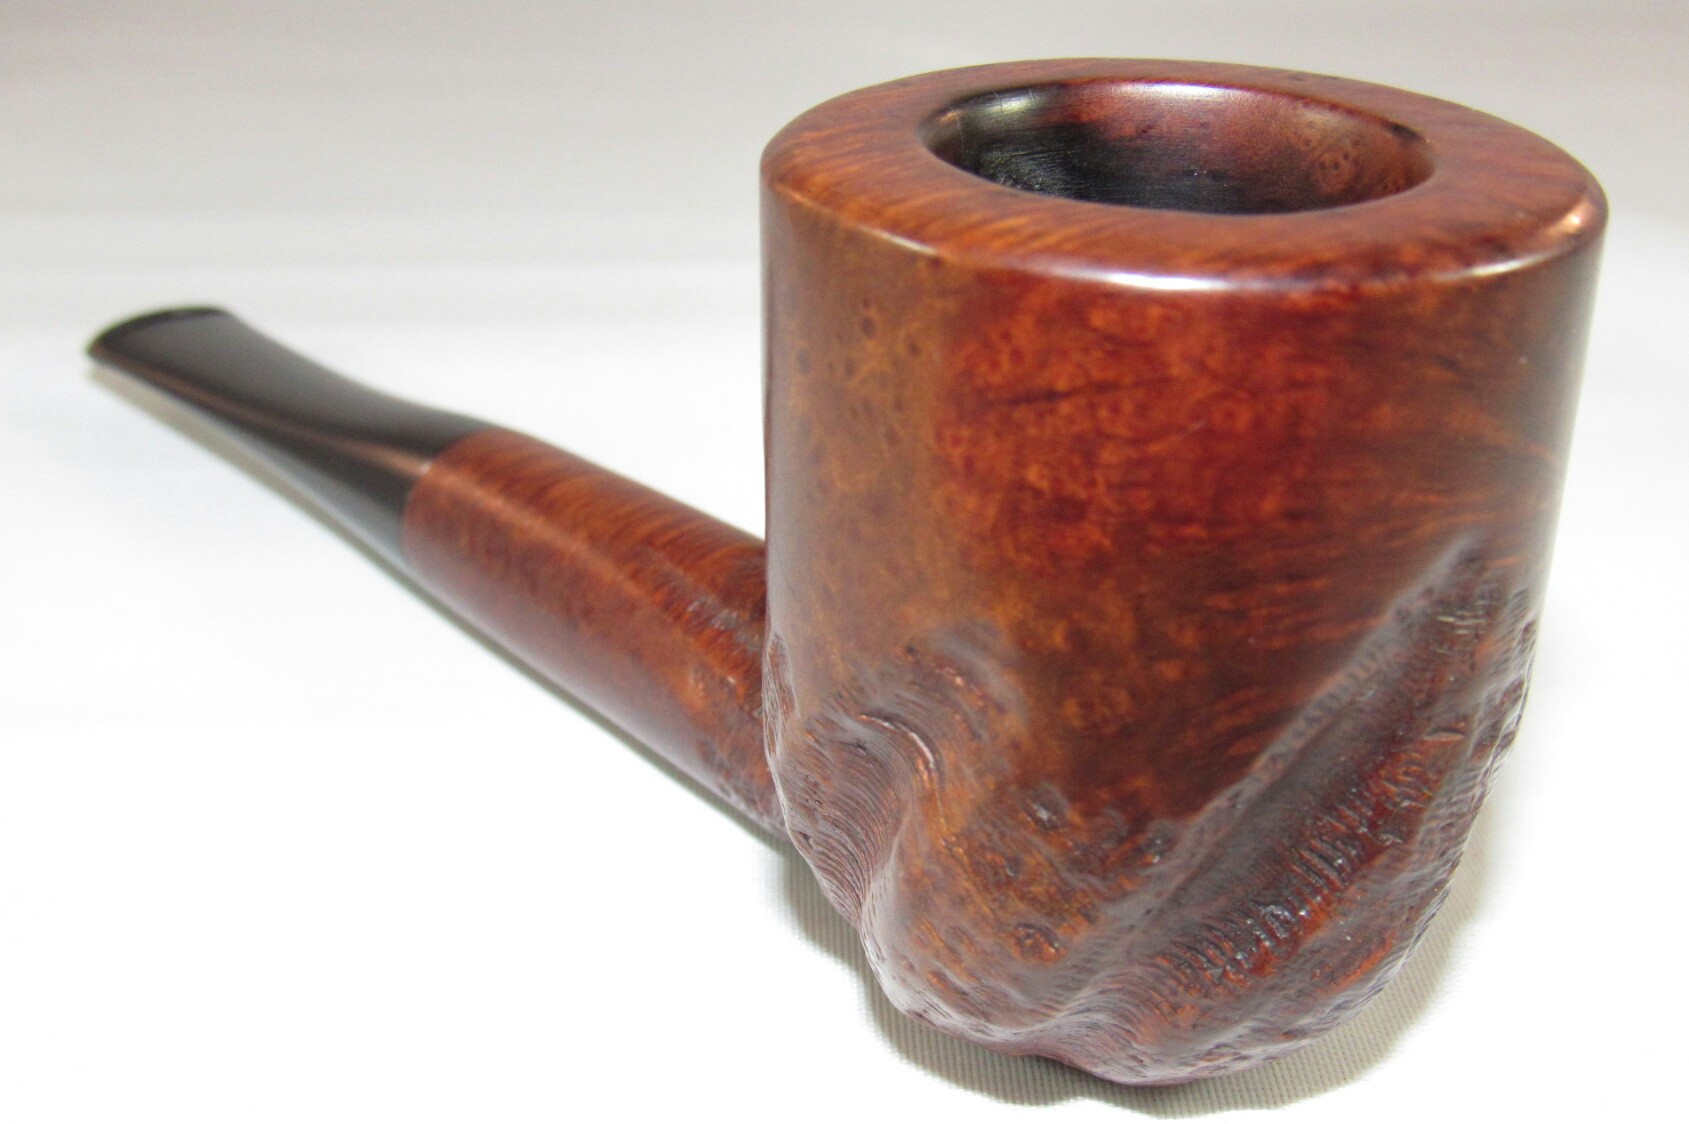
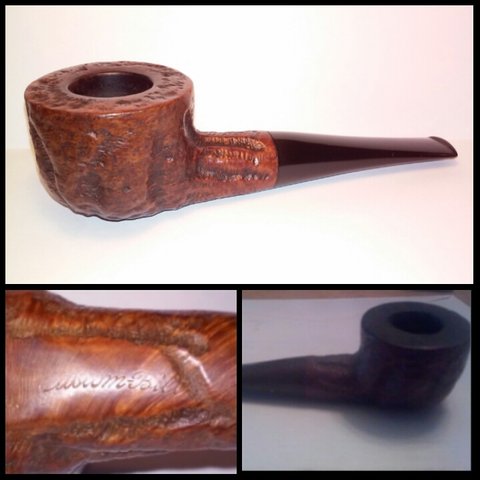
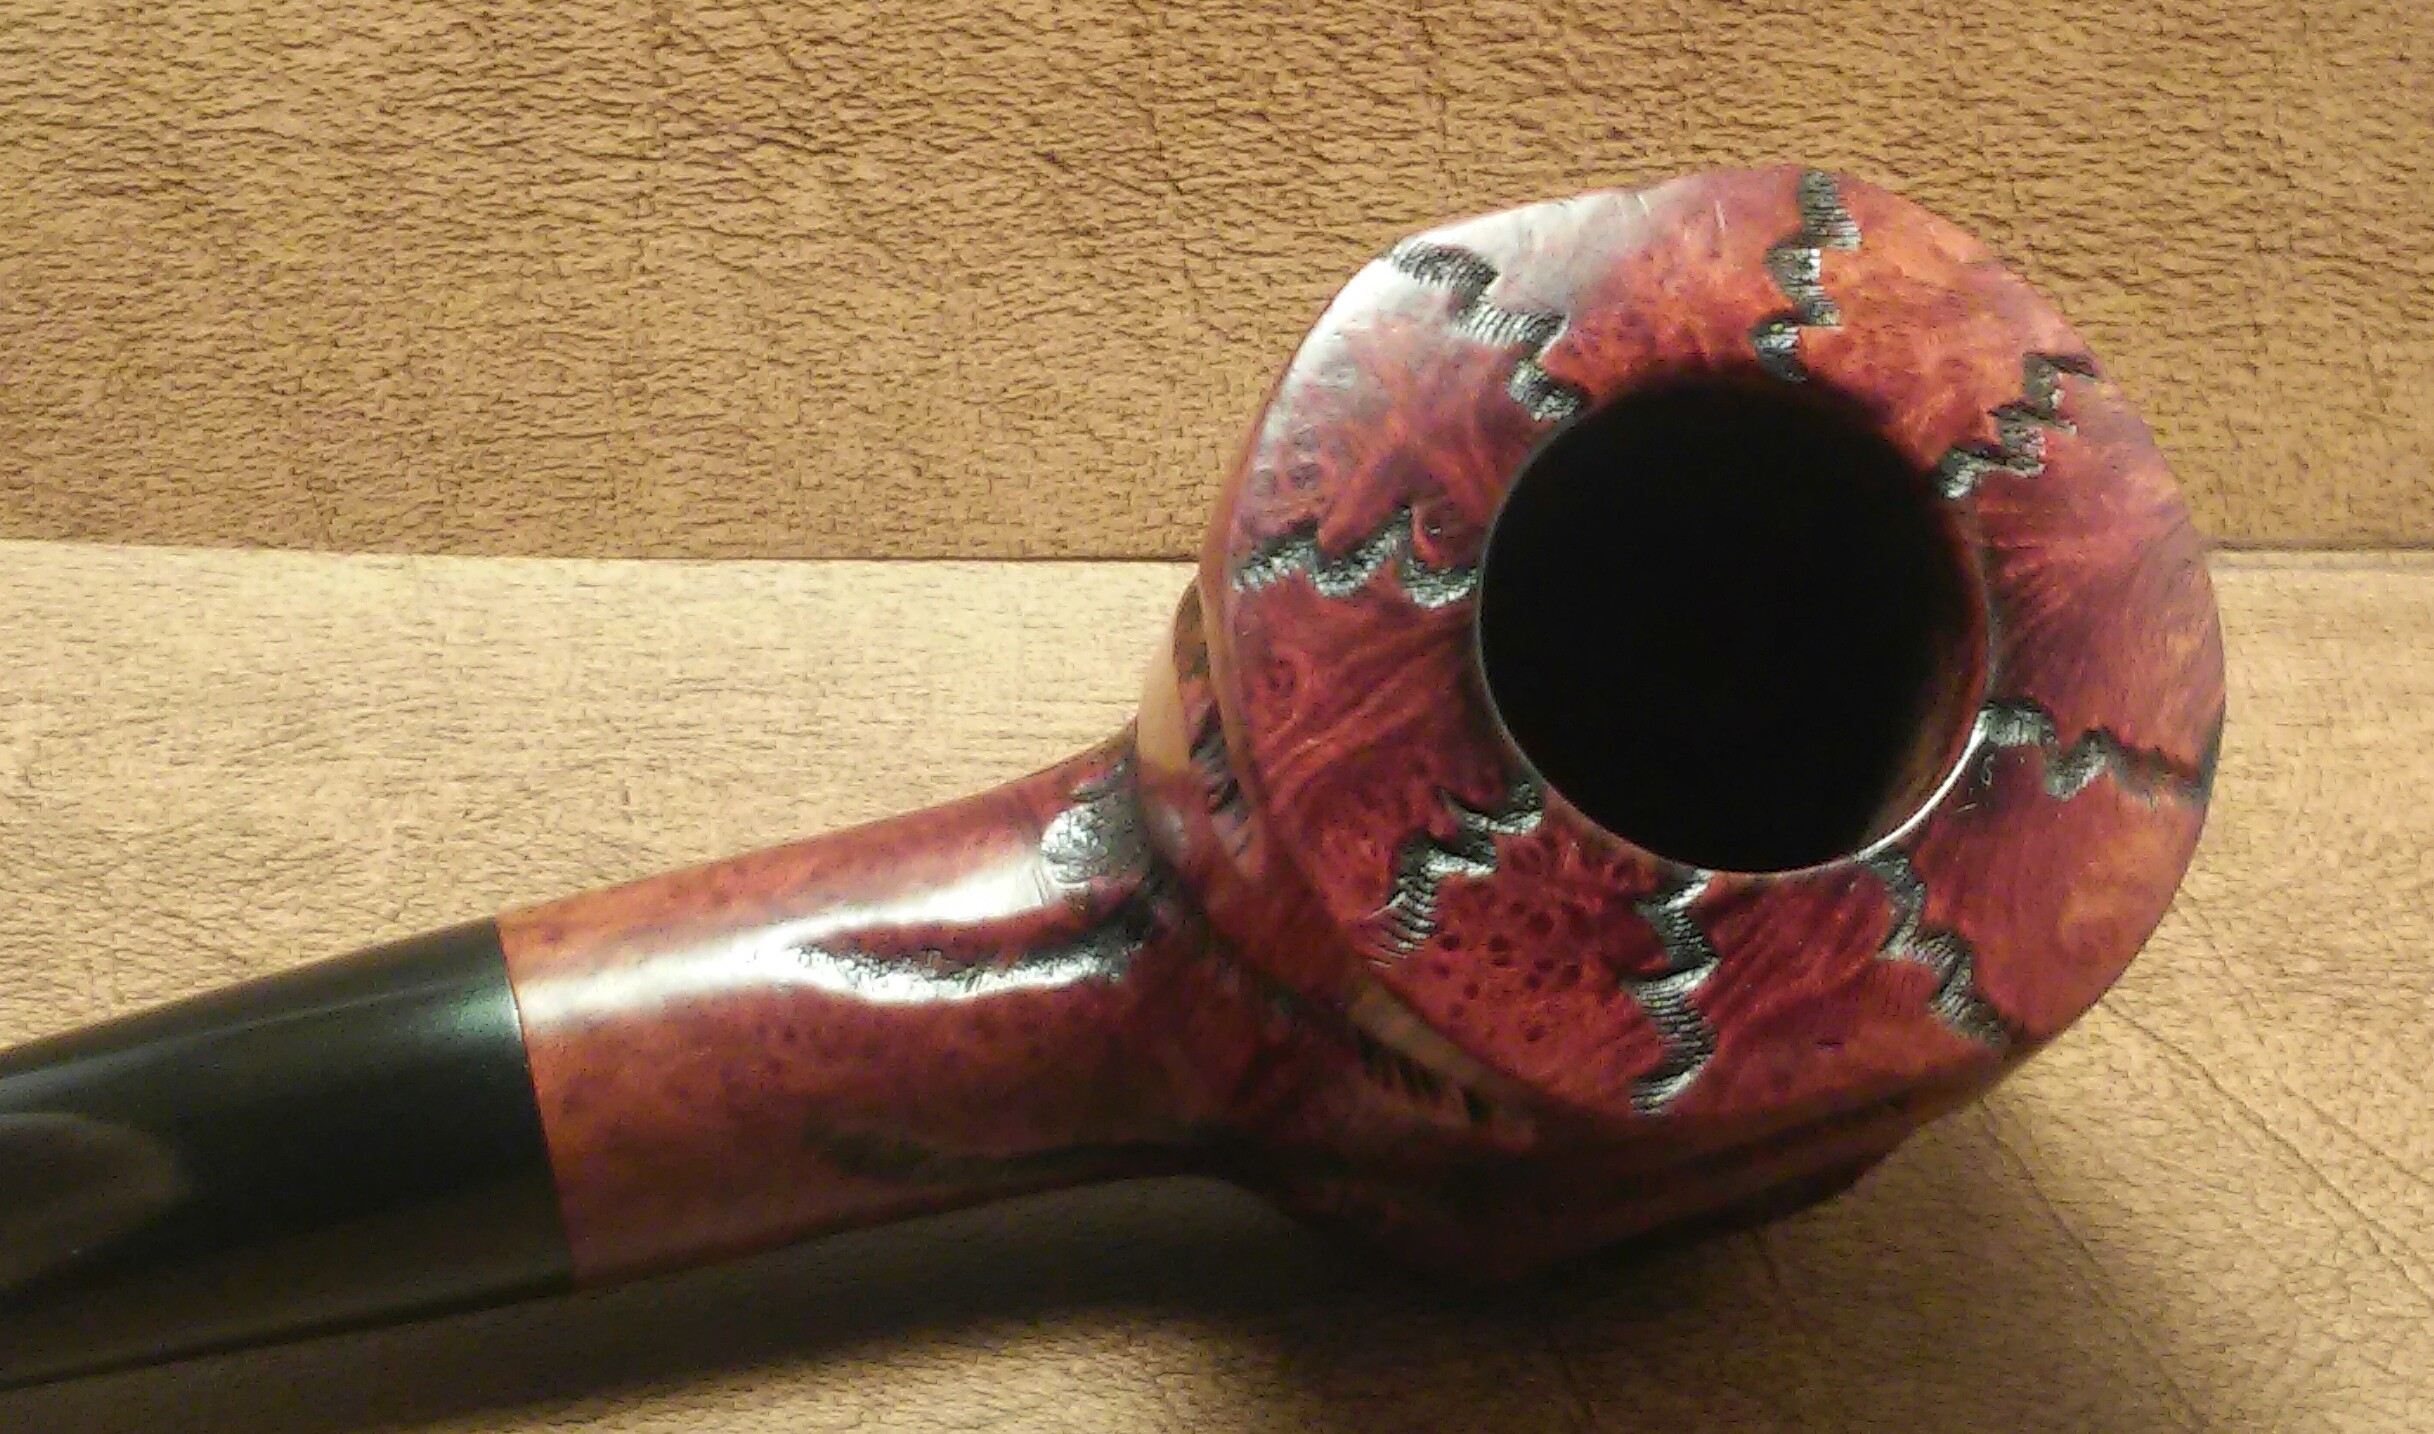
Complete
20160112211808~2
We named this one The Briar Shot, because it closely resembled – Well a shot glass.

20160111_154827~2PhotoGrid_1452645651071PhotoGrid_145264560002820160112210852~220160112210928~220160112210827~2PhotoGrid_145264566988220160112211539~2

Photos & Information Courtesy of Bill Unger's As Individual As Thumbprint The Custom-Bilt Pipe Story

Photos & Information Courtesy of Bill Unger’s As Individual As Thumbprint The Custom-Bilt Pipe Story. My favorite pipe pictured in Bill Unger’s book, mine is not an exact match but I’ll take close enough.

Finished her up on the wheel with white diamond, a few coats of carnauba and a microfiber hand buffing. I buffed the stem with blue compound, I have read in Steve’s blog Reborn Pipes of him using the blue compound and thought I’d give it a whirl. The blue all purpose compound seems to take more, if not all of the fine sanding marks leftover from the micro-mesh. Once again I’m impressed.


Custombilt Clean up (Rich era)

The scoundrel Pipes

Two down one to go it seems fitting to keep plugging away at the pipes I received from fellow blogger Pipe Scoundrel.

20160103_105200~2

Custombilt Eugene Rich Years.

1946-1952

My original impressions of Custombilt pipes was anything post Mincer was not worth my time or efforts but I’ve been wrong before. The change of hands did not necessarily mean a change in quality, yes the dash was eliminated and the rustication was not quiet as deep but big , thick and chunky they still are. I now have four in my ever-growing collection drilled perfect and not one ounce filler to be found. Eugene J Rich INC definitely did the Custombilt name justice.

Pipe As Received

PhotoGrid_1451839361020PhotoGrid_1451839409791PhotoGrid_1451839430908

The next was in beautiful used condition and unlike the first was lacking any paint which would make for an easier start. A Little rim tar&char , thin cake and light stem chatter.

PhotoGrid_1451944167633

I started with my Castleford reamer working from the smallest attachment to the largest that the chamber would accept, in this case it would accept the largest. I brought the chamber back to briar to be able to see the start of a burn out, I found only slight pitting on the inner wall on one side. After reaming I sanded the chamber with 400 grit paper until the pitting smoothed out. I could now work on the build up on the rim. I applied a generous amount of Method Good For Wood Polish with a Q-tip to the rim and left it aside to penetrate the tars.

PhotoGrid_1451926081325

The build up on the rim was quite thick towards the shank and would need more time to sit. I applied another helping of Method polish to the rim and left the stummel upside down on a makeup pad for 20 minutes. After sitting the 20 minutes the rest of the build up was easier to remove. I was now left with a little rim darkening.

20160104_104054~2

Using worn micro-mesh I was able to fade most of the darker spots.

PhotoGrid_1451925994052

With the chamber and rim free of crud I could now move on to the internals. I did a quick clean of the mortise and chamber with EverClear soaked Q-tips to loosen up the residual residue. Next I rolled two cotton balls, twisted them together to form one long swab and twisted it tightly into the mortise. With the swab inserted in the mortise I filled the chamber a quarter of the way with EverClear and allowed the swab to absorb the alcohol.

20160104_111442~2

Once the swab absorbed the EverClear I filled the chamber with two cotton balls and added EverClear to the chamber until the cotton balls are saturated. I left the stummel aside  now so the cotton balls can absorb the tars and any ghosting.

20160104_085100~2

With the stummel set aside I moved to the stem, first cleaning the externals with EverClear and makeup pads.

PhotoGrid_1451944296880

Now I applied non-bleach Soft Scrub to the stem with a children’s toothbrush and left it so the Soft Scrub could work its magic on the oxidation. I allow the Soft Scrub to turn from white to a brownish color before scrubbing vigorously with a rag. From the photo above you can see it removed 90% of the oxidation. I now used a damp Magic Eraser to remove the rest. The surface of the stem was left with a rough texture and would still need to be sanded. Before moving on I cleaned the internals of the stem with EverClear and stiff/soft pipe cleaners until the last pipe cleaner came as it went in.

20160104_132419~2

There were shallow tooth impressions at the bit/button area that raised a bit by heating the area with a Bic lighter (moving the flame at all times never leaving it in one spot too long). The stem was now ready for sanding.

20160104_144652~2

I sanded the stem first with 1000 grit wet sandpaper then 1800, 2000, 2400 wet moving on to the dry 3200-12000. Ready for the buffing wheel.

20160104_131222~2

Moving back to the stummel,  after sitting while working on the stem it had time for the EverClear and cotton balls to pull the tars and old tobacco out of the mortise and chamber. I gave it a good cleaning now with EverClear, Q-tips, cotton balls and stiff/soft pipe cleaners, cleaning until the last pipe cleaner came out as it went in.

PhotoGrid_1451944228522

I now cleaned the exterior of the stummel with Method Good For Wood Polish and allowed it to dry.

20160104_131806~2

With all my CustomBilts I add a little Howard’s butcher block conditioner just before the final buffing on the wheel. I used a Q-tip to get the Howard’s into the deeper crags

 PhotoGrid_1451944257622

I then apply Howard’s to the whole stummel and allow it to penetrate for a few minutes and hand buffing off the excess. She could now receive a final buffing.

Complete

20160104_160324~220160104_160337~2PhotoGrid_145194396807720160106_191528~220160106_191539~220160106_191552~220160104_160310~220160104_160148~220160104_160202~2

I finished her up on the wheel with white diamond, a few coats of carnauba and a microfiber hand buffing.

Another beautiful addition to my Custombilt collection and a pleasure to clean up.

Custombilt Saddle Grain

Now after two month’s of dealing with a medical annoyance doctor’s have put me on a cocktail of meds to control my chronic hives and angioedema. The swelling in my hands has finally subsided so I can now get back to my refurbishing projects.

20151218_124449~2

 Starting the New Year off right .The Custombilt pipes that I received in November from fellow blogger Clint of Pipe Scoundrel were all in pretty nice shape. First up a large Rich Era Custombilt saddle grain billiard, its the first saddle grain Custombilt in my collection. 


Pipe as received.

PhotoGrid_1450463757250PhotoGrid_1450463996402

Overall she’s in nice shape some tar build up around the rim , chunky brittle cake, some red and white paint embedded in the crags. The stem had a few impressions as well.

PhotoGrid_1451541940492

I started off with the stummel and set the stem aside to work on later. The chamber had a thick, uneven, crumbling cake and would have to go. Starting with the smallest attachment my Castleford reamer had to offer and working up to the largest that the chamber would except I removed the tired cake bring it back to briar. The chamber was free of any signs of a burn out. I finished up with 400 grit paper to smooth things out.

PhotoGrid_145154199064020160101_152536~2

My attention now turned to the rim. Caked with tar, paint and char. I applied a generous amount of Method wood for good polish to the rim and set aside to penetrate the built up. After allowing the polish to soften the build up I worked on the rim with a children’s tooth brush, makeup pads and Q-tips until the build up was removed. When I run into a tough build up I’ll leave the stummel upside down on a Method polish soaked makeup pad for 20 minutes.

20160101_160854~2

With the build up removed I could concentrat on the rim char. Using worn miro-mesh I was able to remove most of the rim darkening.

20160101_161827~2

There were a few dings in the rim after the tar and char was removed. I used a hot iron and damp rag to steam out the imperfections.

20160101_170349~2PhotoGrid_1451715765841

The internals needed a good cleaning, I ran it though a retort using EverClear. I used a mortise brush, shank brush, Q-tips, cotton balls and hard/soft pipe cleaners to remove the debris.

PhotoGrid_1451716123076PhotoGrid_1451716151540

Next the externals, I started with Method polish but would need something stronger to remove the red and white oil based paint and what I think is blacktop crack filler for driveways. I used EverClear and Q-tips to remove the gunk.

PhotoGrid_145171555132320160102_011731~2

There was one scratch on the outside of the bowl that would need filling. I cleaned the area of work with EverClear and a Q-tip, filled the imperfection with Gorilla Glue and briar dust and left to dry. After drying I removed the excess glue and dust with miro-mesh. I restained the area with touch markers and wiped away the excess with an alcohol dampened rag.

PhotoGrid_1451716181938

I now applied Howard’s butcher block conditioner with a rag and let it penetrate for 10 minutes , hand buffing off the excess with a clean rag.

20160101_163817~2PhotoGrid_1451758939146

With the stummel complete now on to the stem, starting first with non-bleach Soft Scrub to remove the oxidation. I applied a generous amount using a children’s toothbrush and left it aside to begin working. Once the Soft Scrub turns from white to a brownish color I begin to remove the oxidation with a rag and plenty of elbow grease.

PhotoGrid_1451715817648

The button/bit area of the stem had a few impressions that needed attention.

PhotoGrid_1451715949731

I first rough sanded the area to be repaired with 400 grit wet sandpaper and then wiped down the area with an alcohol dampened rag. I mixed thick black CA glue and activated charcoal power into a paste and applied it with a toothpick to the impressions and worn button, I taped off the button with painters tape so the repair would stay in one spot I allowed the paste to harden a bit before removing the tape and again hitting it with accelerator. I now left it to cure for a few hours.

PhotoGrid_1451716254744

After my internal cleaning of the mortise the tennon fit was left loose, this happens with many of my estates. I ues jewellers pliers to expand the tennon from the inside out by heating the tennon lightly with a bic lighter and inserting the tip of the pliers into the tennon and slowly expanding the tennon until a snug fit is achieved between mortise and tennon.

PhotoGrid_1451716030812

After allowing the repair to cure I could now shape the new button. Using needle files I removed the excess paste and new button began to form. I used blue painters tape to tape the under side of my needle file so I wouldn’t cut into the bit and would be able to get the file flush against the new button.

20160102_004026~2

After completing the repair I wet sanded the stem first with 1000,1800, 2000 grit sandpaper then the various gits of micro-mesh.

Complete

PhotoGrid_145178968006820160102213710~220160102213726_1~220160102213305~220160102213104~220160102213233~2PhotoGrid_1451789730428PhotoGrid_1451789710844

Finished up on the buffing wheel with white diamond, carnauba, and miro fiber hand buff.

This Custombilt was a true pleasure to clean up and add to my collection. Thanks Clint.

( EUGENE RICH ) Boxed Custombilt 1946-1952

20151030_223109~2

My wife and father through a joint effort picked this one up for me, it arrived today and I was blown away . I’ve been trying to get my hands on a boxed Custombilt for a few years but they were always just out of reach. This beautiful bulldog is a Eugene Rich era Custombilt very lightly smoked, amazing condition and it came with the original box, paperwork and guarantee. The box was a little rough around the edges not unlike the pipes themselves. This is my first Rich era Bilt and not an ounce of filler, I’m starting to think it’s time to broaden my horizons.

 This is more of a standard clean up then a restoration. I decided to share this clean up because every collector/pipe smoker has there white whale. Whether it be a priceless one of a kind or an inexpensive hard to find piece.

20151030_211521~2 20151030_211525~2 20151030_211515~2 20151030_211530~2 20151030_211535~2

Sometimes it’s the packaging that needs the work.  This is my first pipe box refurb. Using Q-tips, Method disinfectant and a rag I carefully removed the mold/mildew from the box and set it aside to dry.

20151030_223102~220151030_223136~2 20151030_223201~2 20151030_223212~2 20151030_223230~2 20151030_223239~2 20151030_205405~2 20151030_205508~220151030_205540~220151030_205424~220151030_205519~220151030_205607~2

The box is in pretty good shape for almost 70 years old.

( Pipe As Received)

20151031_222352~2 PhotoGrid_1446345411004PhotoGrid_1446423022819 PhotoGrid_144634538649420151031_222424~2

The pipe was in wonderful condition the mildew that had engulfed the box did not affect the pipe itself. Light chatter, little to no cake and the mortise was spotless. The nomenclature was well stamped , crisp and clear. On the right side of the shank there’s a circle stamped, I was unaware that these stamped shapes were used past Mincers era 1946. There is also the presence of a bowl coating, the first I’ve seen in a Custombilt .

 PhotoGrid_1446381168423

I started with the bowl, cleaning the chamber and mortise with Q-tips, soft pipe cleaners and EverClear. It would not need a ream as I believe it was only smoked once or twice at most. The stem needed a quick once over, I wiped down the stems exterior with EverClear and a cotton ball and cleaned the internals with an EverClear soaked soft pipe cleaner.

PhotoGrid_1446381133655

The rim and shank needed a little attention. The rim had a small scorch mark and the shank an ink spot. I applied a small amount of Method wood for good polish to the rim and shank and allowed it to soak in for a few minutes, using Q-tips I worked the rim and ink spot.

20151031_232132~2~220151031_232211~2

I was able to completely remove the scorched area and fade the ink spot on the shank. My use of Howard’s conditioner and final buff would hide this spot completely.

PhotoGrid_1446406109625

Using a Bic lighter I carefully heated the area of the chatter to raise the impressions. (Moving the flame rapidly so not to burn the stem)  I would repeat this process in intervals until all the impressions had risen.

PhotoGrid_1446406132477

There was a little oxidation present and would still need micro mesh to smooth out the area but the button impressions had risen back to its original shape.( I neglected to take a photo of the oxidation removal ) I applied a generous amount of non-bleach Soft Scrub and scrubbed the stem vigorously with a rag until the oxidation was removed.

20151101_185231~2

I ran the stem through the various grits of micro mesh. 1500-2400 wet and 3200-12000 dry.

20151102_092051~2

I now applied a little Howard’s butcher block conditioner to the bowl with a rag, I let it soak a few minutes and removed the excess with a clean rag.

20151102_093010~220151102_094400~220151102_094159~220151102_094302~220151102_094318~220151102_094345~220151102_094332~2

I finished up with white diamond, carnauba and a micro fiber hand buff.

20151102_093356~2

Not one of my toughest refurbs but definitely one of my favorites.


Custombilt Compilation

I’m starting to realize the photos of my process on many of the pipes I’ve redone in the past are lost. Luckily I have before and after photos, please bare with me as new pipes are redone I will add more detailed photos of my process. I decided to put together a compilation of some of my favorites.


20151009_1027472_zpsuvvs9drj~2

Custom-bilt pipes there will be quite a few of these. I’m a collector and I haven’t seen an end in sight. Each one has it’s own personality As Individual As A Thumbprint stands true. The few below were redone in the past year.  My process has remained the same for that time, I followed the same process as in my previous posts.

20151025_122929~2 20151025_112240~2~2

(1939 brochure)

20151025_123435~2

Images & information courtesy of Bill Ungers As Individual As A Thumbprint-The Custombilt Pipe Story.

~~~~~~~~~~~~~~~~~~~~~~~~~~~~~~~~~~

20150501_112045_zpszhnfky8g~2 20150501_112005_zpsxasdh2wi~2 PhotoGrid_1430935869731_zps1gymblhs20150506_1414002_zpsrn9kgjfl~2PhotoGrid_1430935937335_zpsawasawyt

First up a Custom-Bilt patiented filter system billiard from what I’ve read it was made between 1935 to around 1941. A very large, long and partically rusticated pipe .I have to two in my collection one redone and one in the to do box.

——————————————————–

PhotoGrid_1431692470042_zps8ak4qdkh 20150515_0801382_zpstdyouklc20150515_0816432_zpshlggkuzm

Next up another Custom-Bilt filtered pipe. In my first post I went through my process of cleaning a similar pipe that also had it’s rubber filter insert. I could not find an exact year or much else on these. Between 1941-1946 ? Something had nested in the stem, luckily it had moved out prior to my receiving it. One of the smallest bilts I own.

——————————————————–

PhotoGrid_1427902122727_zpsvhpon1hb PhotoGrid_14291934845692_zpsc2tpy438

The first Custom-Bilt I purchased around three years ago. The bottom right photo was from the auction. Still one of my favorites.

——————————————————–

Screenshot_2015-10-25-12-34-54~2

 Typically I go after older Custom-Bilt pipes but there was something different about this one. The Canadian shape and shell finish was eye catching . It’s my one and only Canadian style pipe.

20150824_1556152_zpsfrfmnycb 20150824_1555512_zpsucrctg8v PhotoGrid_1440446617707_zpsn2nwk1me

One More For The Case.

20151009_1027472_zpsuvvs9drj~2

My ever-growing collection of Custom-Bilt pipes, it has indeed outgrown it’s display case. Originally meant to house my small Tom Howard and Custom-Bilt collection has turned into an overflowing collection of Custom-Bilt pipes alone. Before my knowledge of the company and it’s founder Tracy Mincer, I was intrigued by these large and ugly pieces of briar. They seemed like misfits in a sea of smooth,small and manicured pipes of it’s time.

Custombilt pipes are not all created equally which I soon found out. My first Custom-Bilt purchase three years ago was more of an accident, an older woman the owner of an antique shop in Troy N.Y. had listed a pipe in her EBay shop, poor photos and little information let it slip by unnoticed , I decided to pull the trigger. I was surprised upon receiving the pipe it was big, bulky and roughly carved but comfortable in the hand. On the underside of the pipe was the words Imported Briar and Custom-Bilt I instantly fell in love with the pipe. Now the research began, I found the company founder was Tracy Mincer and the name Custombilt later changed hands multiple times and with the change of hands came the change in quality.  I own only a couple of the un-hyphenated examples there rustication and use of filler is unappealing to my eye. My focus is on the Mincer era 1934-1946 pipes (Custom-Bilt)I have found zero filler in these.

Last month thanks to my wife and Jeff of the NASPC I received a copy of Bill Ungers book- As Individual as a Thumbprint: The Custom-Bilt Pipe Story. A whole new world opened, the information in Bills research and writings is priceless to a collector. I now know much more then I did three years ago.

My latest purchase via EBay is no different thick, bulky and beautiful with the exception of a small rubber filter insert which I have two others in my collection one with it’s insert and one without. I have become addicted to finding these oddities, the filter inserts were usually misplaced or simply tossed but this one is complete.

The pipe when received.

PhotoGrid_1445044720471

Custom-bilt was stamped on the left side, on the right side a triangle and there was no evidence of Imported Briar having been stamped anywhere . The same is true with the two others in my collection.

PhotoGrid_1445300357120

Custom-Bilt was lightly stamped or worn over time.  From my experience it’s common in Pre-1946 pipes.

20151016_211601~2~2

PhotoGrid_1445050535863

It appeared untouched by someone like myself which is always a  good start ,it seems everyone on EBay is refurbishing now and not always for the good of the pipe  . Overall she was in good shape upon receiving, a bit of fossilized cake, build up around the rim and only faint chatter/ oxidation on the stem. The button was worn and would need attention as well. Now the fun could begin.

20151016_221802~220151018_142146~2

   After looking over and disassembling the pipe I set aside the stem to come back to later. I started with the bowls chamber and my Castleford reamer , beginning with the smallest reamer always keeping it centered and working up to the largest that the chamber would accept,in this case it would accept the largest. Finishing up with 400 grit sandpaper wrapped around a finger. I always take my estates  back to briar to be able to see the start of a burn out/damage , the chamber was free of burning or cracks.

20151016_221802~2~2

   Next my attention turned to the caked rim.

PhotoGrid_1445194414822

 I started  by applying a generous amount of Method wood for good polish with a Q-tip and letting it penetrate the build up . I let it sit from  15min/30min depending on the severity. After letting it penetrate I used a children’s  toothbrush to break up some of the tars.

PhotoGrid_1445218544331

Next I used makeup pads, Q-tips, the toothbrush and kept working at the area until the build up was removed. At this time I cleaned the exterior of the bowl with the wood polish ,toothbrush and Q-tips  as well.

PhotoGrid_1445220637331

Next the internals. The draft and mortise were  plugged with tars and old tobacco. It would need to be cleared before receiving a retort.

PhotoGrid_1445264690221

Using a pick set, shank brushes, stiff bristle pipe cleaners ,Q-tips and EverClear I cleared the blocked airway. Next I unrolled cotton balls and then twisted them together to form a long cotton swab.

PhotoGrid_1445264730170

Using the twisted cotton swab I turned it into the mortise tightly. I then filled the chamber with a little EverClear and waited for the swab to absorb the alcohol. Then I filled the chamber with three cotton balls and soaked them with EverClear. I would set the bowl aside to let the alcohol and cotton balls absorb the leftover tars/ghosting.

PhotoGrid_1445268638230

With the bowl set aside I moved on to the stem.  I Cleaned the interior and exterior using EverClear, cotton balls, small shank brush and stiff/soft pipe cleaners. I worked the interior until the pipe cleaners came out as they when in.

PhotoGrid_1445350833827

It appeared that the filter end at one point was removed using pliers there were deep grooves imbedded in the  rubber. Using a Bic lighter I carefully heated the area until the indentations were all but gone. I will finish it up later on with micro mesh.

PhotoGrid_1445268672316

Using a children’s toothbrush I applied non-bleach Soft Scrub and let set for 10min as it soaks into the oxidation the Soft Scrub turns from white to a brown color. Now comes the elbow grease.

PhotoGrid_1445276750985

After the Soft Scrub had time to work into the oxidation, I scrubbed the stem with a Magic Eraser  and a rag until the oxidation was removed. I then heated the stem with a bic lighter (moving the heat source at all times never leaving it in one area too long) at the bit/lip area to raise some of the tooth impressions (I also use a heat gun) .

PhotoGrid_1445276770920

After the Soft Scrub and heat the stem was left with a rough surface, some of the impressions had risen but the button would still need work.

PhotoGrid_1445431503155

 I was now able to concentrate on the worn button. I roughed up the surface of the stem by wet sanding with 400 grit sandpaper I tapped off the shank of the pipe so I wouldn’t round the edges of the stem. ( I will also use a washer in between the shank and stem.)

PhotoGrid_1445362312531

After sanding I wiped down the stem with alcohol. I then made a paste by mixing thick black CA glue and activated charcoal powder. With a toothpick I applied the paste to the button trying to keep it as even as possible. Once I was happy with the shape I sprayed it with accelerator.

PhotoGrid_1445391725965

With the paste now hardened I used a needle file to begin forming a new button. I tapped the underside of the file so I could get the file flush against the button to form a sharp edge without cutting into the bit.

PhotoGrid_1445434015282

As I began removing the surface of the new button I uncovered holes where bubbles had formed. The process of mixing the paste and applying it would have to be repeated.

PhotoGrid_1445525135035

After reworking the button and finding  a suitable thickness I moved onto the stem itself . Wet sanding with 1000 grit sandpaper then moving through the various grits of micro mesh. Now it was ready for the buffer.

PhotoGrid_1445438980276

I allowed the bowl to soak for a few hours. The chamber looked good but I would repeat the process on the mortise several  times until the cotton swabs came out clean.

PhotoGrid_1445308051762

  The chamber and mortise were free of the visual residue but the ghost still remained . The previous piper was a fan of aros.

PhotoGrid_1445353252427

I ran it through a retort to remove the ghosting . I have adapted my retort to fit the bowl alone, there was no need to include the stem as my previous cleaning removed the ghosting from it. This also comes in handy with stems that maybe damaged by the alcohol.

PhotoGrid_1445525195479

The rim was darker towards the shank ,I used a worn micro mesh pad to remove some of the darkening. With all my Custombilt, BP Jum, Marxman and Tom Howard pipes I apply a small amount of Howard’s butcher block conditioner. I work it into the deep grooves and the pipe itself with a rag and let it soak in for a few minutes.I remove the excess with a clean rag and give it a quick hand buff.

20150924_091222~2

It was now off to my makeshift buffer, a hand drill clamped in a drill press vice with a drill mounted buffing kit. My original bench buffer burnt out three years ago,out of necessity I came up with this, the results met my expectations. I started with white diamond, than a few coats of carnauba and finishing up with a micro fiber hand buffing.

Here she is.

20151022_115802~2

20151022_115050~2

20151022_115156~2

20151022_115226~2

20151022_120432~2

20151022_120411~2

20151022_120348~2

20151022_120330~2

PhotoGrid_1445533029584

PhotoGrid_1445532870954