Tag Archives: Loose tennon

Scoundrels – John Bessai Pot

12743568_1113167278728461_8755580862501099677_n~2~2

Pipe Scoundrels Pipes.

Way back in February Clint of Pipes Scoundrels sent a huge package out of the blue . We had spoken a month or so before of a pipe that was in need of care but never figured out a plan. In the package a letter where he offered up a trade of sorts skill for skill, I love the barter system. In the package an incredible framed Pen & Ink work, that I watched though his blog come together. I was blown away by his skill and photos online. I had no idea it was coming my way, in person it was even more amazing, beautifully done. Also in the package a couple of Pipe Scoundrels stickers ( he has a killer logo) and three pipes in need of repair/cleaning. A couple John Bessai pipes one Canadian, one Pot and an Iwan Ries a unique shape I’m not familiar with. I was excited to get to work , this was the first time I was to work on someone else’s pipes but I got side tracked and side tracked again but finally I had some time to sit and finish, now the three are complete.

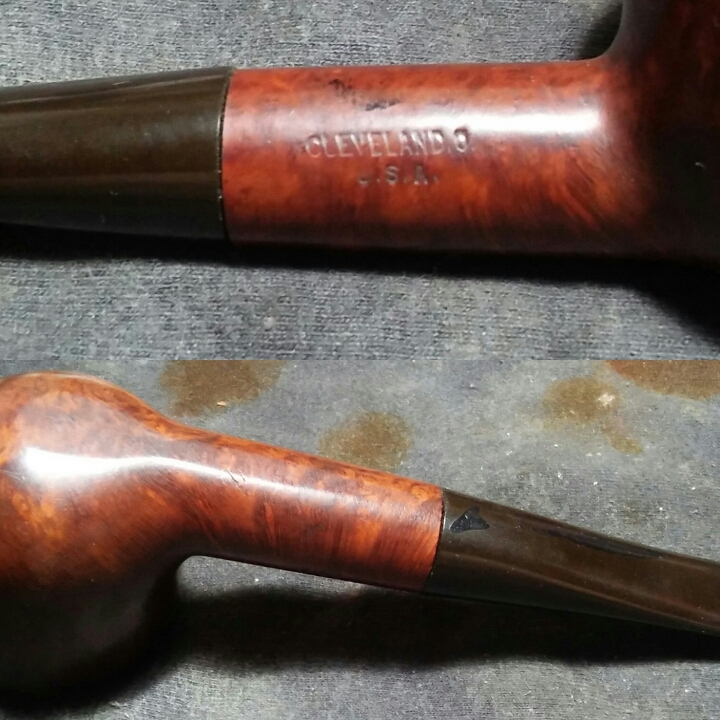
My plain was to write a little something on the history of Bessie pipes but as it has it some else has already done the work and a much better job then I would have. History of John Bessai (thanks to jguss from pipesmagazine forum) Classic Pipe Shops from years gone by in America – pipes and tobaccos and their influence, a well written and informative post. I will say the shop, The John Bessai Pipe Clinic was run between 1909-1993 at 35 Colonial Arcade in Cleveland Ohio.

The Restoration. 

PhotoGrid_1458180163825PhotoGrid_1458180192182PhotoGrid_1458180216926PhotoGrid_1458076975648

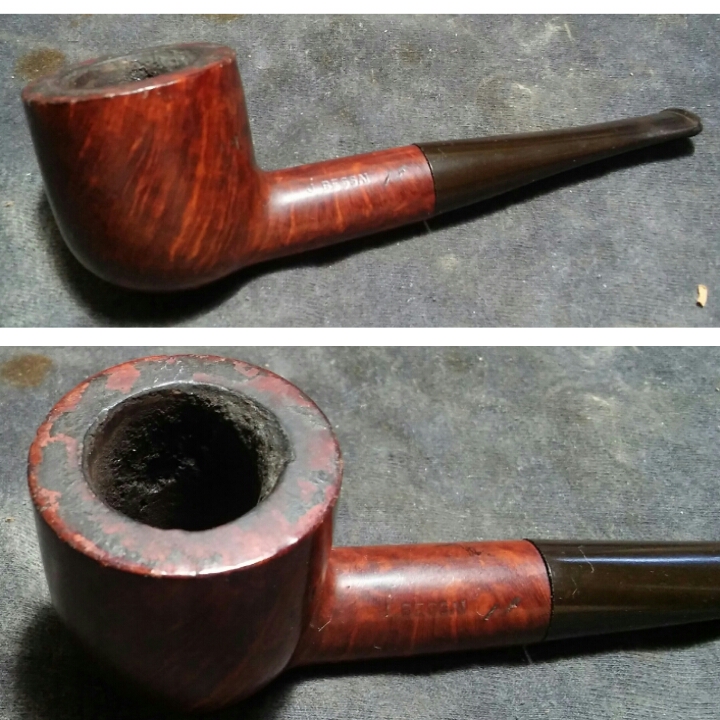
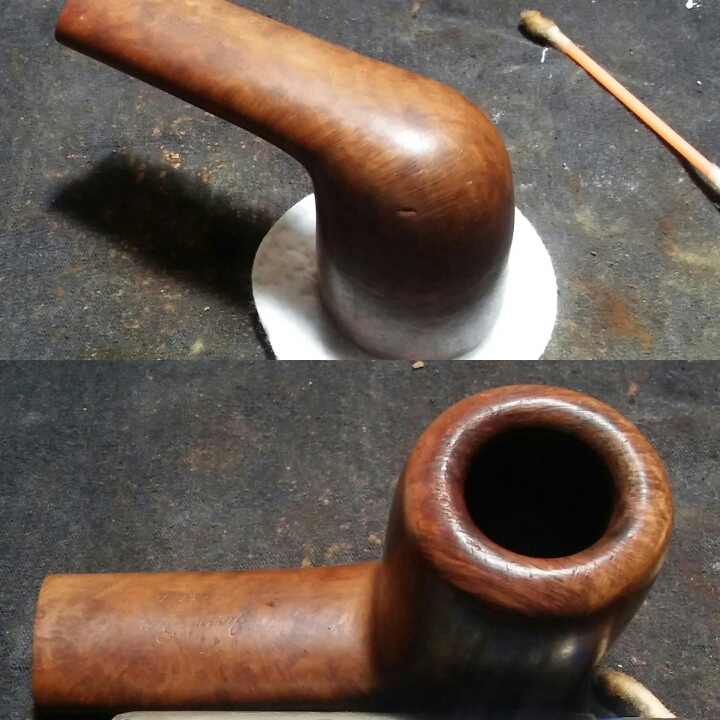
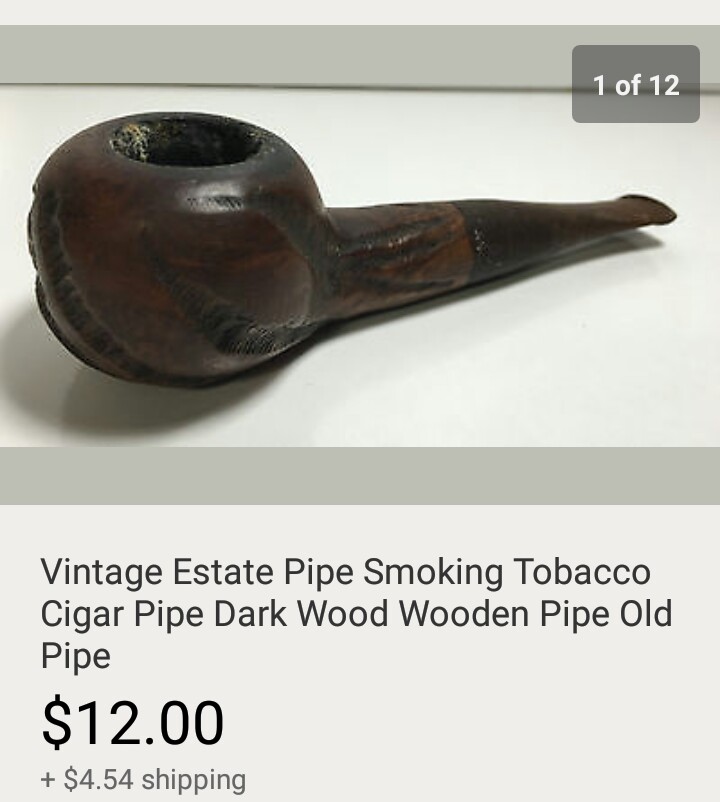
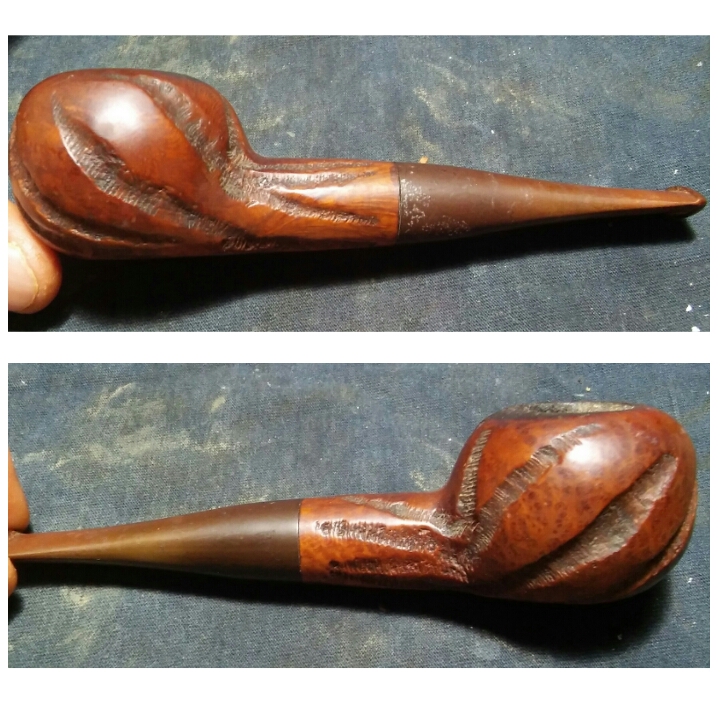
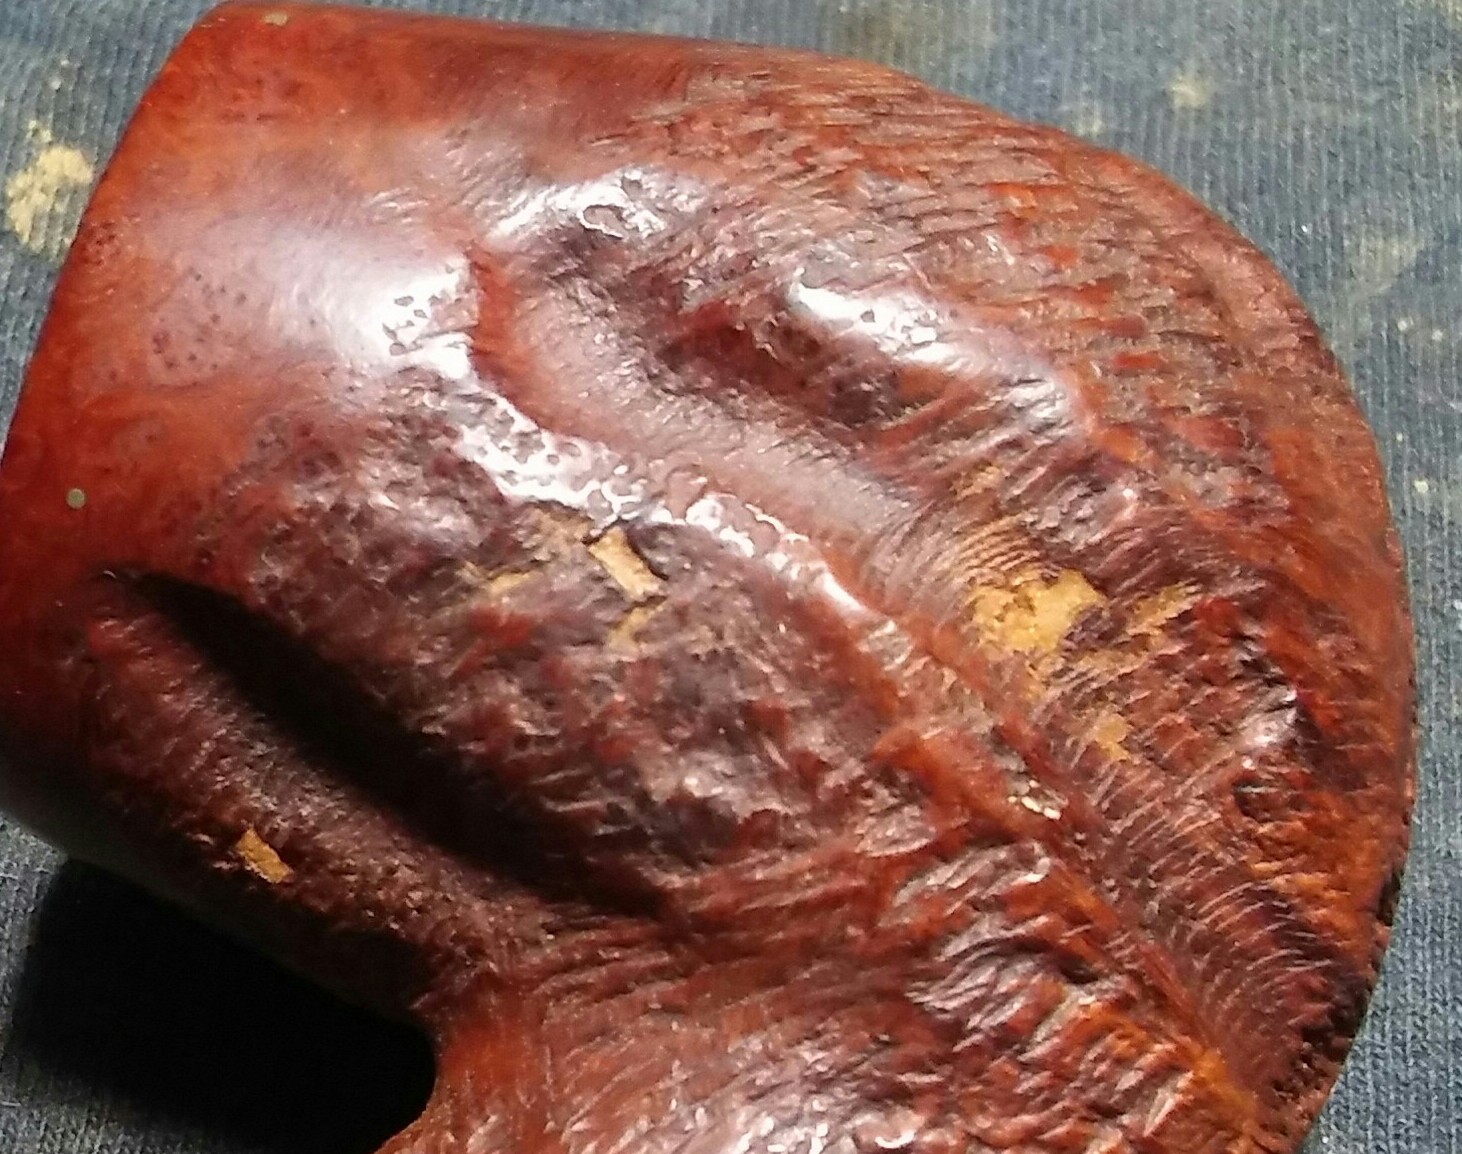
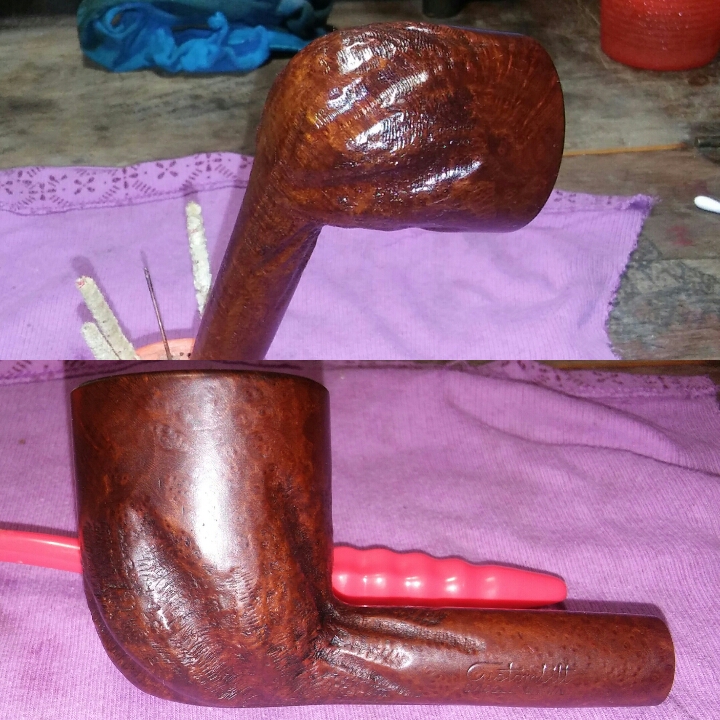
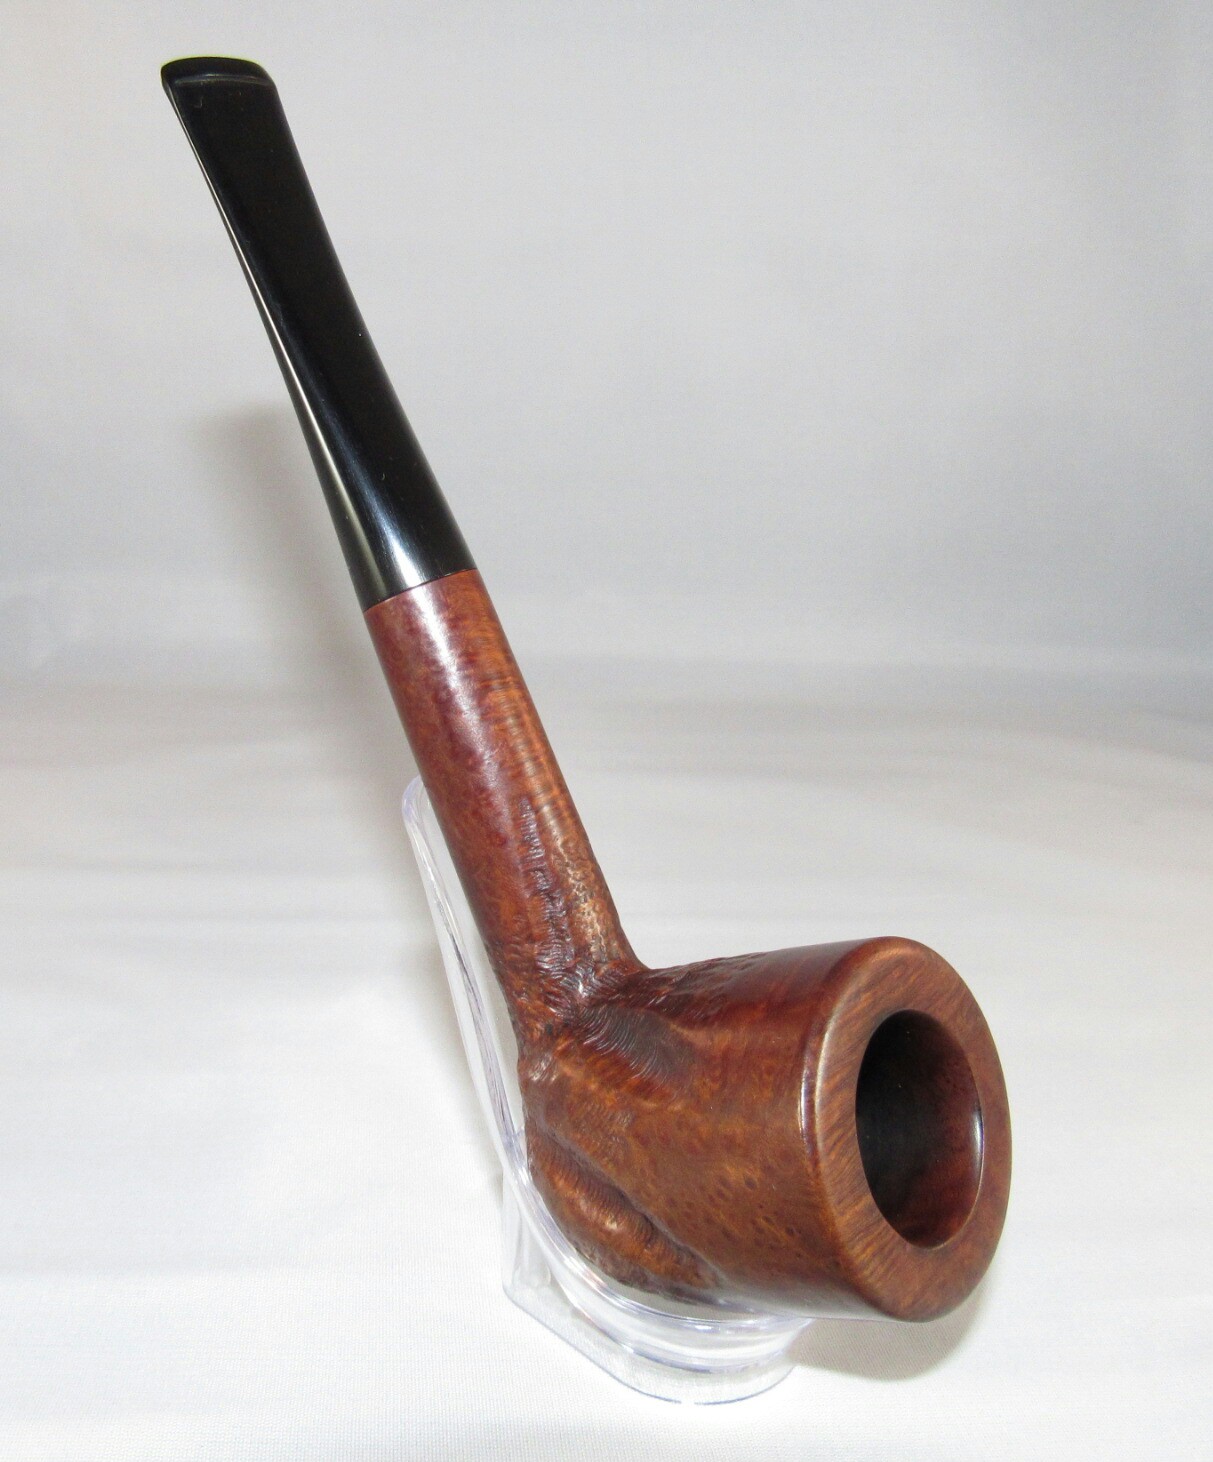
She was in need of help, an ill fitting replacement stem that was oxidized and had a couple of impressions, chunky crumbling cake, a few fills and a rim that was smacked around a bit, but I’m not afraid of a little work.

20160226_215905~2~2

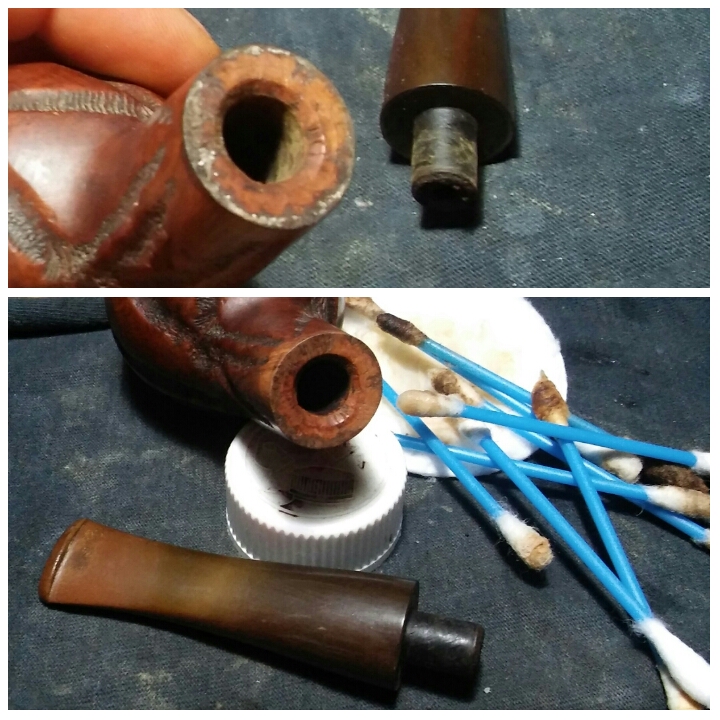
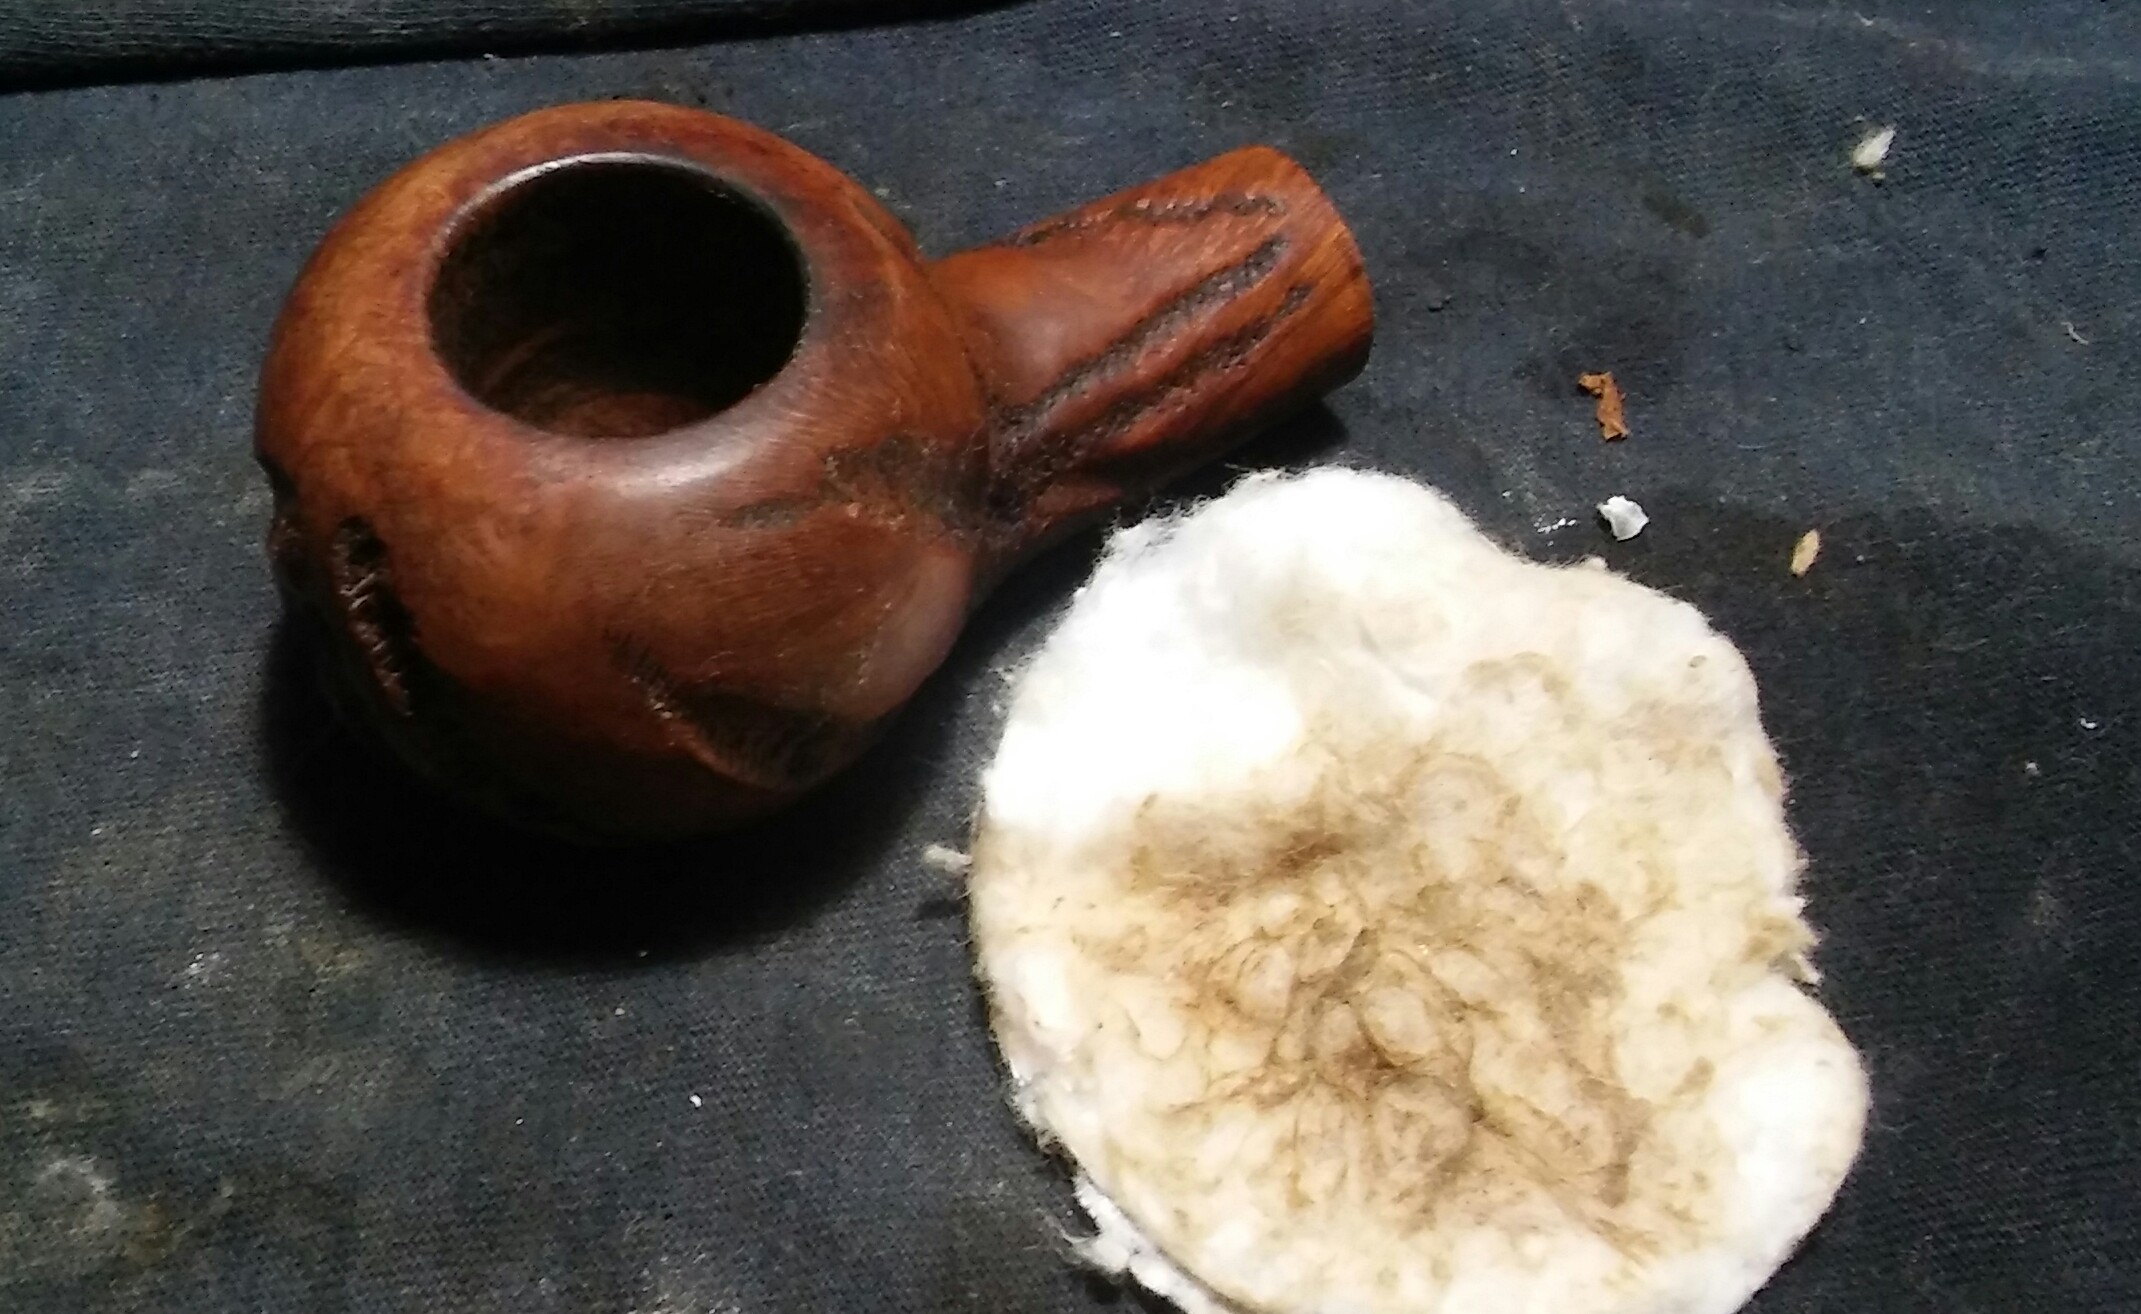
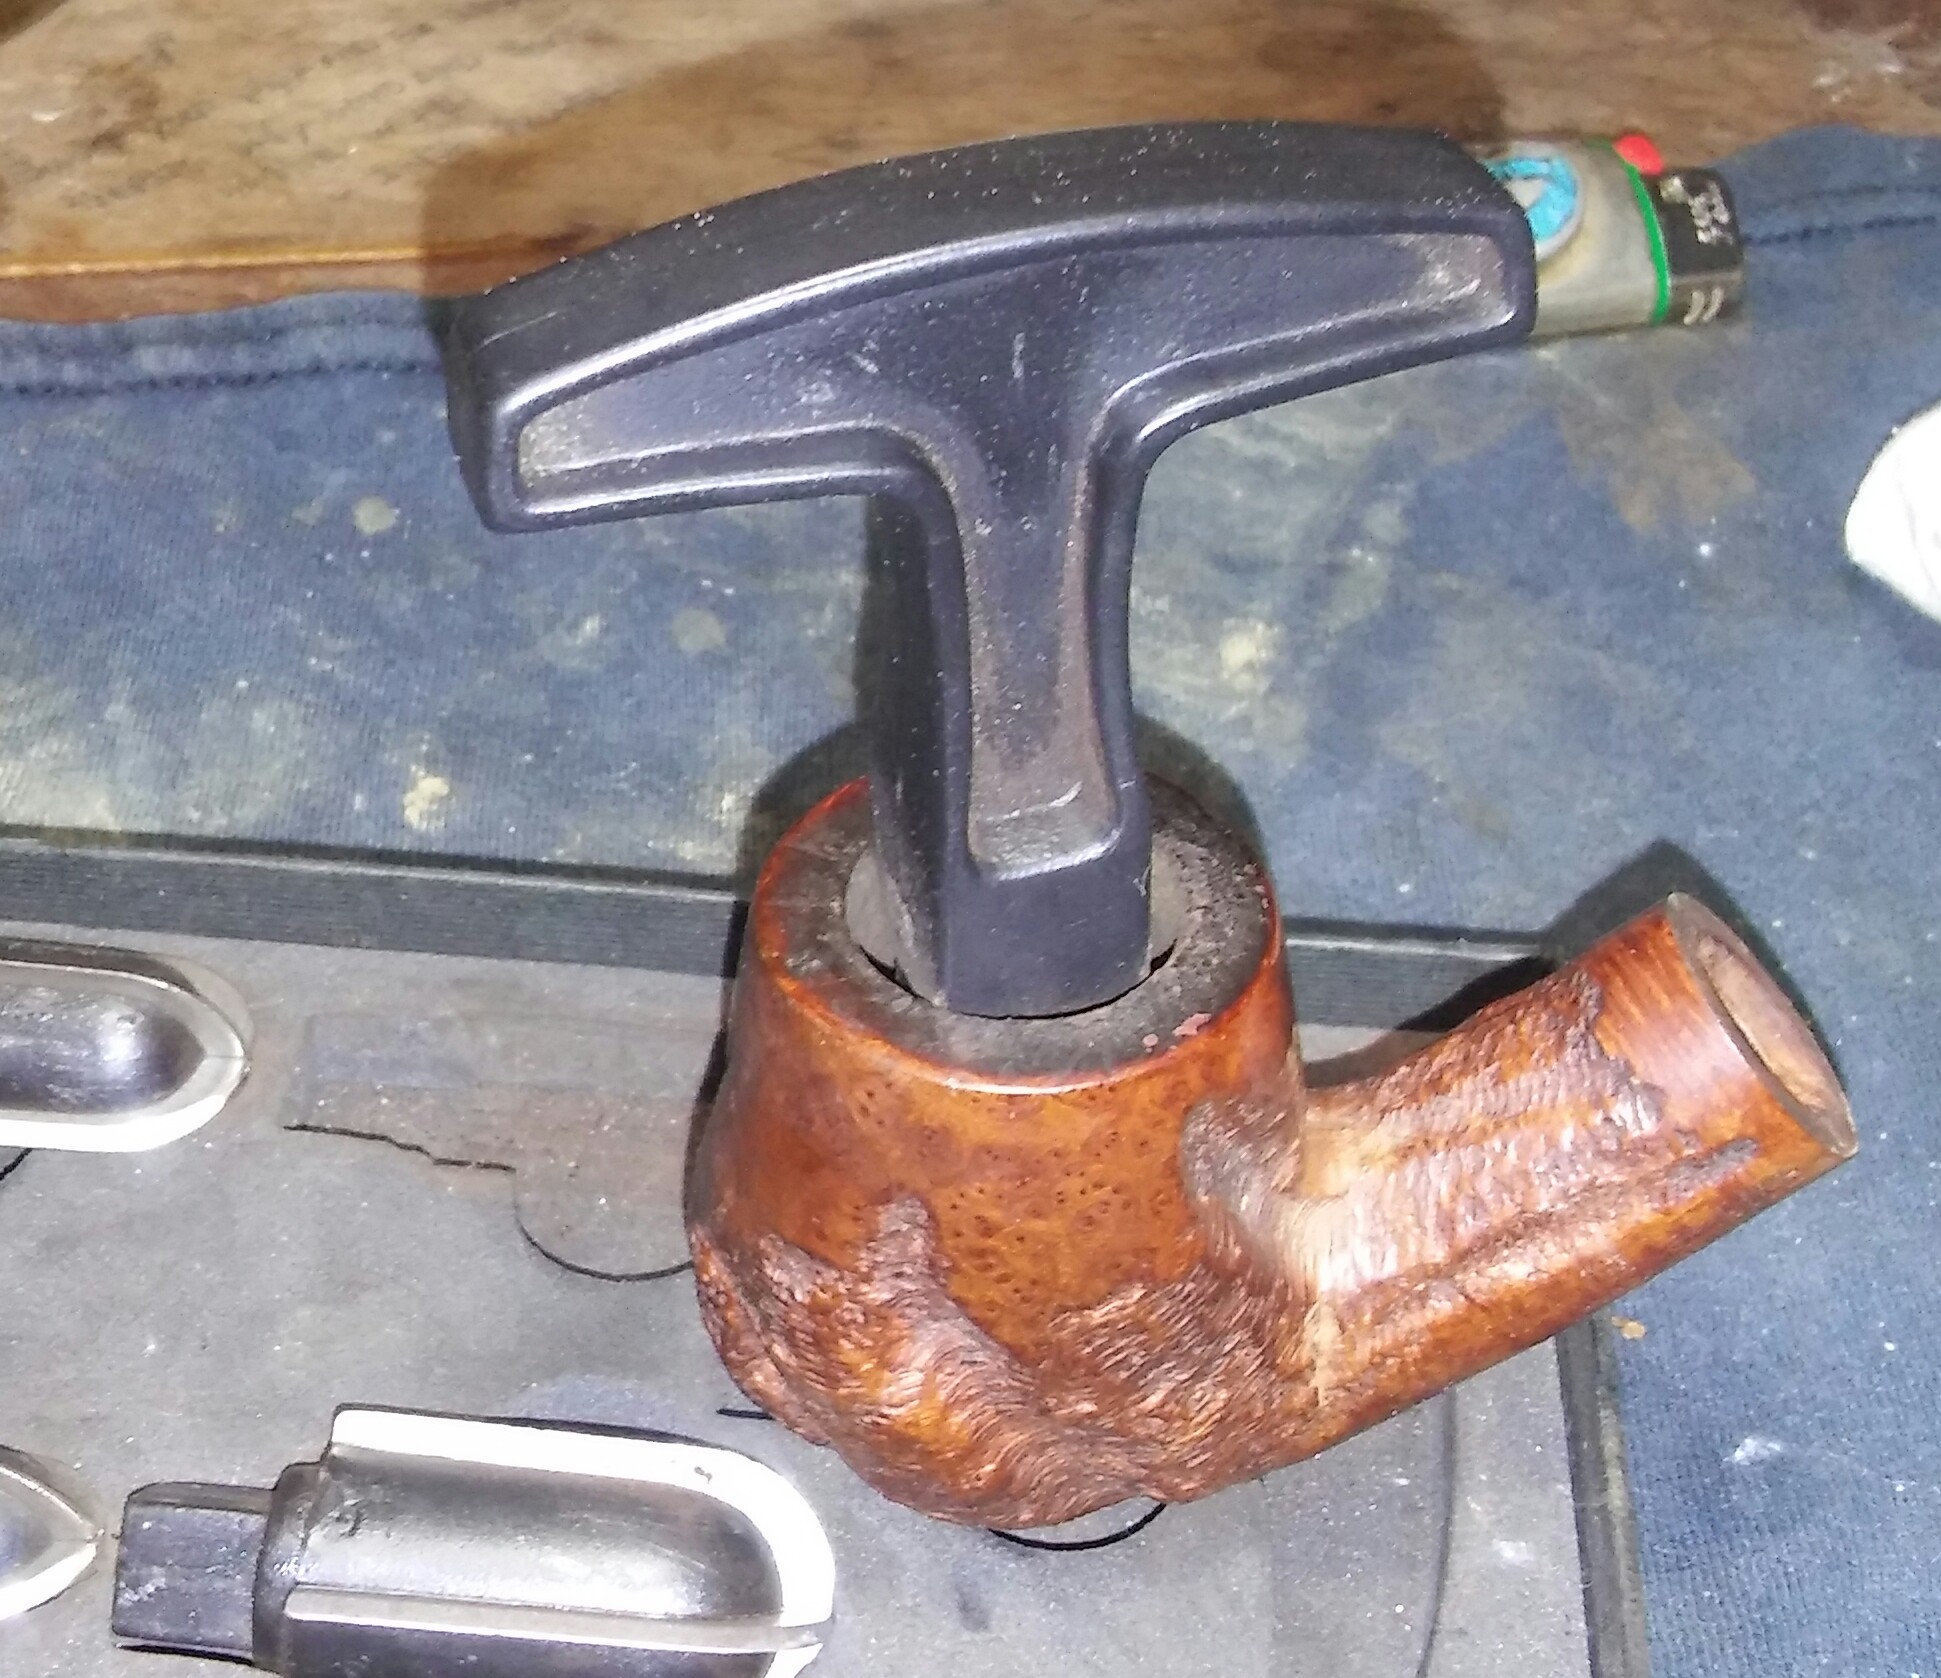
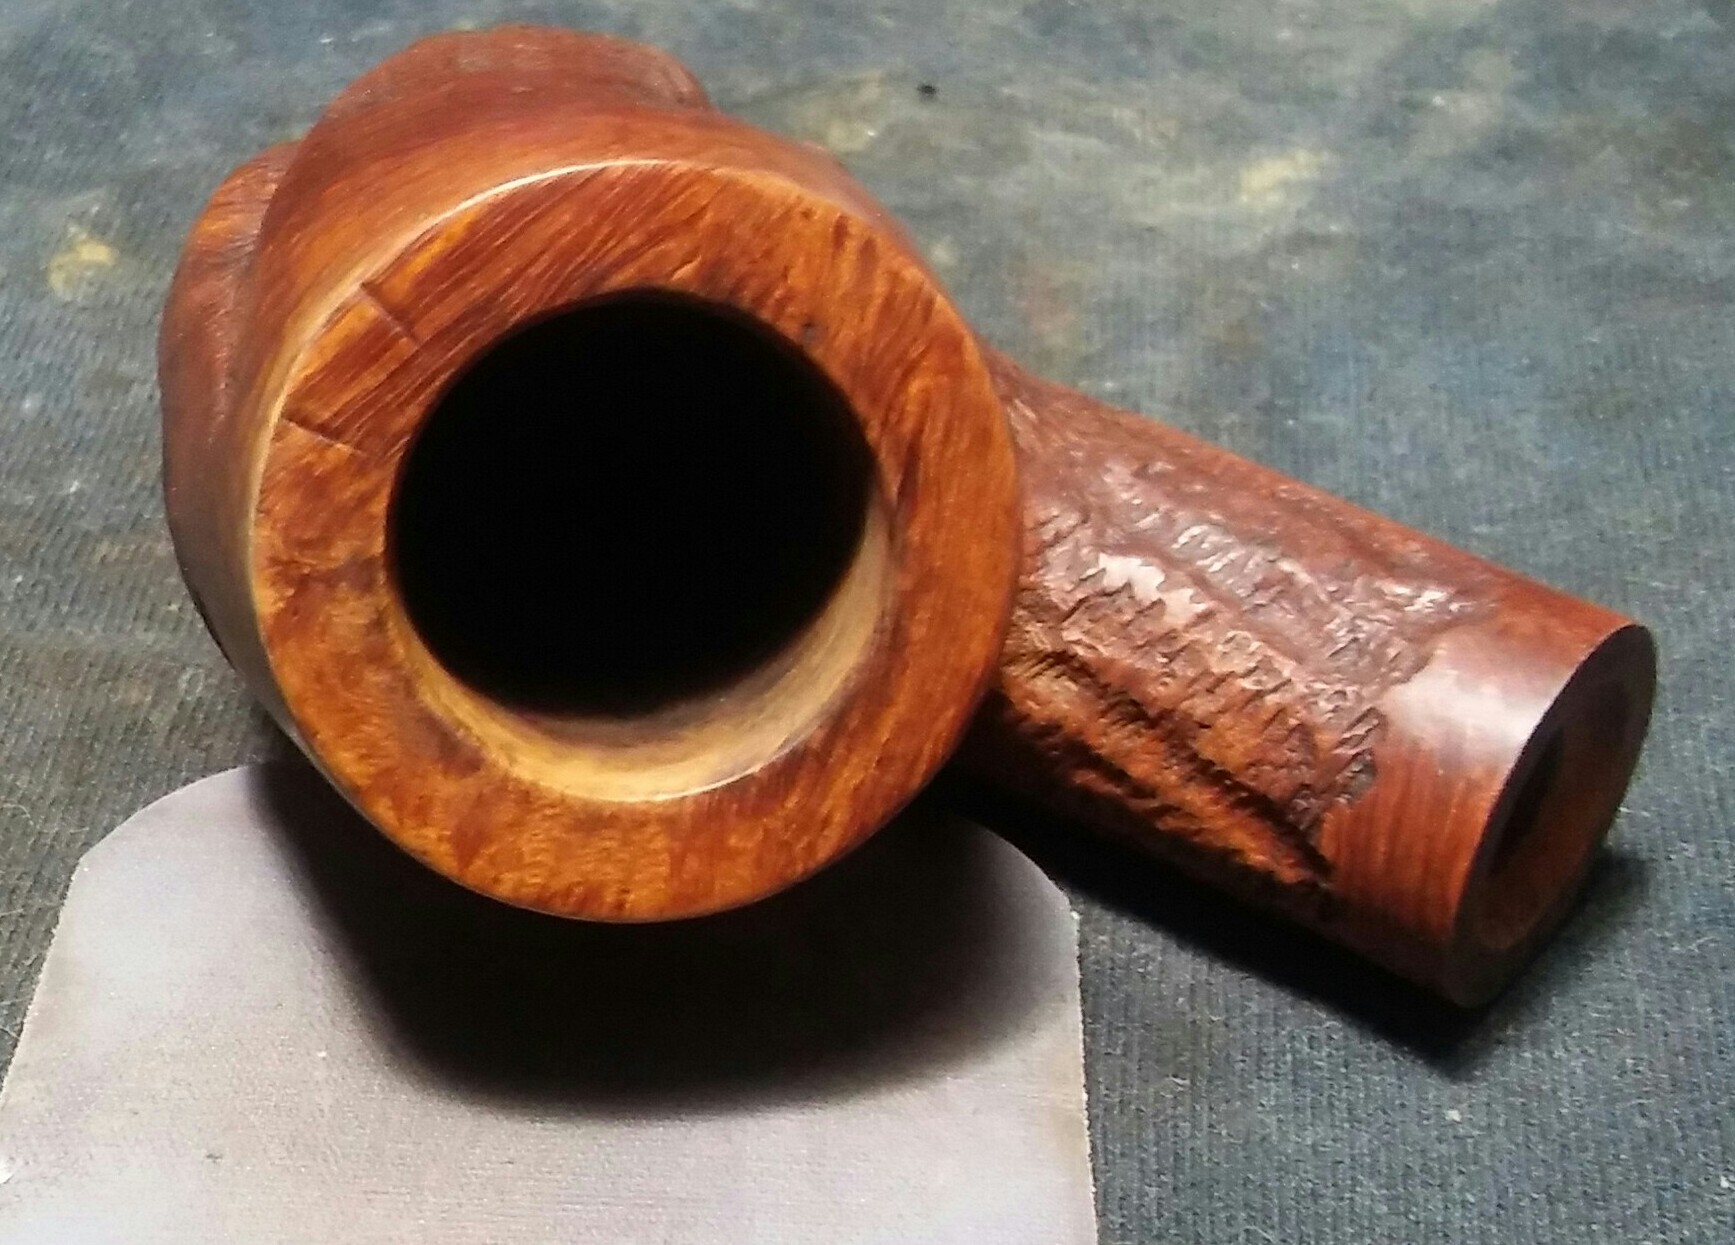
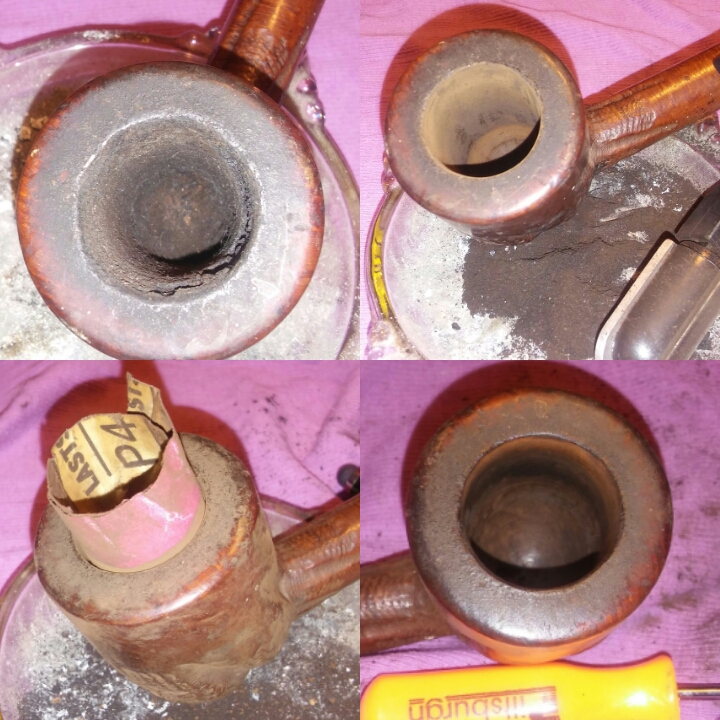
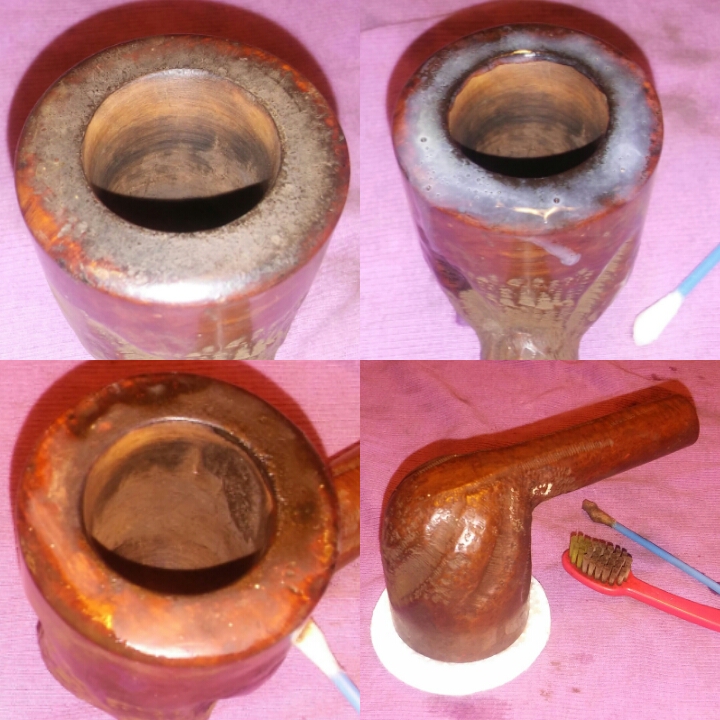
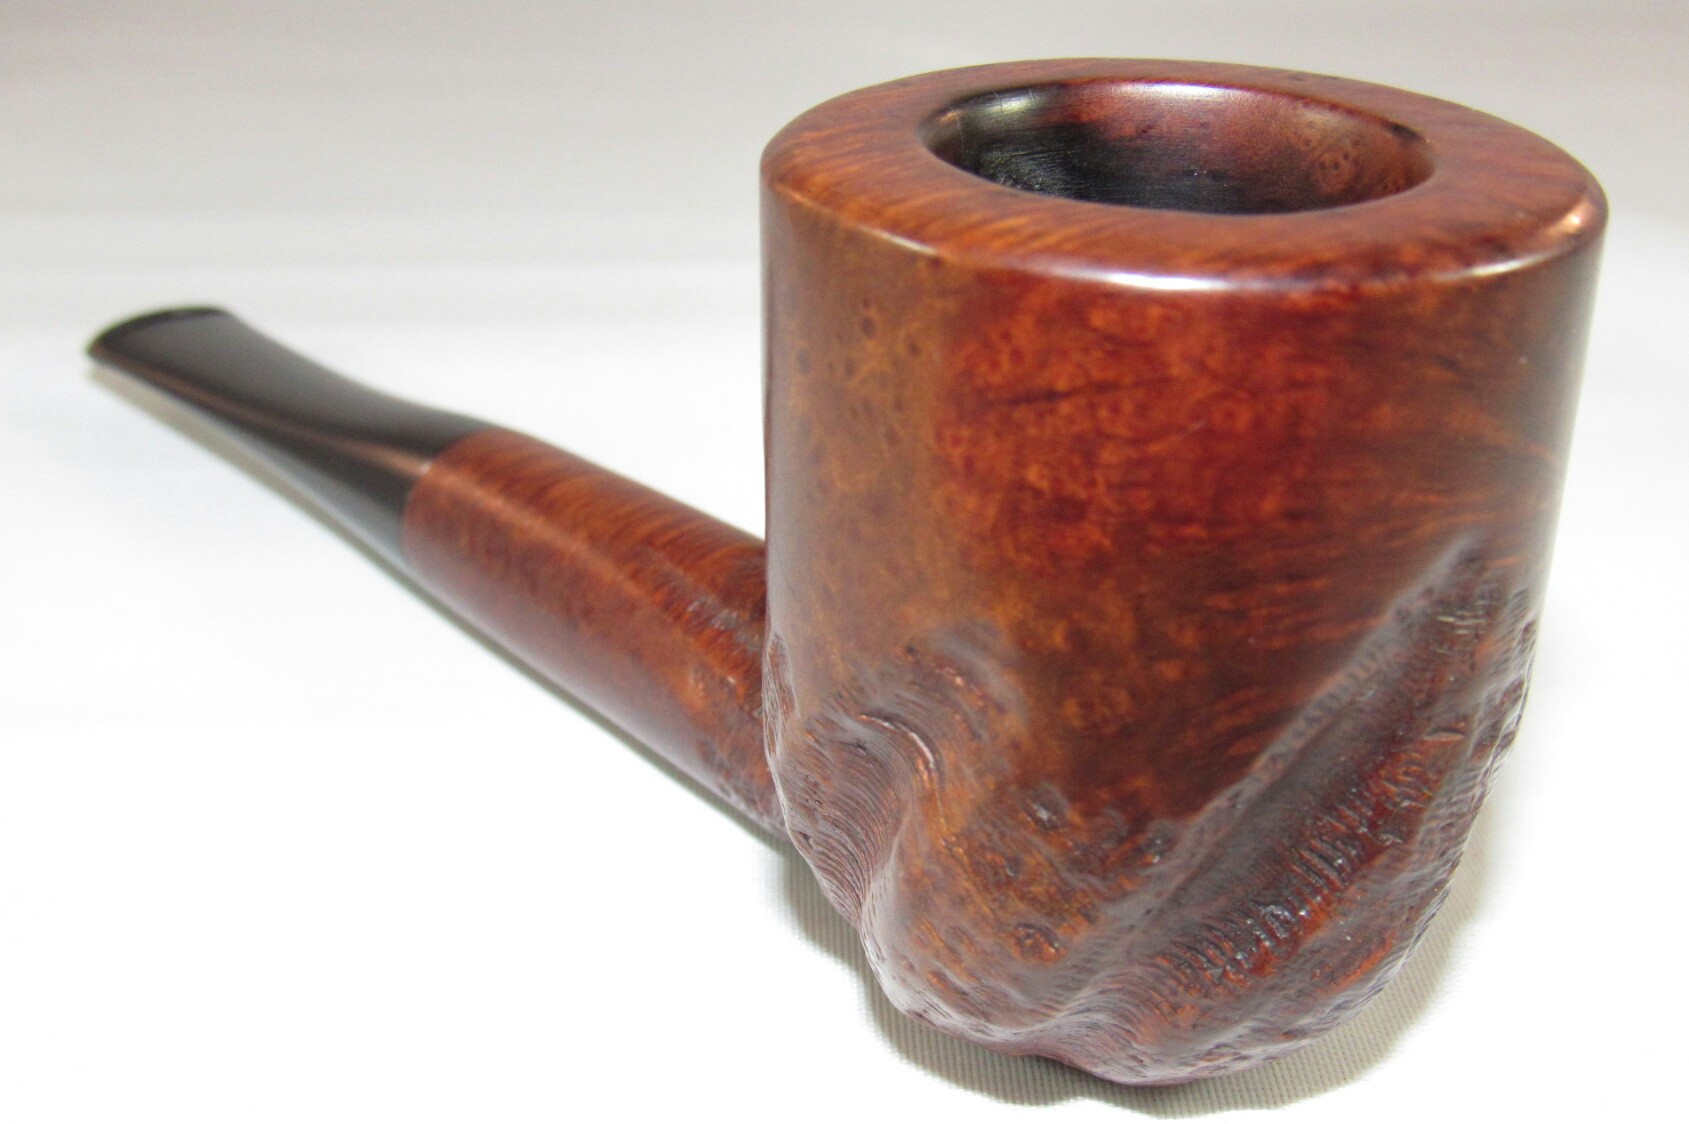
Starting with the stummel  and my PipNet reamer I removed the old cake and took the chamber back to briar. The chamber was in descent shape aside from a small burn/defect at the top of the draught hole, I will address this a little further down.

20160227_000639~2

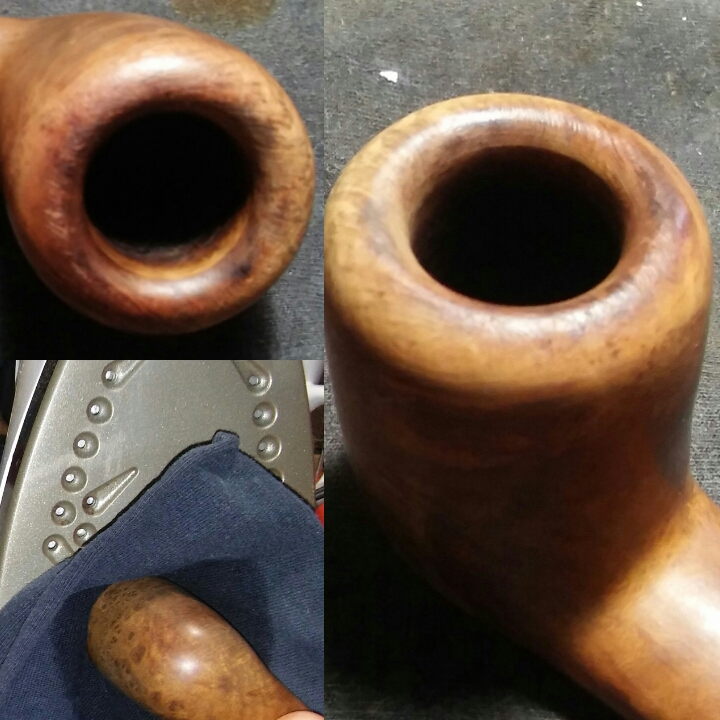
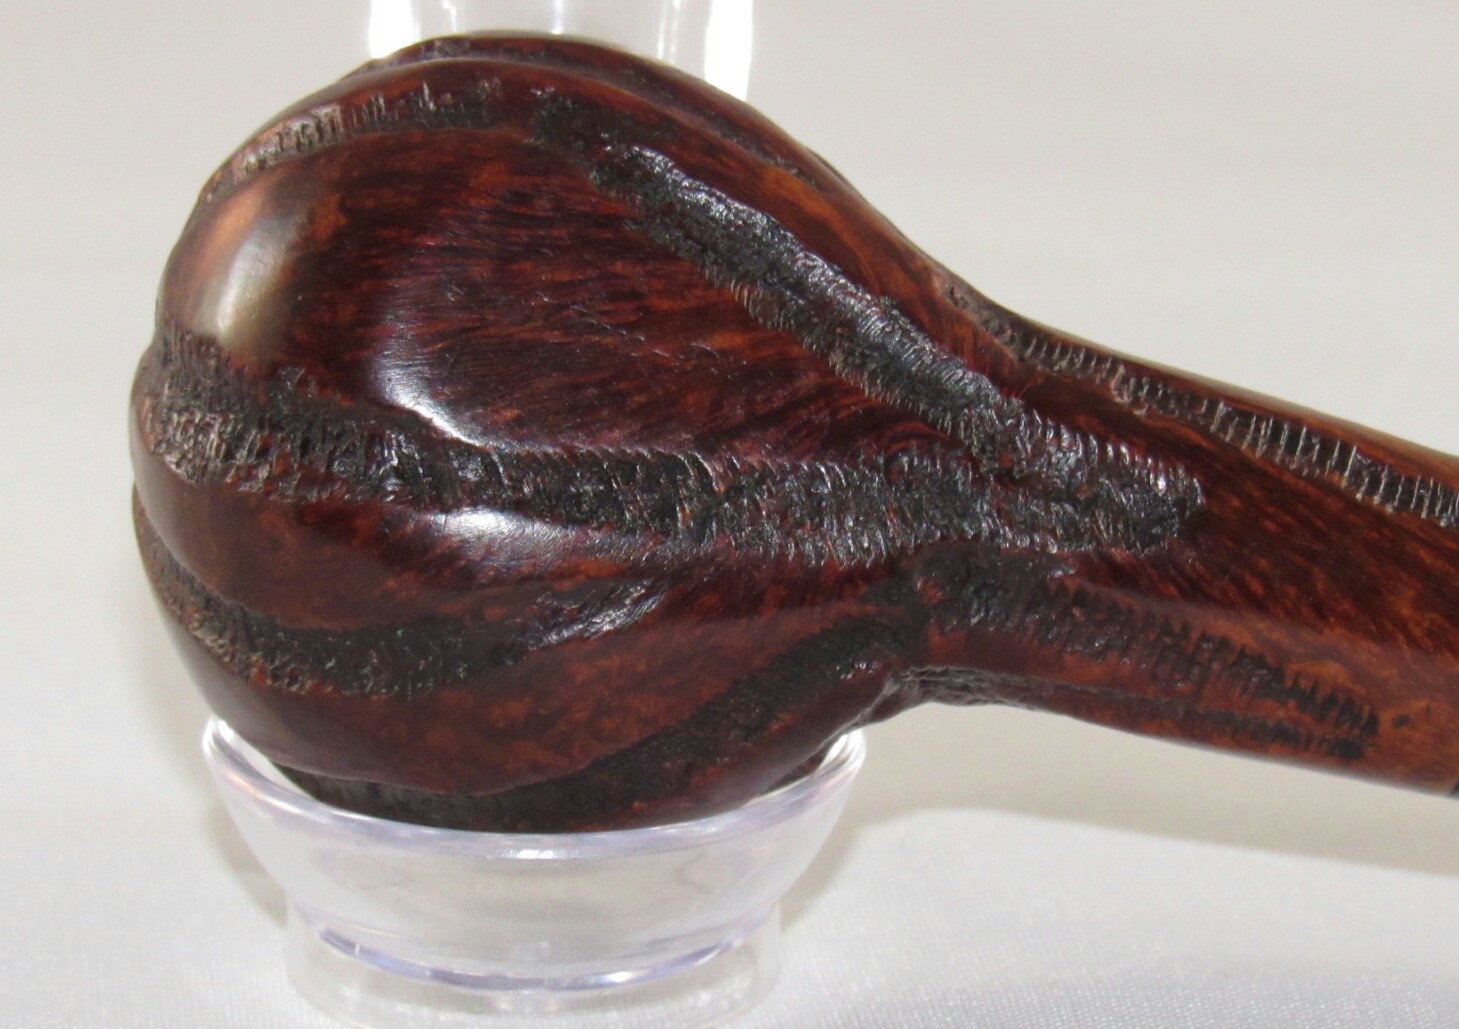
I cleaned up the rim with Method Good For Wood Polish and could now see the damaged rim better. The photo is poor but the top of the chamber/rim was reamed in the past with what I’m guessing  was a pocket knife, the edges of the rim were nicked up and missing small chunks of briar.

PhotoGrid_145818038730820160227_165249~2

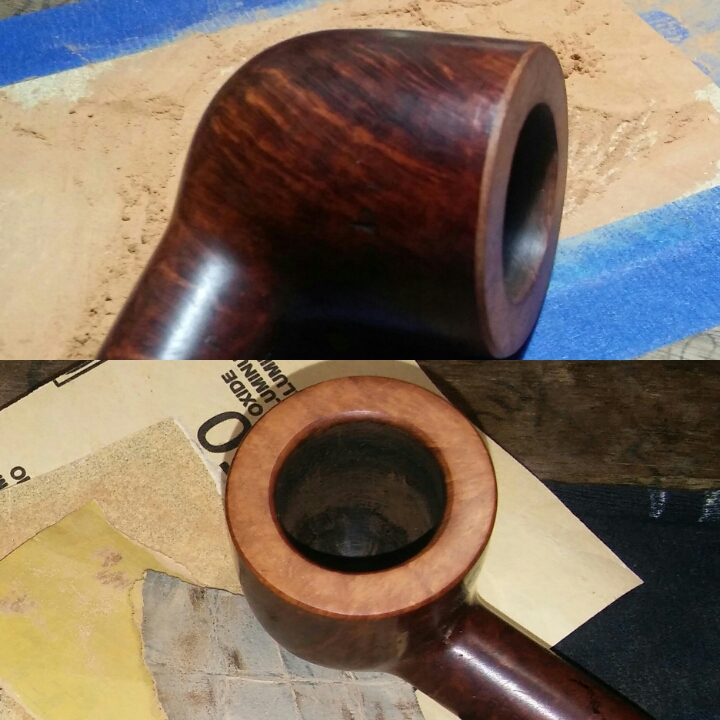
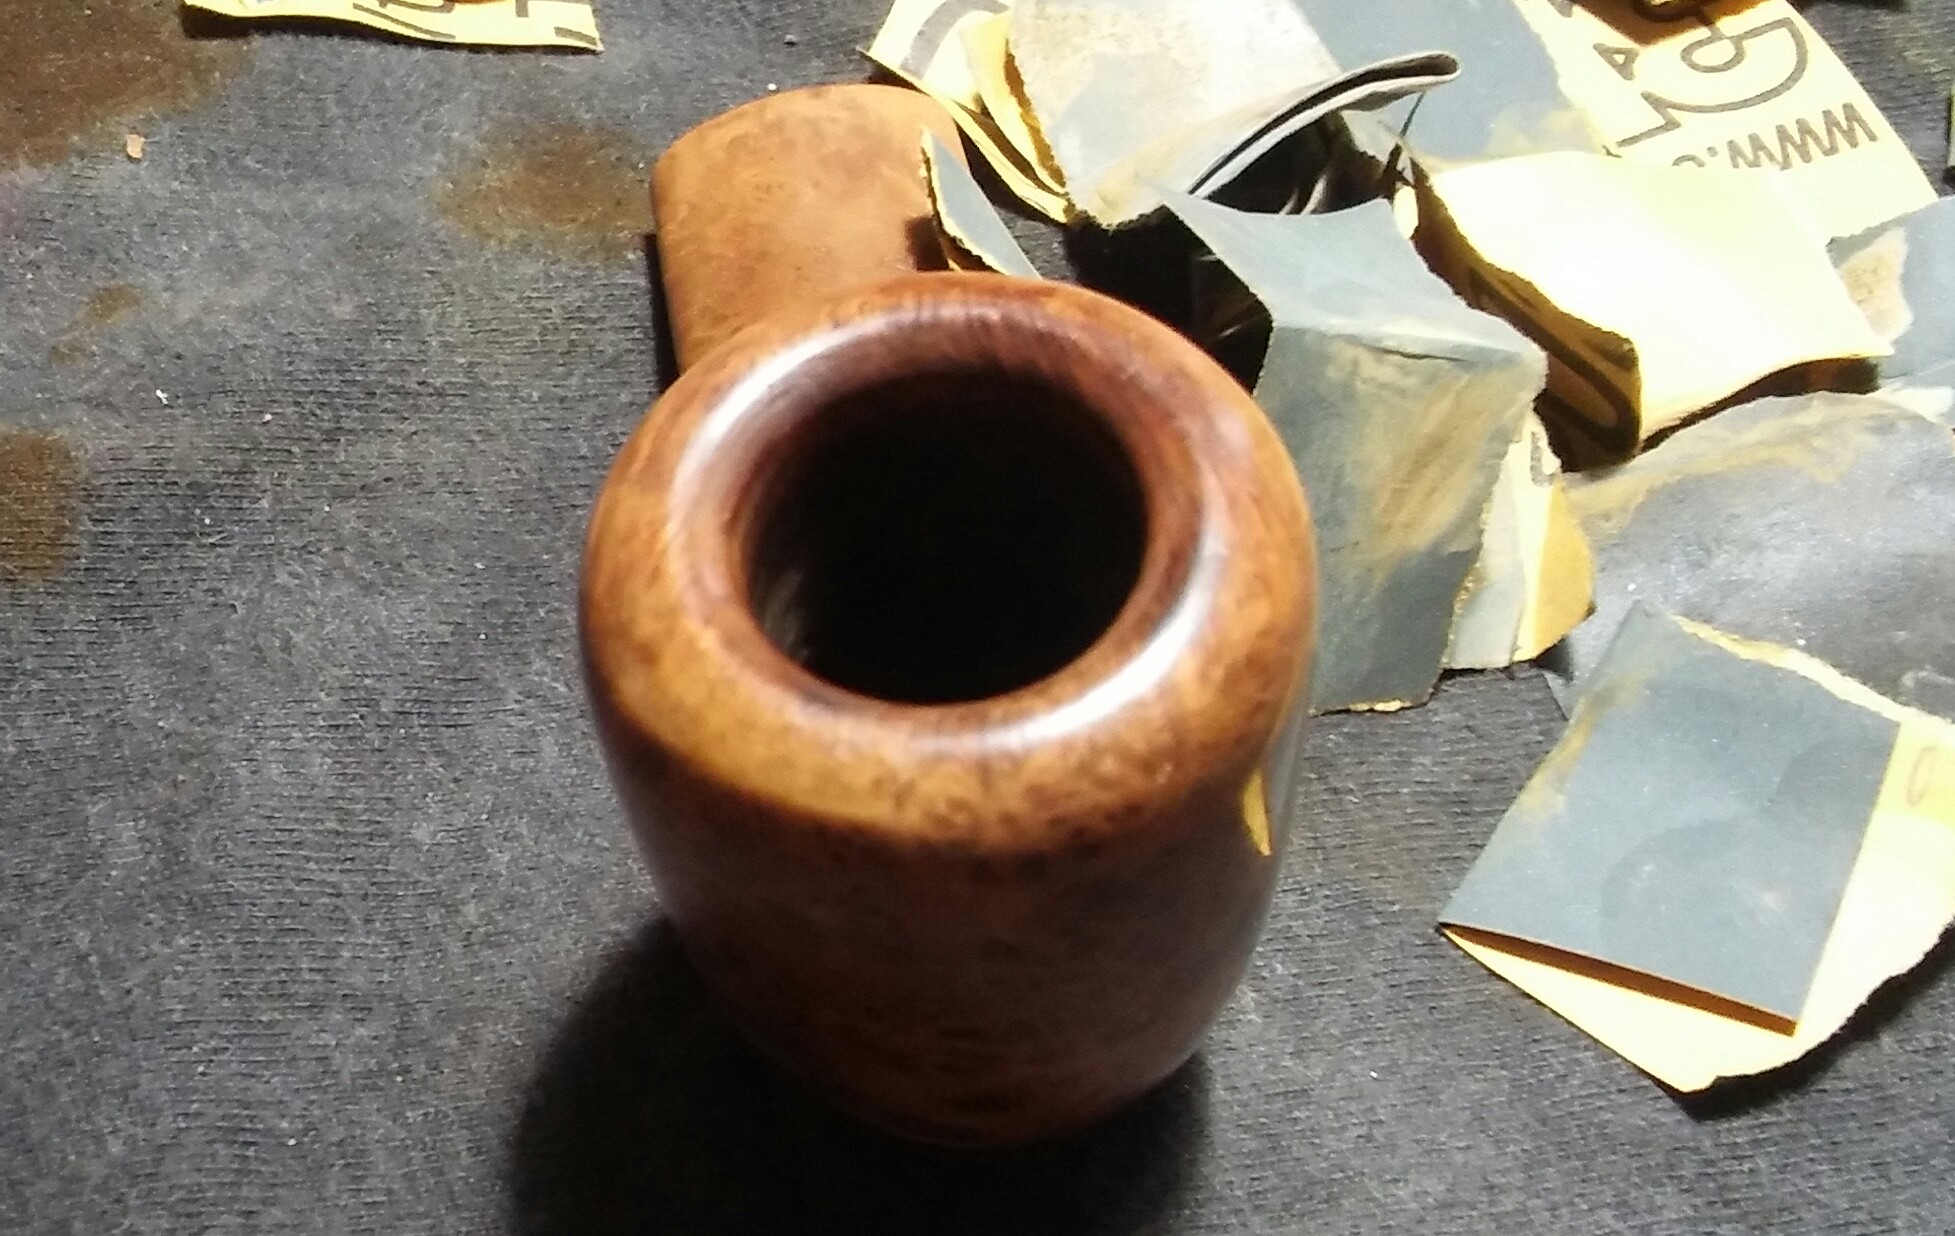
Using needle files and sand paper I began to reshape the rim. First by topping the rim, I taped down 400 grit sand paper and topped the bowl. Next using needle files I reshaped the inner rim removing the file marks with 400 grit sandpaper. I finished the rim with 800 & 1000 grit sandpaper.

PhotoGrid_1458180304487

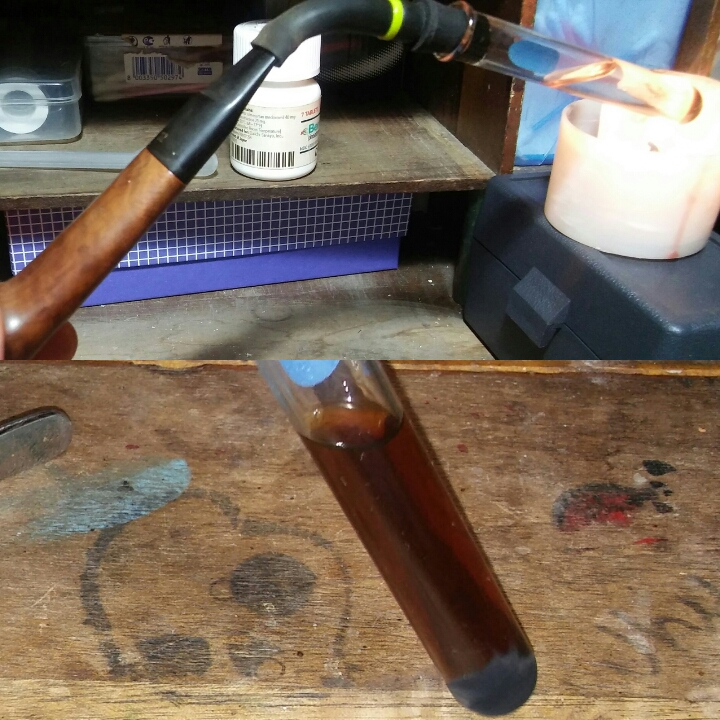
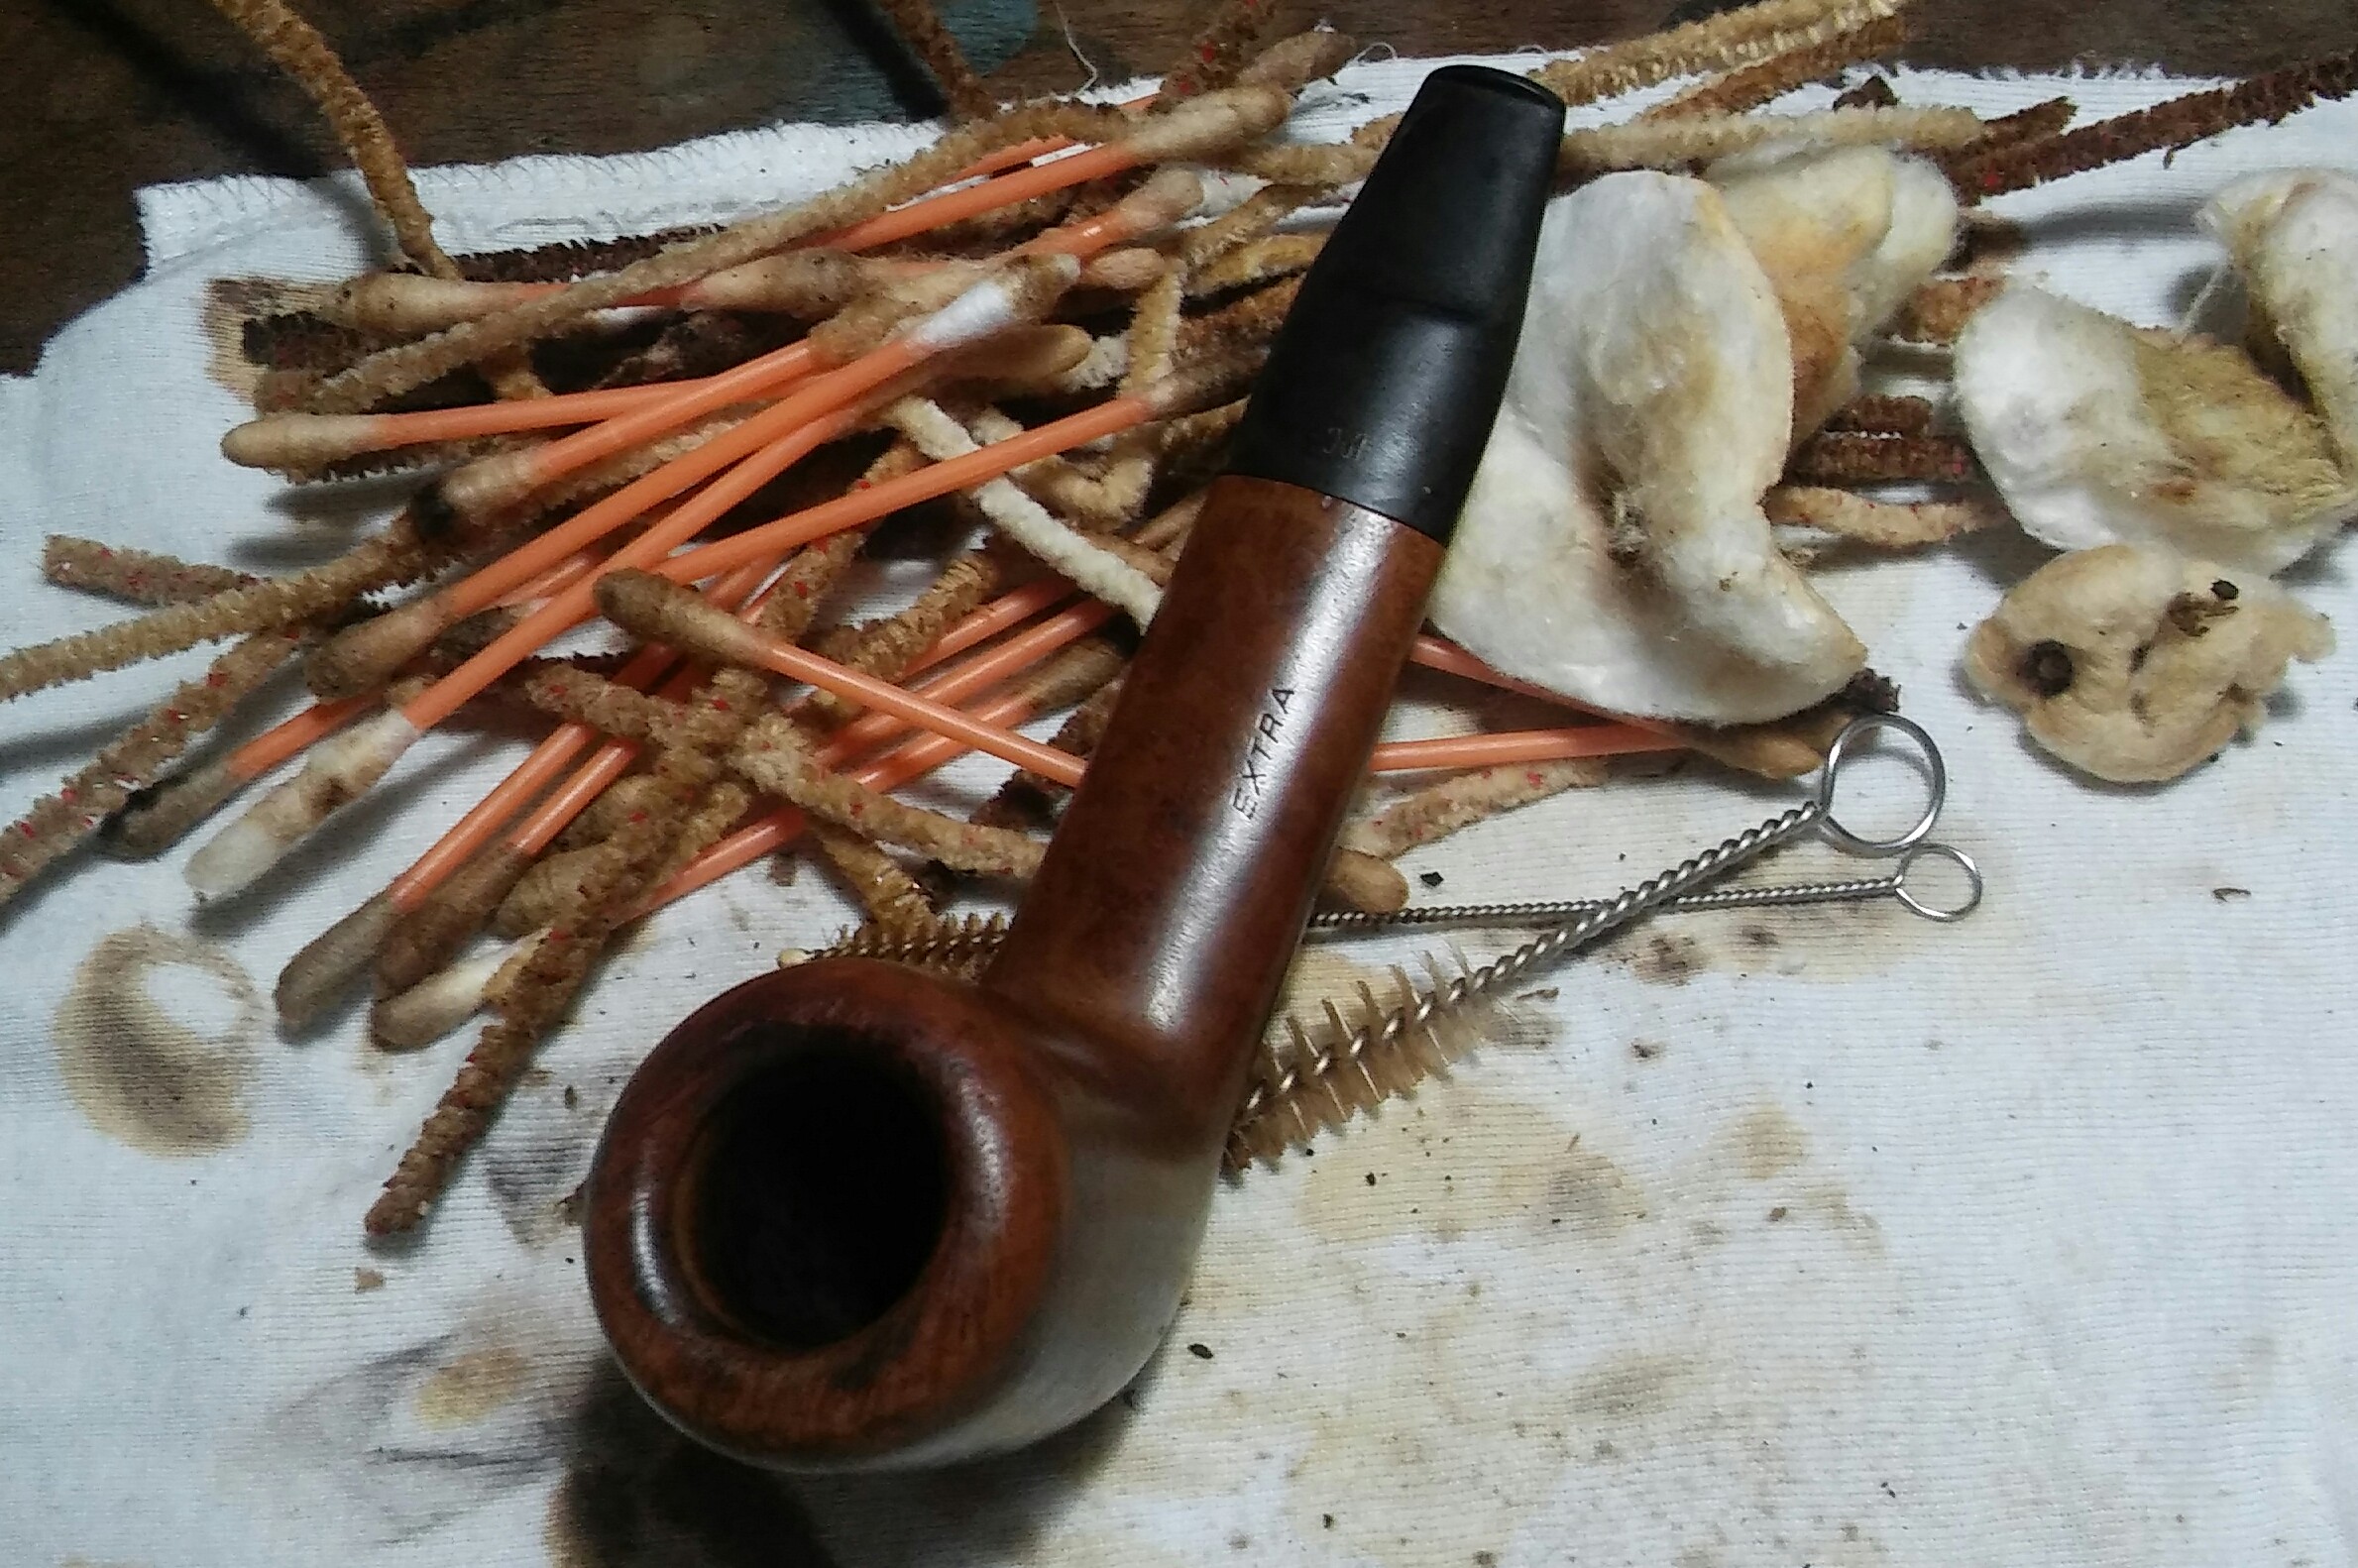
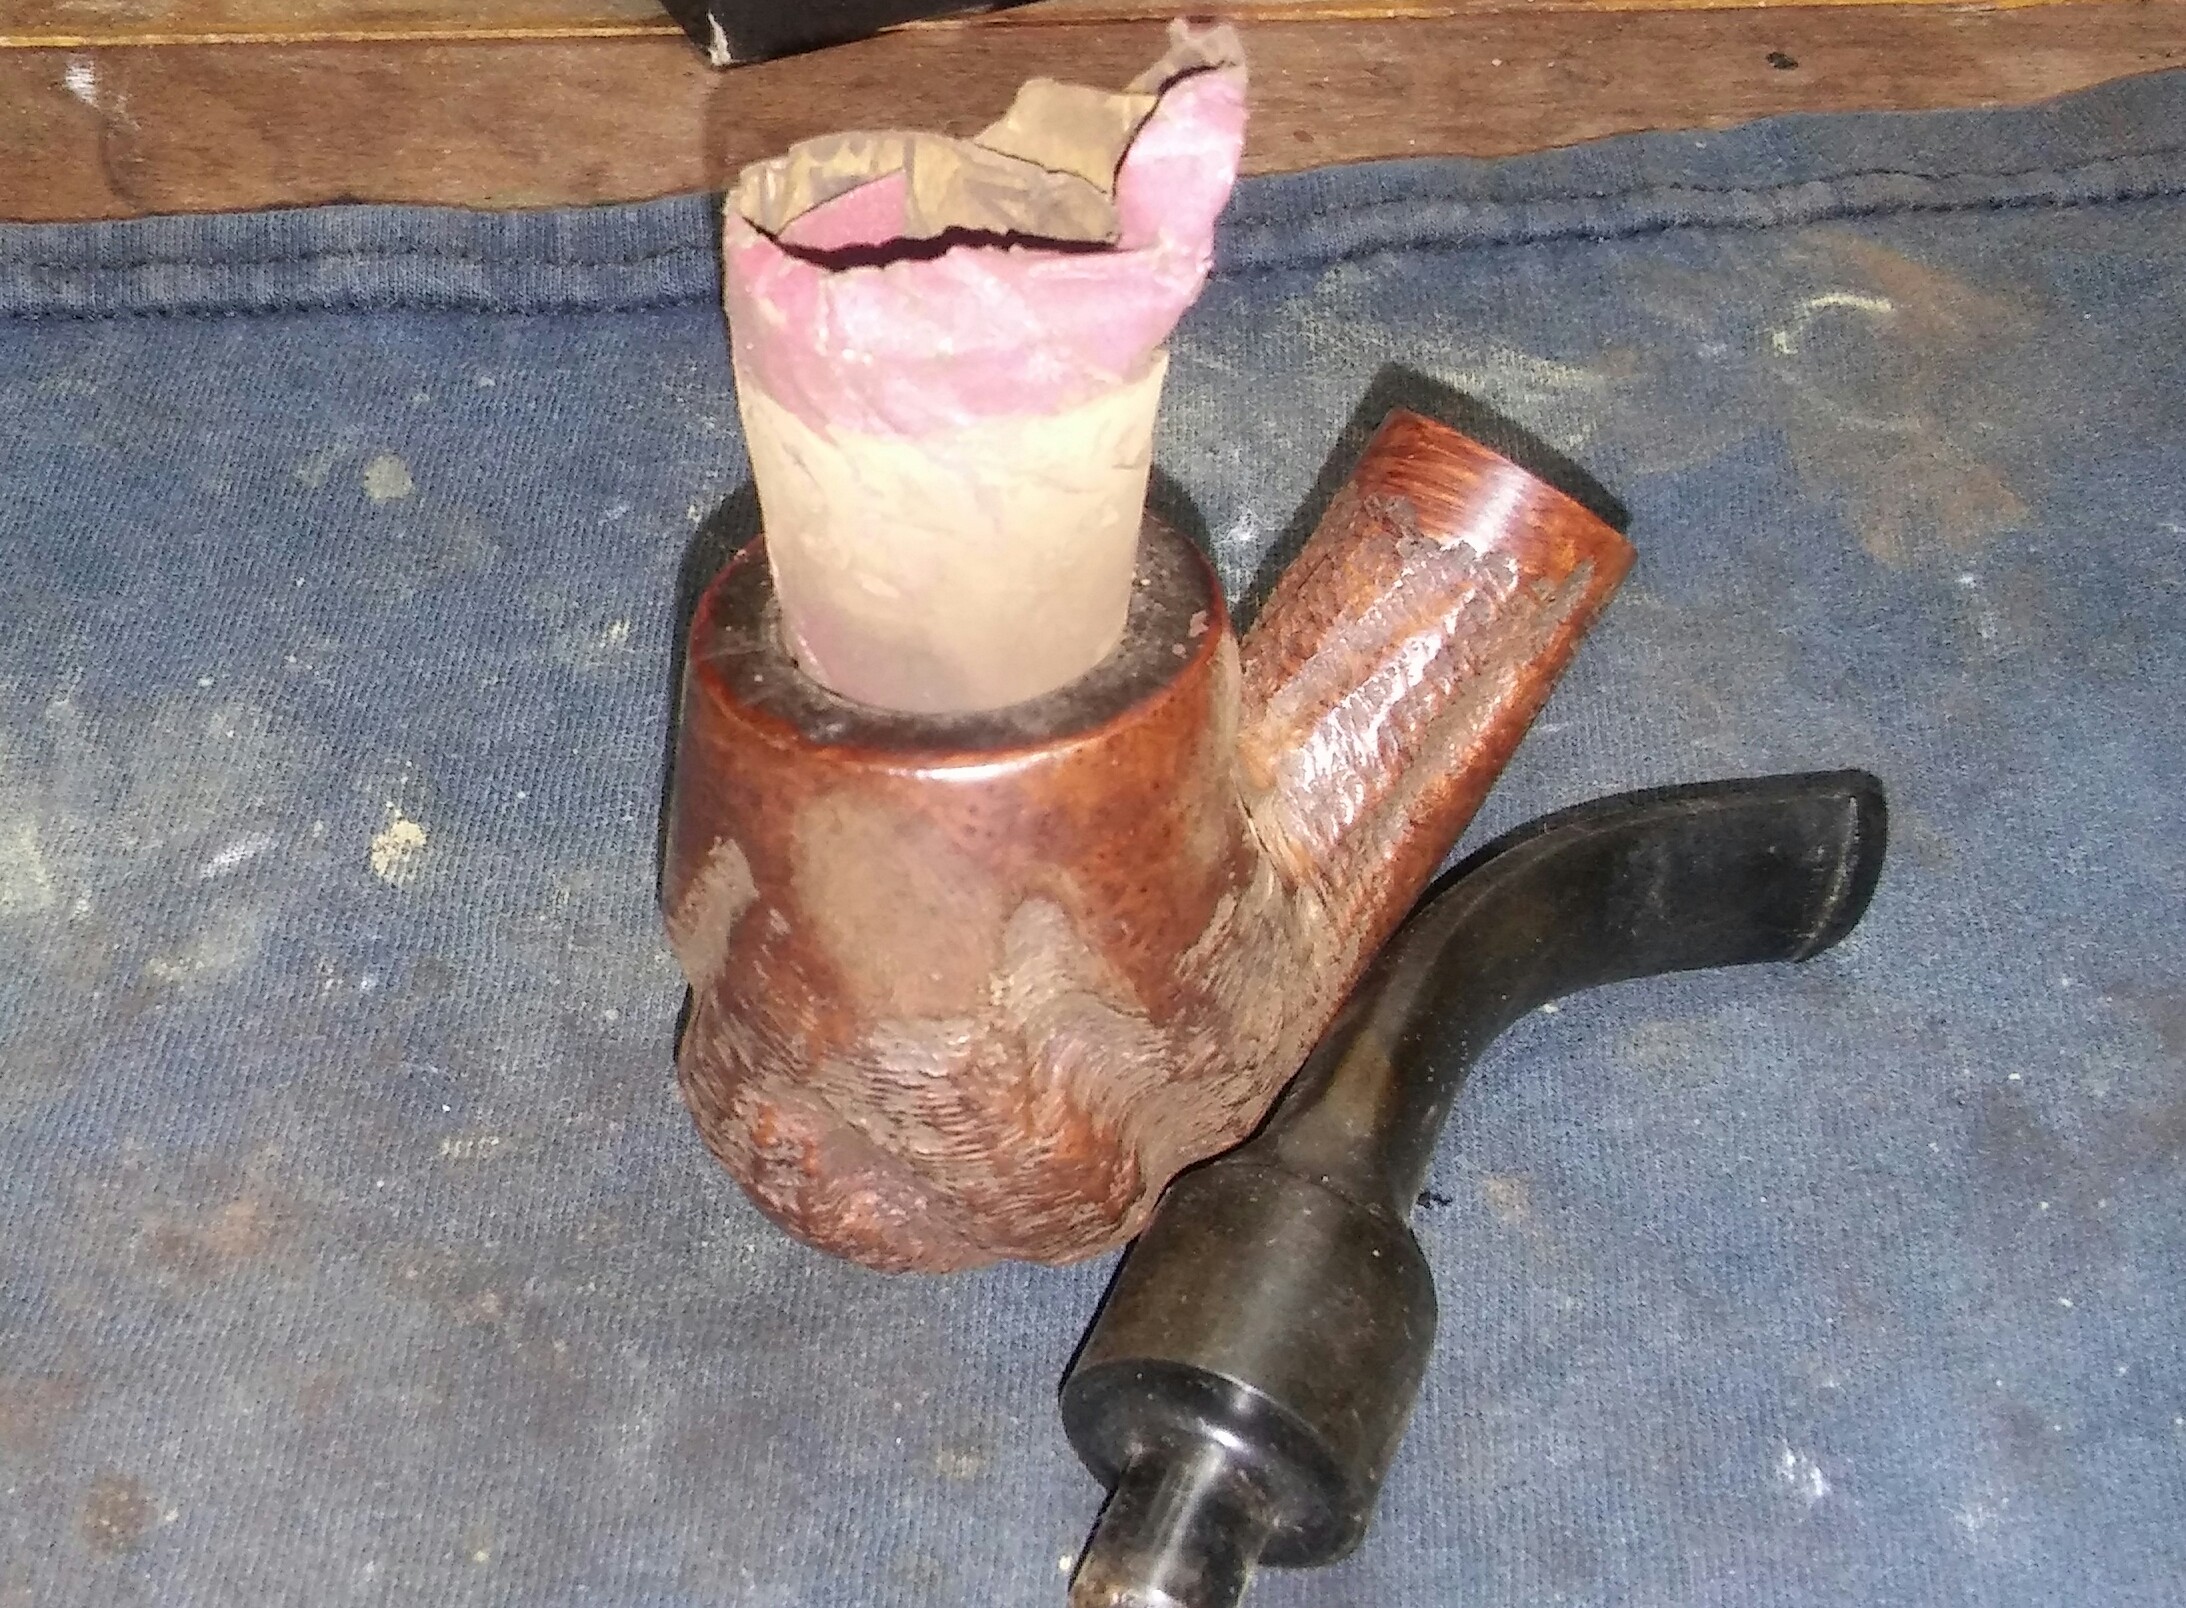
Using EverClear I ran a retort to loosen up the old tars, oils and tobacco.

PhotoGrid_1458180538186

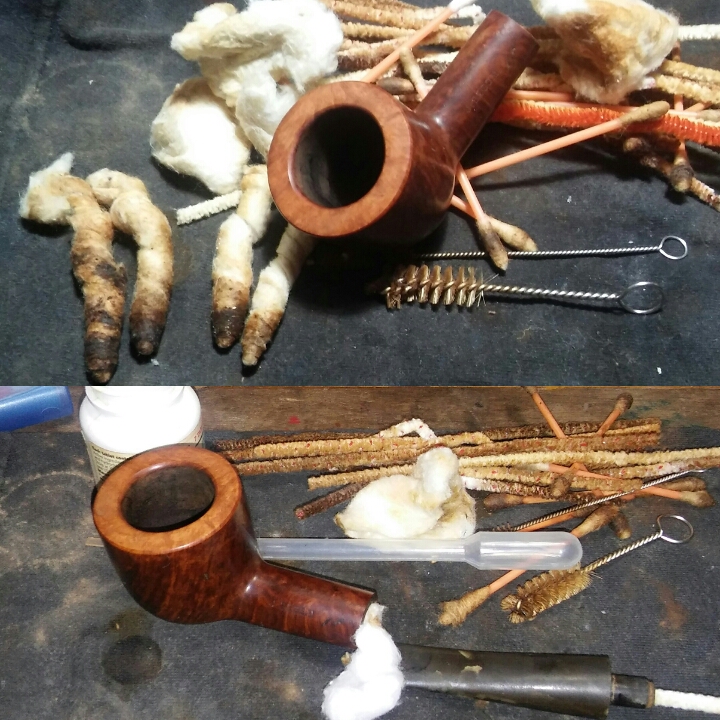
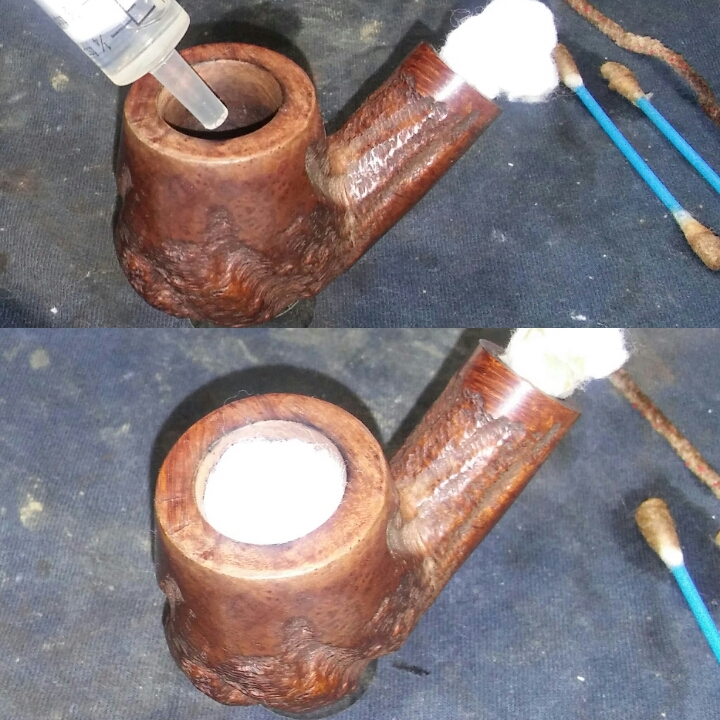
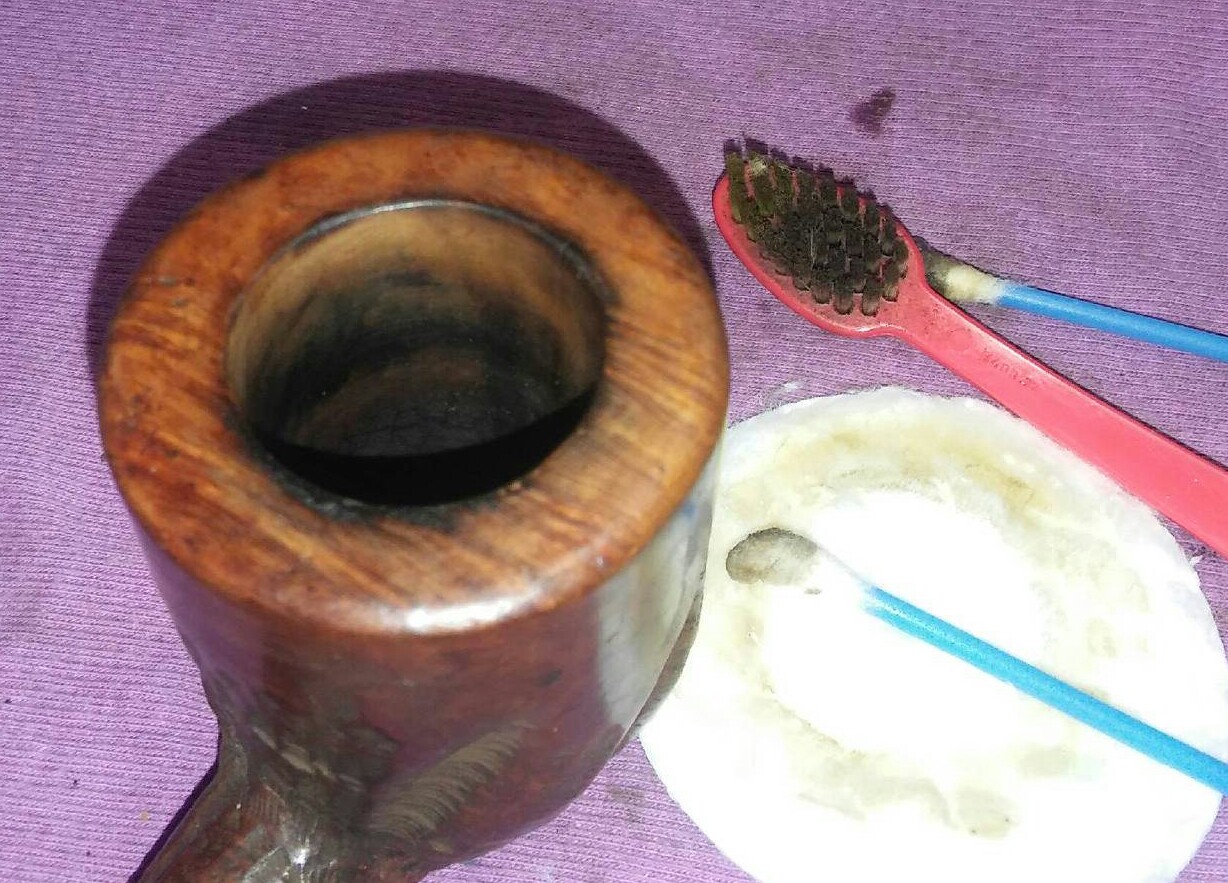
I now gave the stummel and stem internals a good cleaning, using EverClear, shank brushes, mortise brush, Q-Tips, cotton-balls and stiff/soft pipe cleaners. I unrolled cotton-balls, twist them into a swab and turn them tightly into the mortise. I then add EverClear to the chamber and allow the swab to soak up the alcohol, I would repeat this process a few time until the swab comes out clean. I cleaned the stem and draught with stiff/soft pipe cleaners working until my final pipe cleaner comes out as it when in.

20160227_231329~2

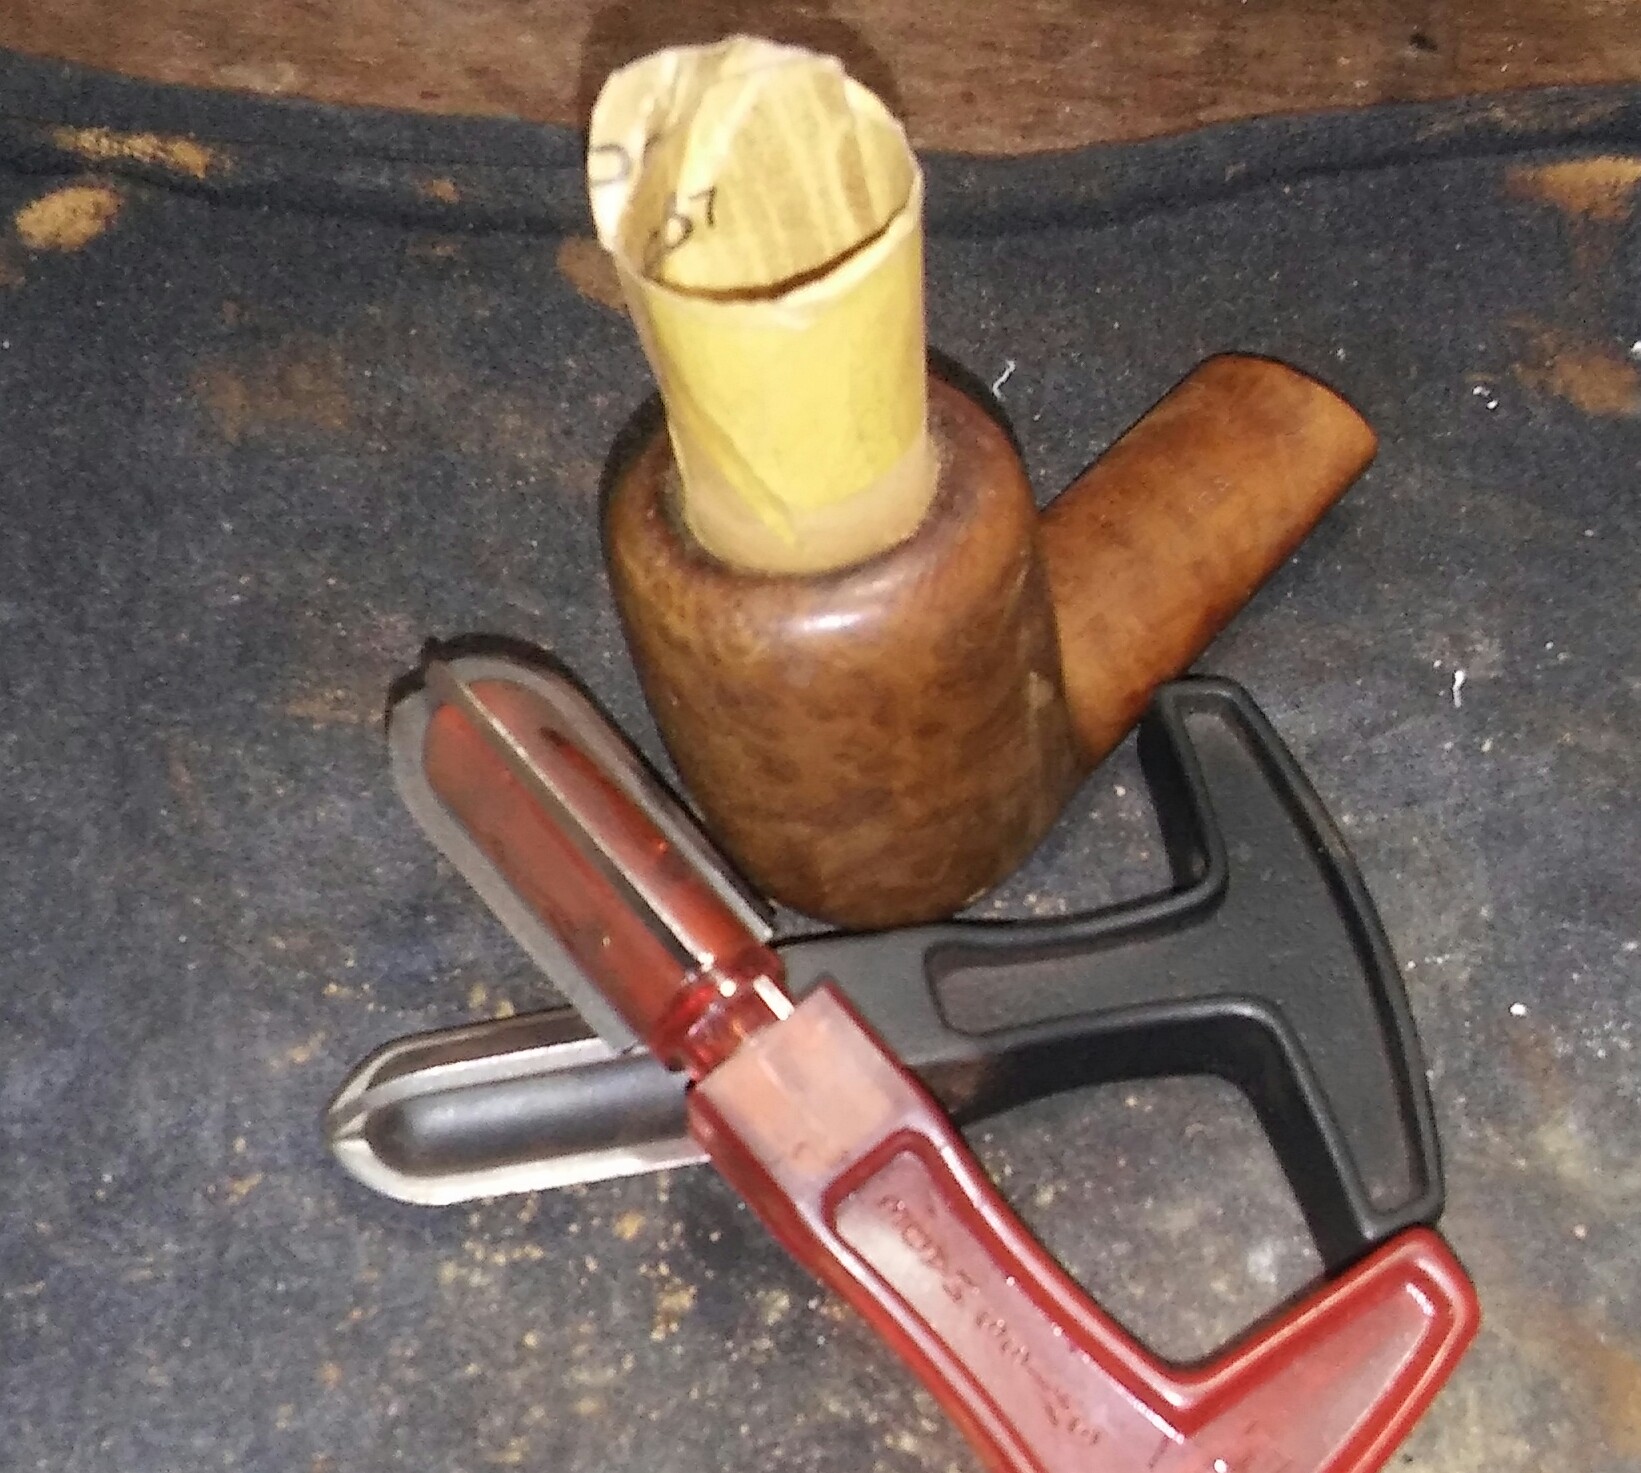
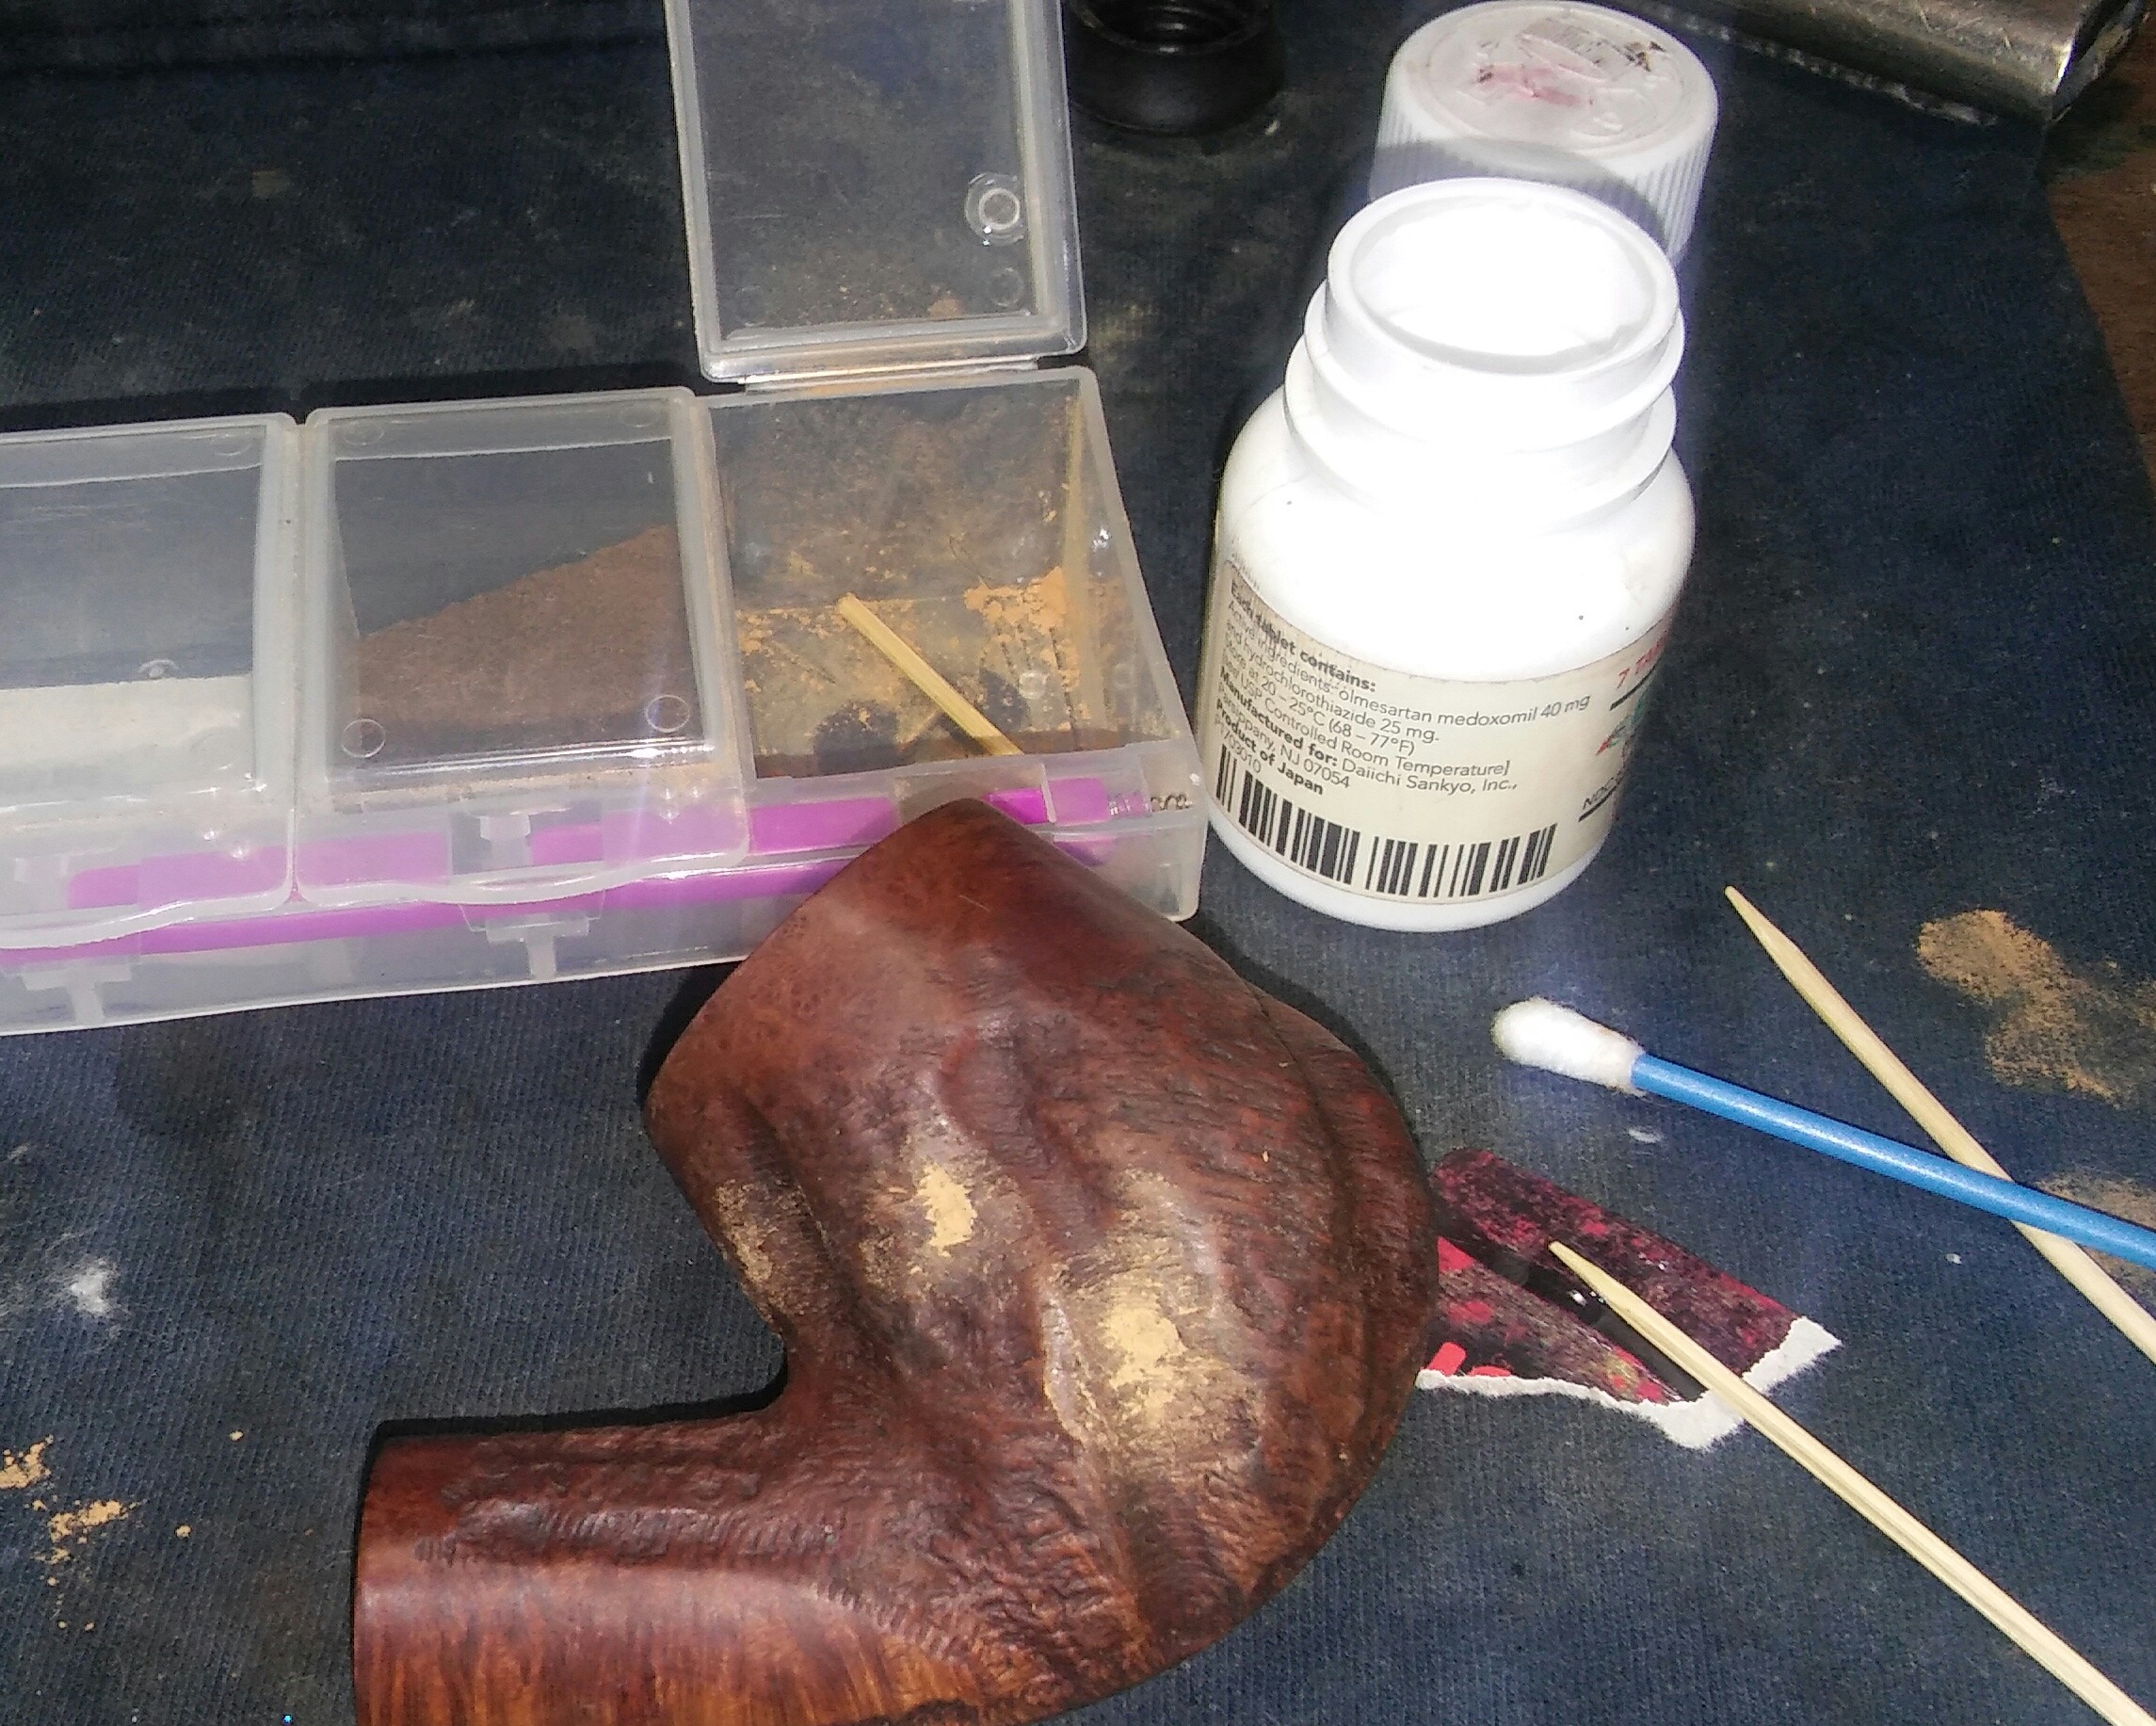
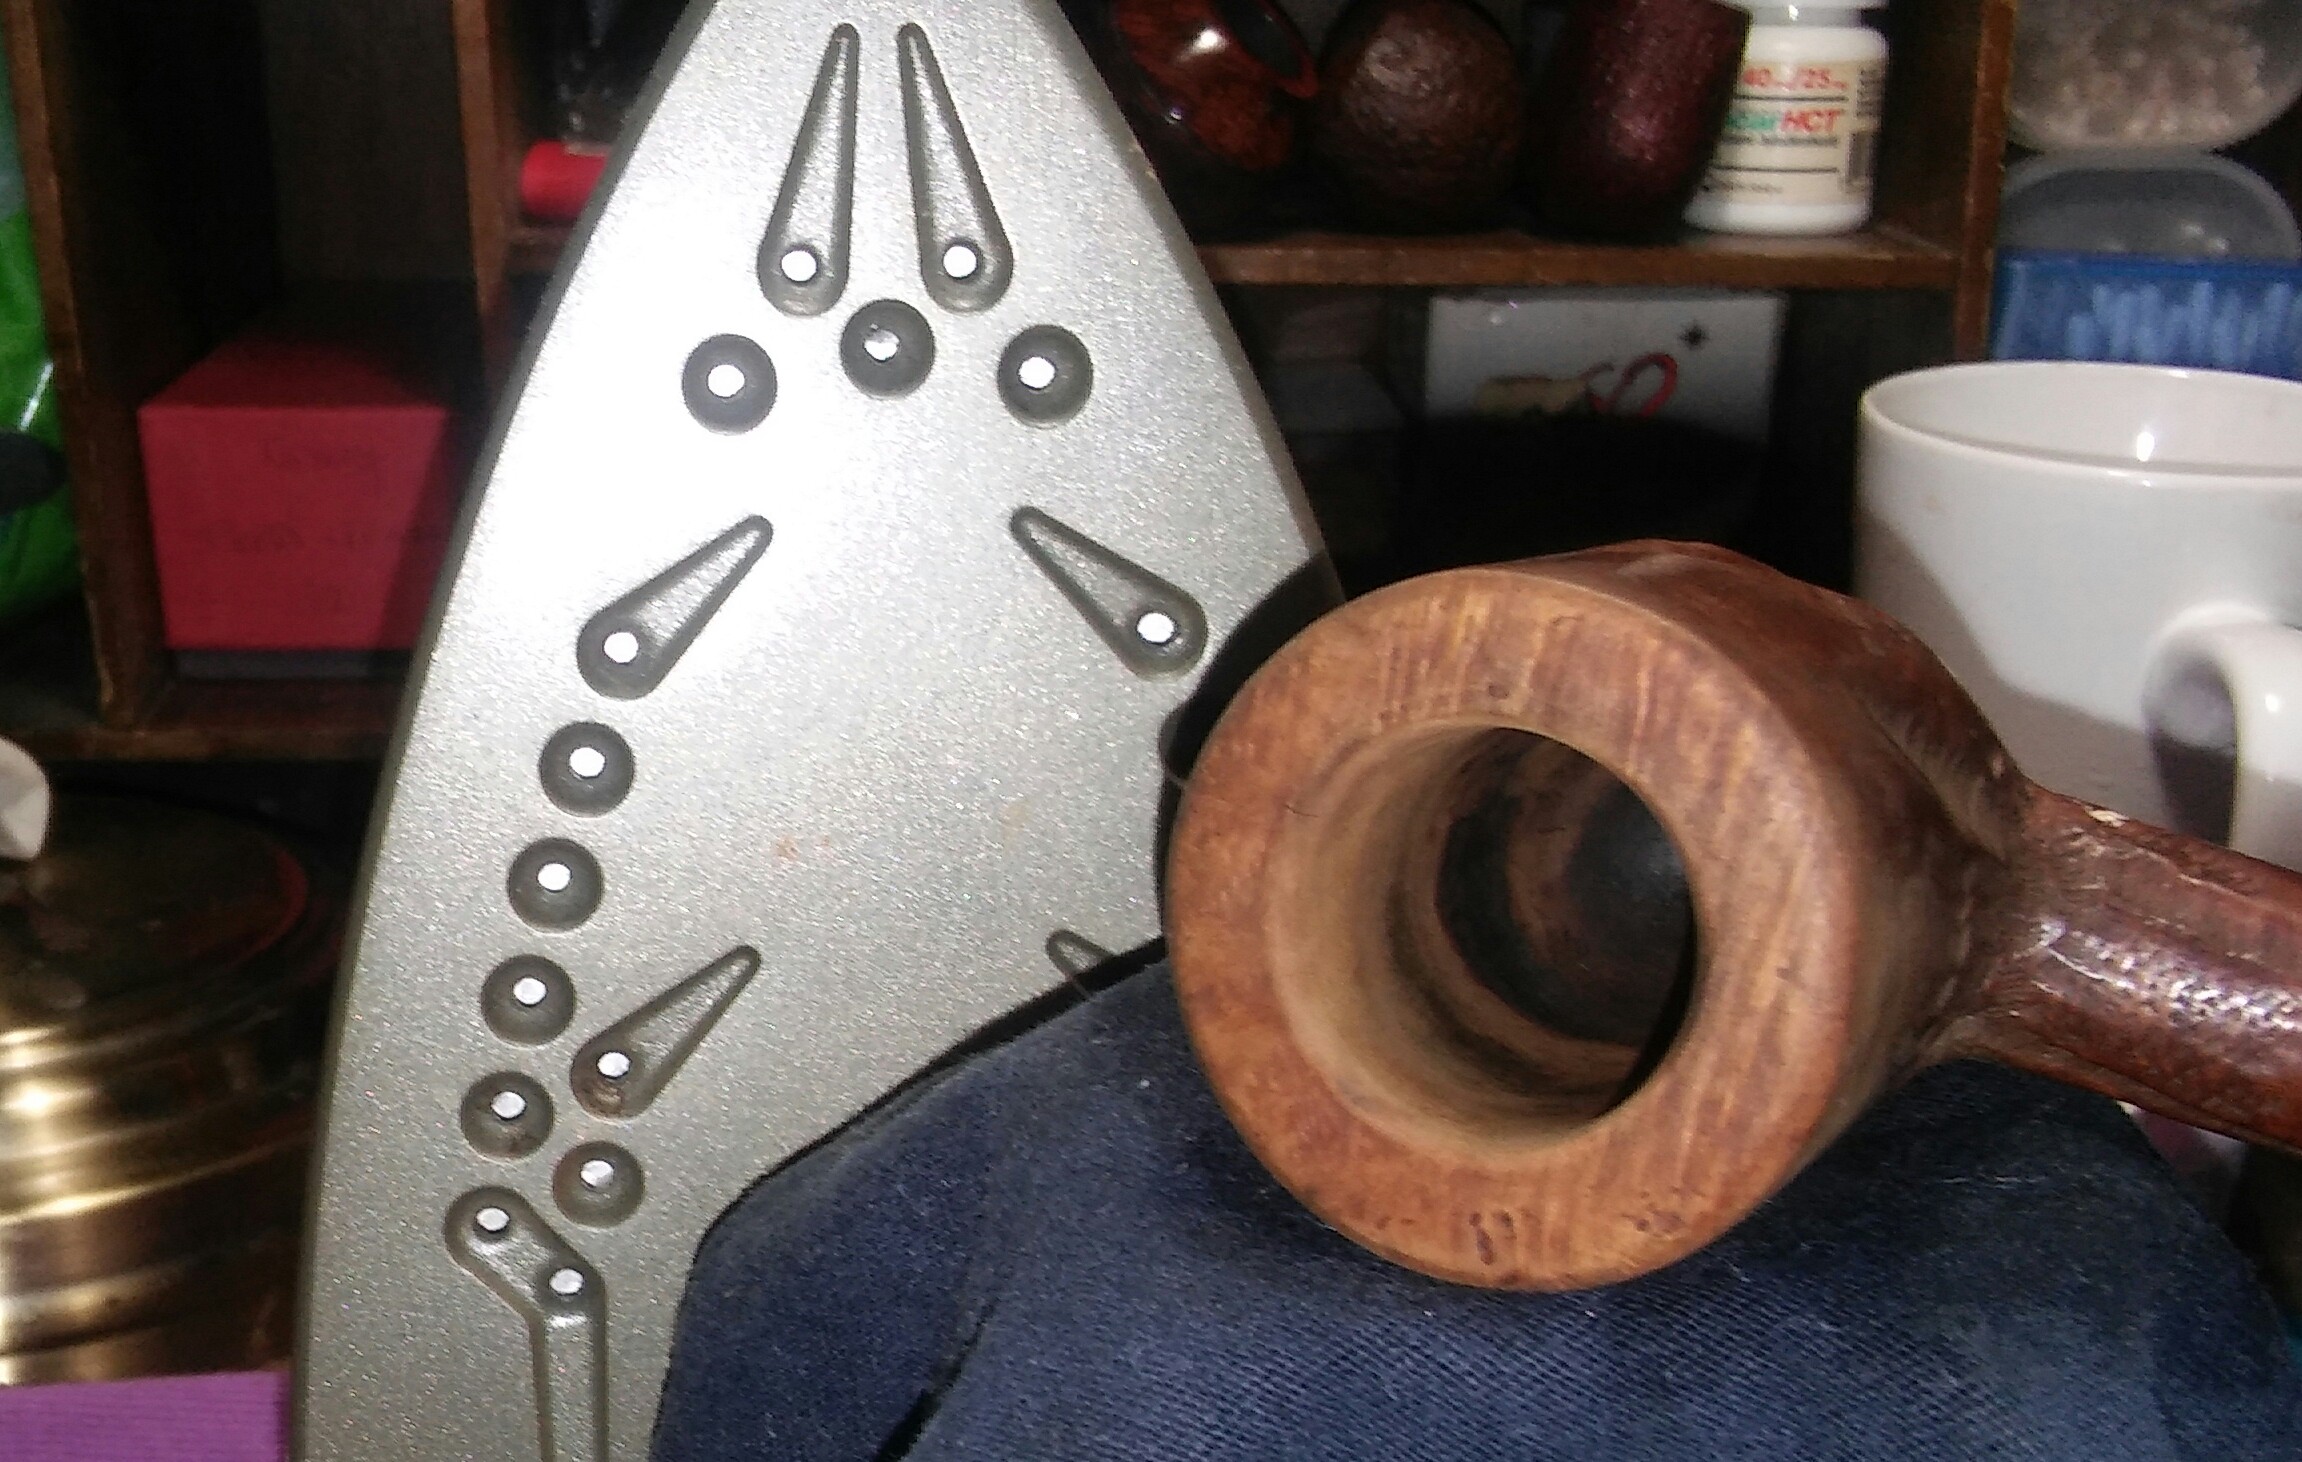
There were a few dents on the stummel, using a household iron set to medium heat and a damp rag I would steam out the dents. By dampening the rag and covering the dents to be steamed out and placing the stummel to the heated iron, I would repeat this process a few times until I was satisfied all imperfections had risen .

PhotoGrid_1458180802933

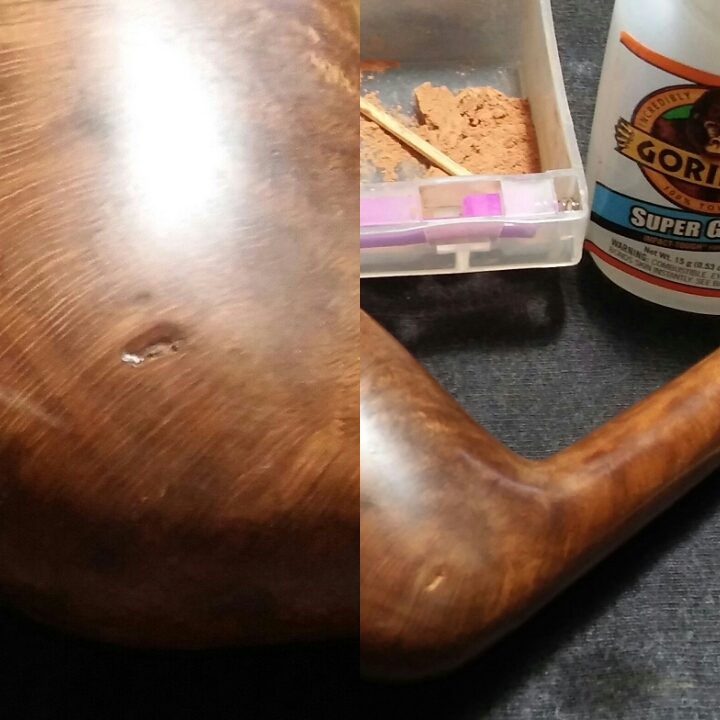
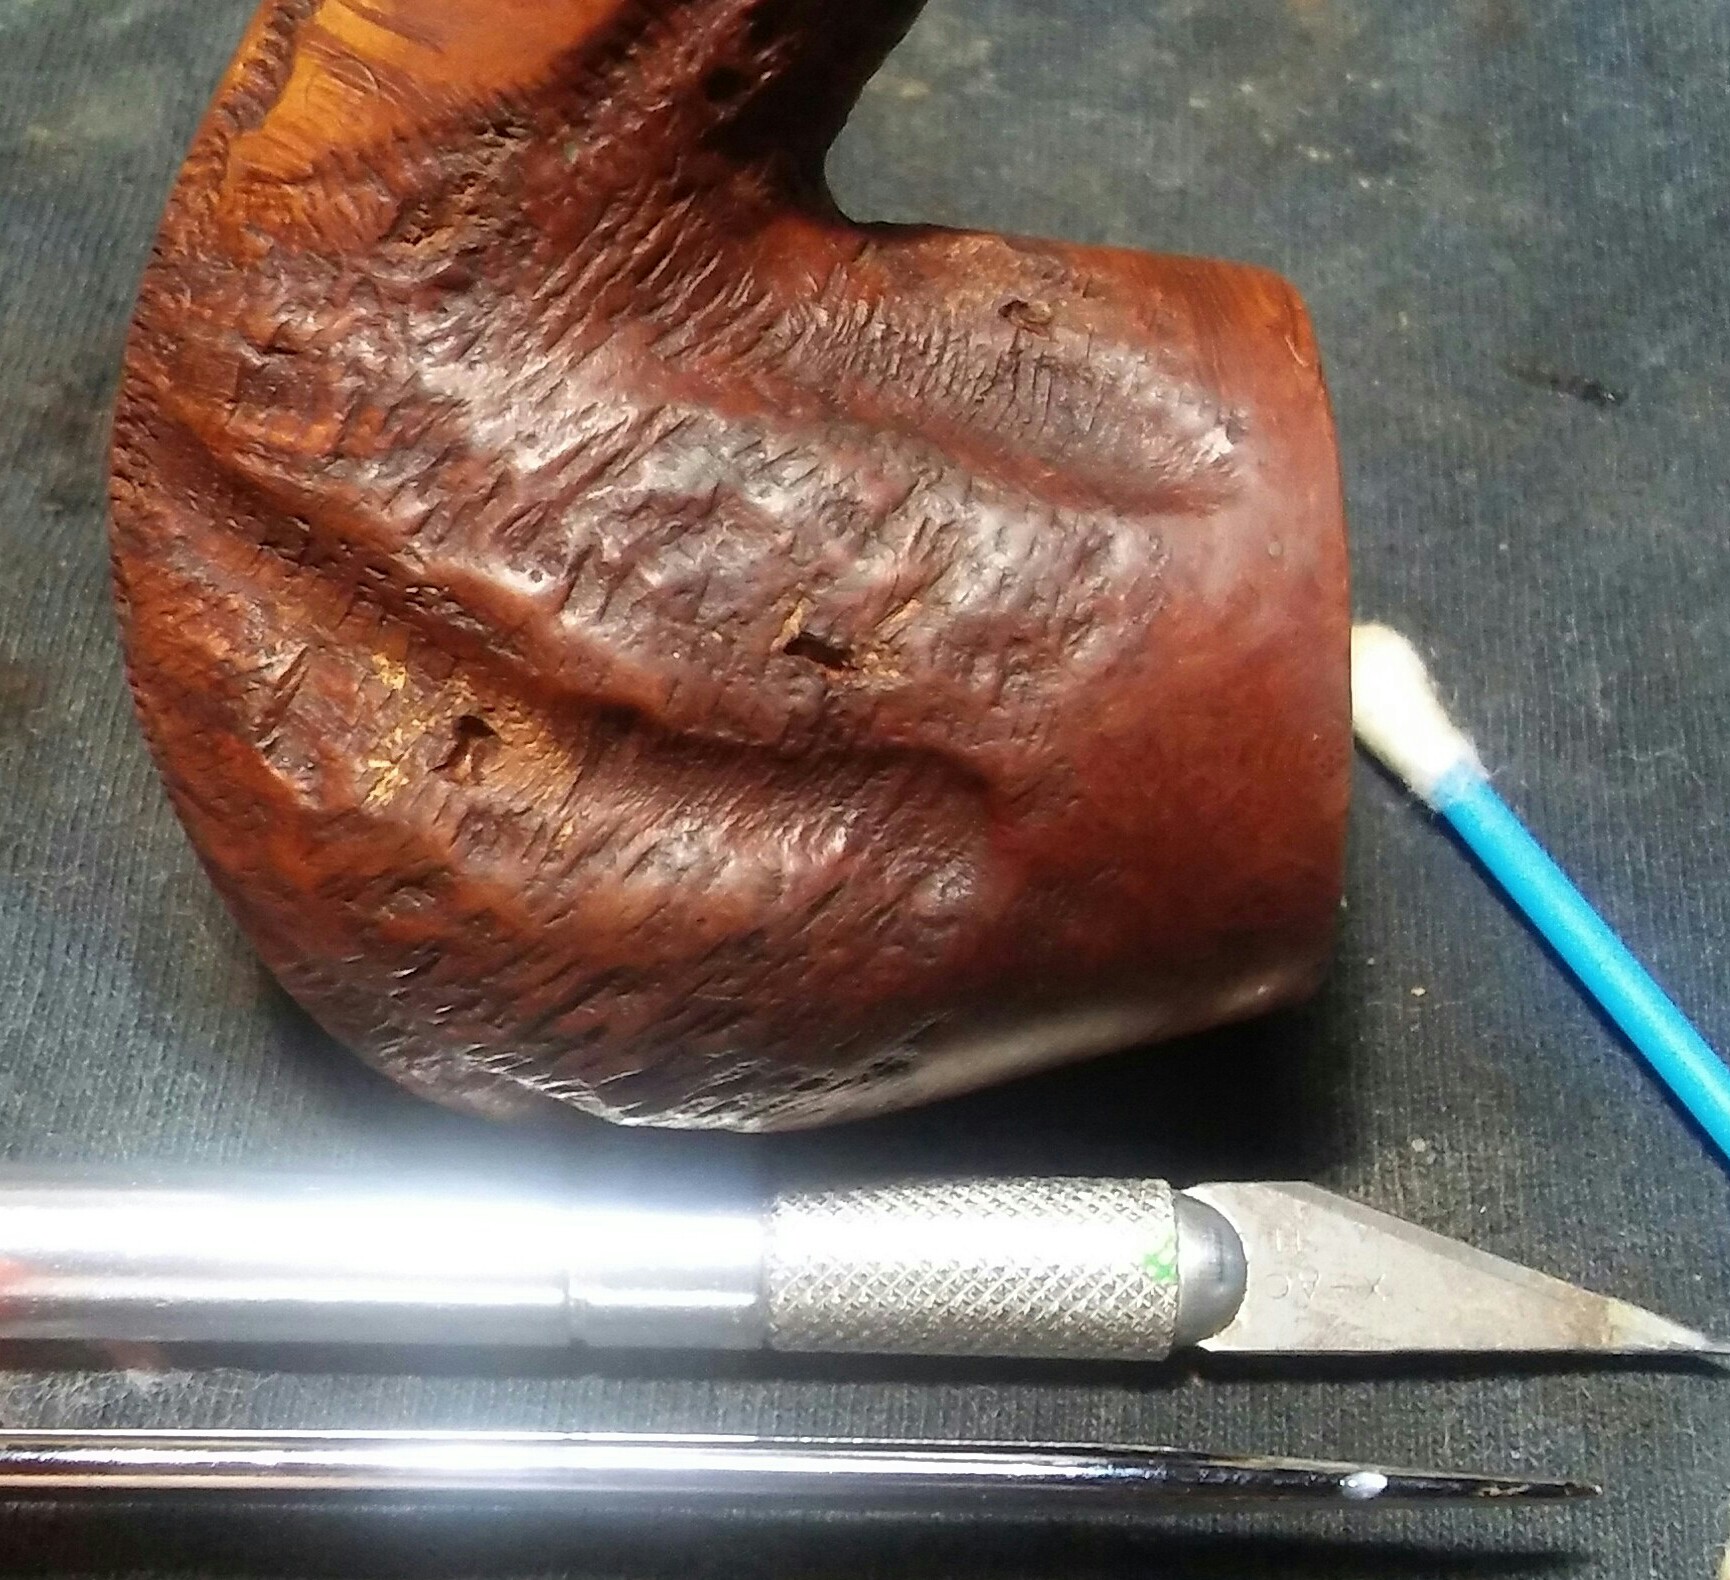
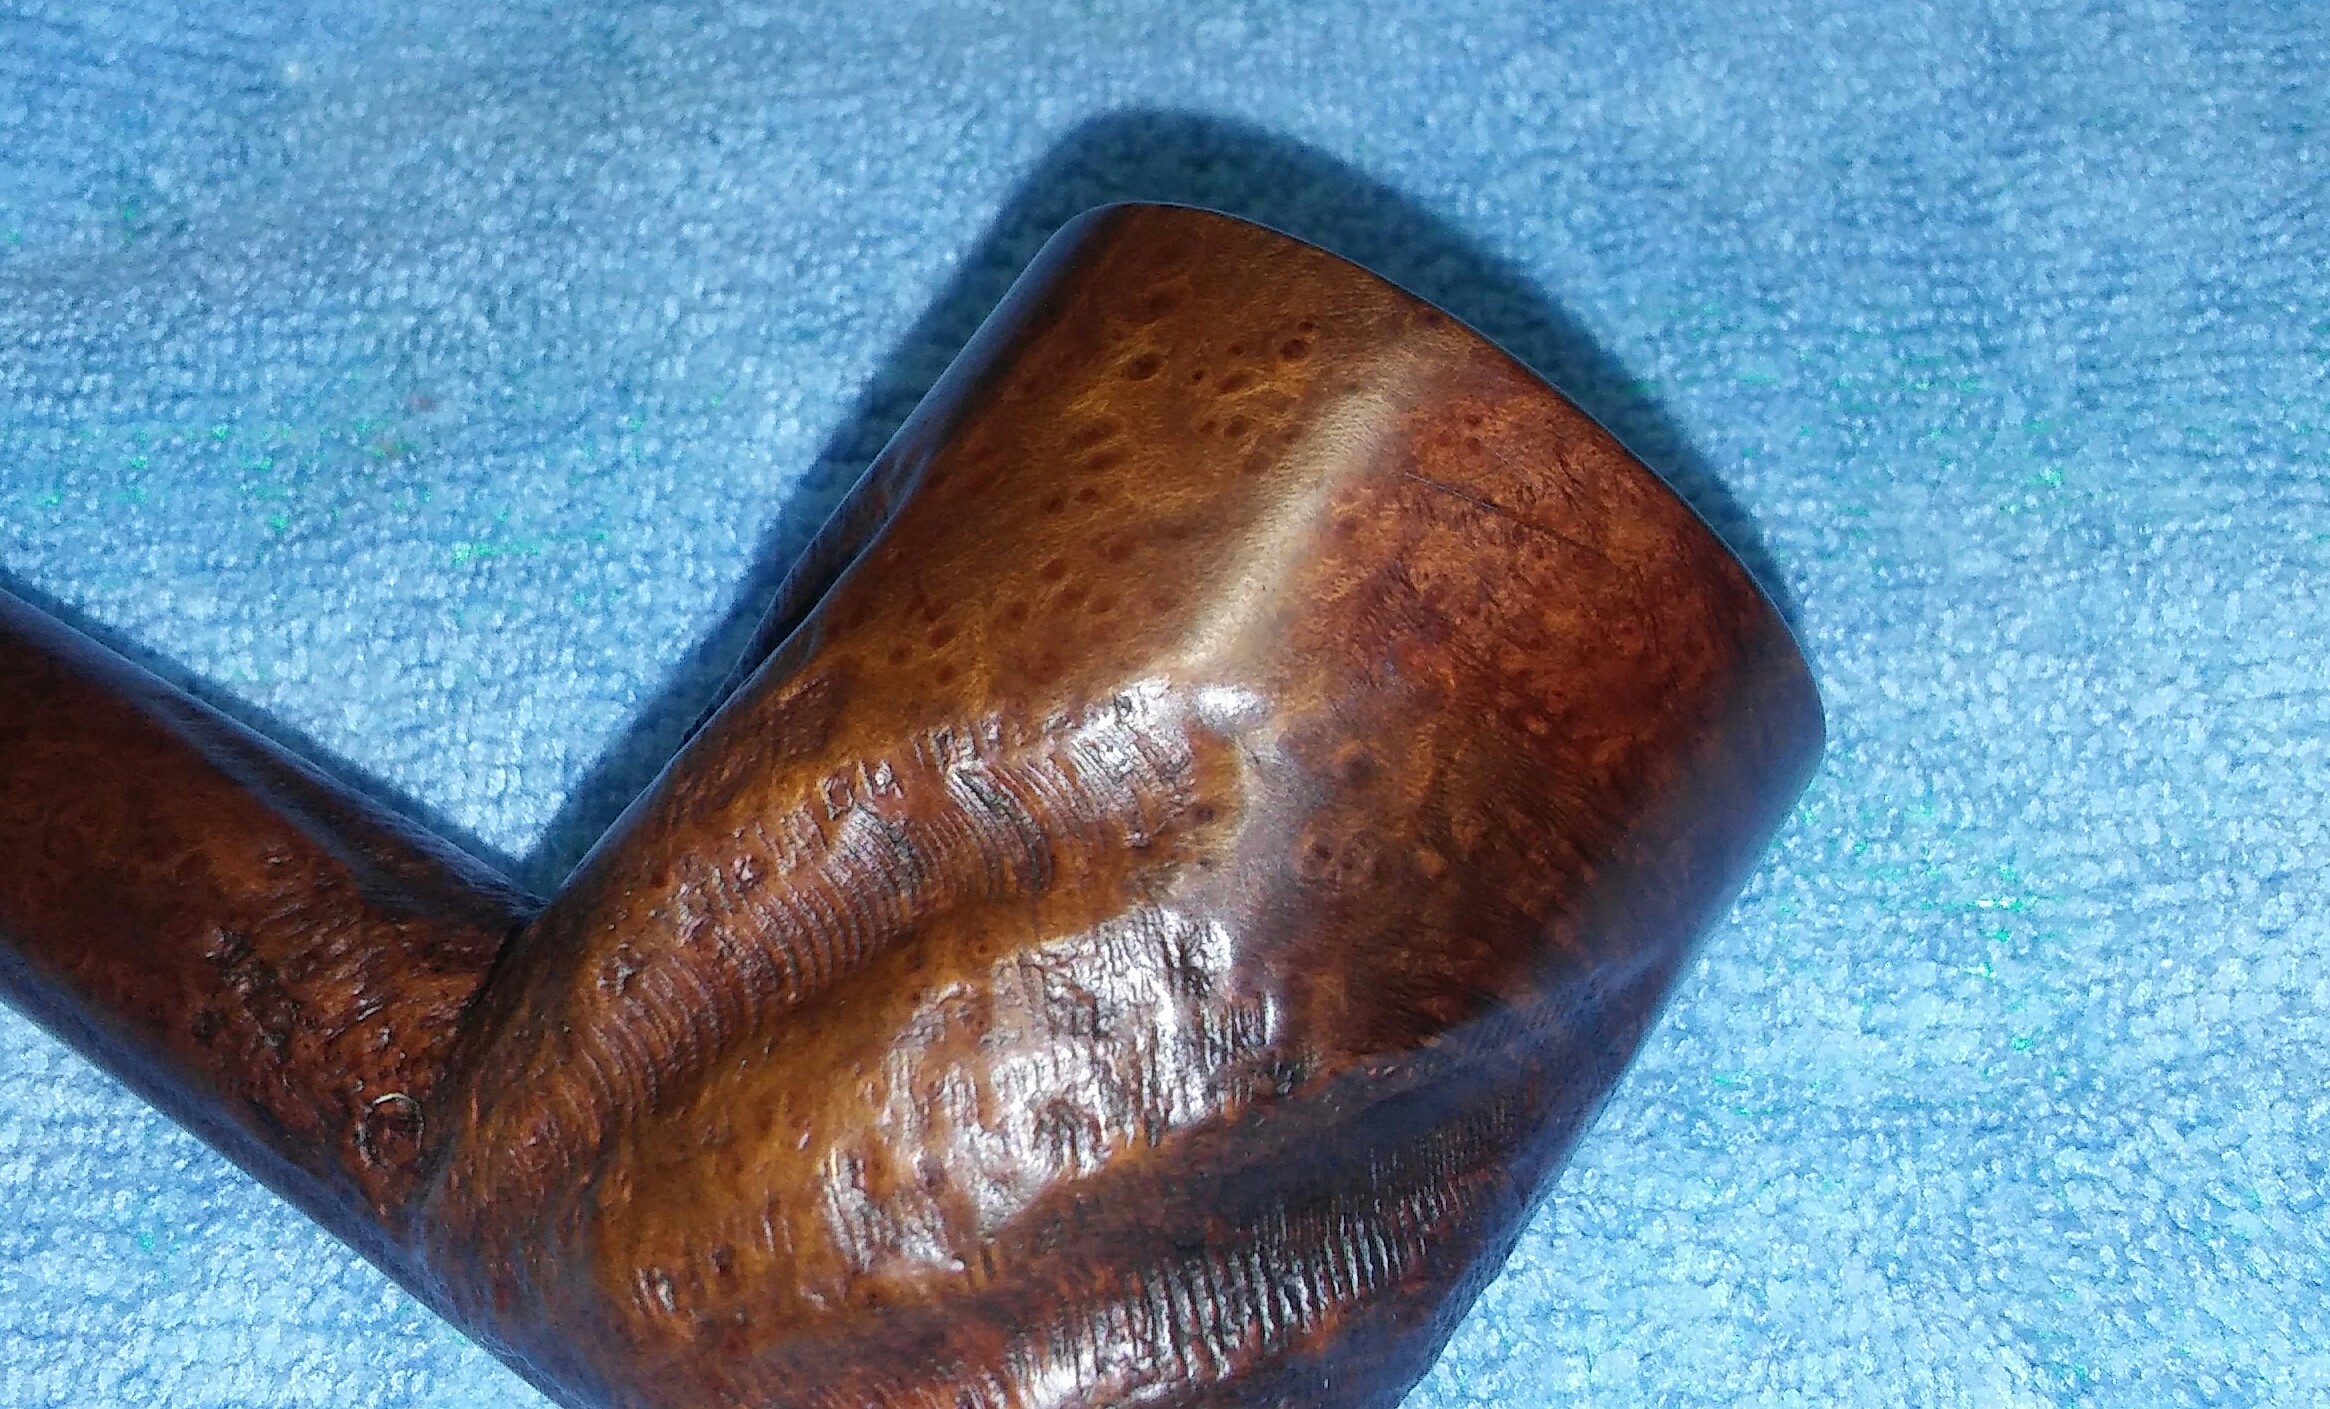
There were a few fills that stood out and would have to be removed. Using a X-Acto knife and Method Wood polish, to soften the fill, I removed the old brightly colored filler. I cleaned the area to be refilled with an alcohol dampened Q-Tip. I now filled the pits with briar dust and Gorilla Glue and allowed it to dry. Once the new fill had time to dry I sanded the areas first with 800 grit sandpaper and finishing with 1000 grit sandpaper.

PhotoGrid_1458180941590

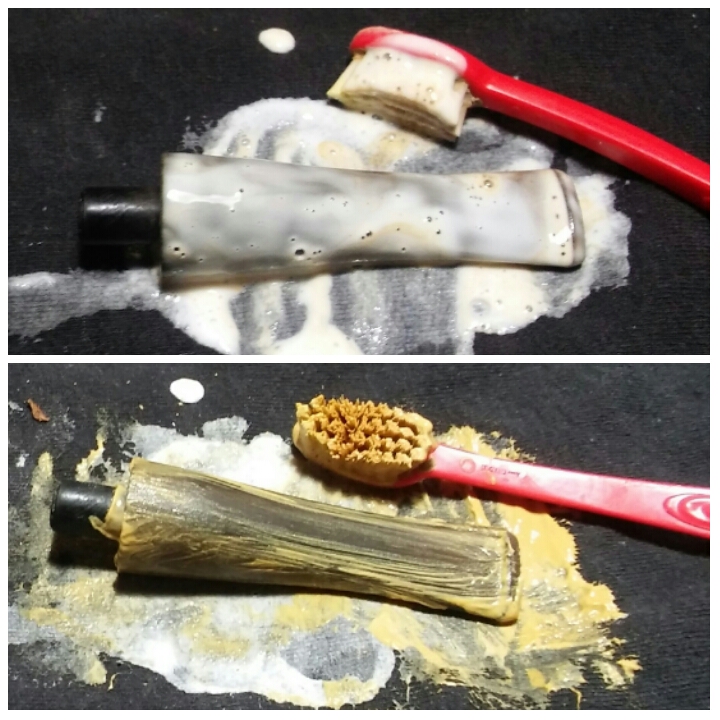
Now the stem, I applied a generous amount of non-bleach Soft Scrub, leaving it aside to allow the Soft Scrub to penetrate the oxidation. Once the Soft Scrub turns form white to a brownish color its time to scrub vigorously with a rag, scrubbing until all the oxidation has been removed. Holding the stem in natural light will allow you to see if all the oxidation was removed.

PhotoGrid_1458180475151

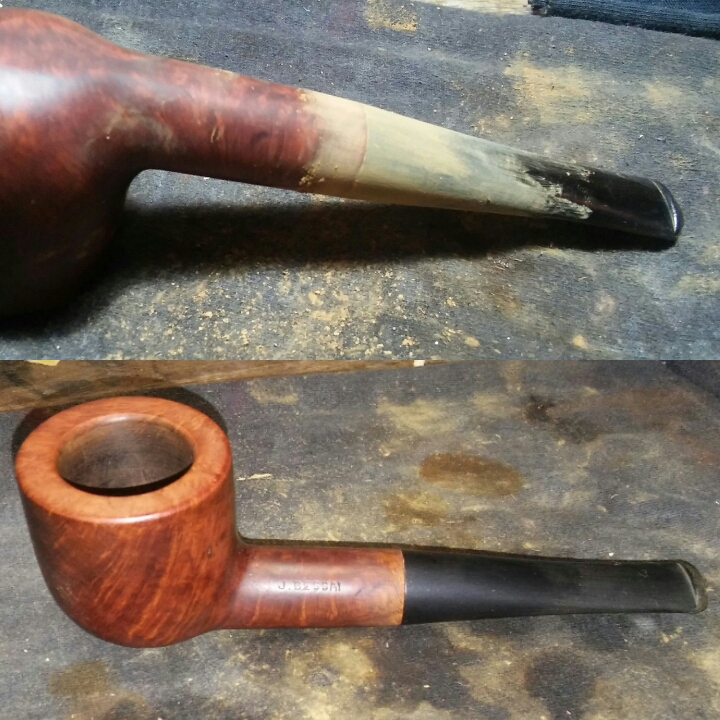
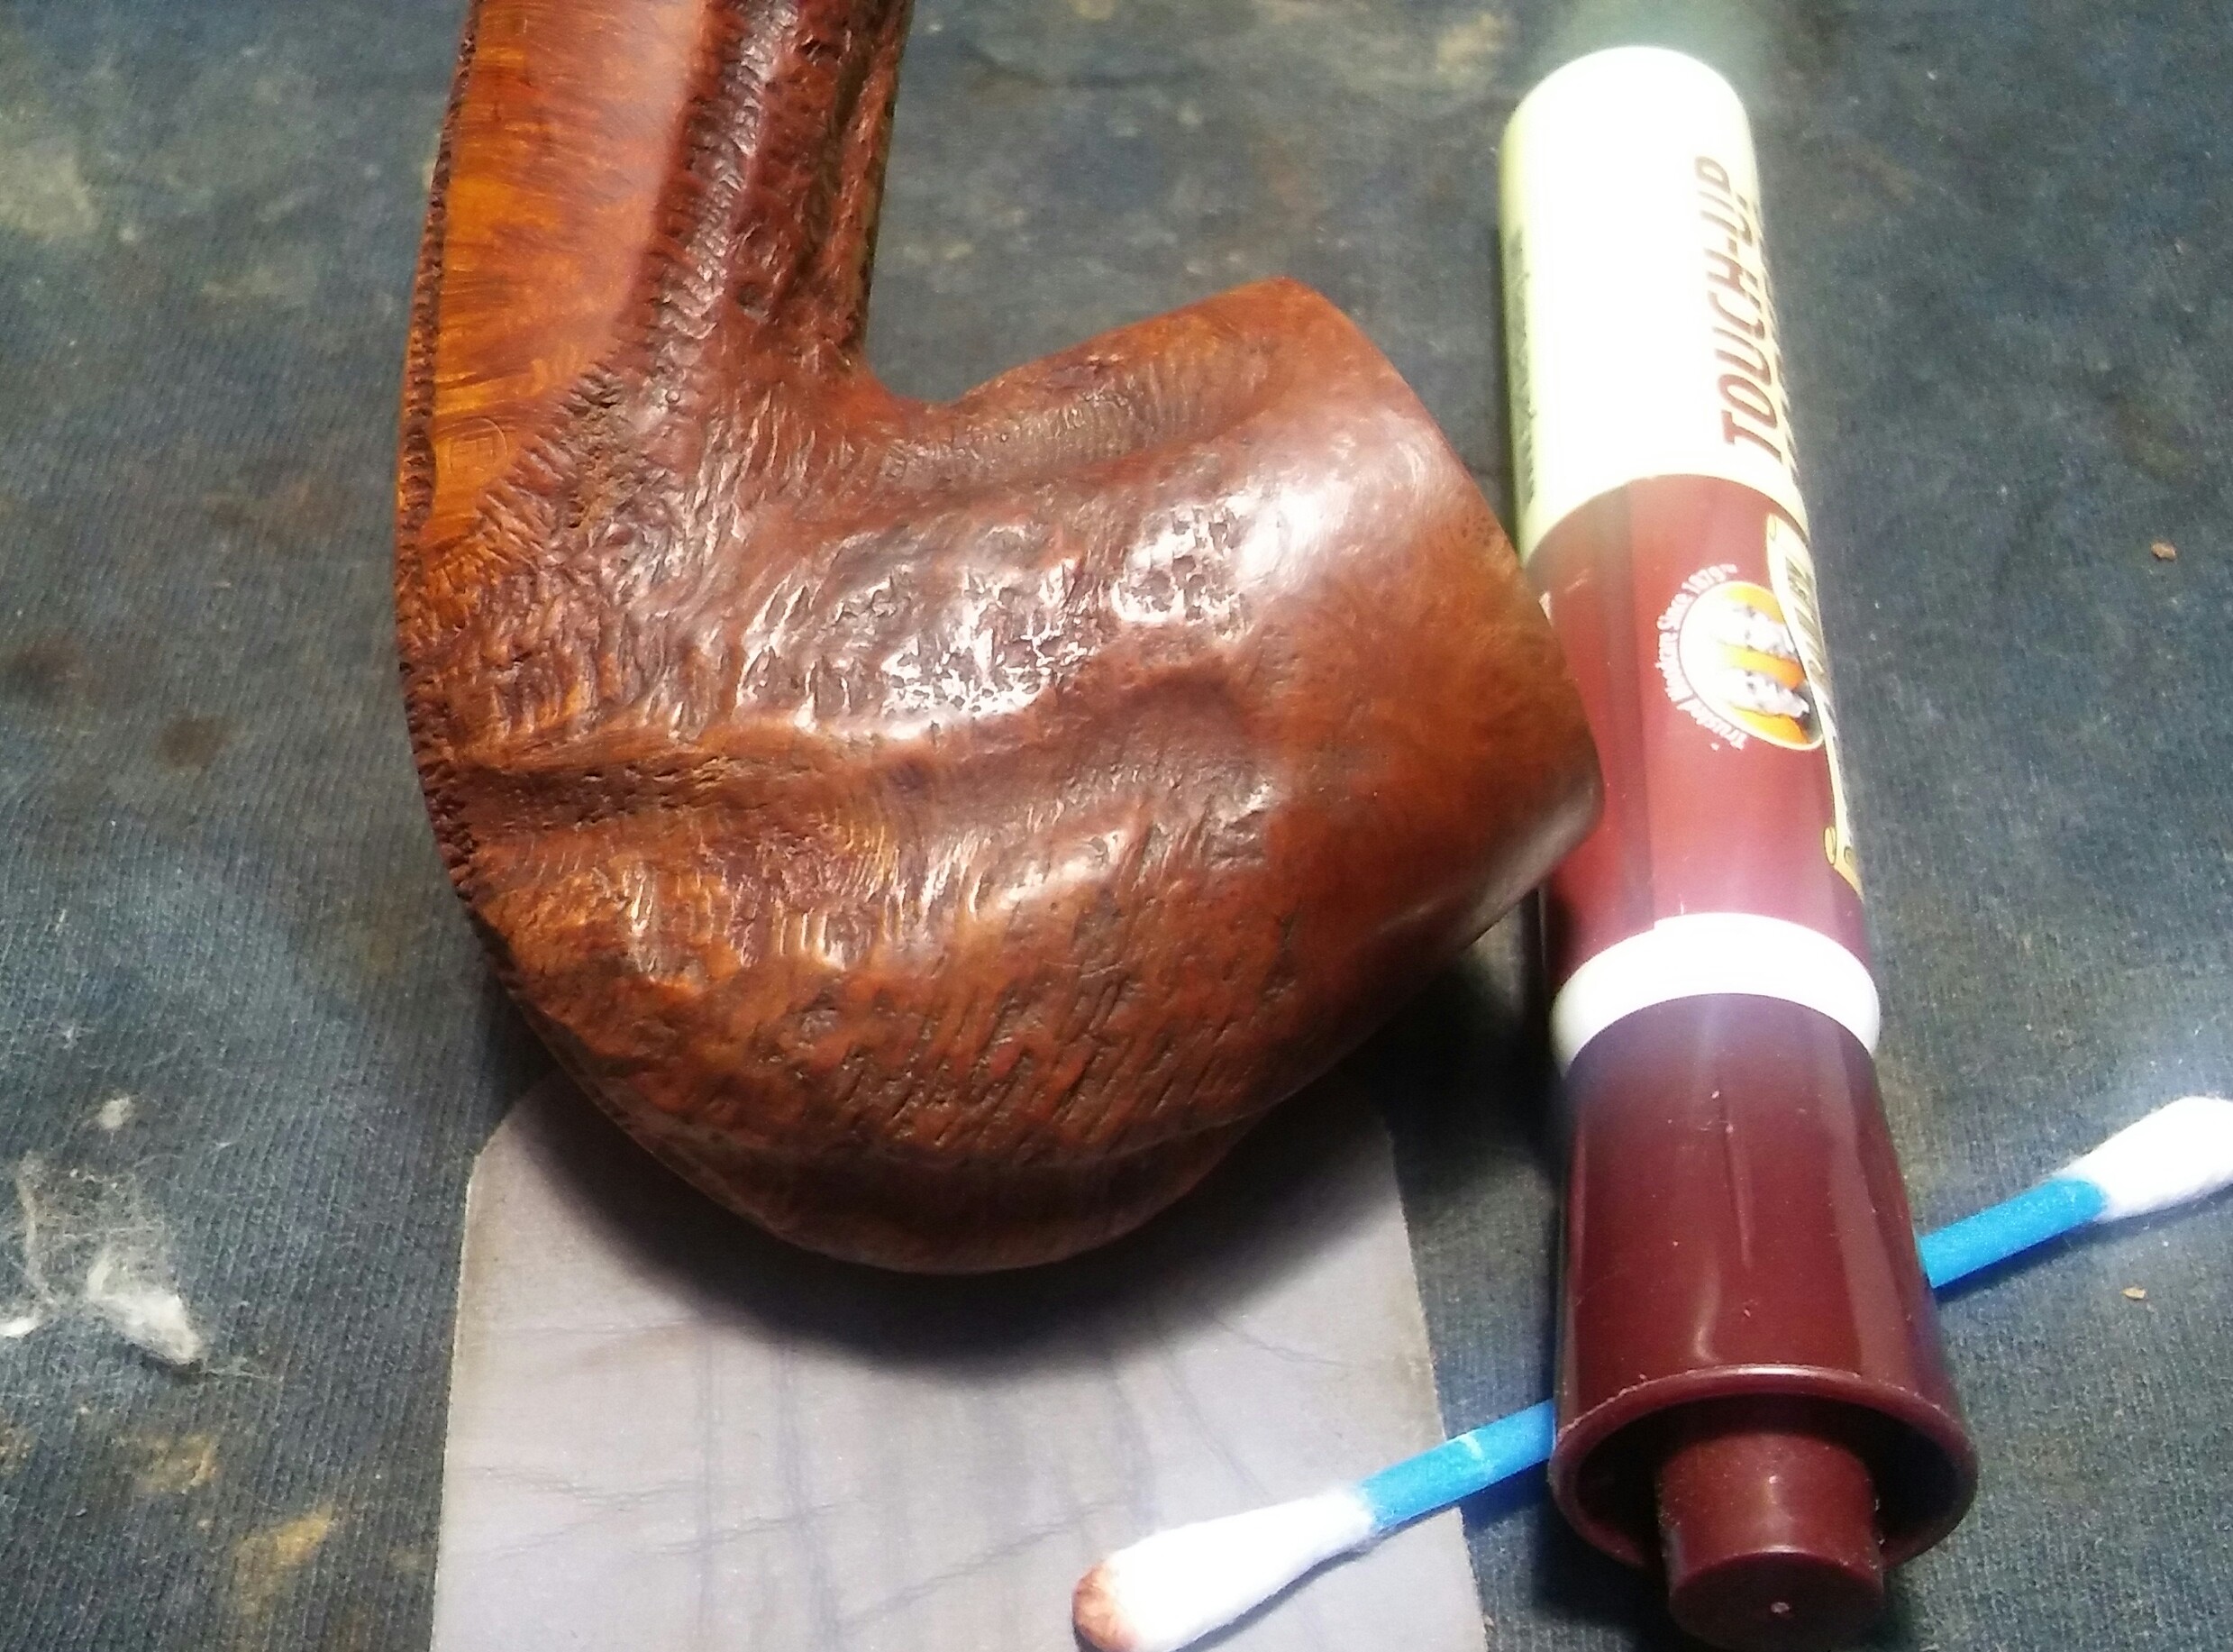
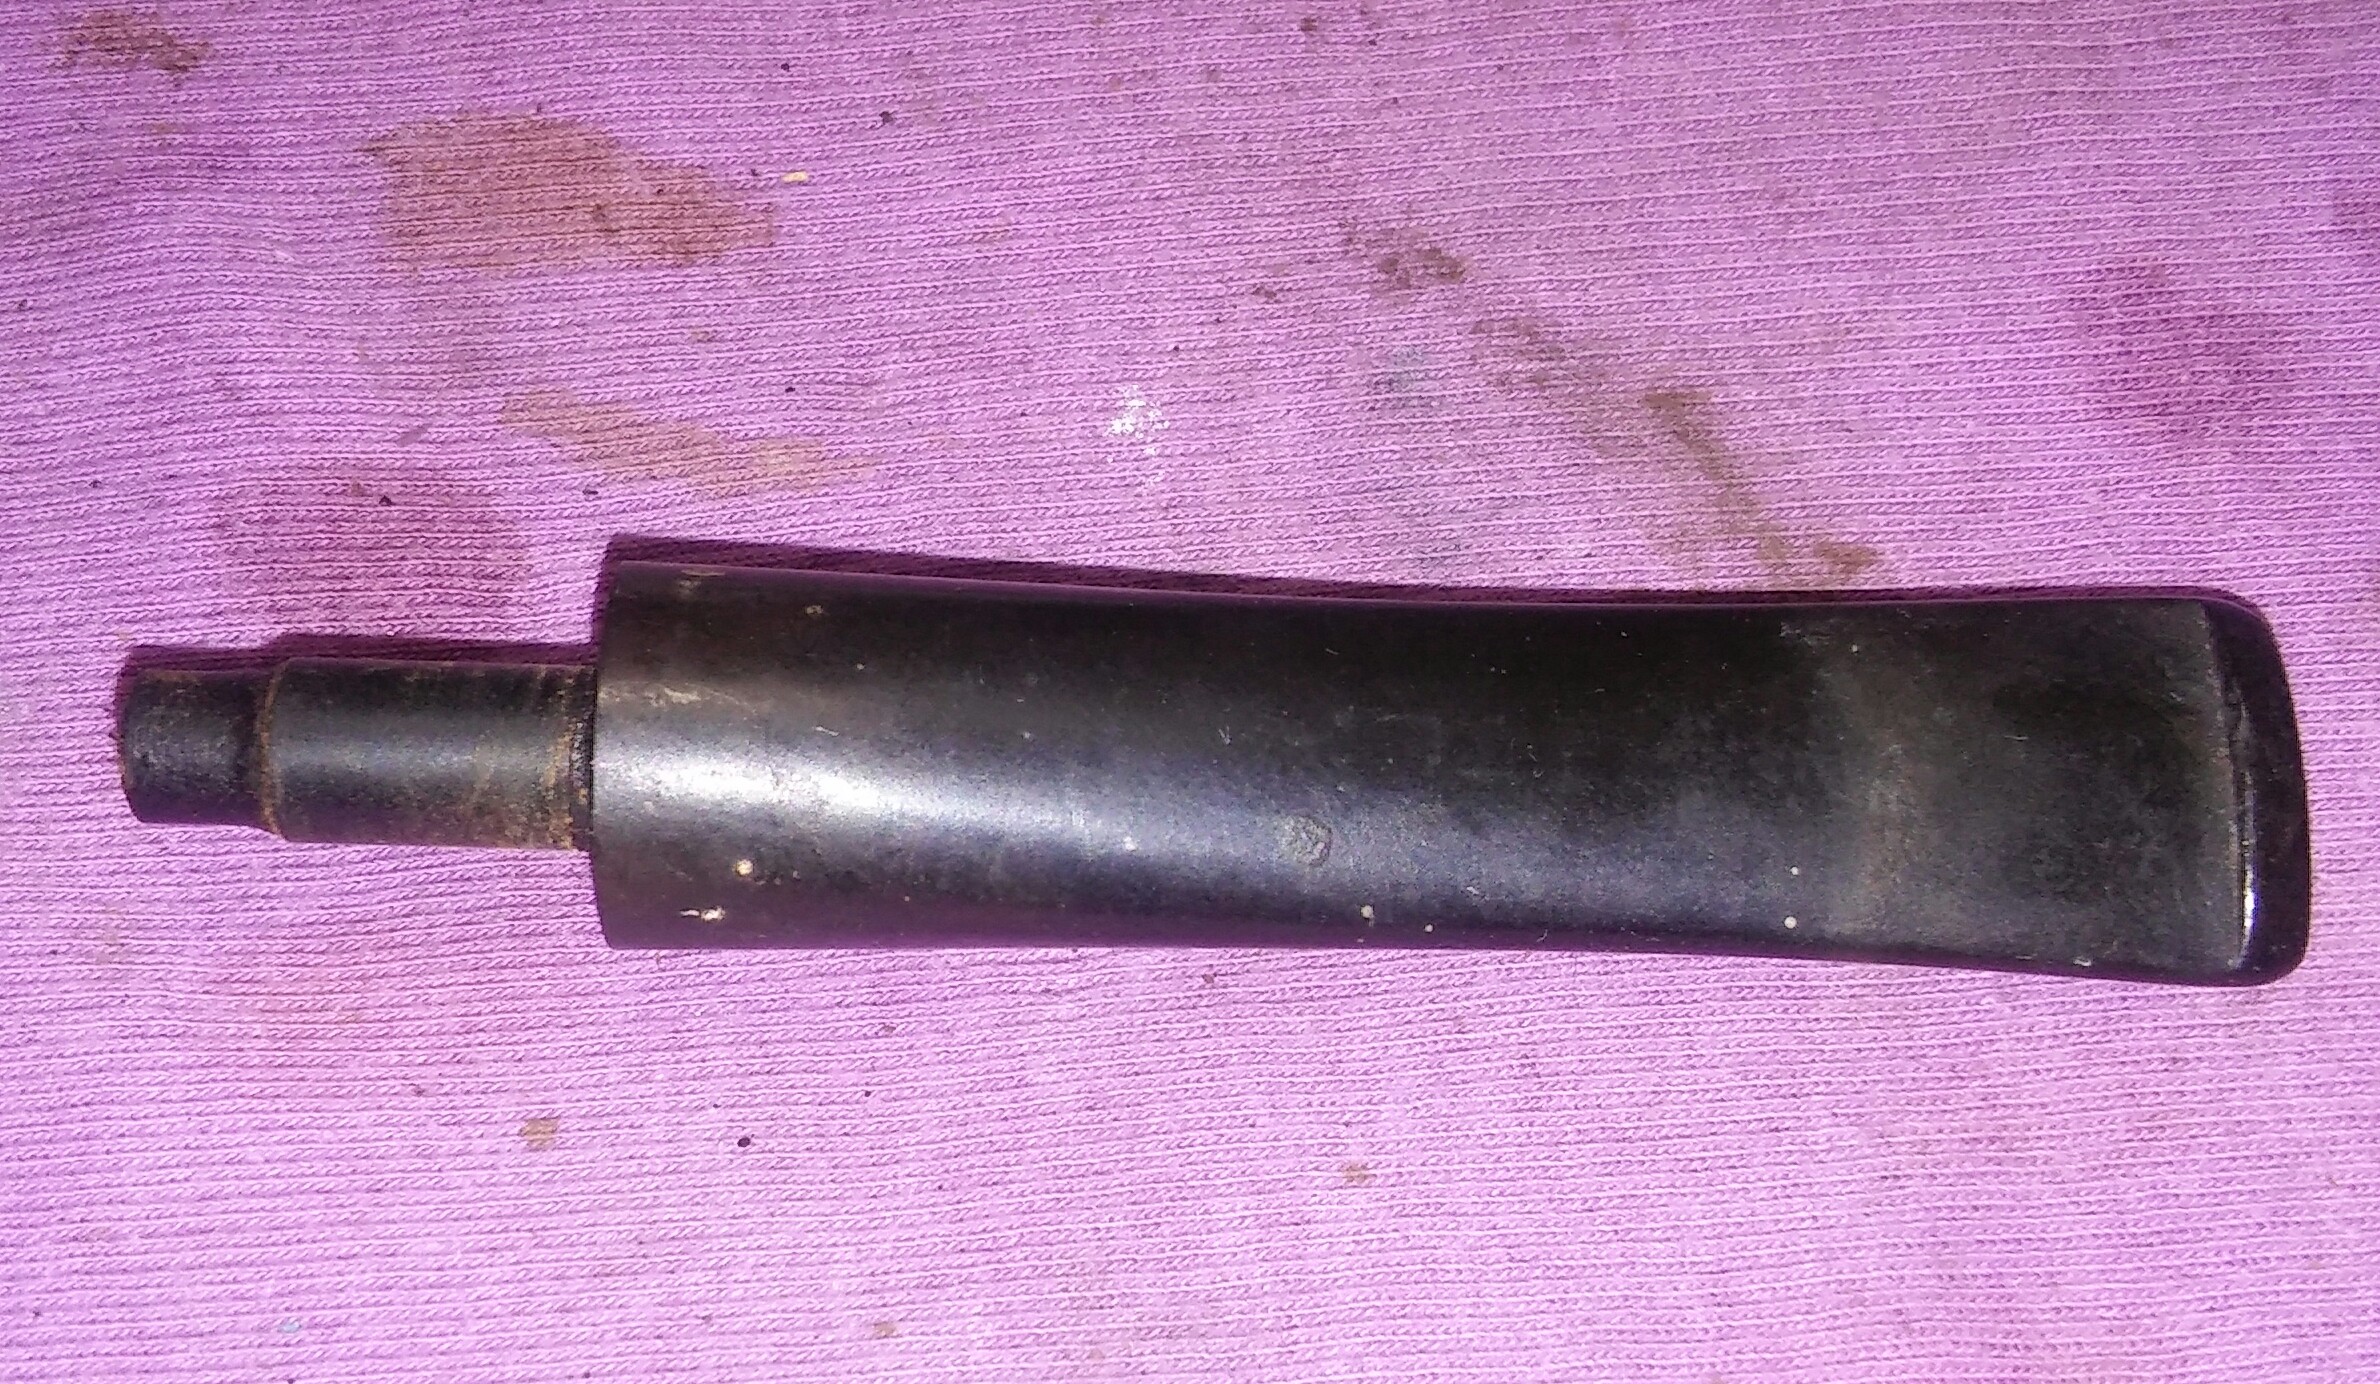
Now the ill fitting replacement stem, the tenon fit snug but the stem and shank had a poor fit, the stem was a bit larger then the shank. Starting with 220 grit sandpaper I sanded down the stem until a uniform fit between shank and stem was achieved.At this time I removed any tooth impressions and sanded the entire stem and the end of the shank with 400 grit sandpaper. I went back in with a brown touch up stain marker and re-stained the shank and fill areas. At this time I took care of the missing chunk at the top of the draught, mixing ash with a little water to make pipe mud I filled the missing spot with the mud and allowed it to harden. I checked before sending it off to Clint and the repair was solid.

20160312_121329~2

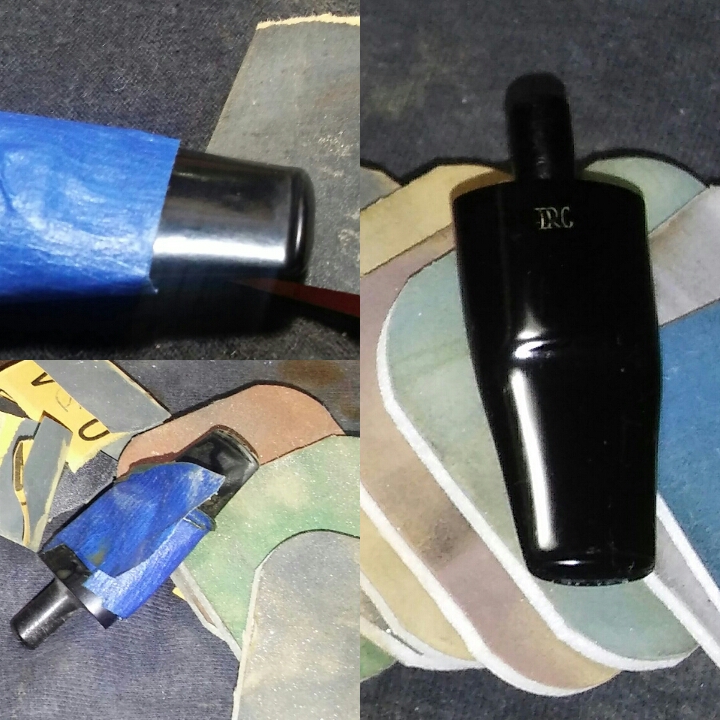
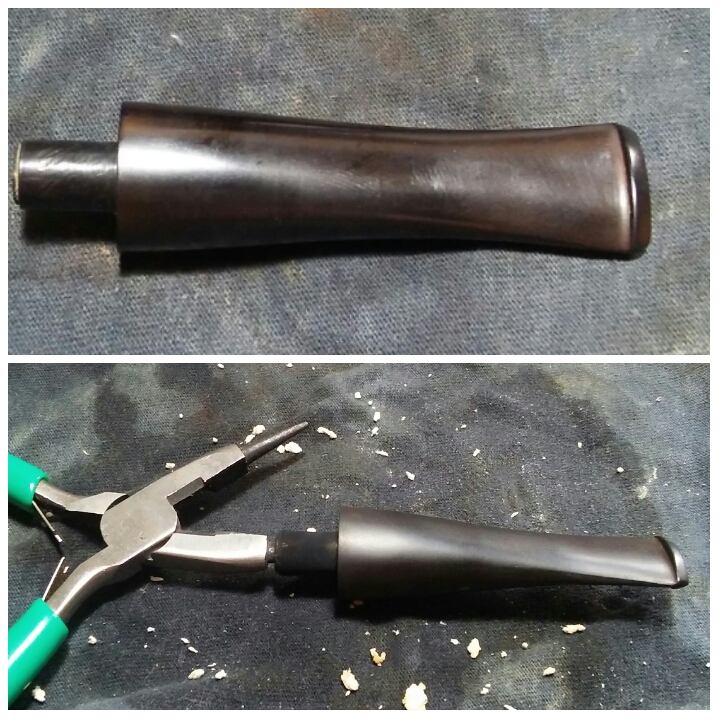
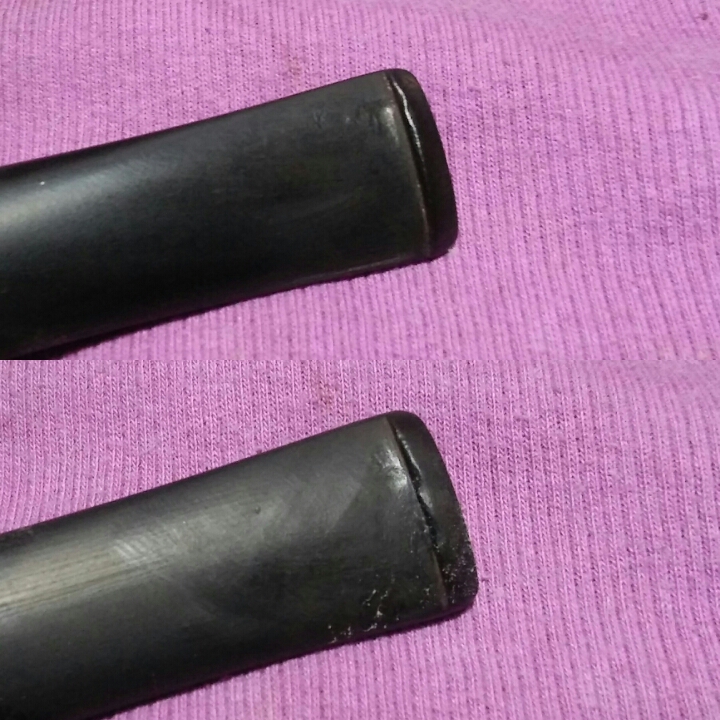
The button had an odd indentation and was worn down.

PhotoGrid_1458077053349

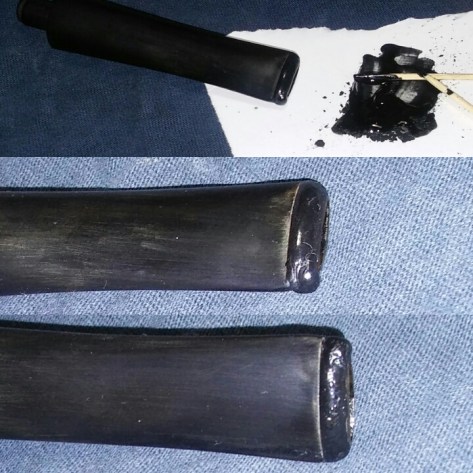
I mixed thick black CA glue and charcoal powder together to make a paste, using a toothpick I applied the paste to the button hitting it with accelerator to set the glue.

20160312_145518~2

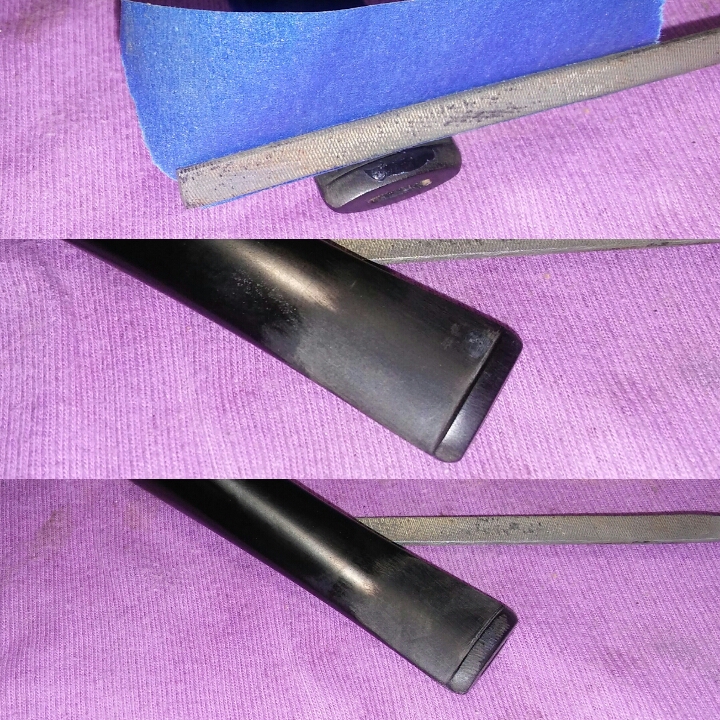
Using needle files and sandpaper I began to shape a new button.

20160312_201954~2

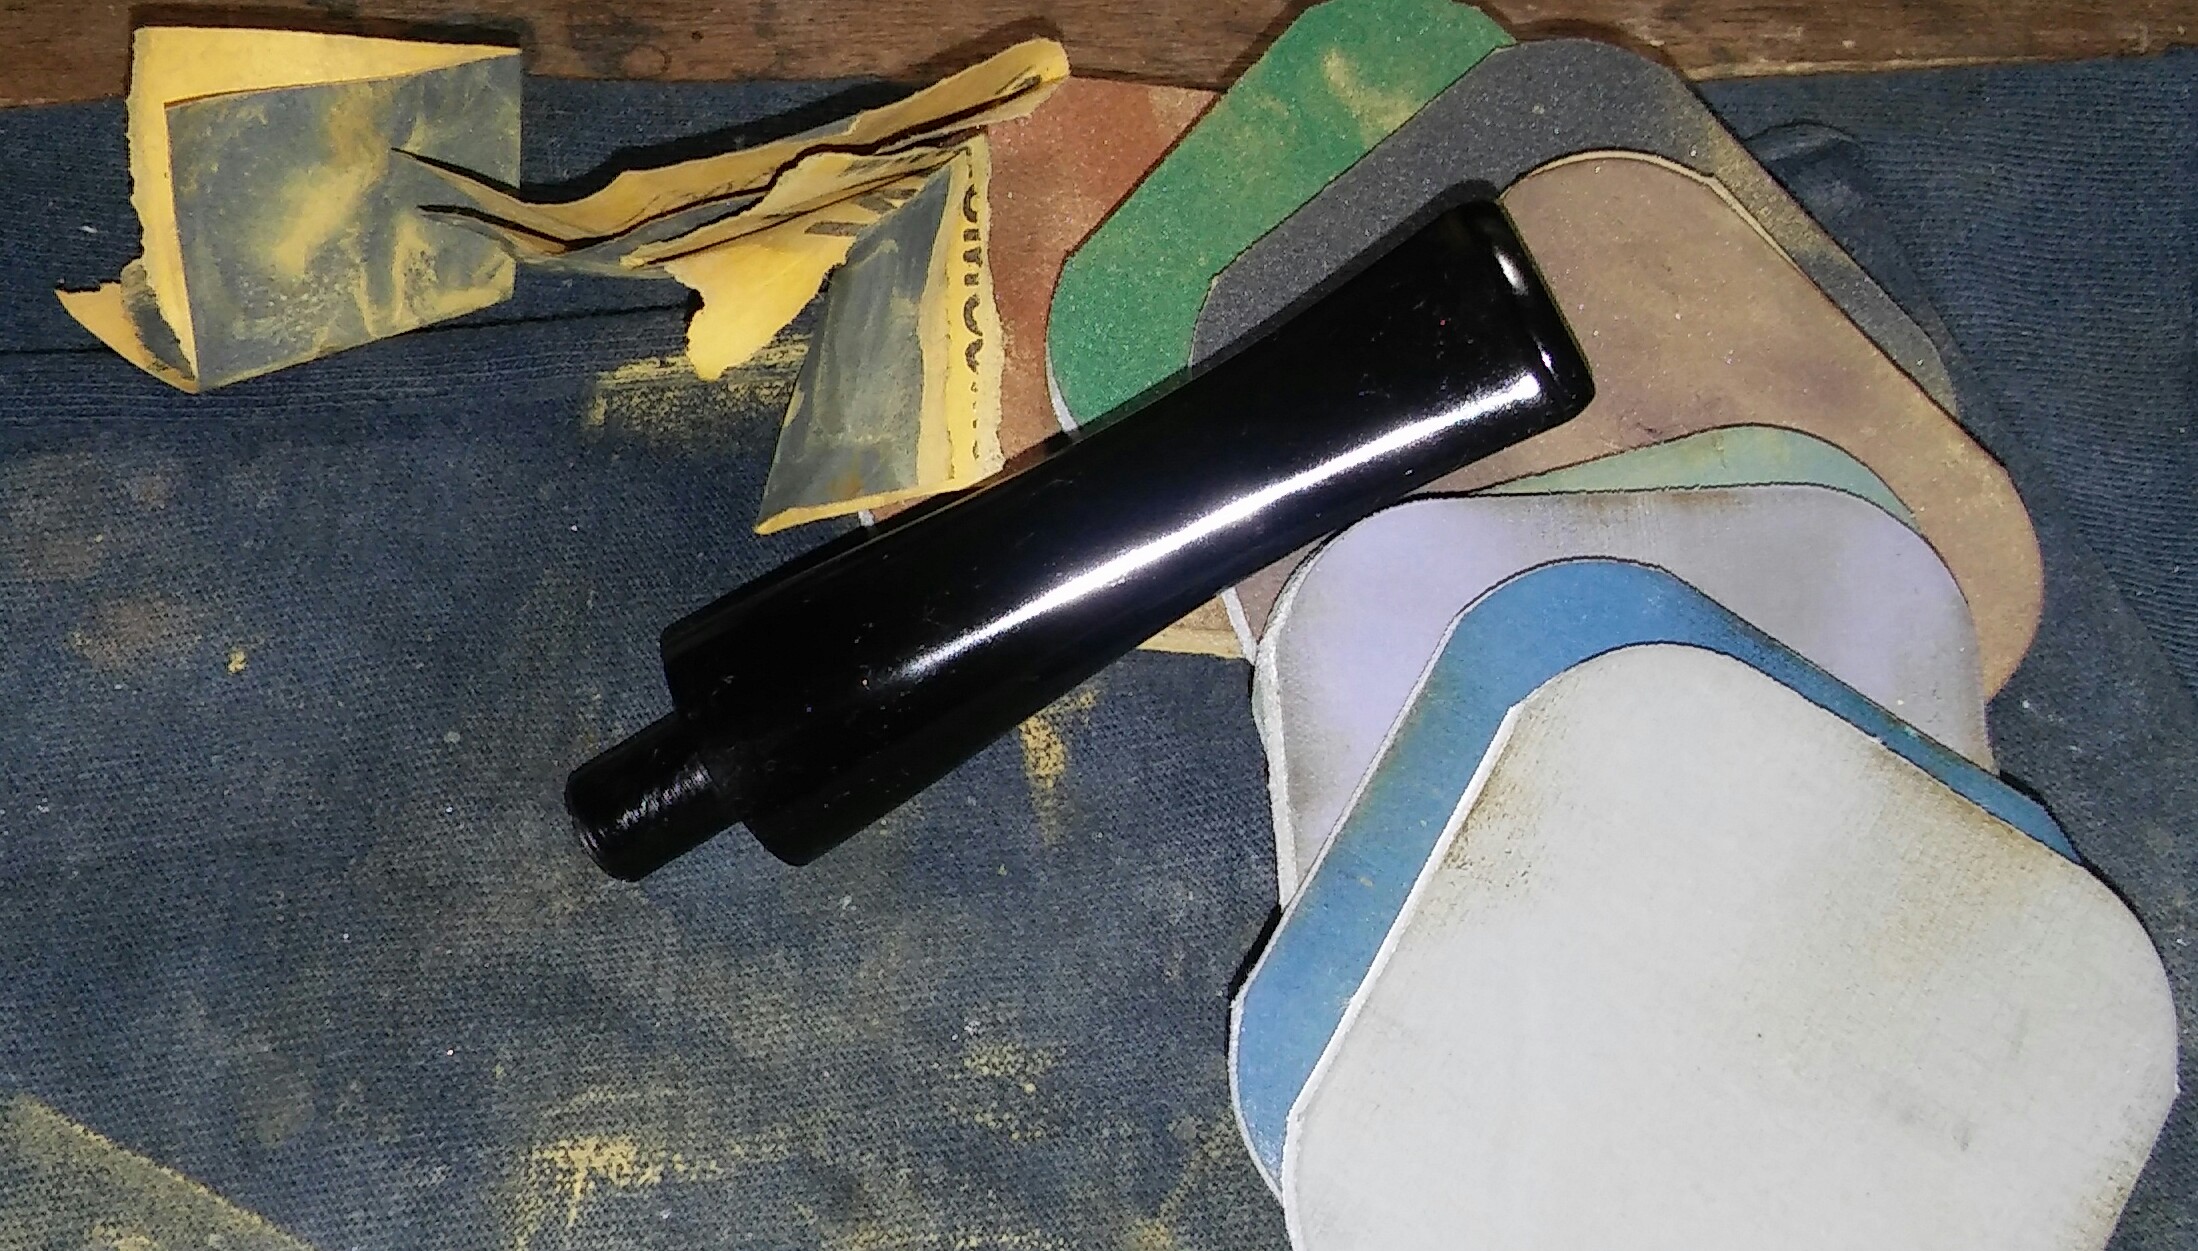
Now I ran the stem thought the various girts of sandpaper and micro-mesh. Starting with 800 grit sandpaper wet, 1000 grit paper wet, 1500 grit paper wet, 1500 micro-mesh wet, 1800 mesh wet, 2000 grit sandpaper wet, 2400 mesh wet. Then the remaining micro-mesh pads dry 3200-12000.
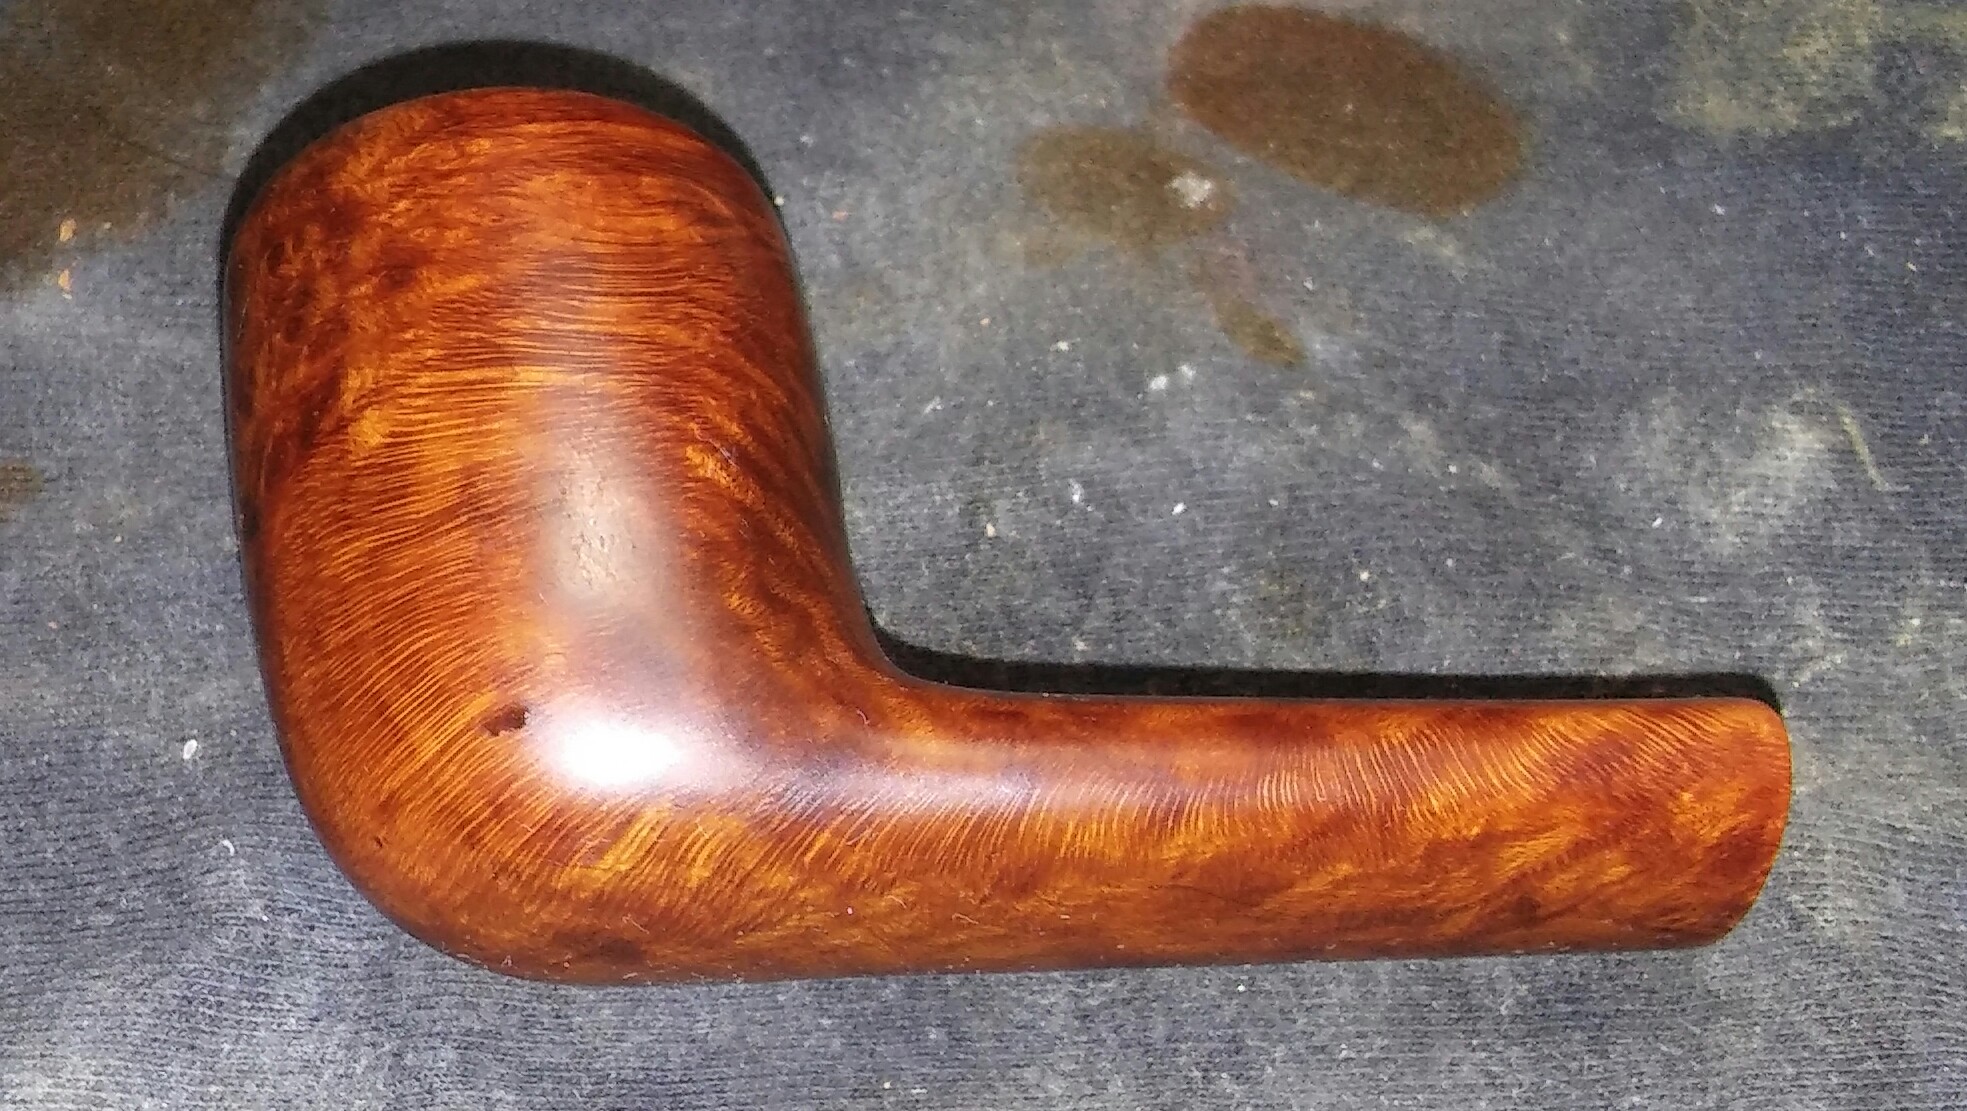
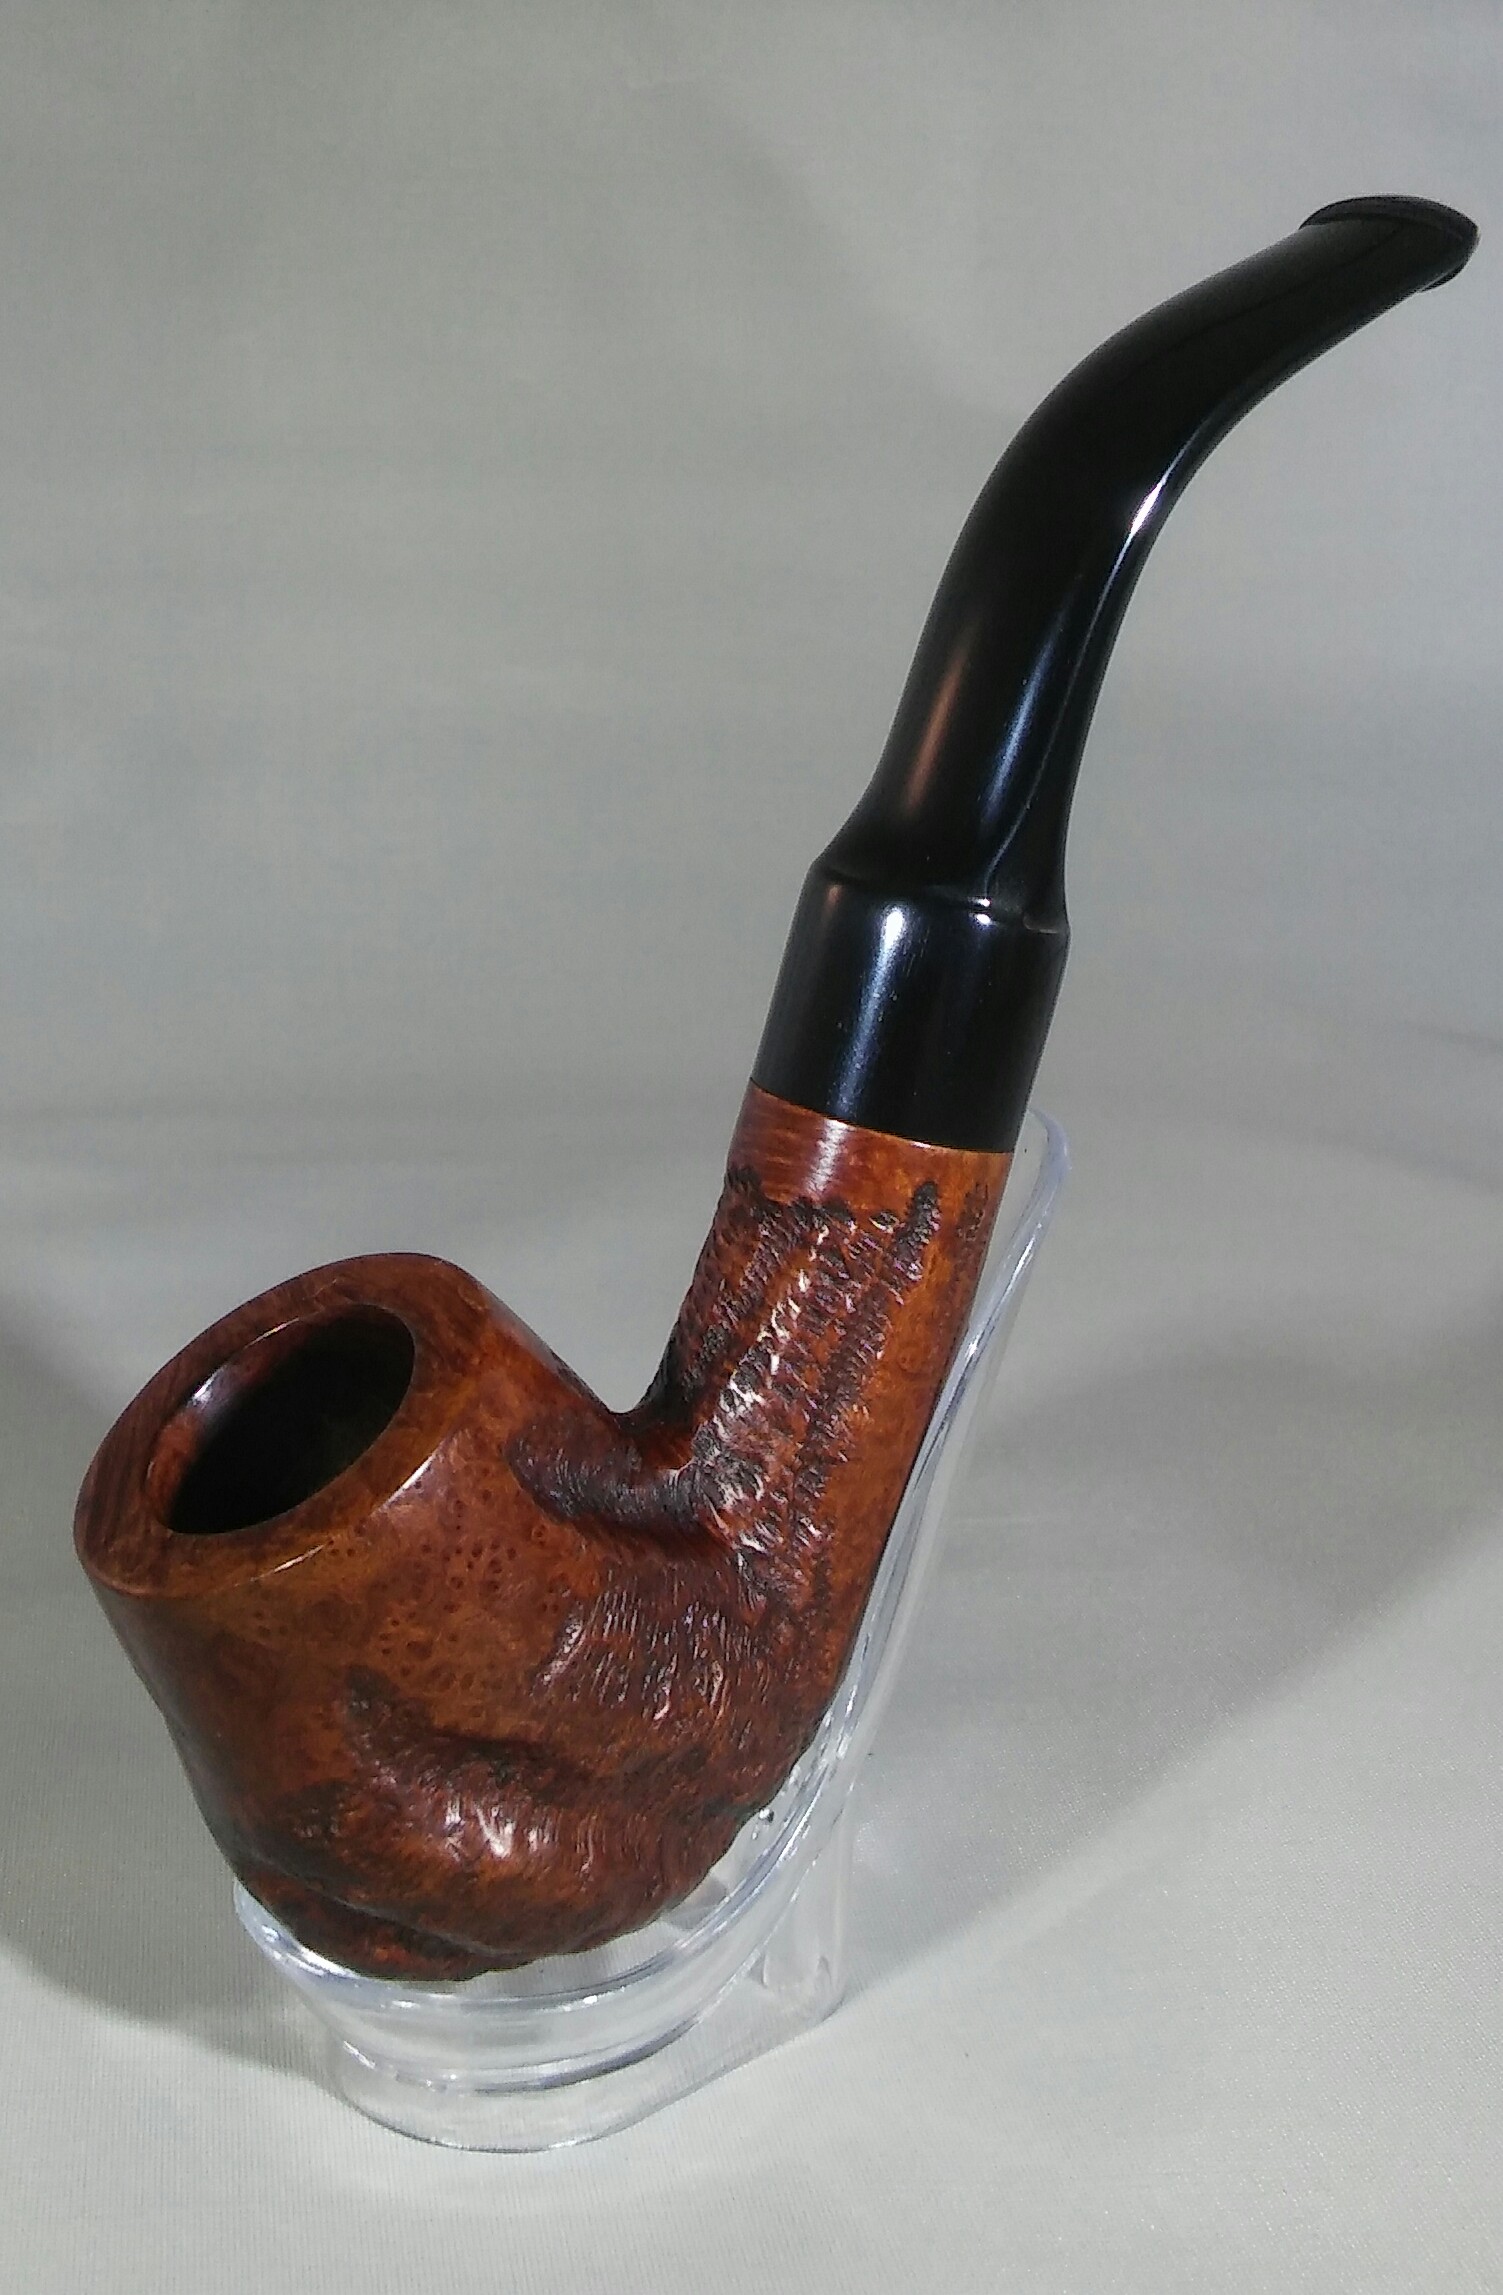
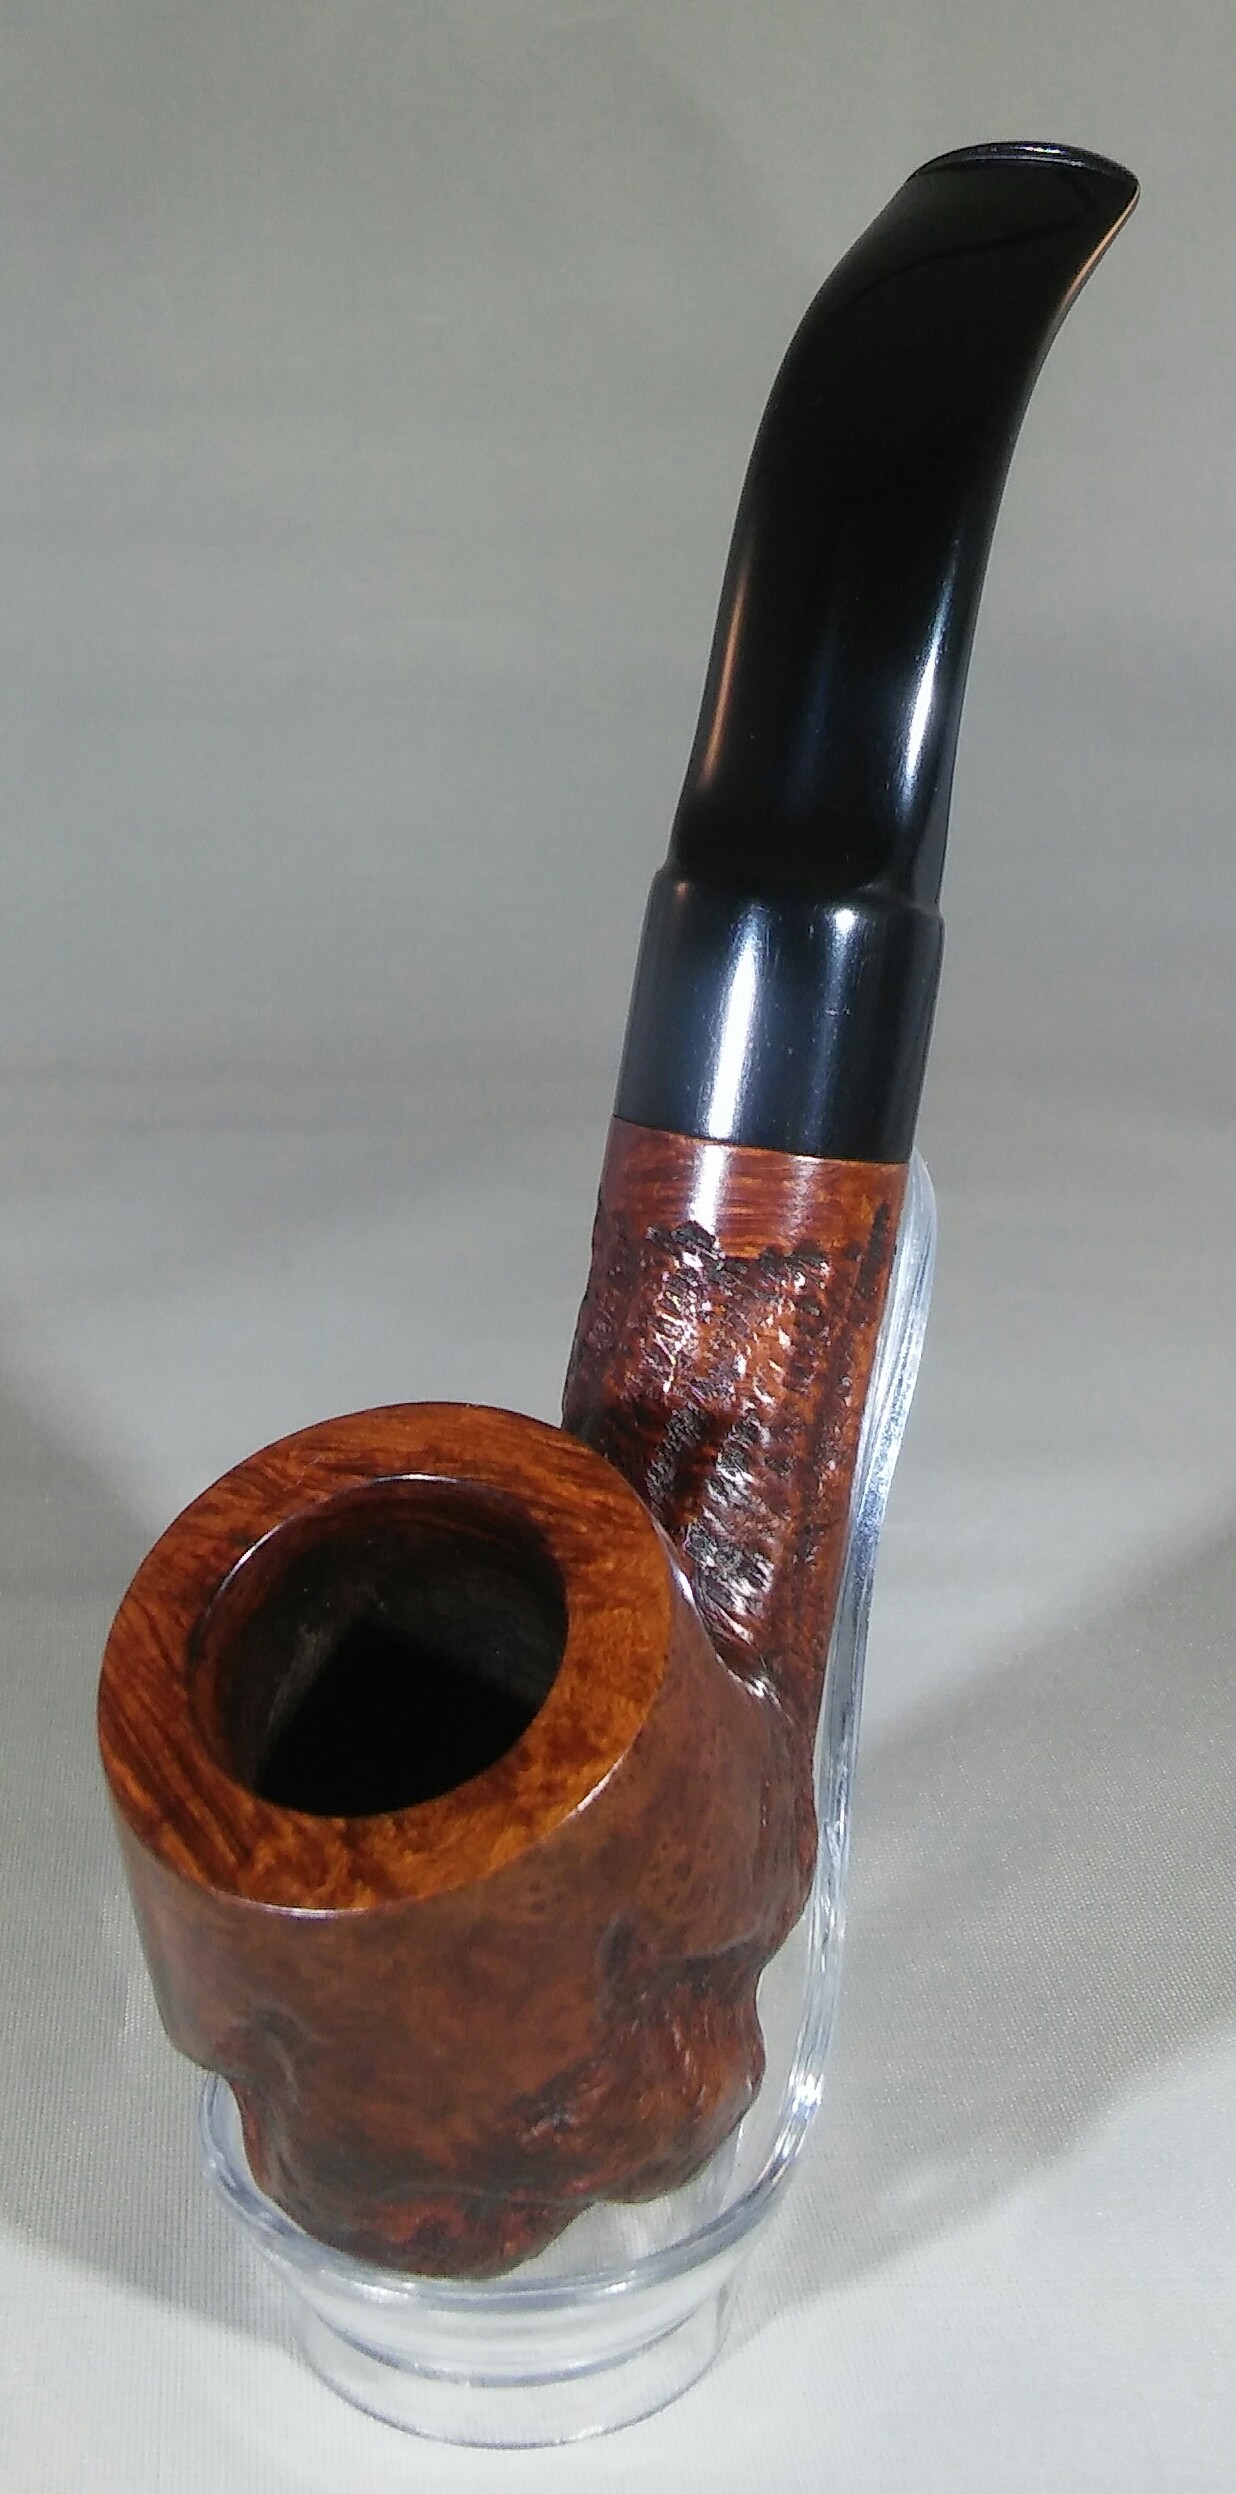
Complete.

20160425204642~220160425204741~220160425204848~220160425204917~220160425204756~2

I finished up on the wheel with white diamond, a few coats of carnauba and a micro-fiber hand buffing. Buffing the stem with blue compound and a few coats of carnauba.

Thanks again Clint the pipes were a pleasure to work on, a nice change from my Custombilt craze . 

PhotoGrid_1458190471174~220160425_203026~2

Thanks for taking a look.

Tim.


Scoundrels – Iwan Ries

12743568_1113167278728461_8755580862501099677_n~2~2

Pipe Scoundrels Pipes.

Way back in February Clint of Pipes Scoundrels sent a huge package out of the blue . We had spoken a month or so before of a pipe that was in need of care but never figured out a plan. In the package a letter where he offered up a trade of sorts skill for skill, I love the barter system. In the package an incredible framed Pen & Ink work, that I watched though his blog come together. I was blown away by his skill and photos online. I had no idea it was coming my way, in person it was even more amazing, beautifully done. Also in the package a couple Pipe Scoundrels stickers ( he has a killer logo) and three pipes in need of repair/cleaning. A couple John Bessai pipes one Canadian, one Pot and an Iwan Ries a unique shape I’m not familiar with. I was excited to get to work , this was the first time I was to work on someone else’s pipes but I got side tracked and side tracked again but finally I had some time to sit and finish. Now the three are complete.

The first three photos were sent by Clint, this was the original pipe that we had talked about a few months back it was in need of a good cleaning. The shape was interesting and not one I’ve seen before. The name however I was familiar with, Iwan Rise & Co an establishment I would like to visit before I kick the bucket. There pipes were made by different manufacturer’s over the years.

The Restoration.

PhotoGrid_145818114246912282982_1097237786988077_761761538_n~2PhotoGrid_1458181302367PhotoGrid_145818132240320160225_154948~2

Overall the pipe was in good condition. The stain had long worn to a lighter color, the chamber had a thick & crumbling cake, the stem was oxidized with mild tooth impressions and the rim had a few indentations.

20160225_161109~2

The narrow chamber would need a tag team of young and old to tackle. My old Castleford reamer  attachments ran a little smaller than the Pipnet set. Starting with the smallest attachment from my Castleford set I slowly worked my way to the bottom of the chamber, then working between the Pipnet set and Castleford set I reamed back the old cake. Finishing up with 400 grit sandpaper to smooth out the chamber.

PhotoGrid_1458181552235

Next I addressed the rim, for the most part it was free of any heavy tars, oils or charing. I applied a light coat of Method Wood For Good Polish to the rim and left it upside down on a make-up pad so the polish could soft up the residue. After allowing the stummel time to sit, the tars and oils were removed with a Q-Tip.

PhotoGrid_1458182144505

 With the rim clean I could now work on the rim indentations. Using a household iron set to medium heat and damp rag I steamed the indentations out.

20160226_151545~2

After the steam there were still a few spots in the inner portion of the rim that needed attention. I worked through a variety of sandpaper, starting with 800, 1000, 1500 and 2000 until all traces of the dents were gone.

PhotoGrid_1458181761208

I now moved on to the internals of the stem and stummel. Using EverClear and a cotton ball lightly inserted in the chamber I ran a retort to loosen the old tars, oils and tobacco.

20160225_215614~2

After the retort I did a vigorous cleaning of the stem and stummel internals. Using EverClear, a shank brush, mortise brush, Q-Tips, make-up pads and stiff/soft pipe cleaners. I worked the internals until my final pipe cleaner came out as it went in.

PhotoGrid_145818138028020160226_154611~2

The stummel had one noticeable fill that the filler had crumbled away. Using Gorilla Glue and briar dust I filled the pit, after allowing the fill to dry I sanded the area with 800, 1000 and 1500 sandpaper.

PhotoGrid_1458181276486

Now the oxidized stem, I applied a generous amount of non-bleach Soft Scrub to the stem and left aside until the Soft Scrub penetrated the oxidation. Once the Soft Scrub turns from white to a brownish shade it’s time to scrub the stem vigorously with a rag until all noticeable oxidation is removed. Holding the stem under natural light will allow you to see if all oxidation has been removed.

PhotoGrid_1458181528872

The Soft Scrub had removed the oxidation and the stem was in good shape aside from light chatter at the bit/button area. I taped off the bit portion of the stem with blue painters tape so my sanding would remain in the area that needed attention. I started with 800 grit sandpaper wet, then 1000 grit paper wet, 1500 grit paper wet, then on to the various grits of micro-mesh -1500 mesh wet, 1800 mesh wet, 2000 grit sandpaper wet, 2400 mesh wet, 3200 mesh dry through 12000 dry. I removed the painters tape before polishing the stem with final two micro-mesh pads 8000 & 12000.

20160226_143003~2

The final step before hitting the buffer was to tighten the loose-fitting tenon. I run into this more times than not after cleaning an estate pipe. I expanded the tenon by lightly heating the tenon with a Bic lighter and slowly inserting the end of a round tip pair of jewelry pliers. Repeating until a snug fit between tenon and mortise is achieved. When using this method to expand the tenon take care not to over or under heat, over heating causes melting, burning or a misaligned tenon , under heating will cause a cracked tenon.

Fin.

20160425204356~220160425204416~220160425204502~220160425204548~2

Finished up on the wheel with white diamond, a few coats of carnauba and micro- fiber hand buffing. Buffing the stem with blue compound and carnauba.

Thanks again Clint I thoroughly enjoyed restoring these estates. I still think I got the better side of the deal.

PhotoGrid_1458190471174~220160425_203026~2

Thanks for taking a look, I hope you enjoyed reading as much as I enjoyed restoring.

Tim-

Custom-Bilt (Mincer Era)

20151009_1027472_zpsuvvs9drj~2

. Mincer Era Custom-Bilt .

Screenshot_2015-12-07-07-27-00~2

I love when auctions go this way , I only wish I was the one who won it. My wife took a chance on this one and gave it to me for Christmas. Sure enough its a Custom-Bilt, the nomenclature is worn or lightly stamped but its there. I have so many in my collection and I talk about them constantly she knows exactly what to look for.

As Received

PhotoGrid_1453699522594PhotoGrid_145369957971420160124_210347~220160124_210431~2

She was in rough shape when received, thick crumbling cake, stem oxidation and the tennon was glued into the mortise. Once the the glue was removed from the tennon and mortise, I realized the glue was the previous owners attempt to fix a loose fitting stem. In my excitement Christmas morning I had already removed the glue. Using EverClear I filled the chamber and left it to soak, eventually I was able to free the stem from the stummel.

PhotoGrid_1453699681920

I set the stem aside to come back to and started with the stummel. I started with my Pipnet Reamer and the smallest attachment and worked up to the third attachment, finishing up with 400 grit sandpaper wrapped around a finger. The chamber was well preserved from the thick cake, no cracking or pitting.

PhotoGrid_1453761268436

Next the rim tar and char, I applied a generous amount of Method Good For Wood Polish with a Q-tip and allowed it to penetrate the residue. I had to repeat the process a few times to remove all the build up, using Q-tips.

PhotoGrid_1453760194830

After freeing the tennon from the mortise Christmas morning there was still glue leftover one the stem, mortise and tennon. I used EverClear Q-tips and makeup pads to remove the rest of the glue.


20160124_231118~220160124_231247~2

I did a quick internal cleaning to remove the loose debris using EverClear, Q-tips and stiff/ soft pipe cleaners. I then did an alcohol and cotton ball soak on the chamber allowing it to absorb the oils and tars, leaving it overnight.

PhotoGrid_1453749192862

The following morning I decided to run a retort using EverClear and cotton balls. I then cleaned the internals of the stummel and stem with EverClear,Q-tips,cotton balls and stiff /soft pipe cleaners, cleaning until the pipe cleaners came out as they went in.

20160125_091354~2

The stummel was pretty caked with dirt and oils. I wiped down the stummel with EverClear and makeup pads making sure I got into the crags.

PhotoGrid_1453749307223

Next the rim dings, using a household iron on medium /high heat and damp rag. I  covered the rim with the damp rag and applied the rim to the hot iron working in intervals until the imperfections were almost gone.

PhotoGrid_1453749336366

Happy with the rim, I now applied Howard’s butcher block conditioner to the stummel using rag and Q-tip to get into the deeper crags and left it aside for a few minutes to penetrat. Hand buffing off the excess.

PhotoGrid_1453749071378PhotoGrid_1453749128658

The stem was heavily oxidized, I applied non-bleach Soft Scrub to the stem with a children’s toothbrush and left it aside to penetrat the oxidation. Once the Soft Scrub turns from white to a brownish color its time to scrub vigorously with a rag until the oxidation is removed. I would repeat this process a few times and finish with a damp Magic Eraser to remove the leftover oxidation.

PhotoGrid_1453749144980

The loose fitting tennon, I heated the tennon with a Bic Lighter (moving the flame at all times never leaving it in one spot too long) and inserted the tip of round tipped jewelry pliers into the tennon and slowly expanded the tennon from the inside out until a snug fit between mortise and tennon was achieved.

20160125_112623~220160125_165534~2

I now ran the stem through the various grits of sandpaper and micro-mesh. I tapped off the shank with blue painters tape so my sanding would remain on the stem. I removed what little chatter there was with 1000 grit sandpaper wet and then moved on to the miro-mesh pads 1500-2400 wet and 3200-12000 dry. She was now ready for the wheel.

Complete

20160125224057~220160125224119~220160125224135~2PhotoGrid_1453773455838PhotoGrid_145377340917320160125224406~2

Finished her up on the wheel with white diamond, a few coats of carnauba and a microfiber hand buffing. Buffing the stem with blue compound.

Thanks For Taking A Look.


Custombilt Bent Billiard (Rich Era)

The scoundrel Pipes

The pipes I received from fellow blogger Clint of Pipe Scoundrel are complete. They have a new home and are ready to be enjoyed once again. This trio of Bilts has been an eye opener, I believe there will be many more Rich era Custombilts in my future.

The last pipe as received

20160104_222830~2

The nomenclature was stamped unevenly but I could still make out the tell tail (S) of Eugene Rich era Bilts.

PhotoGrid_1451965163069PhotoGrid_1451965201323PhotoGrid_145196517494120160104_222954~2

The last of the trio a large bent billiard. Much like the last shes in pretty descent shape. The cake is a little thicker, the tennon would need tightening, rim tar&char, there is a little filler present and light chatter.

20160105_080059~220160105_111226~2

I started off with the smallest attachment of my Castleford reamer and moving on to the largest that the chamber would except in this case it was one up from the first. I finished up with 400 grit sandpaper. The chamber was free of pitting or the start of a burn out.

PhotoGrid_1452021326533

Now for the rim, it was thick with tars and build up. I applied a generous amount of Method Good For Wood Polish to a makeup pad and left the stummel upside down so the polish could soften the build up. I would have to repeat this process a couple of times to remove all the debris, using a children’s toothbrush and Q-tips. I have also uncovered a couple of dents on the rim that I will address later on.

PhotoGrid_1452021270770

With the rim clean I moved to the chamber and mortise. I did a quick clean of the internals with EverClear and Qtips to remove the loose debris. Now the soak, I unrolled a cotton ball and formed a long swab, using the swab I twisted it into the mortise tightly. I now filled the chamber a quarter of the way with EverClear and allowed the swab to absorb the alcohol. Once the alcohol is absorbed I filled the chamber with two cotton balls and added EverClear to the cotton balls untill saturated. I now set the stummel aside while I worked on the stem.

PhotoGrid_1452021196393

I started the stem by cleaning the exterior first with EverClear and a makeup pad, then the internals with EverClear and stiff/soft pipe cleaners, cleaning until the pipe cleaner came out as it went in.

20160105_143453~2

Now the oxidized stem I applied non-bleach Soft Scrub with a children’s toothbrush and left aside until the Soft Scrub turns from white to a brownish color.

20160105_145753~2

Now the elbow grease, I  now scrubbed the stem vigorously with Soft Scrub and a rag to remove the oxidation

20160105_150600~2

Finishing with a damp Magic Eraser to remove the leftover oxidation. The surface still has a rough texture and would need to be sanded.

PhotoGrid_1452024653610

The stem had a couple of tooth impressions, using a Bic lighter I heated the area of the impressions (moving the flame at all times never leaving it in one spot too long). I was able to raise a few but one was stubborn and would need filling.

PhotoGrid_1452116628613

I roughed up the area to be repaired with 400 grit sandpaper, then wiped the area with an alcohol dampened rag. I made a paste using thick black CA glue and activated charcoal power and applied it to the impression with a toothpick, hitting it with accelerator to set the patch.

20160106_095533~2

After allowing time for the paste to cure I removed the excess using a needle file. I smoothed out the repaired area with 400 grit sandpaper .

20160106_141755~2

I now ran the stem though the various grits of sandpaper and micro-mesh 1000-2400 wet and 3200-12000 dry.

PhotoGrid_1452116681213

The tennon was loose upon receiving the pipe. I used jewelers pliers and a Bic Lighter to expand the tennon from the inside out, by heating the tennon with the lighter and inserting the tip of the pliers into the tennon gradually untill a snug fit between mortise and tennon was achieved.

20160105_163400~2~2

With the stem complete I moved on to the stummel. After sitting for an hours or so the cotton balls had time to absorb some of the tars. The chamber was clean but I would have to repeat the process on the mortise a few more times. Then finishing up the mortise and draught with  EverClear, Q-tips and stiff/soft pipe cleaners until the pipe cleaners came out clean.

20160105_164435~2~2

Now to address the rim dents and darkening.

20160105_192609~2

Using a hot iron and a damp rag I steamed the dents out and lightened the rim darkening with worn micro-mesh.

20160104_222954~2~2

There were three spots of filler present that would have to go.

20160105_165224~2

I applied Method Wood For Good Polish to the filler and let it soften up for a few minutes.

20160105_165804~2~2

Using a pick and X-acto knife I removed the light colored filler.

20160105_195139~2

I refilled with briar dust and Gorilla Glue and left aside to dry.

20160105_200737~2

I removed the excess glue with worn miro-mesh, then stained the new fill with a touch up marker, lighting up the color to match with an alcohol dampened Q-tip.

PhotoGrid_1452116736757

I now wiped down the stummel with Method polish and let dry. Next Howard’s butcher block conditioner, using a Q-tip I worked the Howard’s into the crags and then applied Howard’s to the whole stummel letting it penetrate for a few minutes, hand buffing the excess off with a clean rag. She was now ready for a final buff.

Complete

20160106_190947~220160106_191005~220160106_191025~220160106_191048~220160106_191108~220160106_191034~2

Finished her up on the wheel with white diamond, a few coats of carnauba and a microfiber hand buff.

20160106_191335~2

The Gang all together.

 Clint your generosity is greatly appreciated. The pipes are beautiful and right at home in my collection.

Custombilt Saddle Grain

Now after two month’s of dealing with a medical annoyance doctor’s have put me on a cocktail of meds to control my chronic hives and angioedema. The swelling in my hands has finally subsided so I can now get back to my refurbishing projects.

20151218_124449~2

 Starting the New Year off right .The Custombilt pipes that I received in November from fellow blogger Clint of Pipe Scoundrel were all in pretty nice shape. First up a large Rich Era Custombilt saddle grain billiard, its the first saddle grain Custombilt in my collection. 


Pipe as received.

PhotoGrid_1450463757250PhotoGrid_1450463996402

Overall she’s in nice shape some tar build up around the rim , chunky brittle cake, some red and white paint embedded in the crags. The stem had a few impressions as well.

PhotoGrid_1451541940492

I started off with the stummel and set the stem aside to work on later. The chamber had a thick, uneven, crumbling cake and would have to go. Starting with the smallest attachment my Castleford reamer had to offer and working up to the largest that the chamber would except I removed the tired cake bring it back to briar. The chamber was free of any signs of a burn out. I finished up with 400 grit paper to smooth things out.

PhotoGrid_145154199064020160101_152536~2

My attention now turned to the rim. Caked with tar, paint and char. I applied a generous amount of Method wood for good polish to the rim and set aside to penetrate the built up. After allowing the polish to soften the build up I worked on the rim with a children’s tooth brush, makeup pads and Q-tips until the build up was removed. When I run into a tough build up I’ll leave the stummel upside down on a Method polish soaked makeup pad for 20 minutes.

20160101_160854~2

With the build up removed I could concentrat on the rim char. Using worn miro-mesh I was able to remove most of the rim darkening.

20160101_161827~2

There were a few dings in the rim after the tar and char was removed. I used a hot iron and damp rag to steam out the imperfections.

20160101_170349~2PhotoGrid_1451715765841

The internals needed a good cleaning, I ran it though a retort using EverClear. I used a mortise brush, shank brush, Q-tips, cotton balls and hard/soft pipe cleaners to remove the debris.

PhotoGrid_1451716123076PhotoGrid_1451716151540

Next the externals, I started with Method polish but would need something stronger to remove the red and white oil based paint and what I think is blacktop crack filler for driveways. I used EverClear and Q-tips to remove the gunk.

PhotoGrid_145171555132320160102_011731~2

There was one scratch on the outside of the bowl that would need filling. I cleaned the area of work with EverClear and a Q-tip, filled the imperfection with Gorilla Glue and briar dust and left to dry. After drying I removed the excess glue and dust with miro-mesh. I restained the area with touch markers and wiped away the excess with an alcohol dampened rag.

PhotoGrid_1451716181938

I now applied Howard’s butcher block conditioner with a rag and let it penetrate for 10 minutes , hand buffing off the excess with a clean rag.

20160101_163817~2PhotoGrid_1451758939146

With the stummel complete now on to the stem, starting first with non-bleach Soft Scrub to remove the oxidation. I applied a generous amount using a children’s toothbrush and left it aside to begin working. Once the Soft Scrub turns from white to a brownish color I begin to remove the oxidation with a rag and plenty of elbow grease.

PhotoGrid_1451715817648

The button/bit area of the stem had a few impressions that needed attention.

PhotoGrid_1451715949731

I first rough sanded the area to be repaired with 400 grit wet sandpaper and then wiped down the area with an alcohol dampened rag. I mixed thick black CA glue and activated charcoal power into a paste and applied it with a toothpick to the impressions and worn button, I taped off the button with painters tape so the repair would stay in one spot I allowed the paste to harden a bit before removing the tape and again hitting it with accelerator. I now left it to cure for a few hours.

PhotoGrid_1451716254744

After my internal cleaning of the mortise the tennon fit was left loose, this happens with many of my estates. I ues jewellers pliers to expand the tennon from the inside out by heating the tennon lightly with a bic lighter and inserting the tip of the pliers into the tennon and slowly expanding the tennon until a snug fit is achieved between mortise and tennon.

PhotoGrid_1451716030812

After allowing the repair to cure I could now shape the new button. Using needle files I removed the excess paste and new button began to form. I used blue painters tape to tape the under side of my needle file so I wouldn’t cut into the bit and would be able to get the file flush against the new button.

20160102_004026~2

After completing the repair I wet sanded the stem first with 1000,1800, 2000 grit sandpaper then the various gits of micro-mesh.

Complete

PhotoGrid_145178968006820160102213710~220160102213726_1~220160102213305~220160102213104~220160102213233~2PhotoGrid_1451789730428PhotoGrid_1451789710844

Finished up on the buffing wheel with white diamond, carnauba, and miro fiber hand buff.

This Custombilt was a true pleasure to clean up and add to my collection. Thanks Clint.