


In 1948 Jean Cassegrain inherited a small shop near the French Theater on the Boulevard Poissonnière in Paris, called “Au Sultan”. Articles for smokers and fountain pens were offered there.
Now, the absolute bulk of the pipes Cassegrain found in the inventory was from war-time production and due to the sharp restrictions on pipe production the French government had enforced in 1940, these pipes were of very poor quality and showed large fills. Strictly speaking, they were not marketable now that the French pipe industry produced pipes of pre-war standards again. In this situation Cassegrain had the probably most enlightened moment in his life: he took some of these pipes to a leather worker who clad bowls and shanks in leather. Only the rims of the bowls and the shanks’ faces remained blank.
I like to get more bang for my buck, so I like to go after pipes listed in lots, keeping what I want and donating or selling off what doesn’t catch my eye. As the small flat rate box fills with extra pipes, I’ll take the box to my wife and daughter to see if anything catches their fancy. Usually it’s let em go to someone else but for some reason the leather-covered LONGCHAMP pipes my daughter found unique. She’s ten now and has taken an interest in some of my refurbishing projects. I have a few in my rotation that she wouldn’t let go, a red Color Duke by Dr.Grabow, a cheerywood Ropp and a BamBoo Briar.
Back Out Of The Box


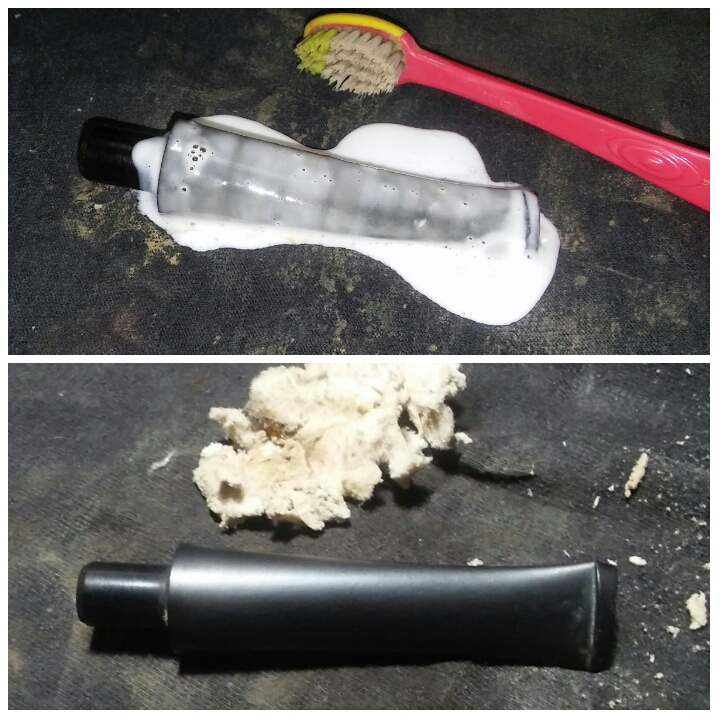
The pipe was in good shape, leather wrap was a little dry & dirty, worn button, deep tooth impressions, oxidation, rim darkening and brittle cake.

A conventional reamer would not work with a ovel bowl, instead I started with 220 grit sandpaper and finished with 400 grit sandpaper.
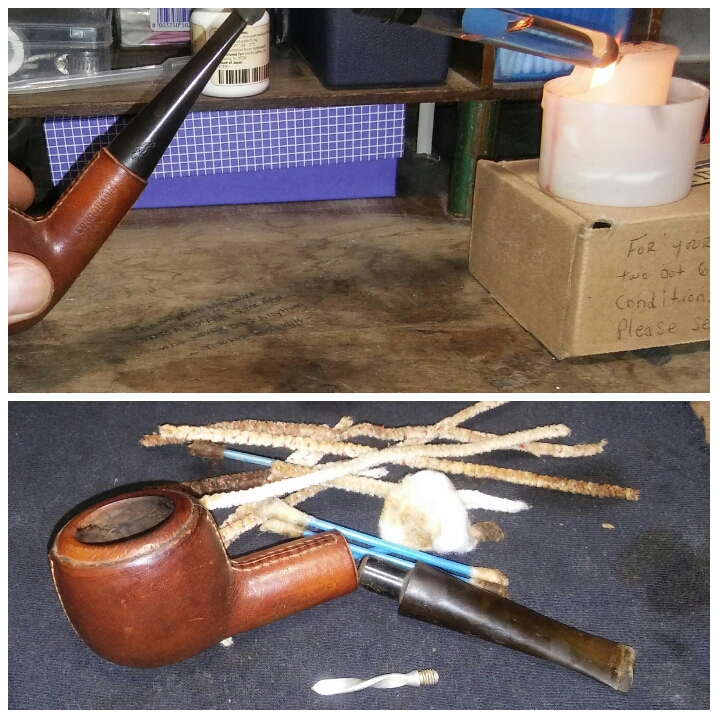
The internals were caked in old tars,oils and tobacco. I ran it though a retort using EverClear and cotton balls. I then did a thorough cleaning of the chamber, mortise and stem with EverClear, Q-tips and stiff /soft pipe cleaners. Cleaning until the last pipe cleaner came out as it went in.

There were a few dings in the rim, using a household iron on medium/ high heat and a damp rag I would steam out the imperfections. Covering the rim with the damp rag and applying it to the hot iron working in intervals until the imperfections were almost gone.
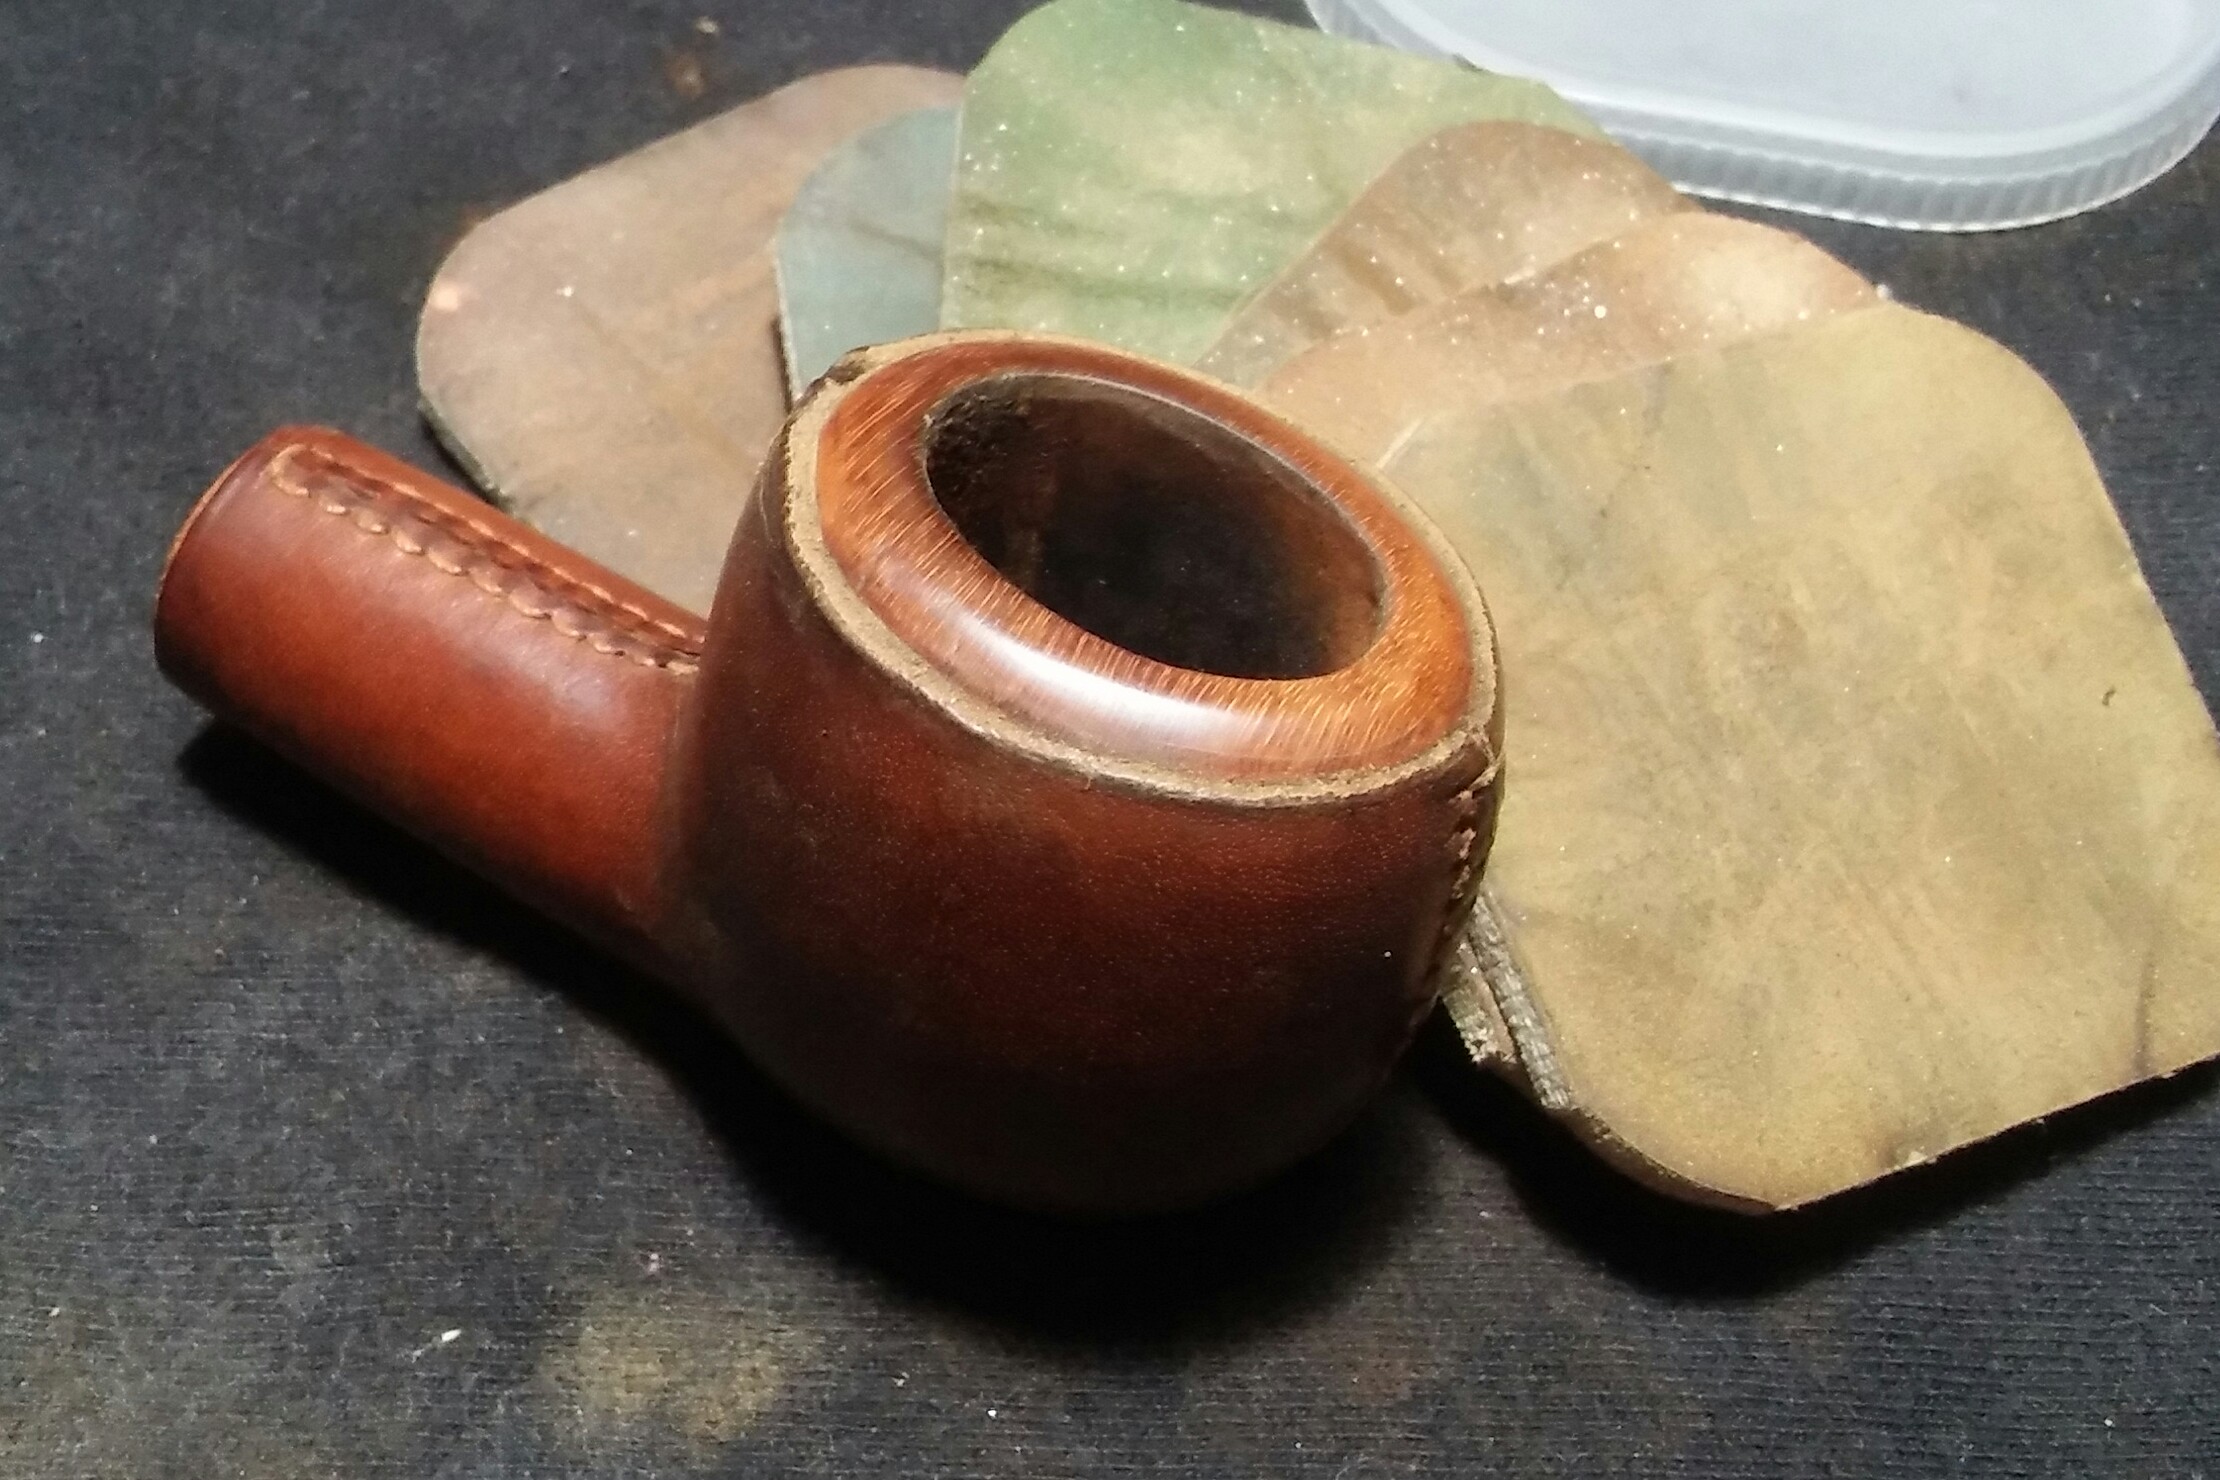
What was left of the imperfections and darkening, I removed with worn micro-mesh pads.
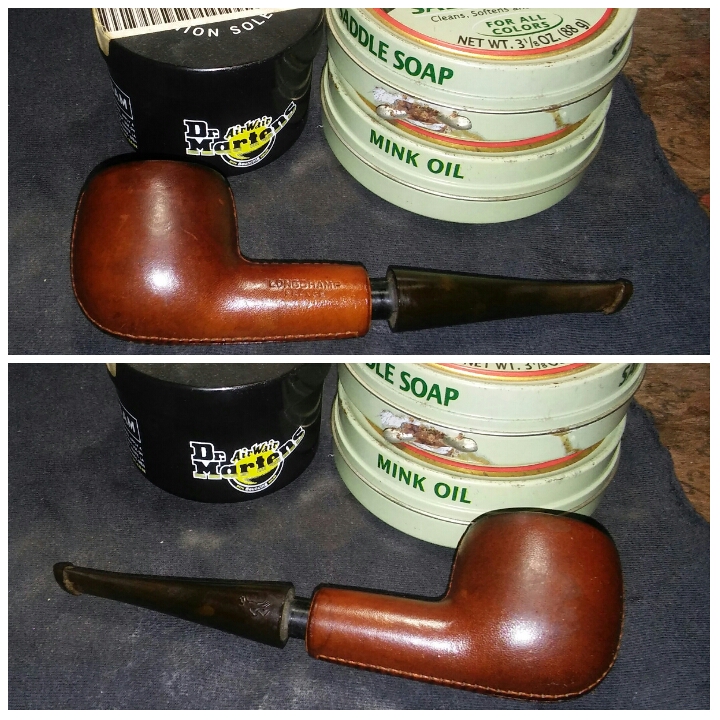
The leather covering was dry and grimy. I busted out my wife’s leather cleaning products. I started with saddle soap to clean away the grease and grime, being careful not to get it into the chamber or mortise. I then switched to Doc Martin’s leather conditioner and finally ended with mink oil. The leather was now soft and supple.

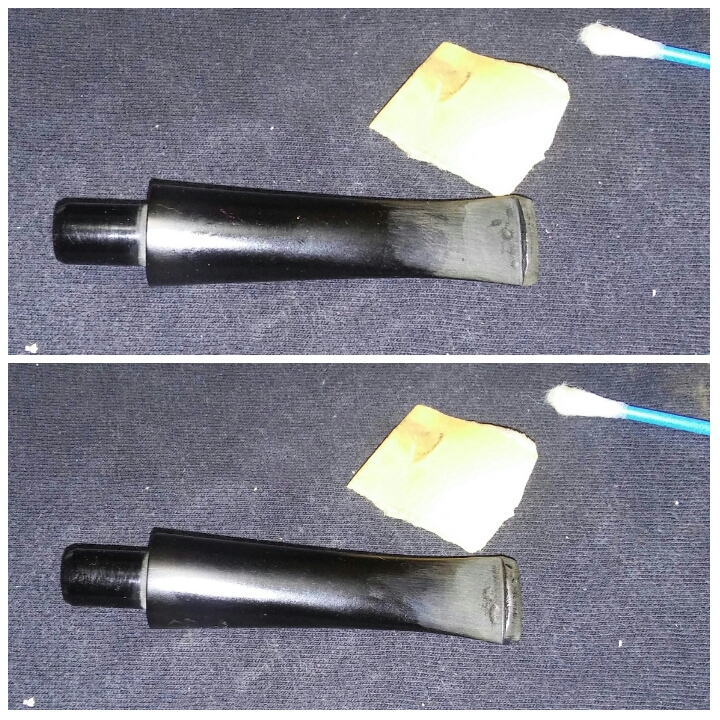
The oxidized stem, I applied a generous amount of non-bleach Soft Scrub to the stem with a children’s toothbrush and left it aside to penetrate the oxidation. Once the Soft Scrub turns from white to a brownish color its time to scrub vigorously with a rag until the oxidation is removed, finishing up with a damp Magic Eraser to remove the leftover oxidation.
It was now time to address the tooth impressions, I first roughed up the area of repair with 400 grit sandpaper so my fill would have a good hold and then cleaning with EverClear to remove my sanding dust.

To fill the deep impressions and rebuild the worn button I mixed thick black CA glue and activated charcoal power into a paste and applied it to the impressions/button using a toothpick. I then hit it with accelerator to set the repair, leaving it aside to cure overnight.
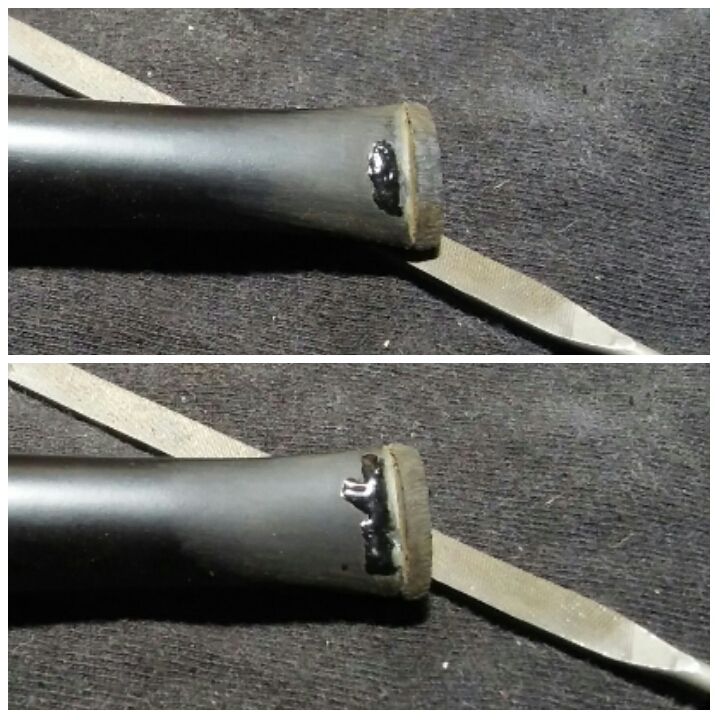
Now that the repair had time to cure overnight, I could shape the new button. Using a flat needle file I removed the excess until I had an uniformed shape.

Once the new button was at a suitable thickness I moved to 400 grit sandpaper to remove the file marks.

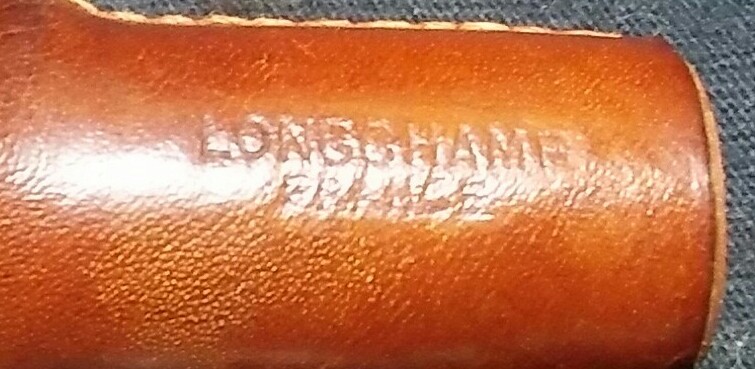
Before hitting the micro-mesh, I re-touched the logo. I tried multiple applications Rub & Buff, White Out Pen and finally white nail polish, which was the winner.

I then sanded the whole stem with 1000 grit sandpaper wet, then ran it though the various grits of micro-mesh pads, 1500-2400 wet and 3200-12000 dry. Stummel and stem complete she was now ready for the final buffing.
Complete.


Finished up the rim on the wheel with white diamond, a few coats of carnauba and a microfiber hand buffing. I lightly buffed the leather covering with a clean buffing wheel. Buffing the stem with blue compound.
Thanks For Taking A Look.

Nice rejuvenation of the leather. Looks like new.
LikeLiked by 1 person
Thanks Al
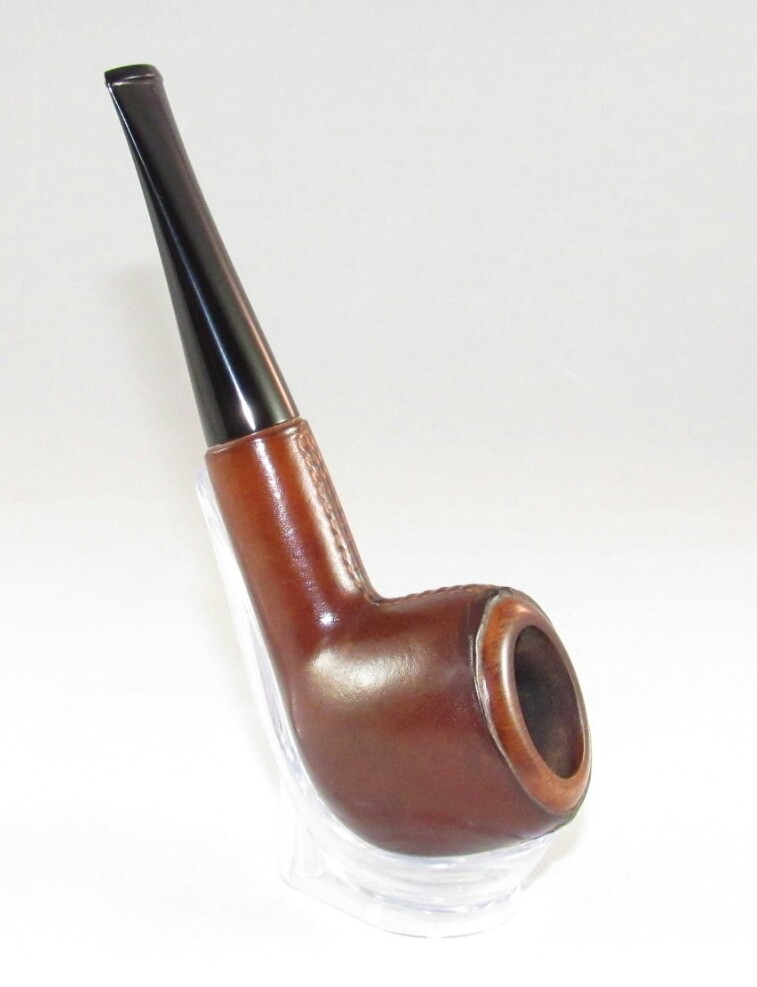
My daughter was pretty happy to see this one come out of the box. In the end I was pretty happy with the way it came out.
LikeLike