

I hope everyone had a Happy and safe Christmas, enjoyed family and friends and received some memorable gifts. My memorable gift would come as a lot of estate pipes that my wife snagged as a Christmas gift and after a little digging I saw what she payed and I was even more surprised.


Newly listed, new seller (zero feedback) and my wife said she knew at least one in the lot was a Peterson, even if she was wrong it was still a good deal. I had to go back through completed listings to find the original auction and I must say she has a good eye, the photos were poor and the description above offered null. So I guess there are deals to be had on the old bay.

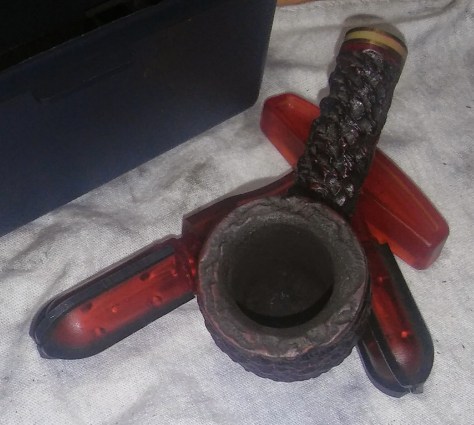
I was a pretty happy pappy on Christmas morning. Three Peterson’s, a Jobey, a small leather covered Big Ben and a bent little dinky pipe named Dinky. I started with the Peterson Emerald 53, a neat little pipe, tho the emerald band had lost its luster.
The Restore


Overall the little Pete was in good shape, some rim build up, light chatter and oxidation, the emerald band was now a cream color and a chip at the rim, (highlighted in the above photos).
I started off with the chamber and my PipNet reamer, starting with the smallest attachment and finishing with the second. The chamber was free of any char/defects.


Next the rim build up, I applied Method Wood For Good polish to the rim with a Q-Tip and left it aside to penetrate the debris.Once the build up softens its easily removed with Q-Tips.
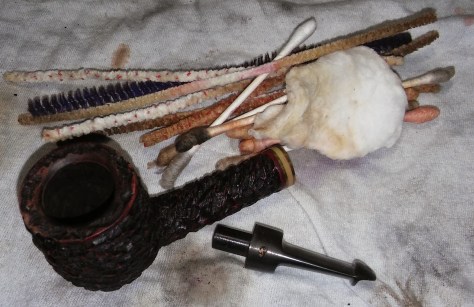
Now with the rim clean I moved onto the internal cleaning. Using EverClear, shank/mortise brushes, Q-Tips and stiff/soft pipe cleaners I scrubbed the internals of the stummel and stem until my final pipe cleaner came out as it went in. I wiped down the exterior of the stem with an EverClear dampened makeup pad.

Now to address the chipped rim. I stated by cleaning the area to be repaired with a Q-Tip dipped in EverClear and removing any loose bits of briar. I then applied a thin layer of Gorilla Glue to the chipped area and then packed with briar dust, I would repeat this process a few times, building layer upon layer of glue and briar dust until I had built up the area just past the existing rim. I now had room to sand the repair without changing the shape of the pipe. With the patch not completely set I lightly sanded the area with an emery board until it was flush with the original rim, using a pick and micro-mesh pads I carefully began to rework the patch to match the original rim and rustication.
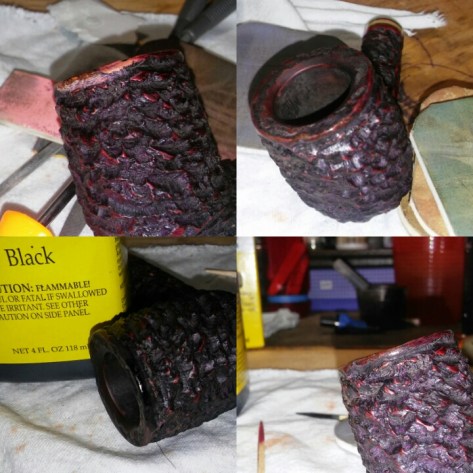
Once the shape and rustication I wanted was achieved I applied Fiebing’s black to the patch and lightly flamed to set the dye, removing the excess with an alcohol dampened Q-Tip. I then lightly polished the area with a worn micro-mesh pad, then going back in with red Fiebing’s dye, lightly flaming once again to set the dye, removing the excess with an alcohol dampened Q-Tip and lightly polishing the area one last time with worn micro-mesh.
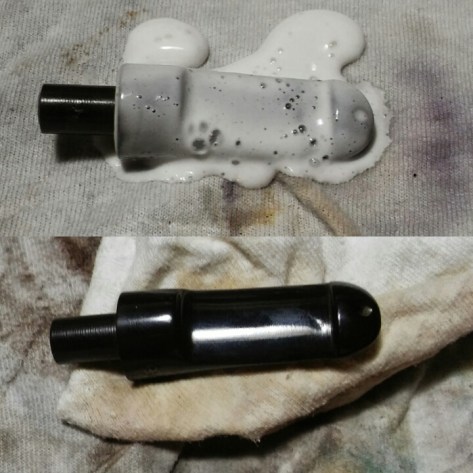
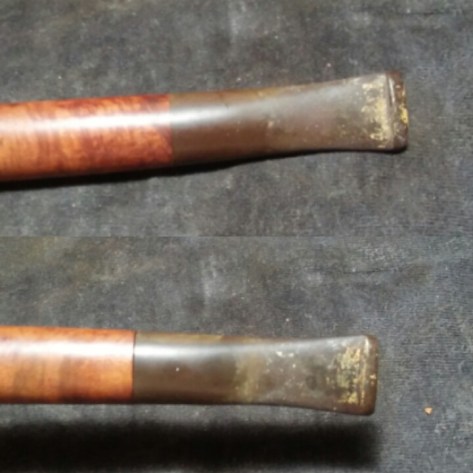
With the stummel complete I moved to the stems oxidation, I applied a generous amount of non-bleach Soft Scrub to the stem and left it to penetrate the oxidation. Once the Soft Scrub turns from white to a brownish color its time to scrub vigorously with a rag adding more Soft Scrub as needed until all oxidation has been removed (holding the stem under natural light will help to see if all oxidation has been removed).
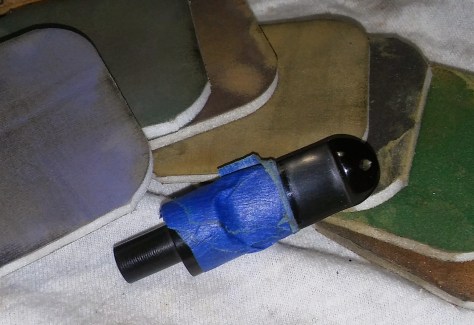
With the oxidation removed the stem was in fine shape aside from some light chatter, I taped off the bulk of the stem to keep my sanding in one area. Using 1000 grit sand paper wet I began working the area until no visible chatter was left. I then ran the stem though the various grits of micro-mesh 1500-2400 wet and 3200-12000 dry. I removed the tape before polishing the whole stem with 8000 and 12000 mesh pads. (When tapping off a portion of the stem there will be a visible difference between the area of work and the untouched portion, it requires buffing with blue compound to remove the fine sanding marks and will match up once again).

Now the rustication of the Peterson Emerald is far deeper then the Donegal line, so standard buffing would be disastrous, I went with Renaissance Wax and a shoe polish brush instead. I will say Renaissance Wax is not something I’ll break out that often, its not that the finished pipe isn’t beautiful, its the smell,” I can’t stand the smell ” but the aroma fades with time and leaves behind a beautiful pipe.
Complete
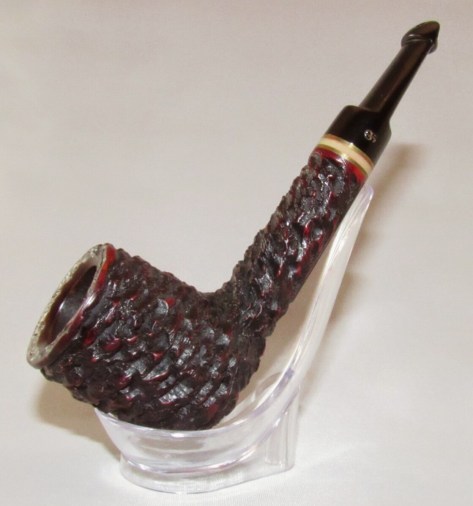


Buffed the stummel with Renaissance Wax and a shoe polish brush, buffing the stem with blue compound.


You must be logged in to post a comment.