Tag Archives: filler

Presumably, A Majestic C.G.F. Meer Lined (“SANDY”)

PhotoGrid_1471104648869

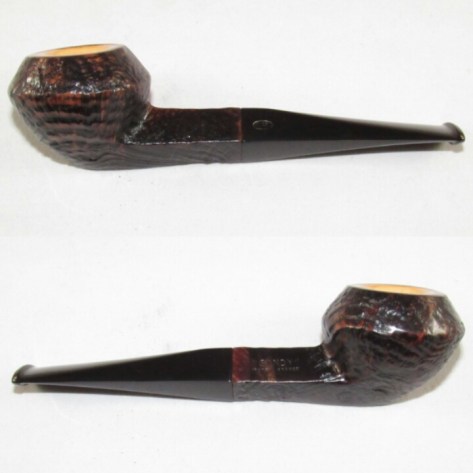
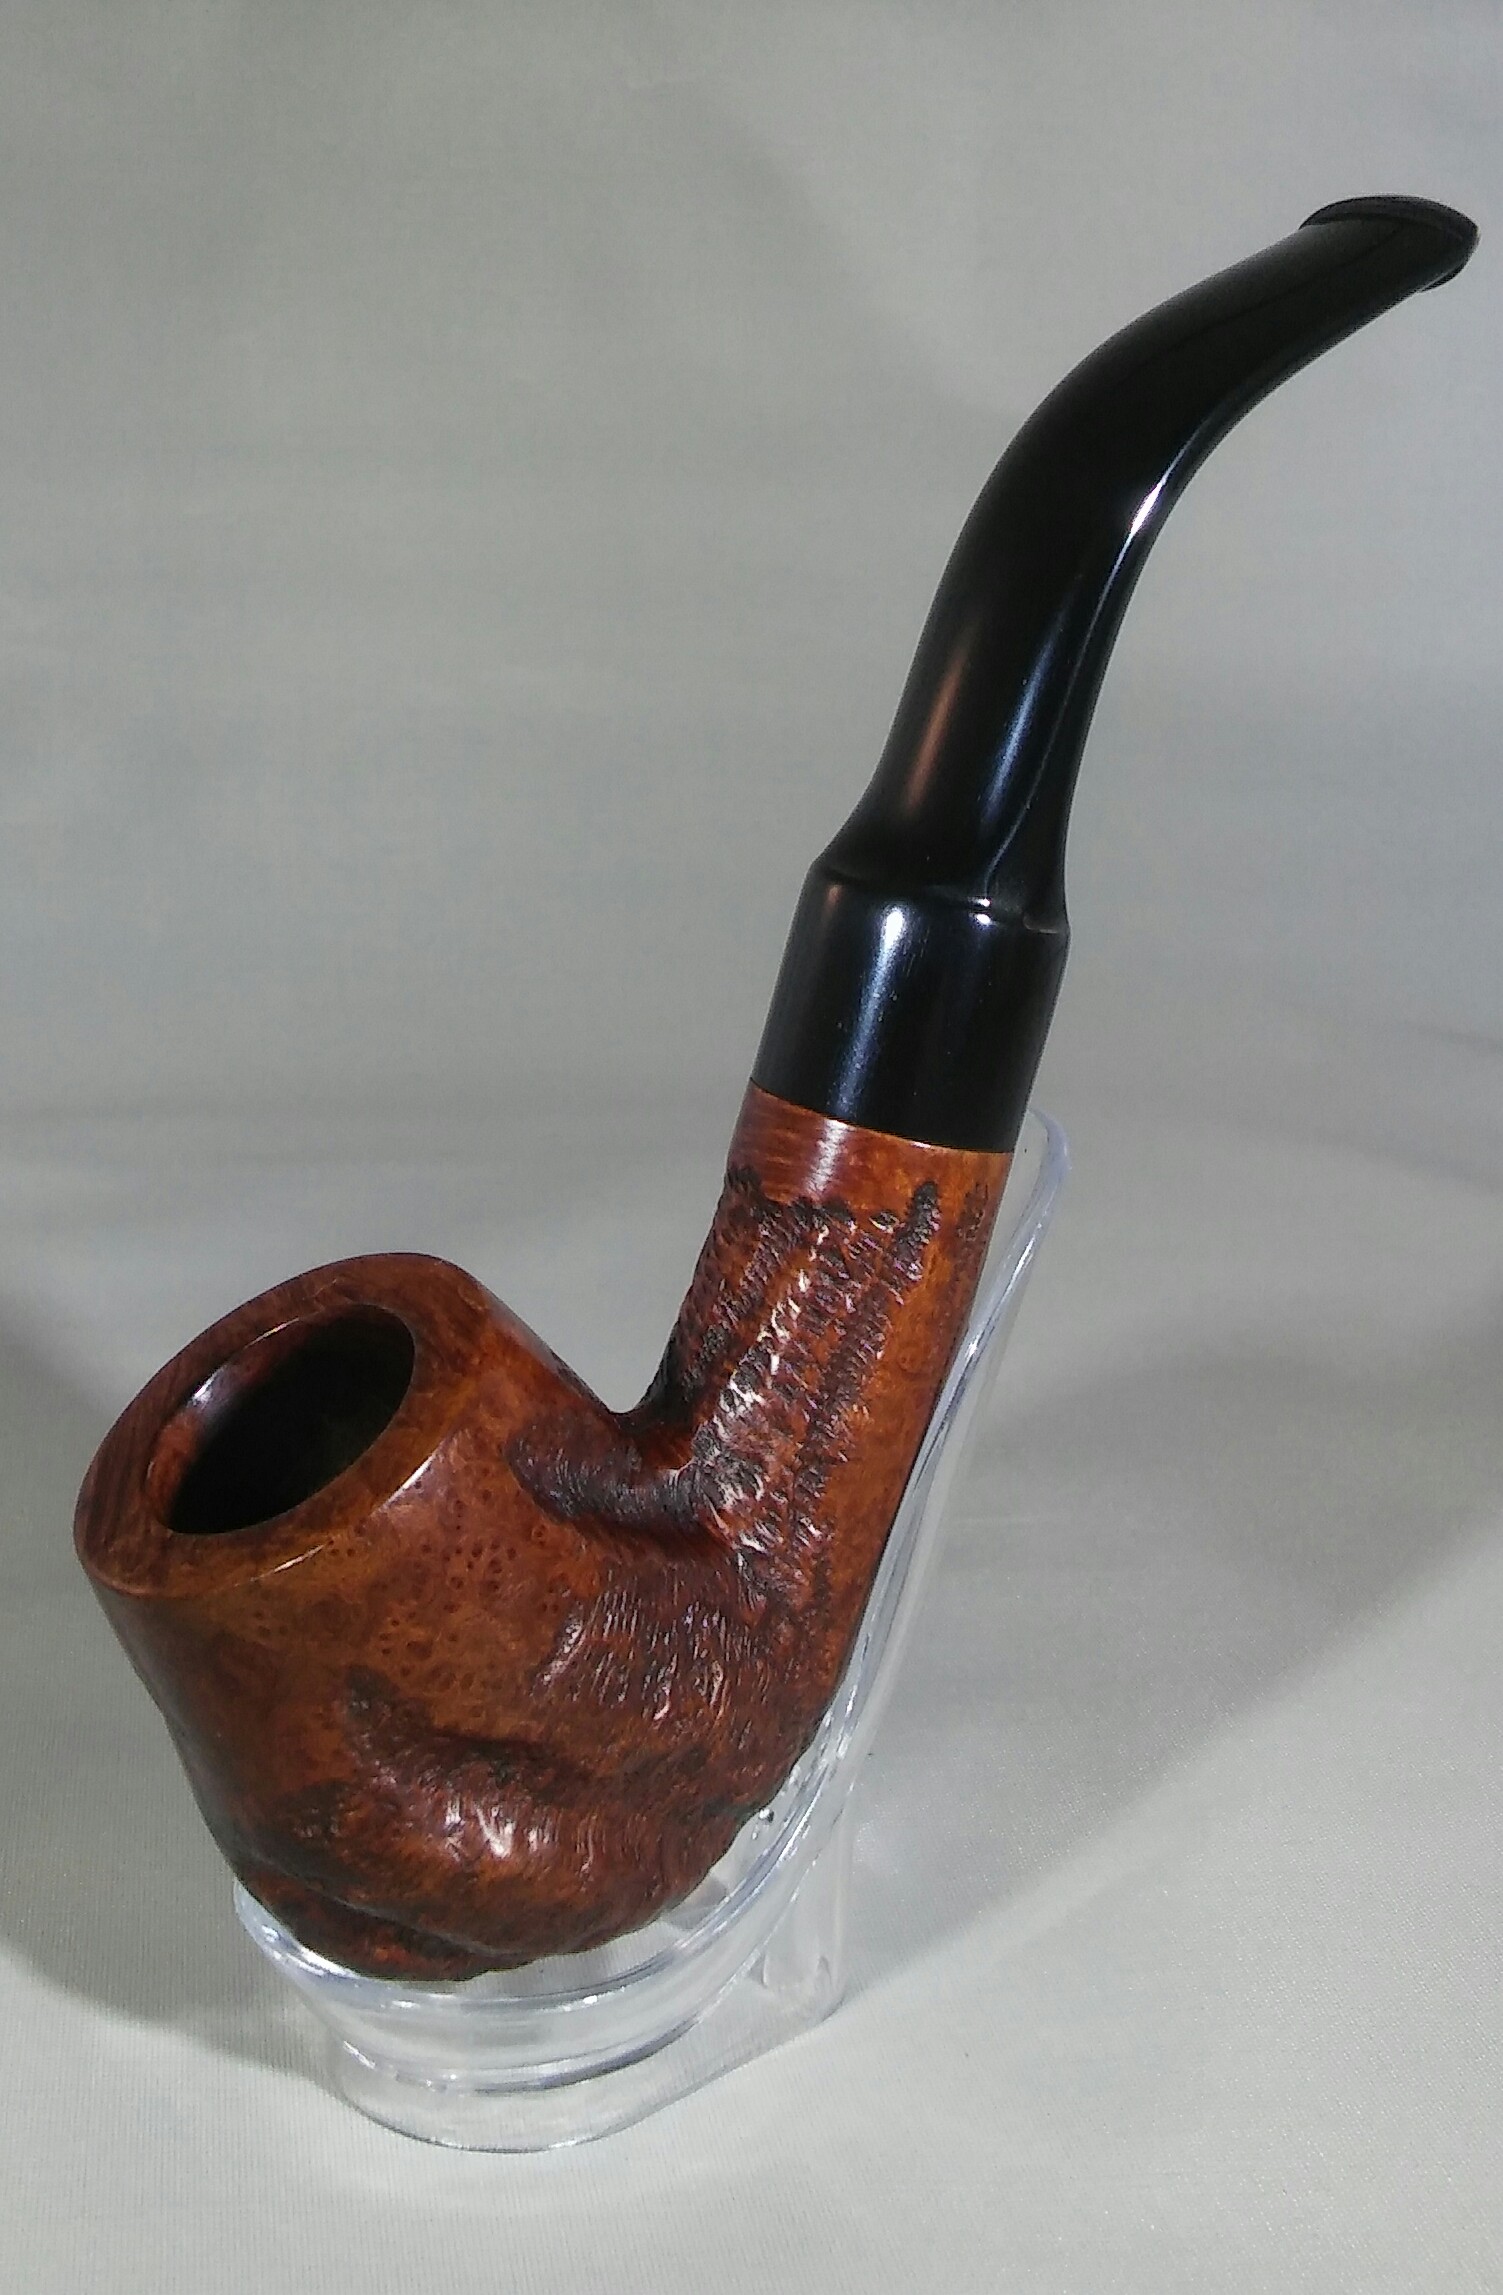
I believe this to be a Majestic C.G.F. made pipe, the name “SANDY” is stamped on the right side of the shank, below that Made In France, there is no other stamping on the stummel. There is a C.G.F. logo on the stem, I have researched the C.G.F. logo and it seems to point to the Majestic company out of Paris France, there is very little info on Pipedia other then a few advertisements and examples of there pipes ( Majestic info ). I’m unsure if ” SANDY” refers to the pipes finish or a pipers name, I know there were mail order gimmicks back in the day where you could have a pipe personalized but I’m unsure if this is one of them.

Restoration

PhotoGrid_1470098302760PhotoGrid_1470098326219

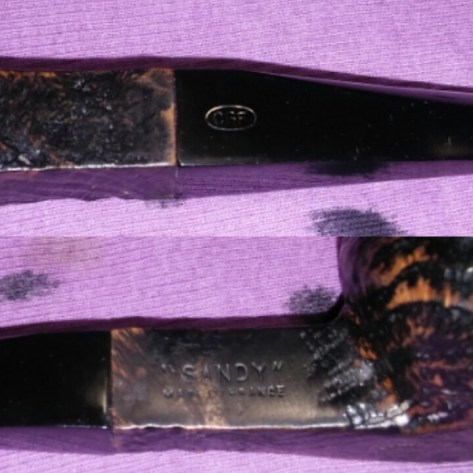
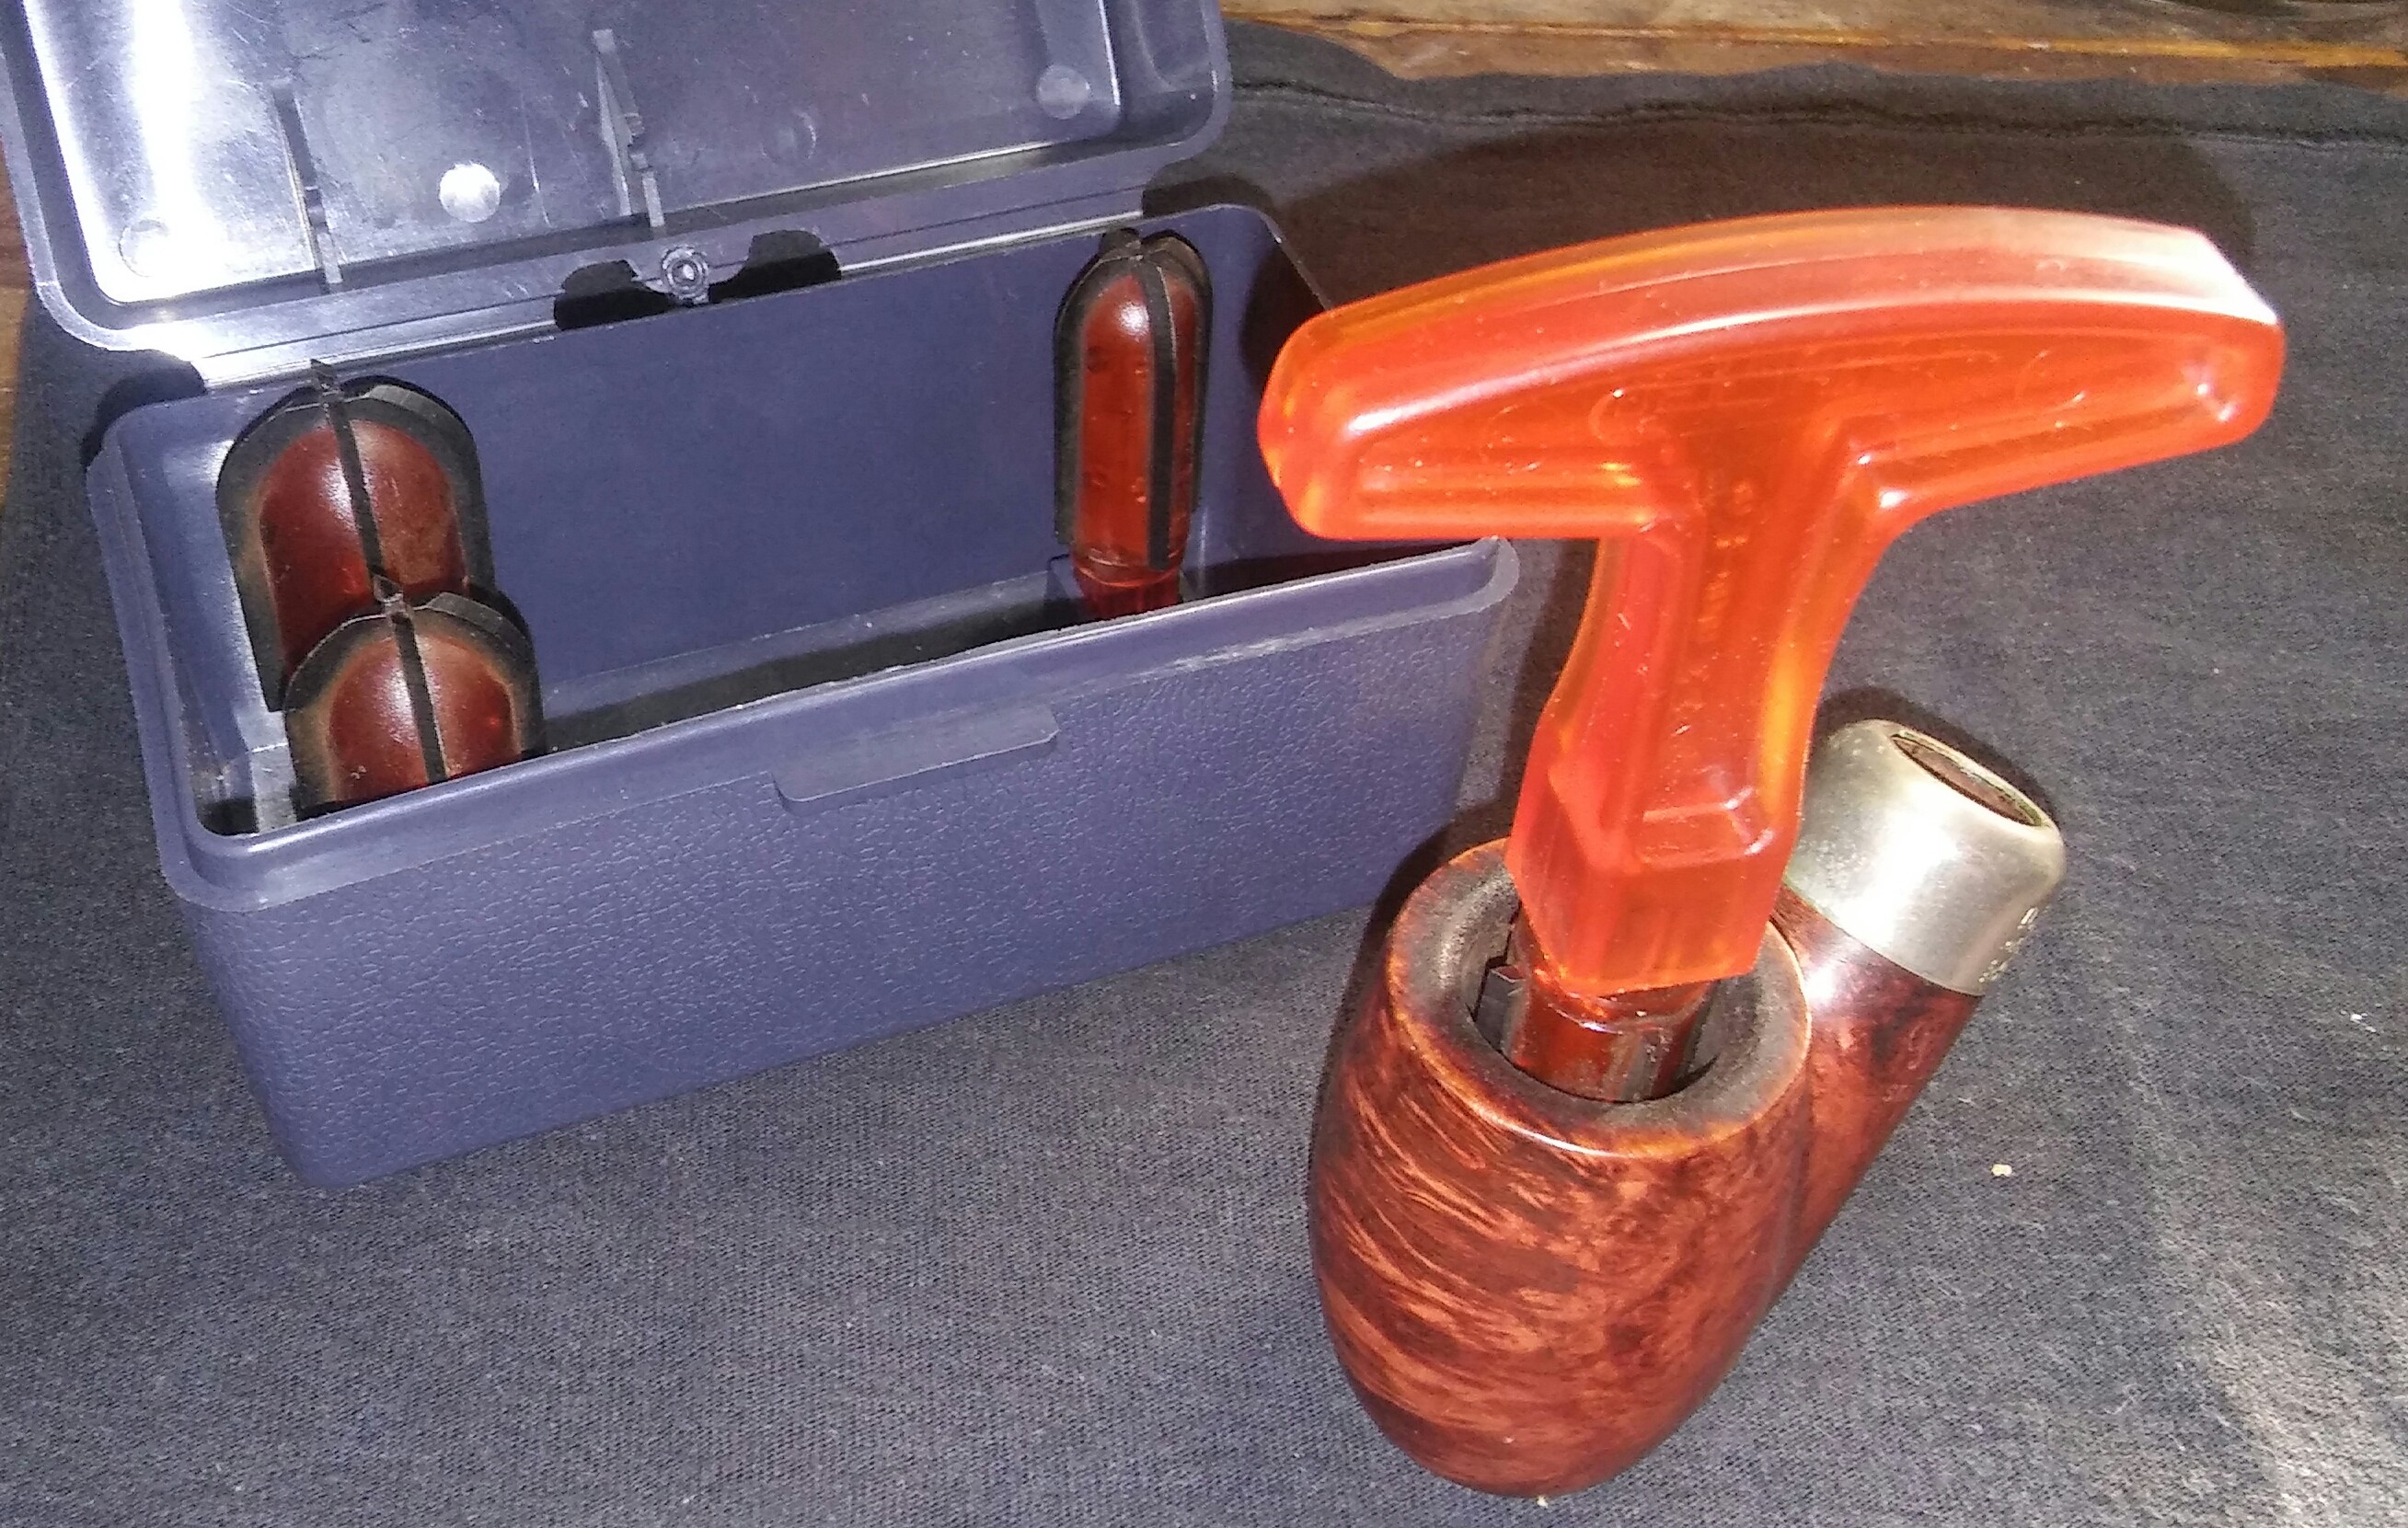
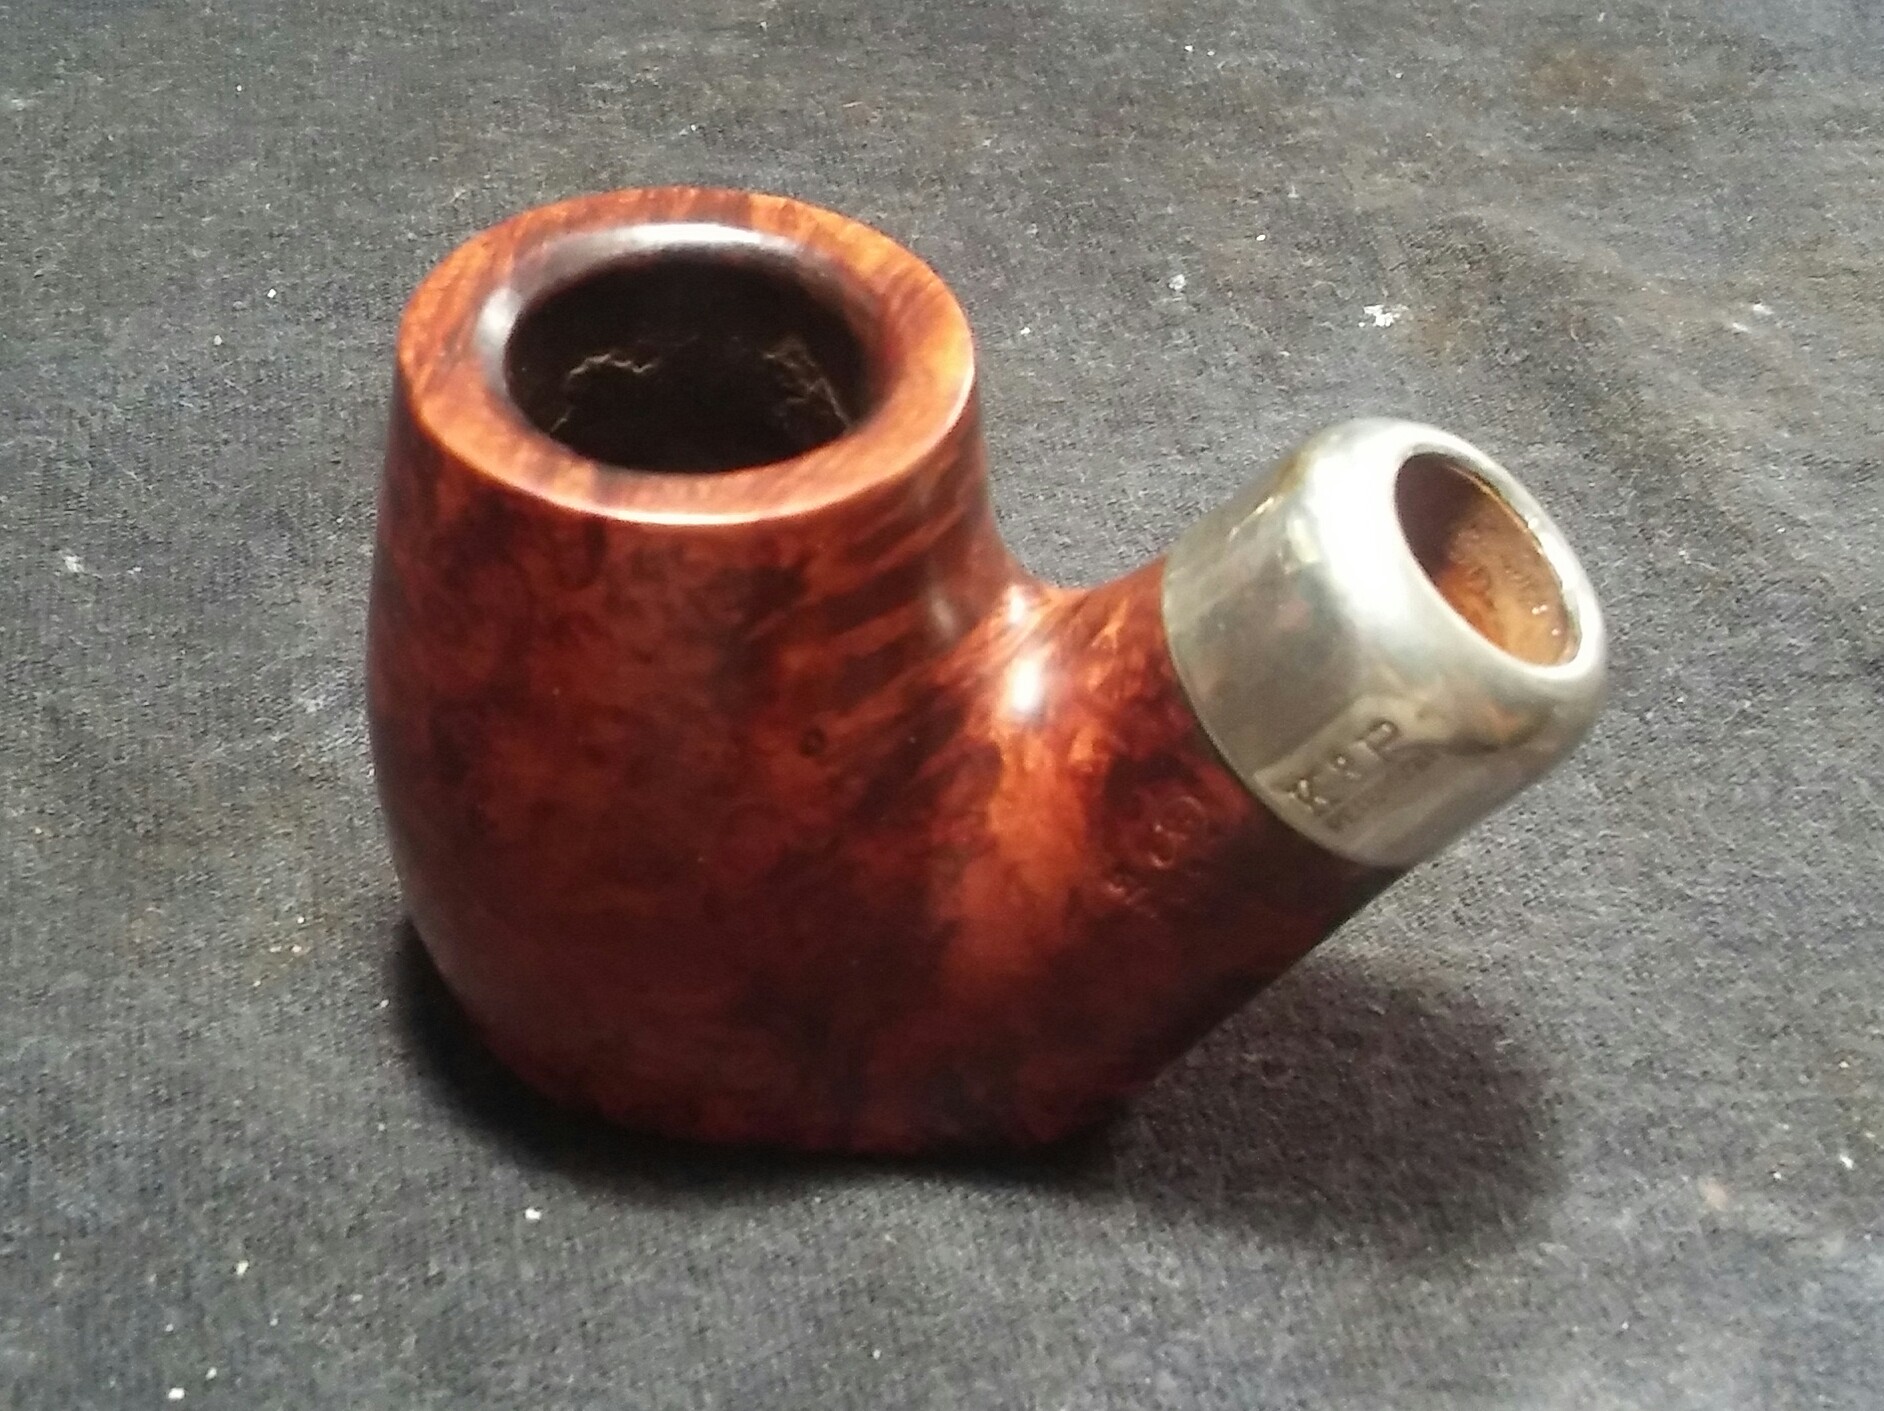
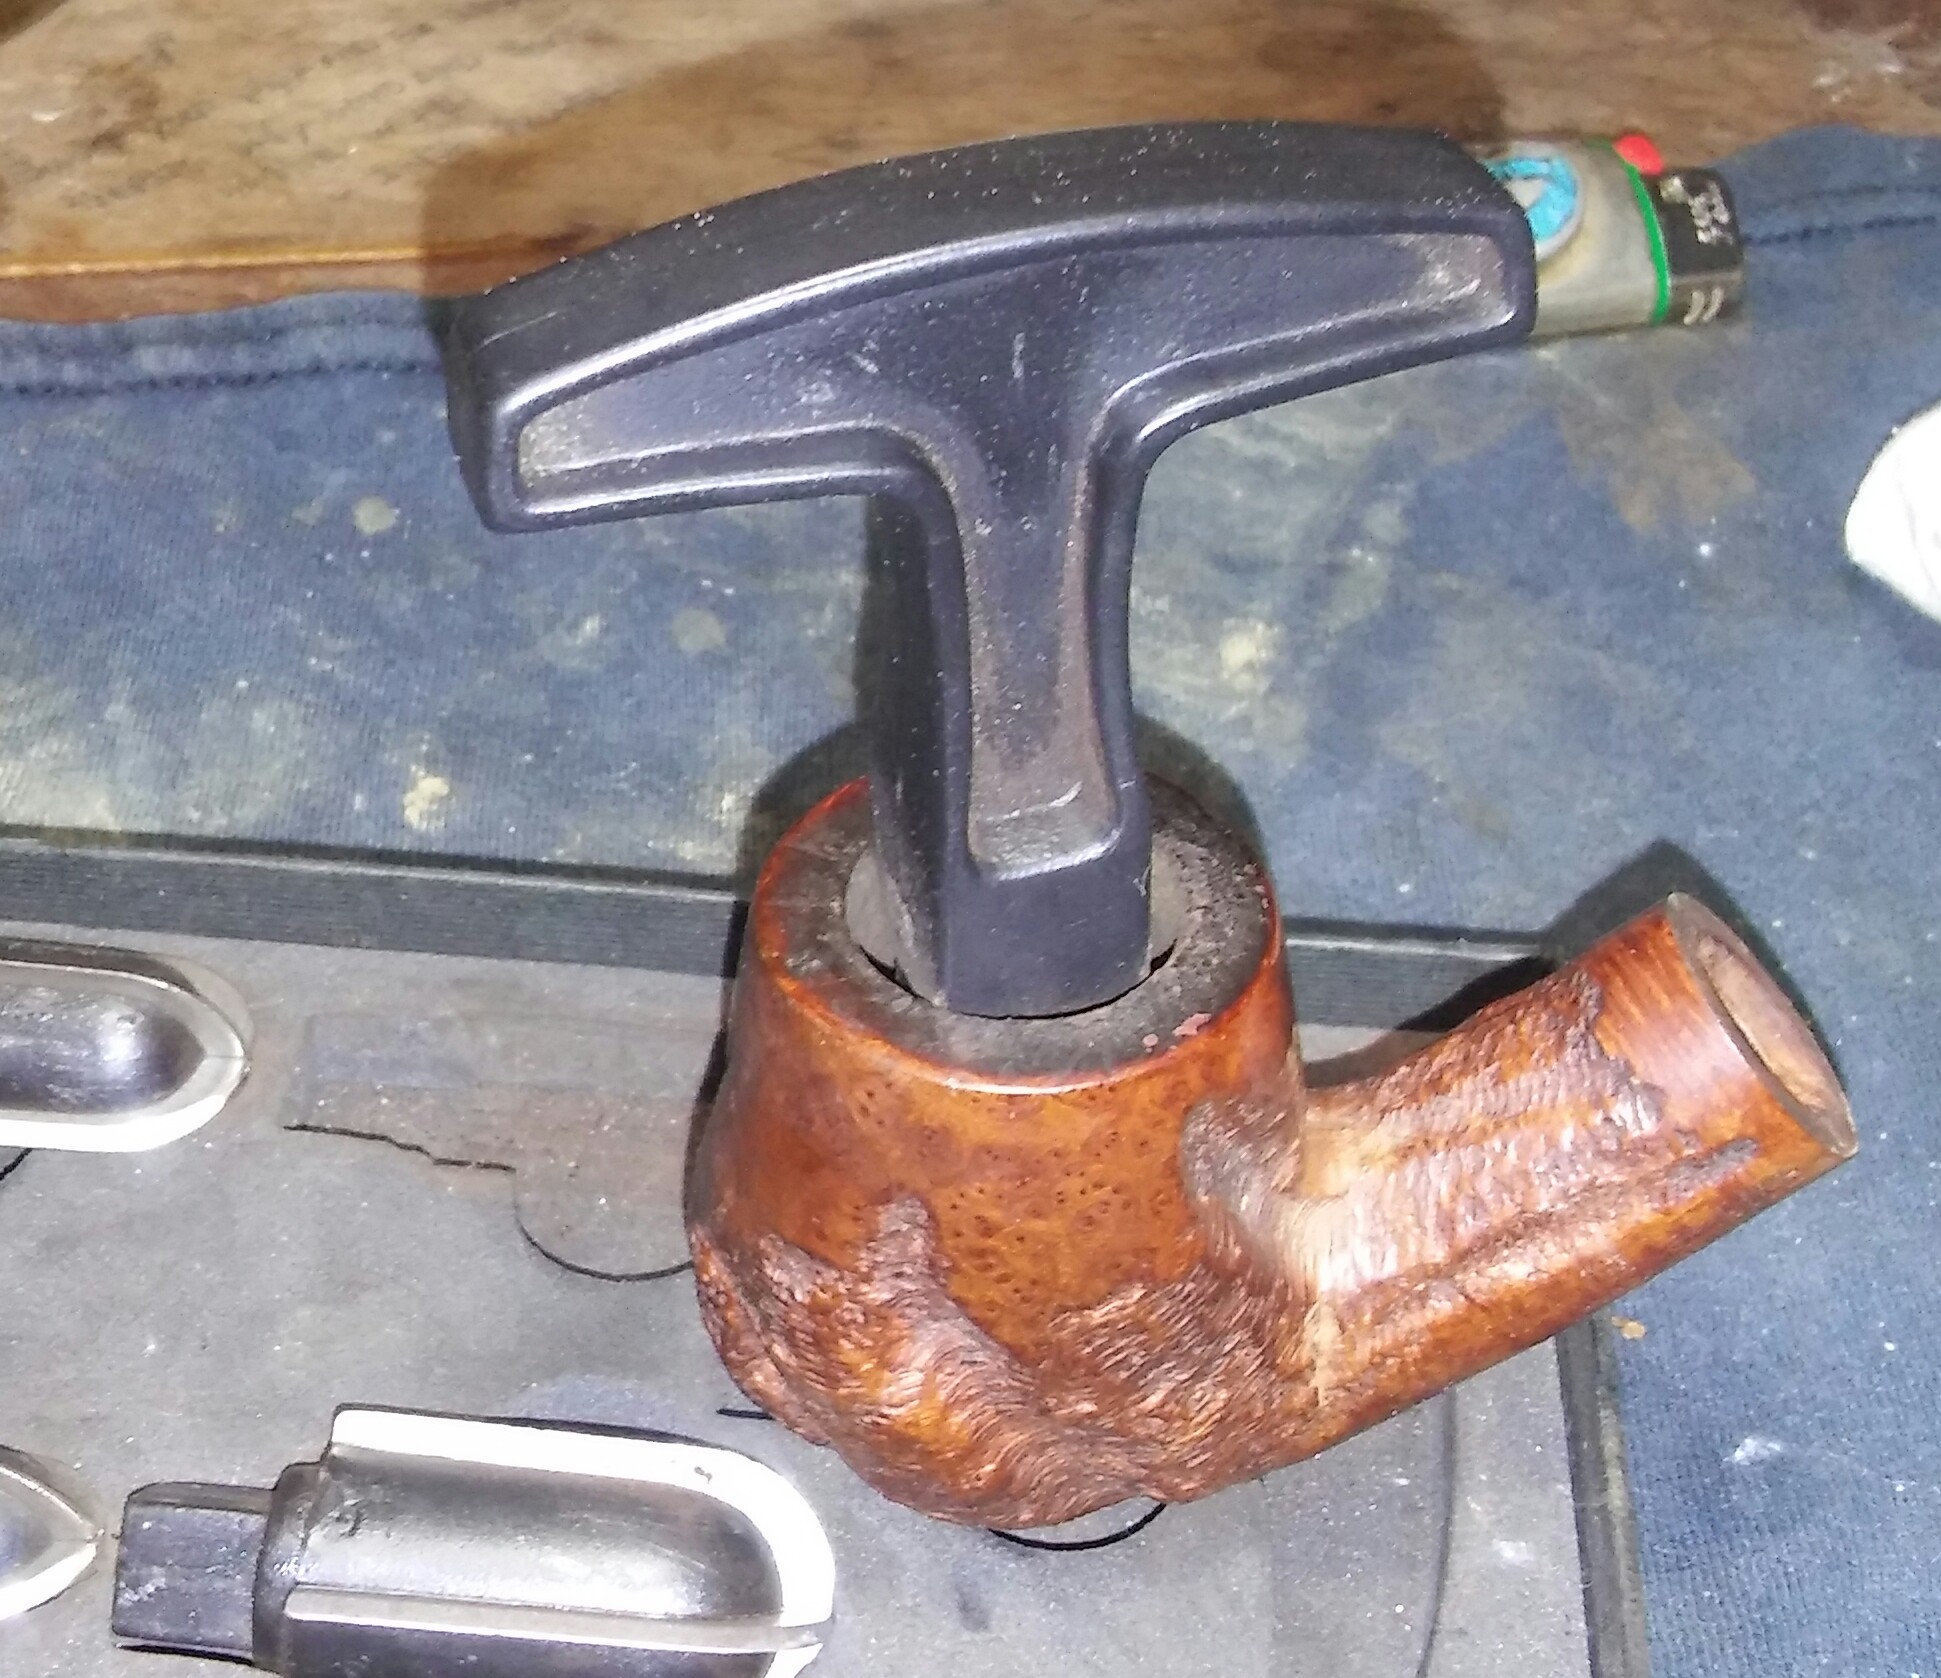
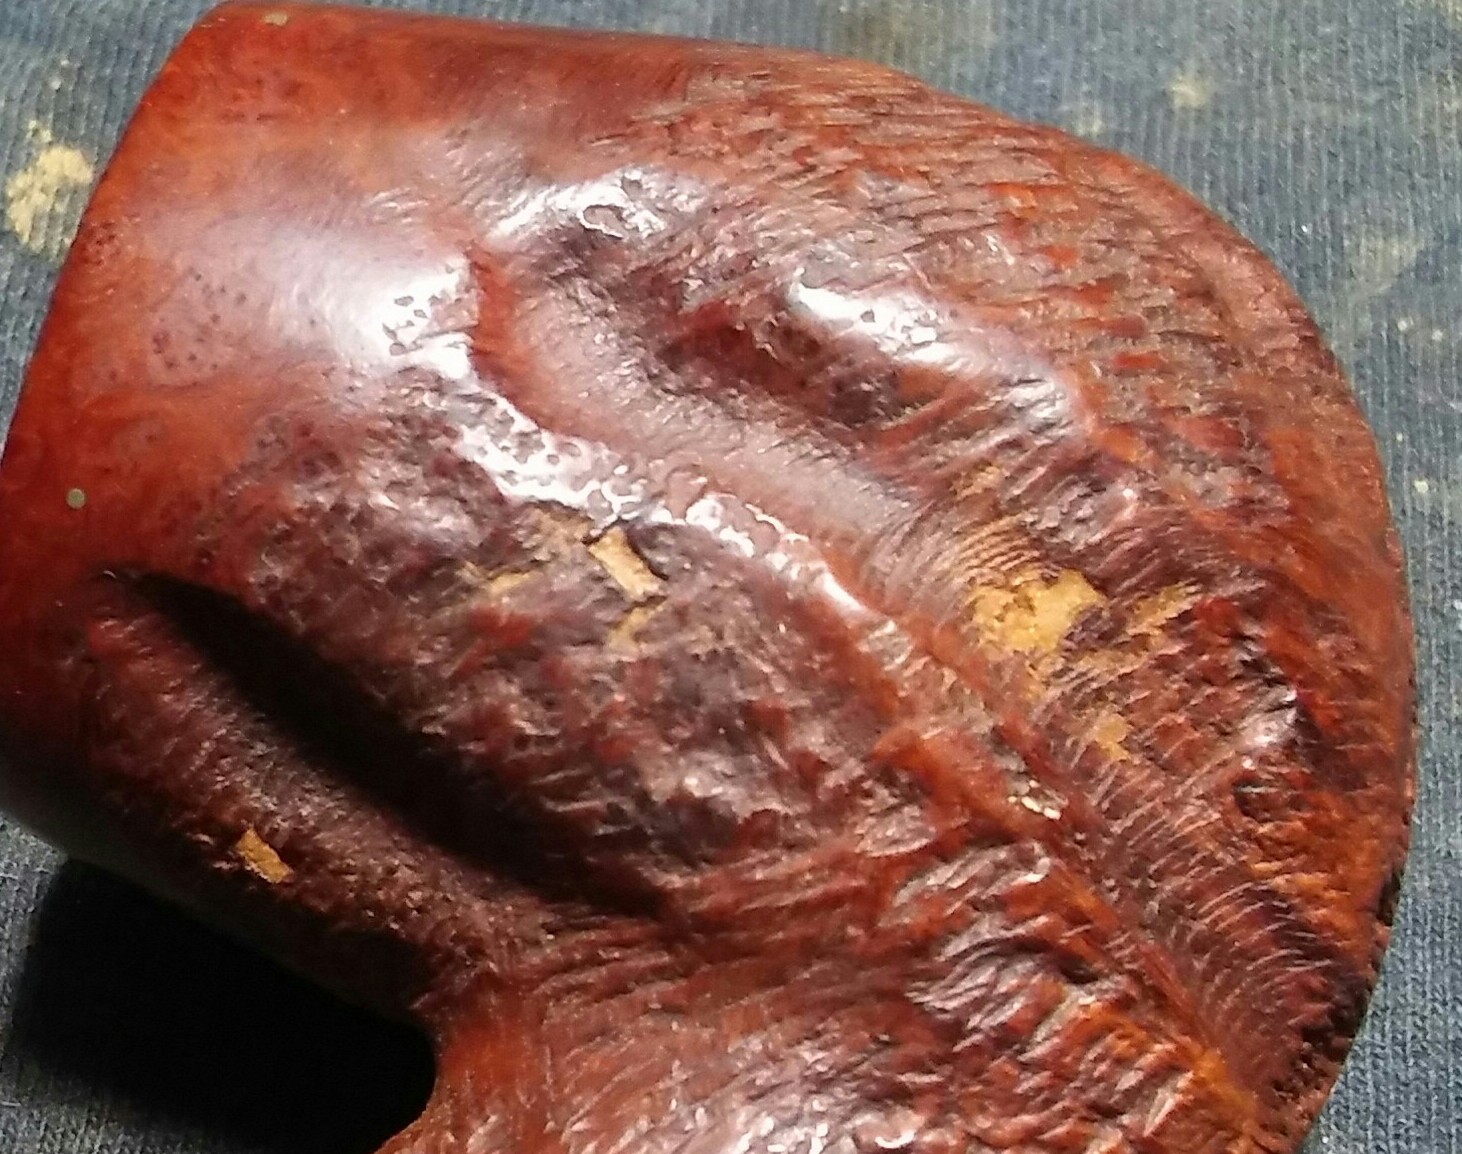
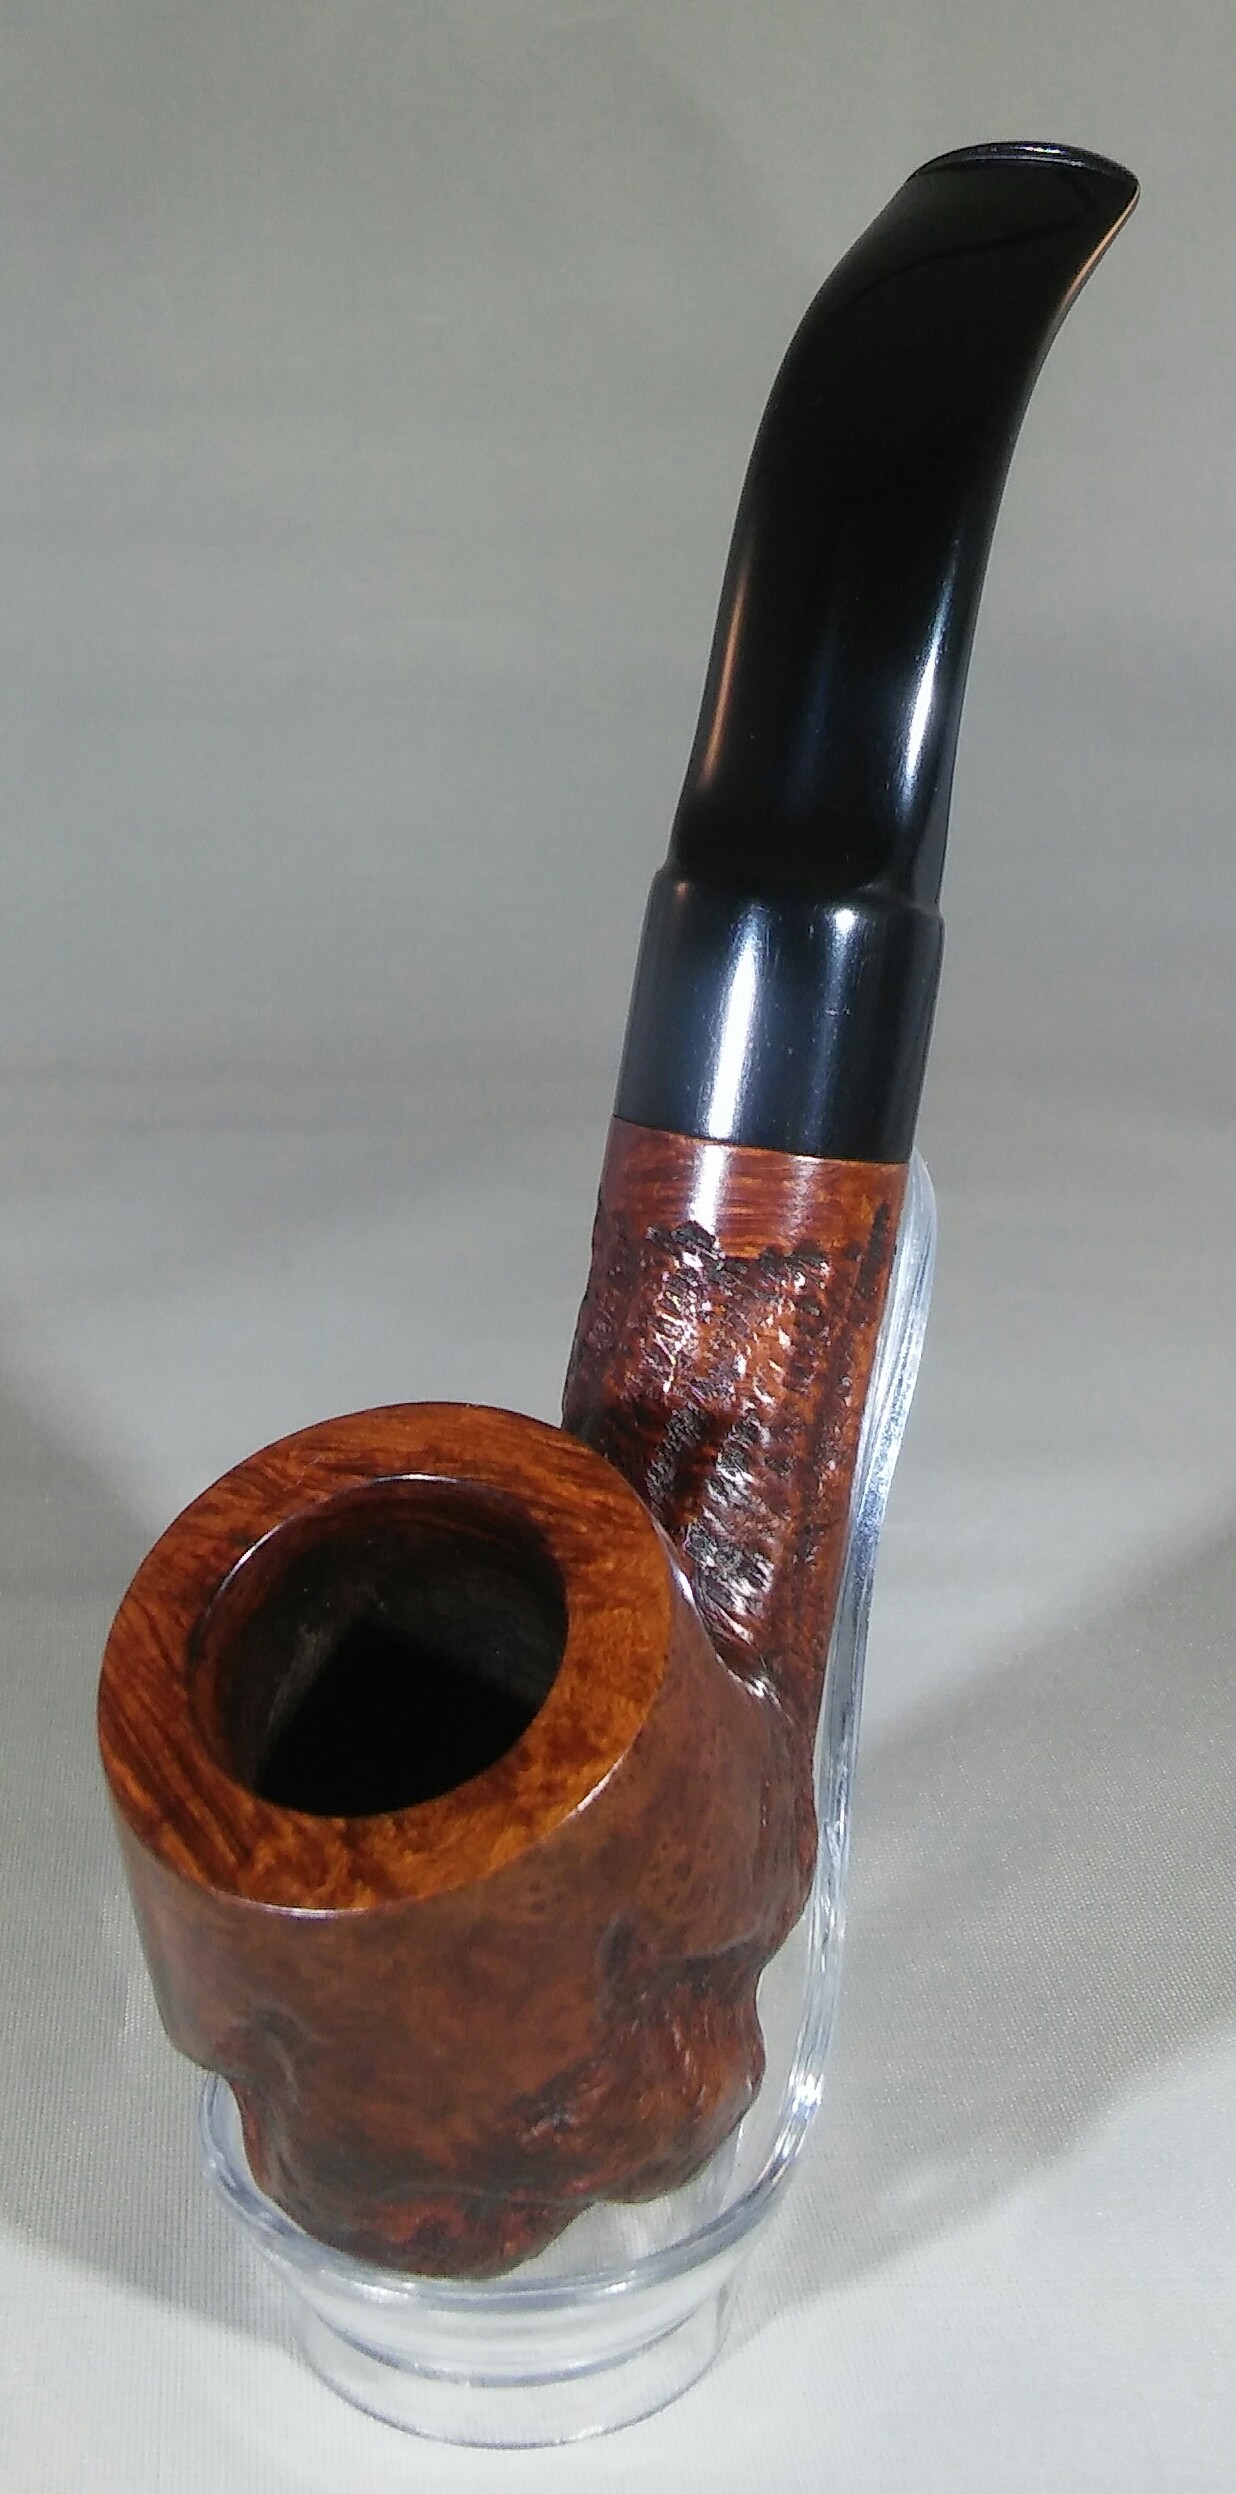
The overall condition of the pipe was good. The meer lining was crack free, the stem chatter free and the C.G.F. logo was legible, it would seem the mad buffer did not get to this one. The chamber was a little caked and one noticeable fill .

PhotoGrid_1470098513815

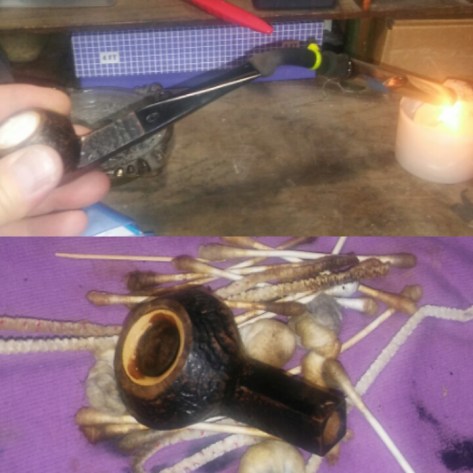
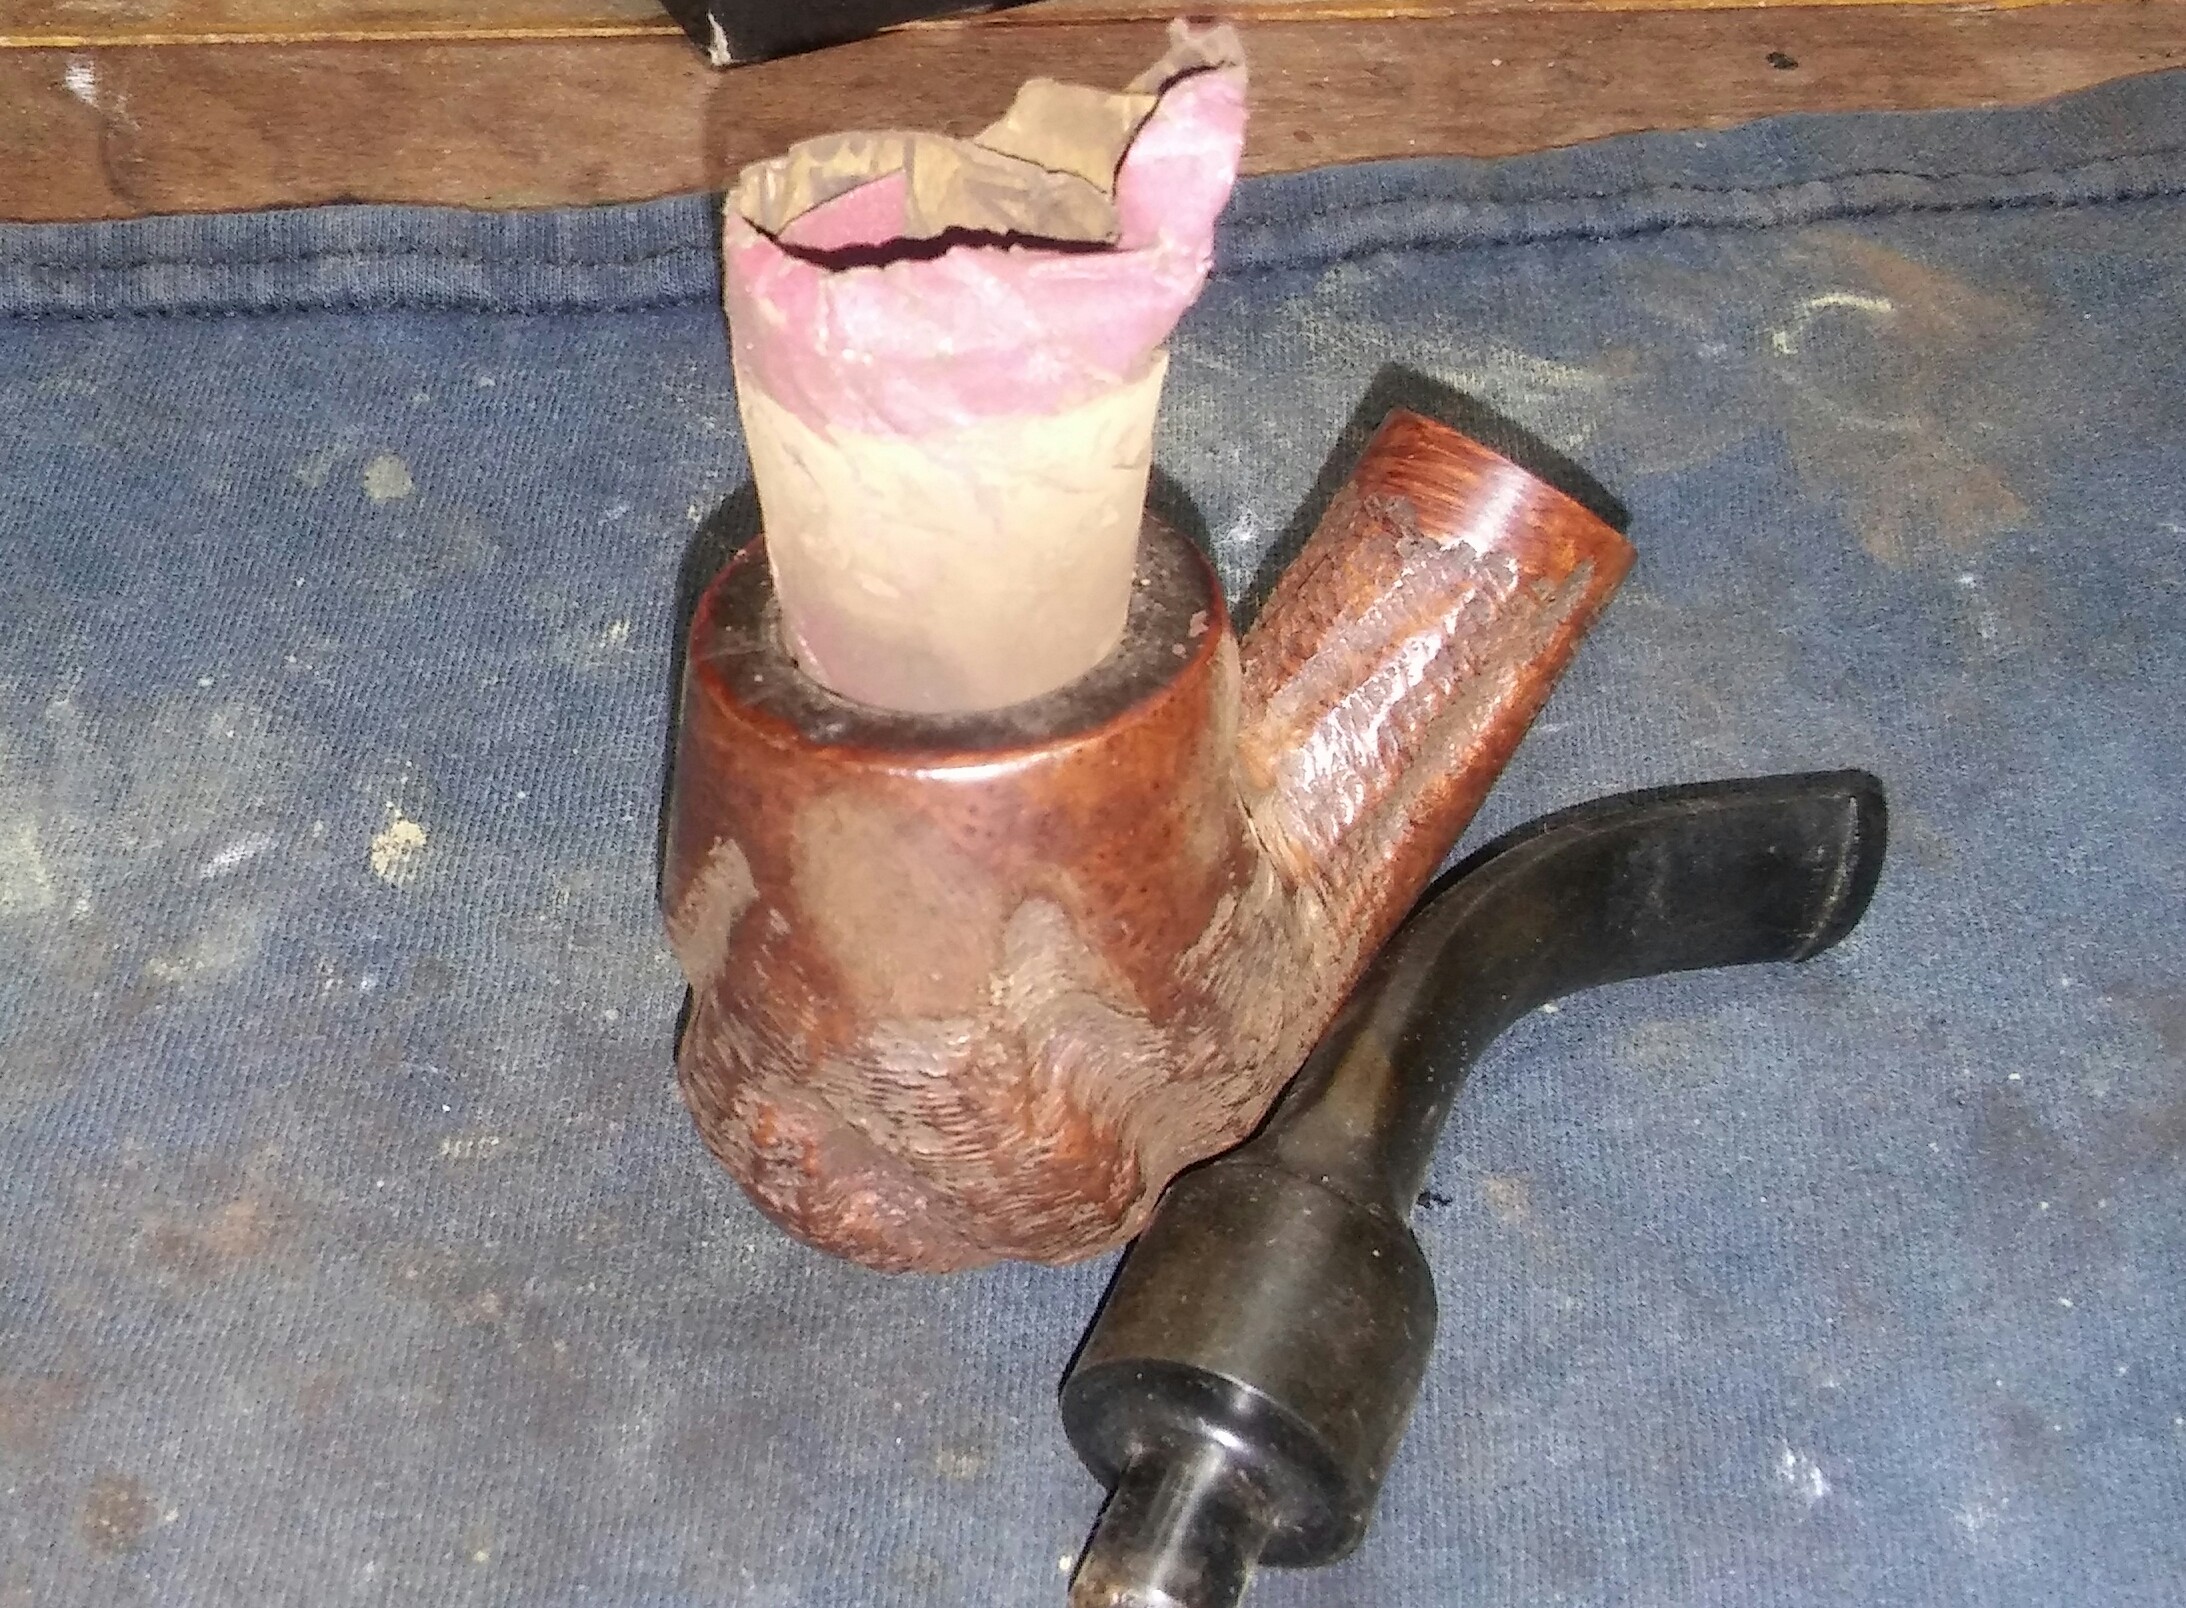
I jumped right in on the internal cleaning of the stummel and stem. The chamber being Meer I didn’t go with my PipNet reamer, instead I cleaned the chamber with EverClear, Q-Tips and 1000 grit sandpaper to remove the stubborn leftovers. The draught, mortise and stem were cleaned using EverClear, Q-Tips and stiff/soft pipe cleaners but this well used pipe would require a retort to get a deeper clean. After the retort I did one more good internal cleaning with EverClear, Q-Tips and pipe cleaners until my finial pipe cleaner came out clean.

PhotoGrid_1470098410649

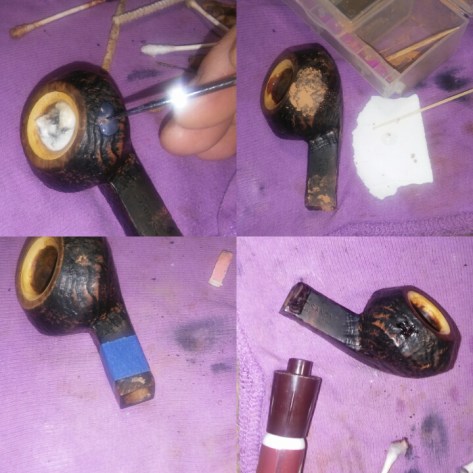
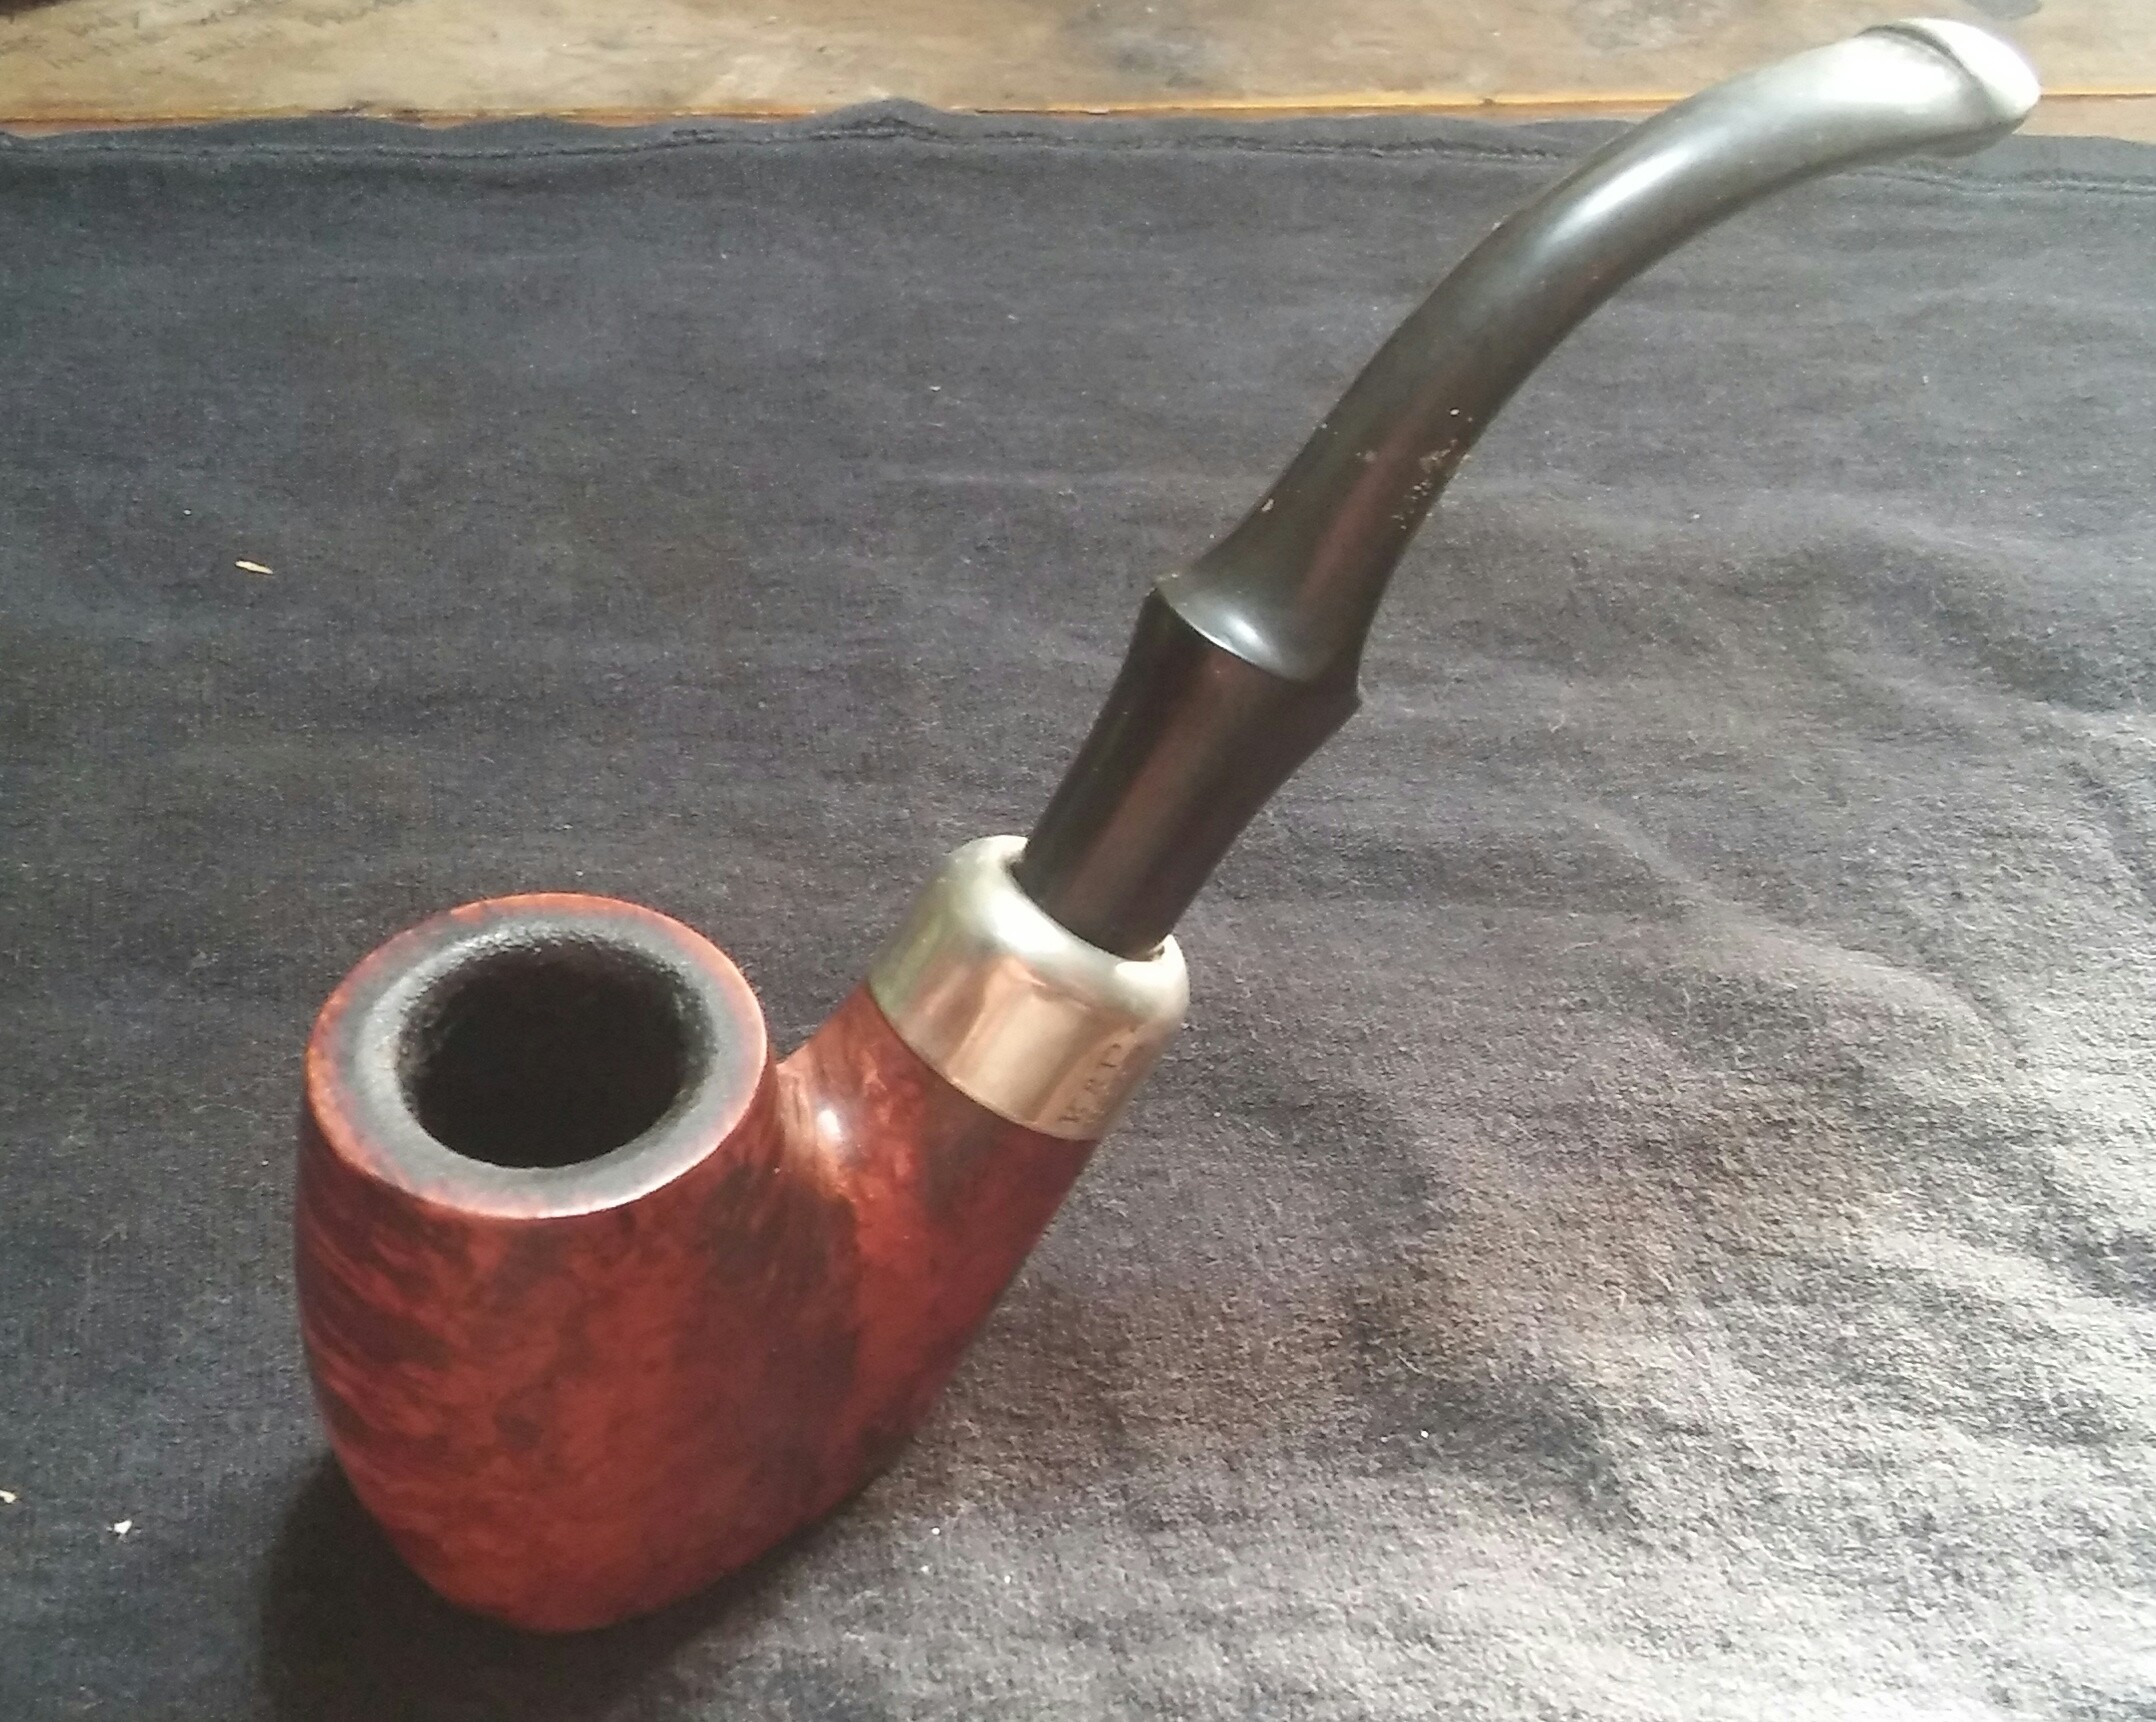
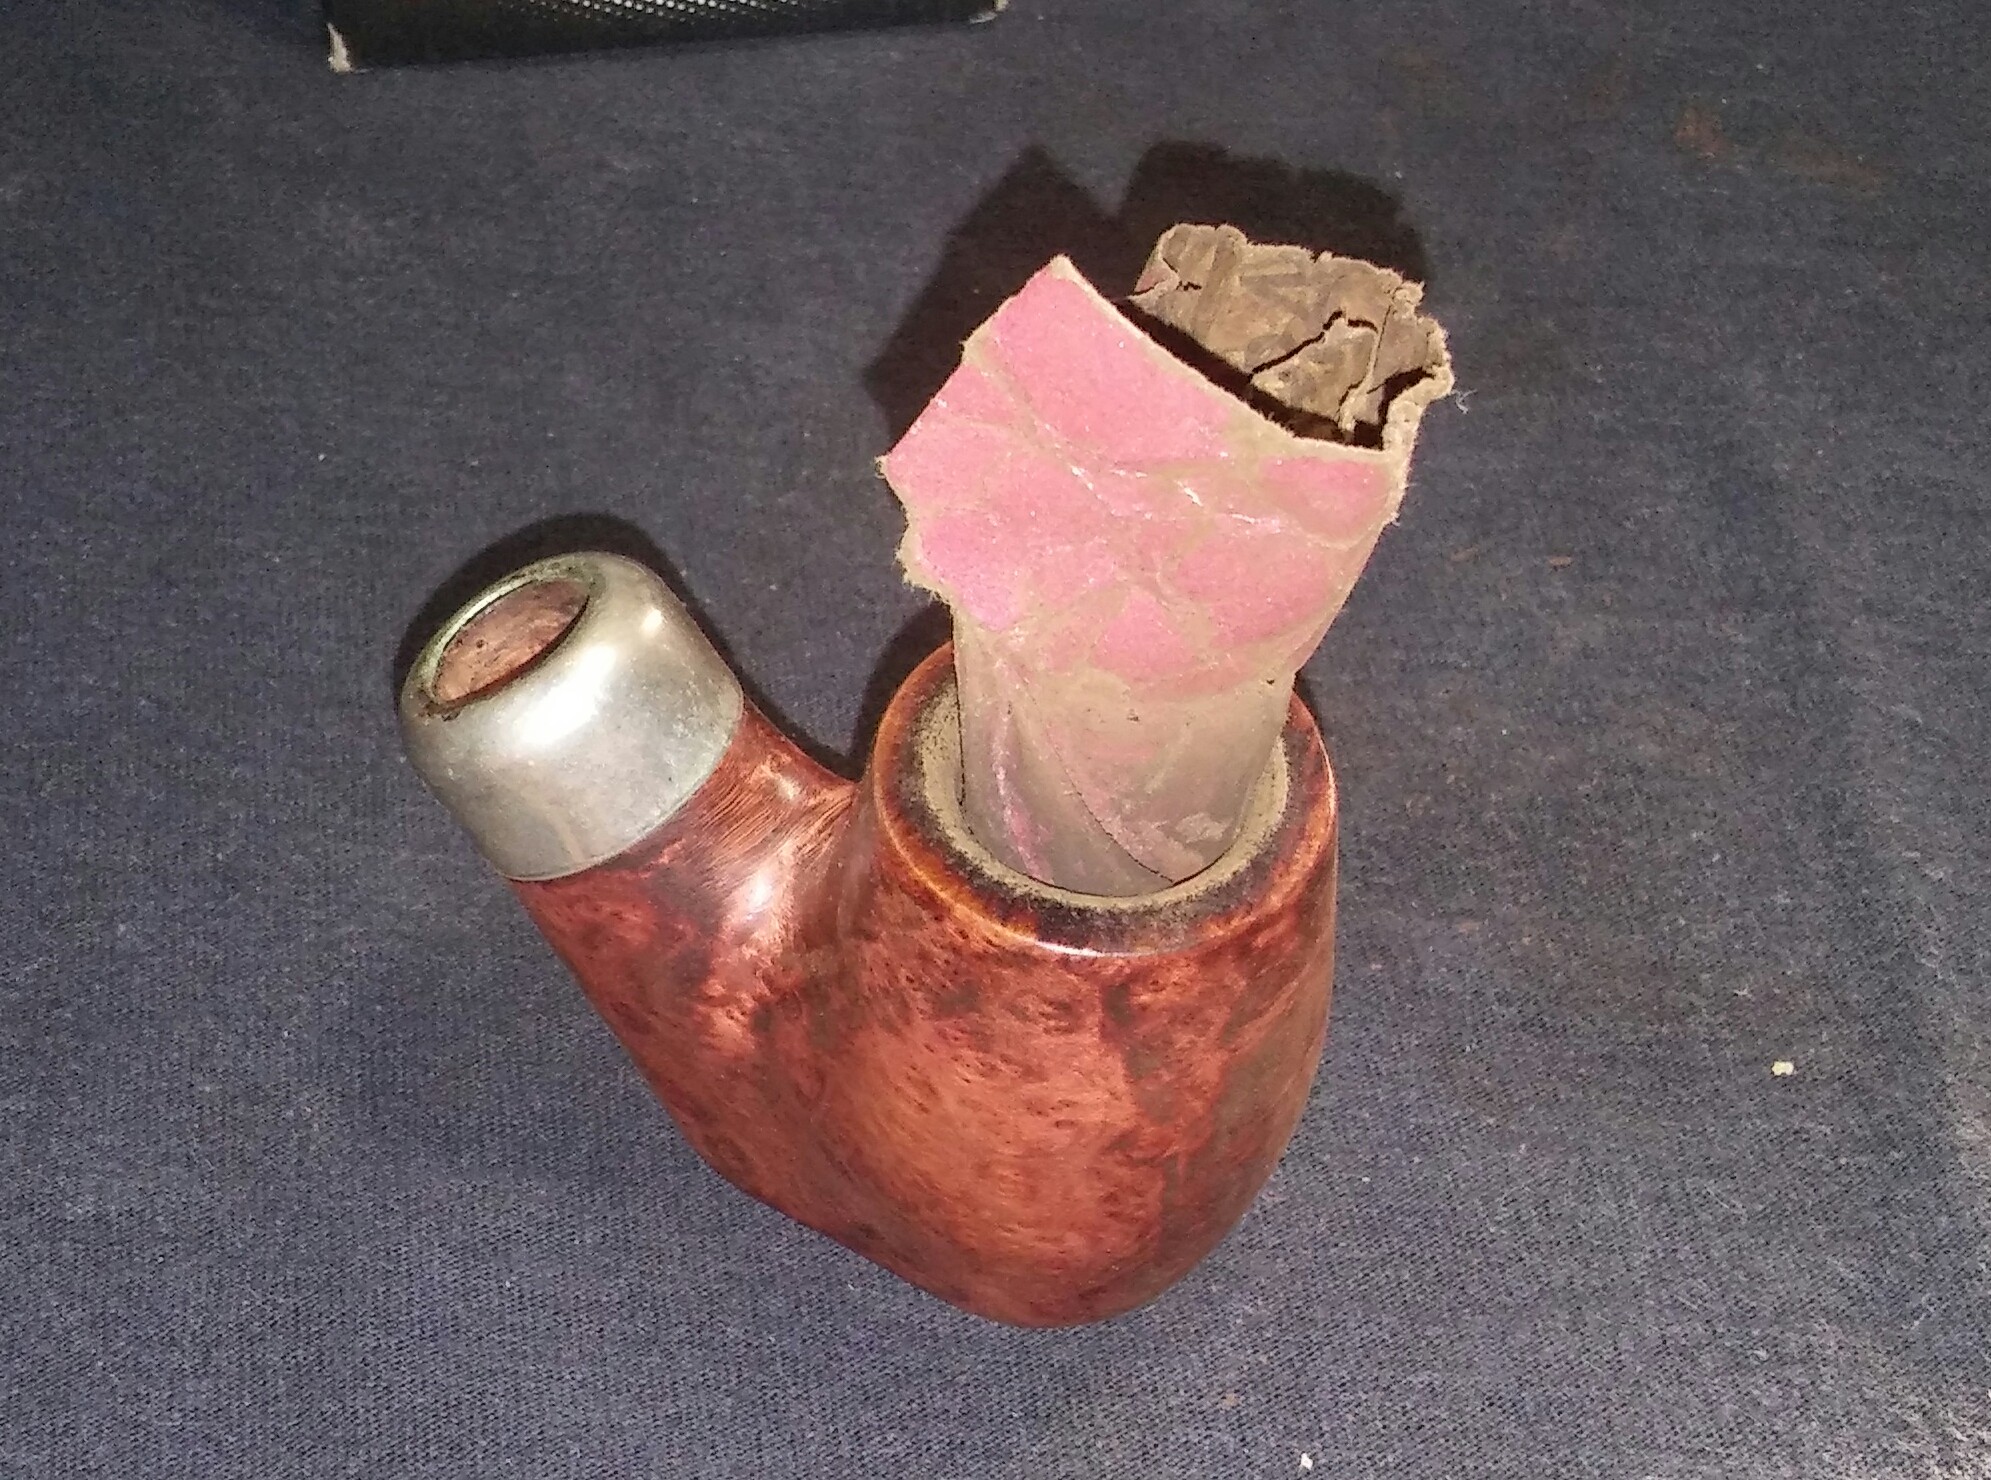
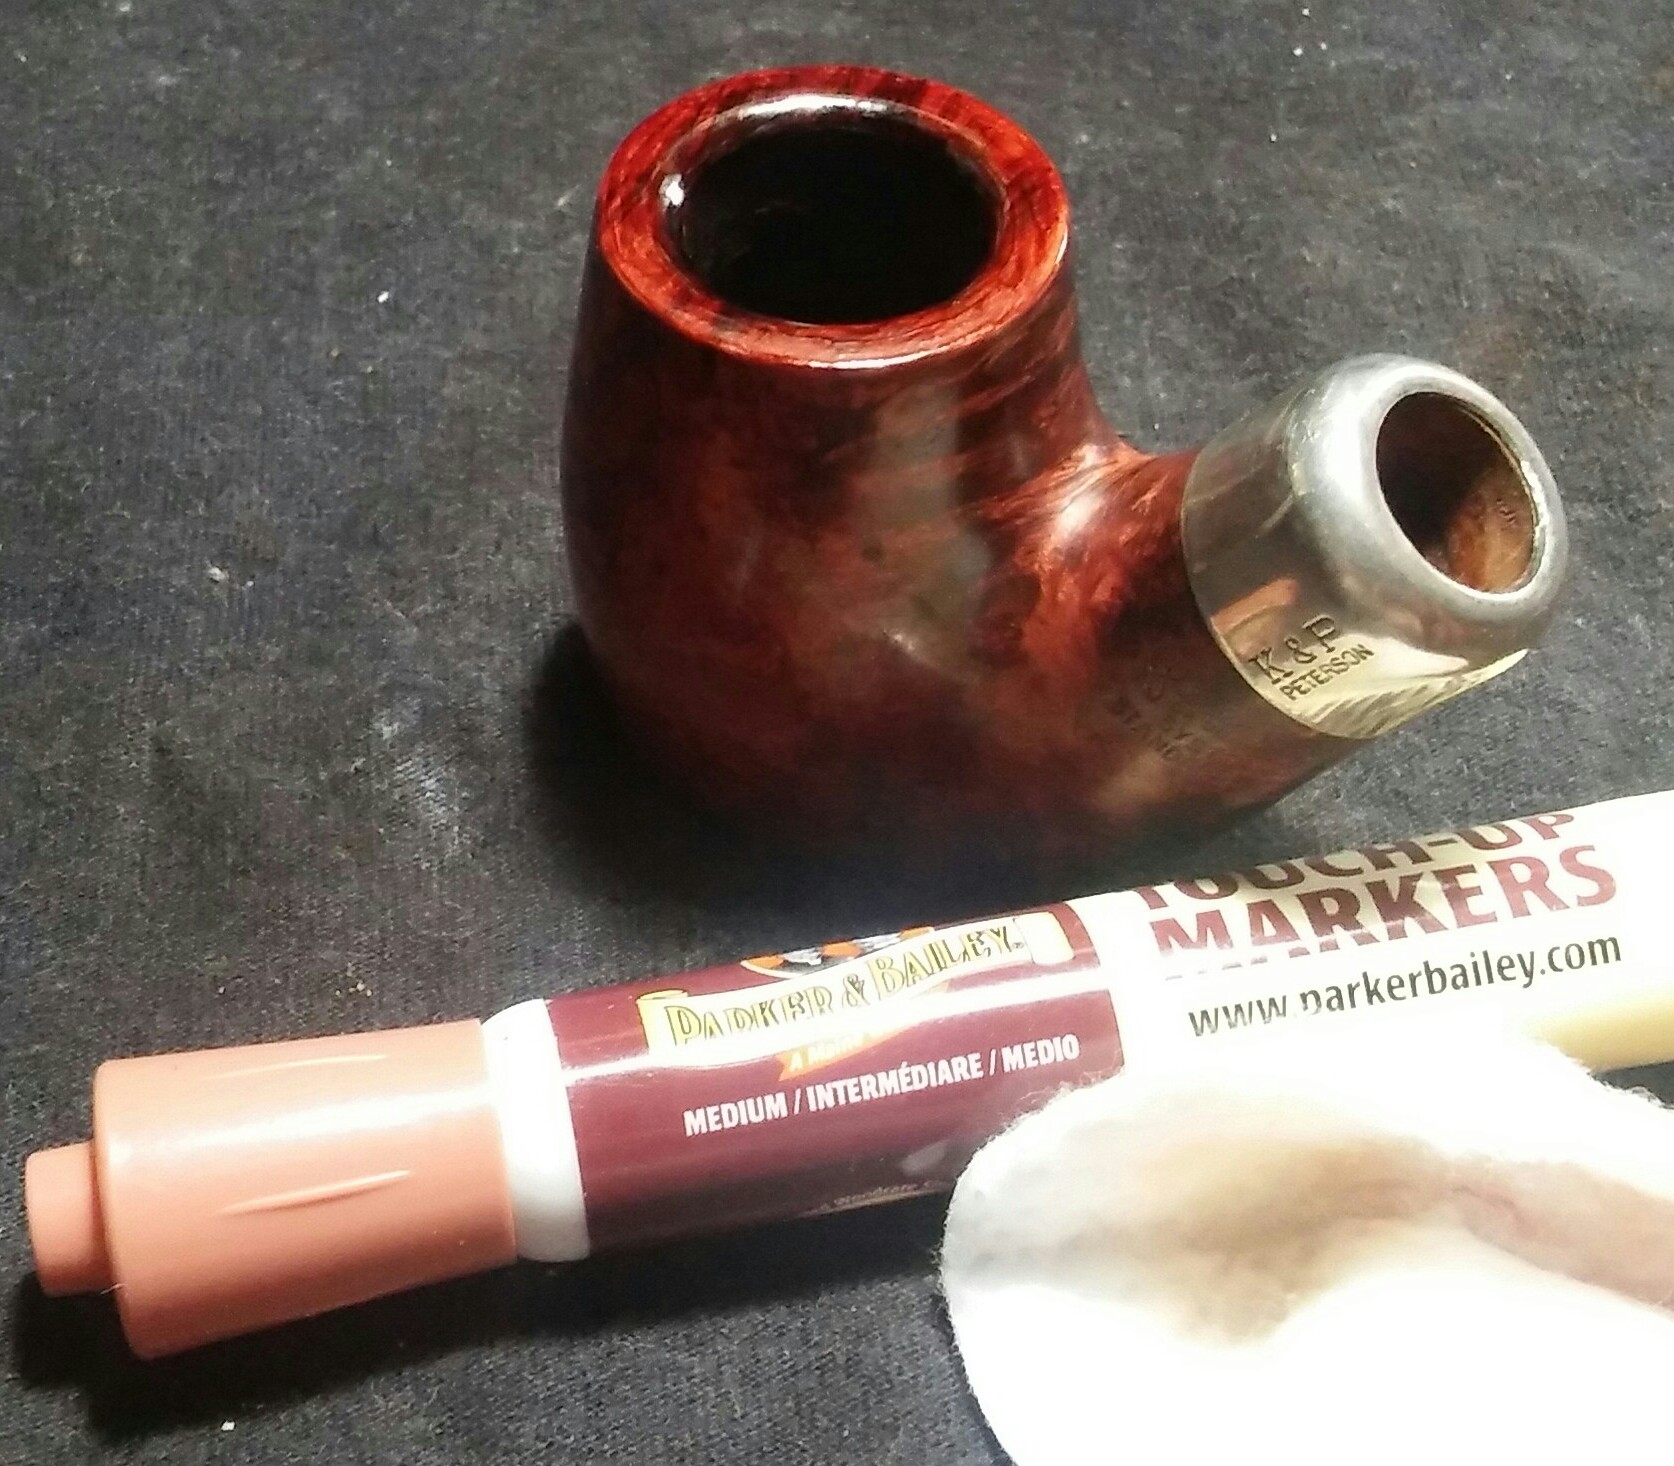
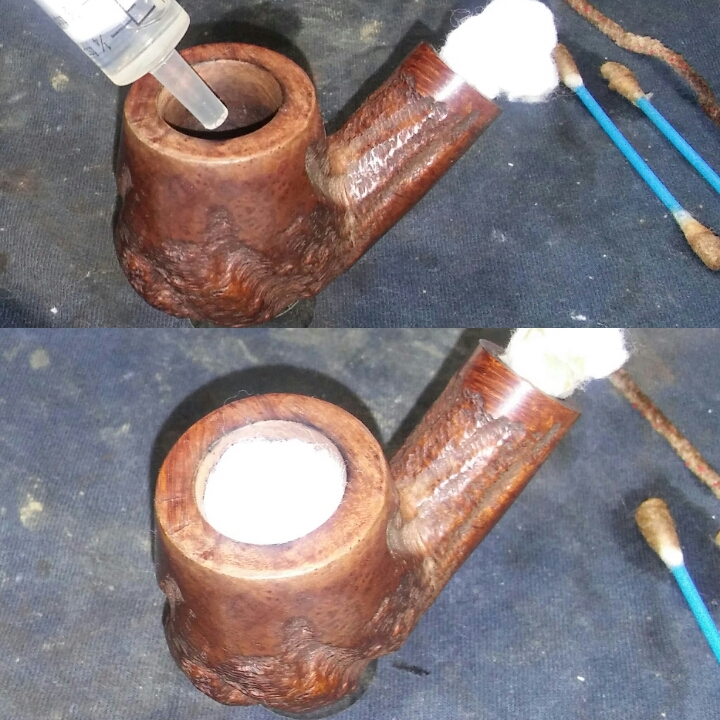
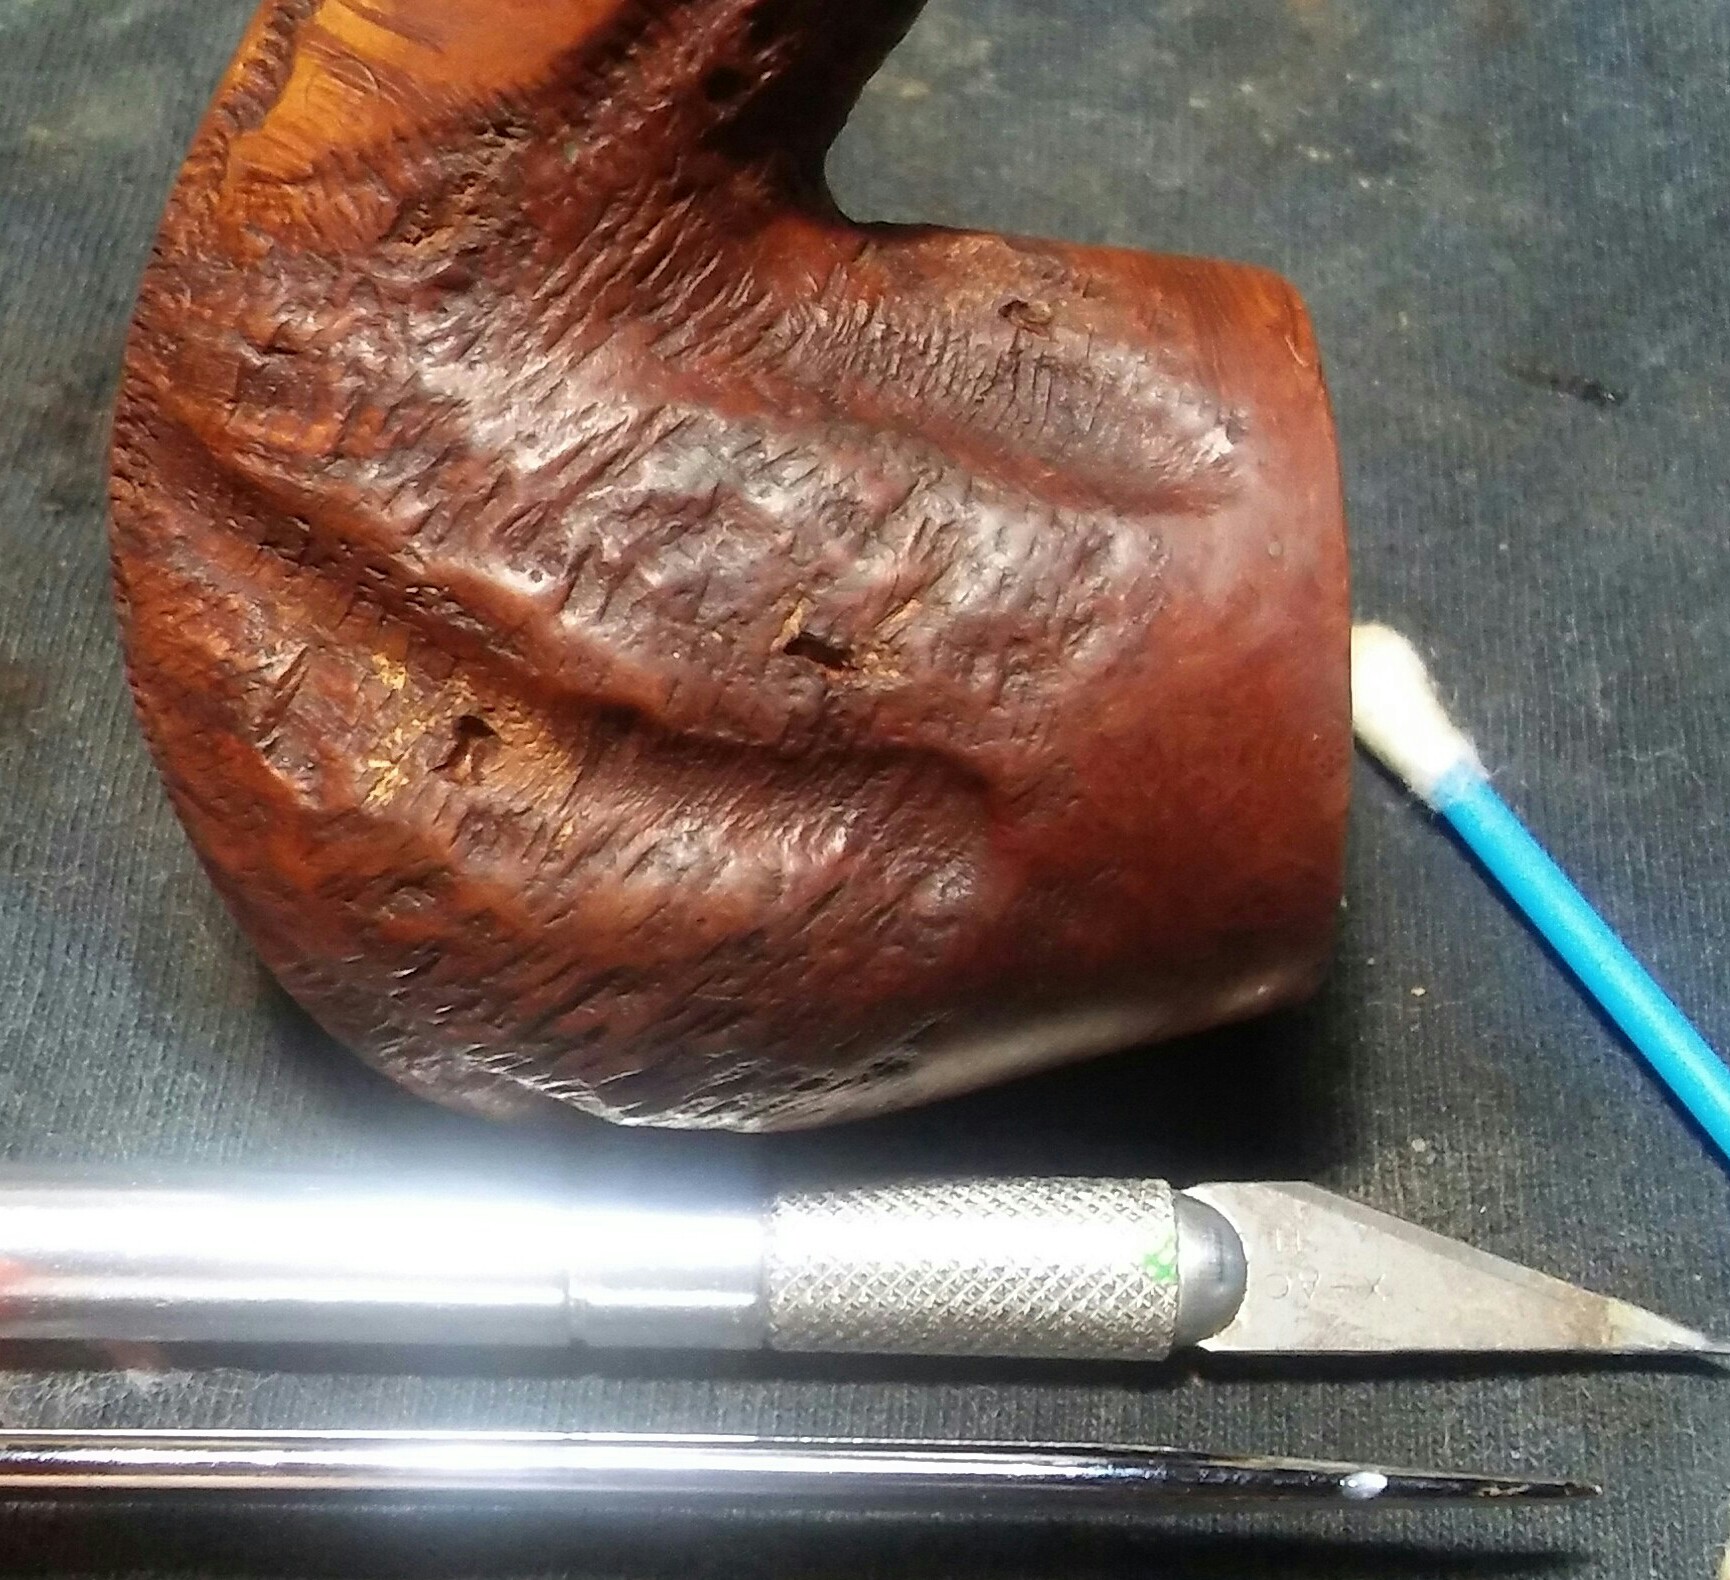
The right side of the bowl and shank had noticeable filler that needed to be removed. I applied Method Wood For Good Polish to the filler and left it to soften. Once the filler softened up I removed it with a pick and straight pin. I cleaned the area to be refilled with alcohol and a Q-Tip, filled the sand pit with Gorilla Glue and briar dust wiping away the excess with a alcohol dampened rag and left to dry. Once dry I lightly sanded the filled areas with a 3200 grit micro-mesh pad, tapping off the shank so not to disturb the  nomenclature with my sanding. I now touched up the new fills with a dark stain marker, let dry and removed the excess stain with an alcohol dampened Q-Tip.

PhotoGrid_1470098470888

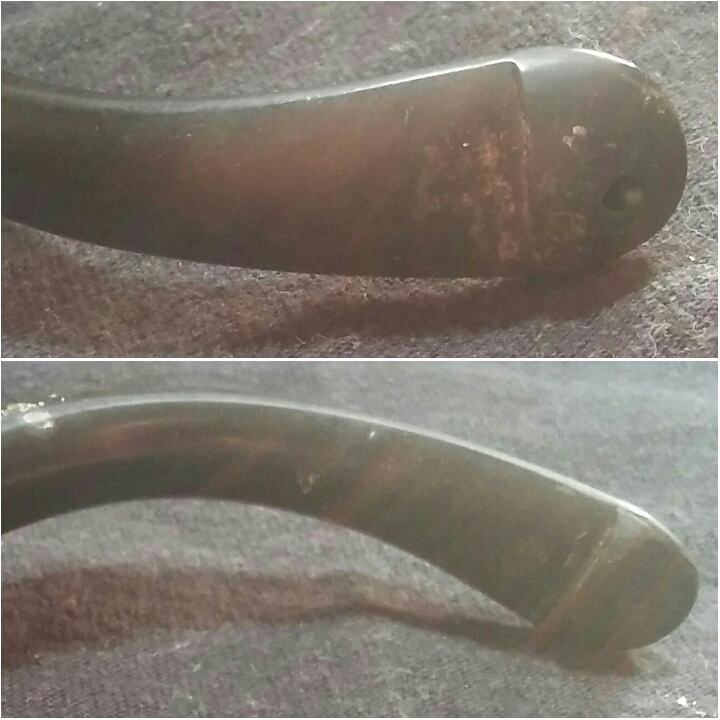
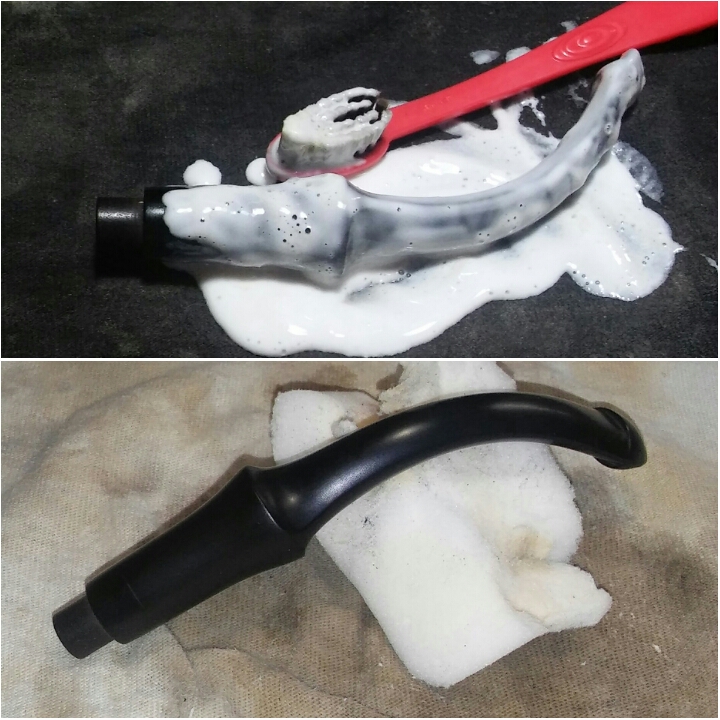
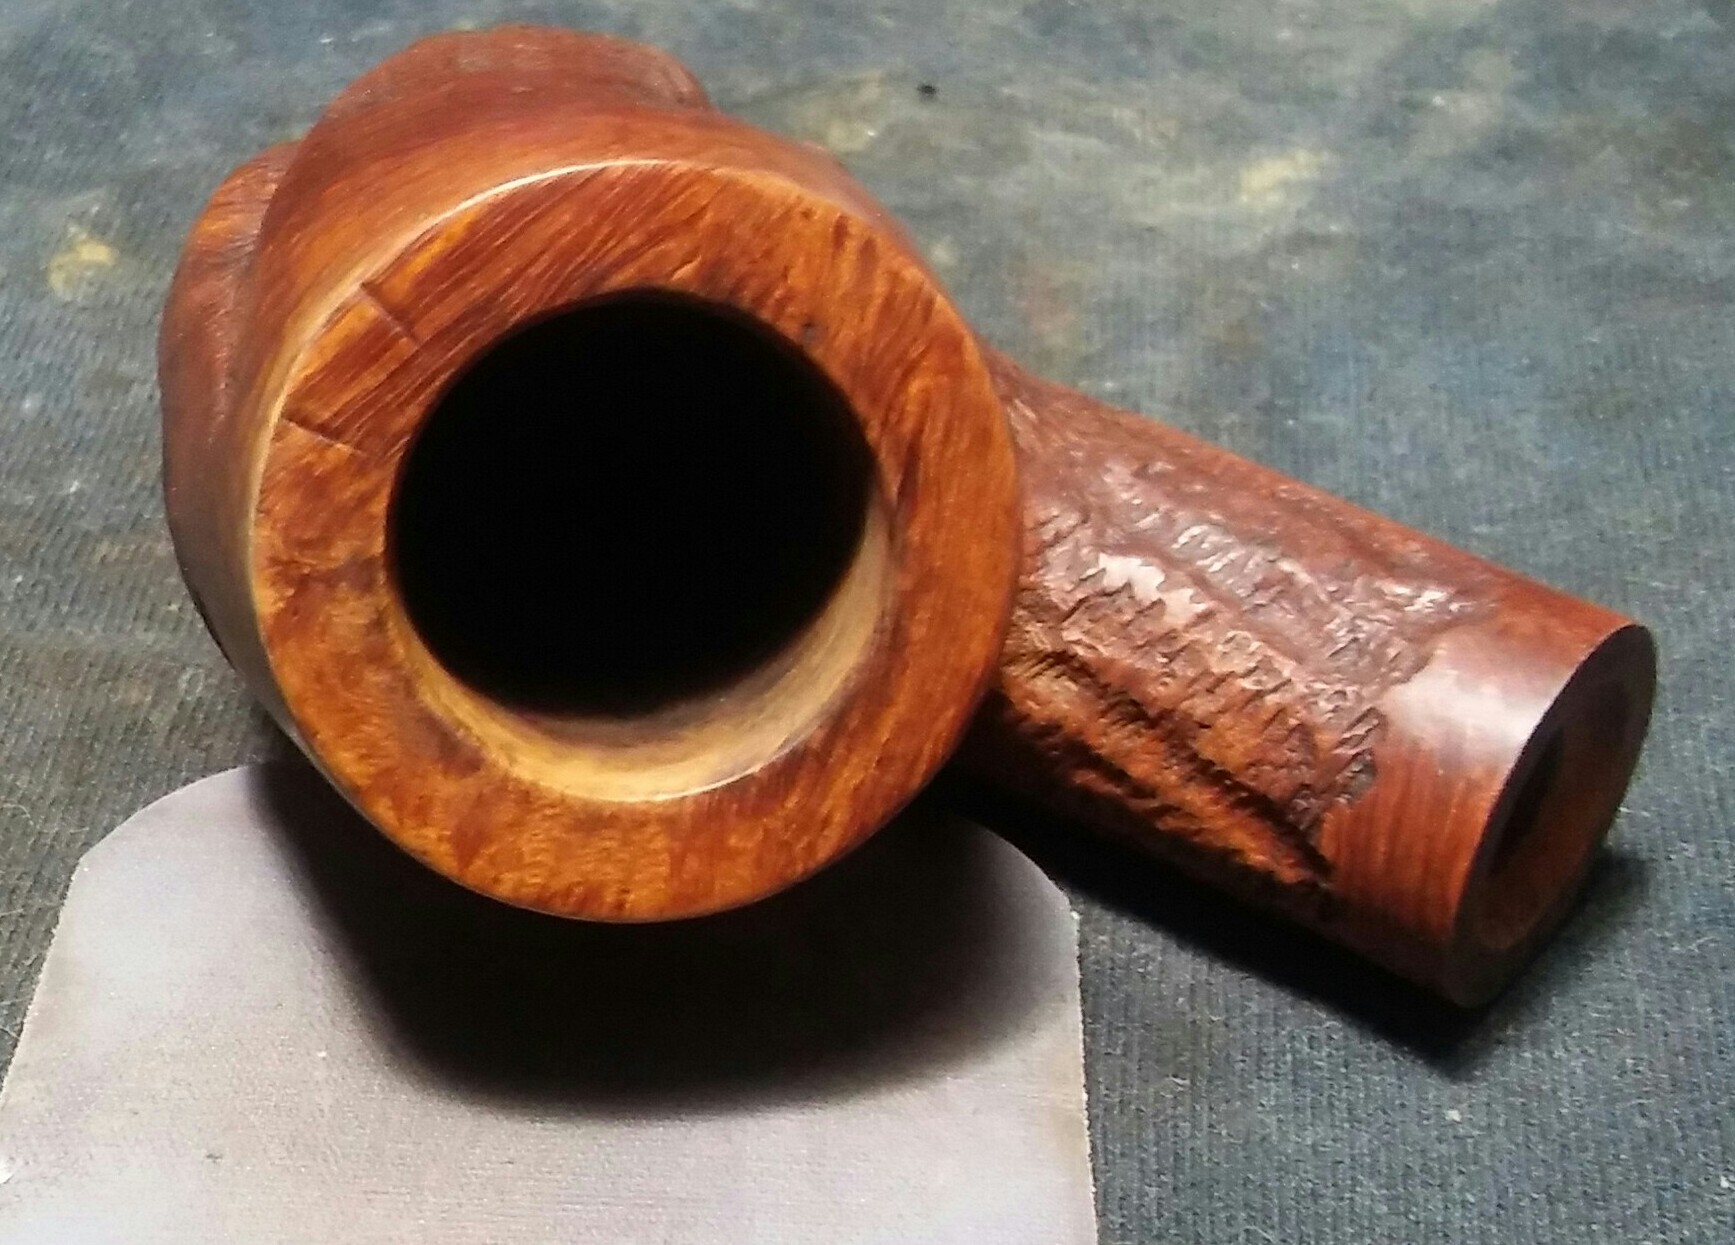
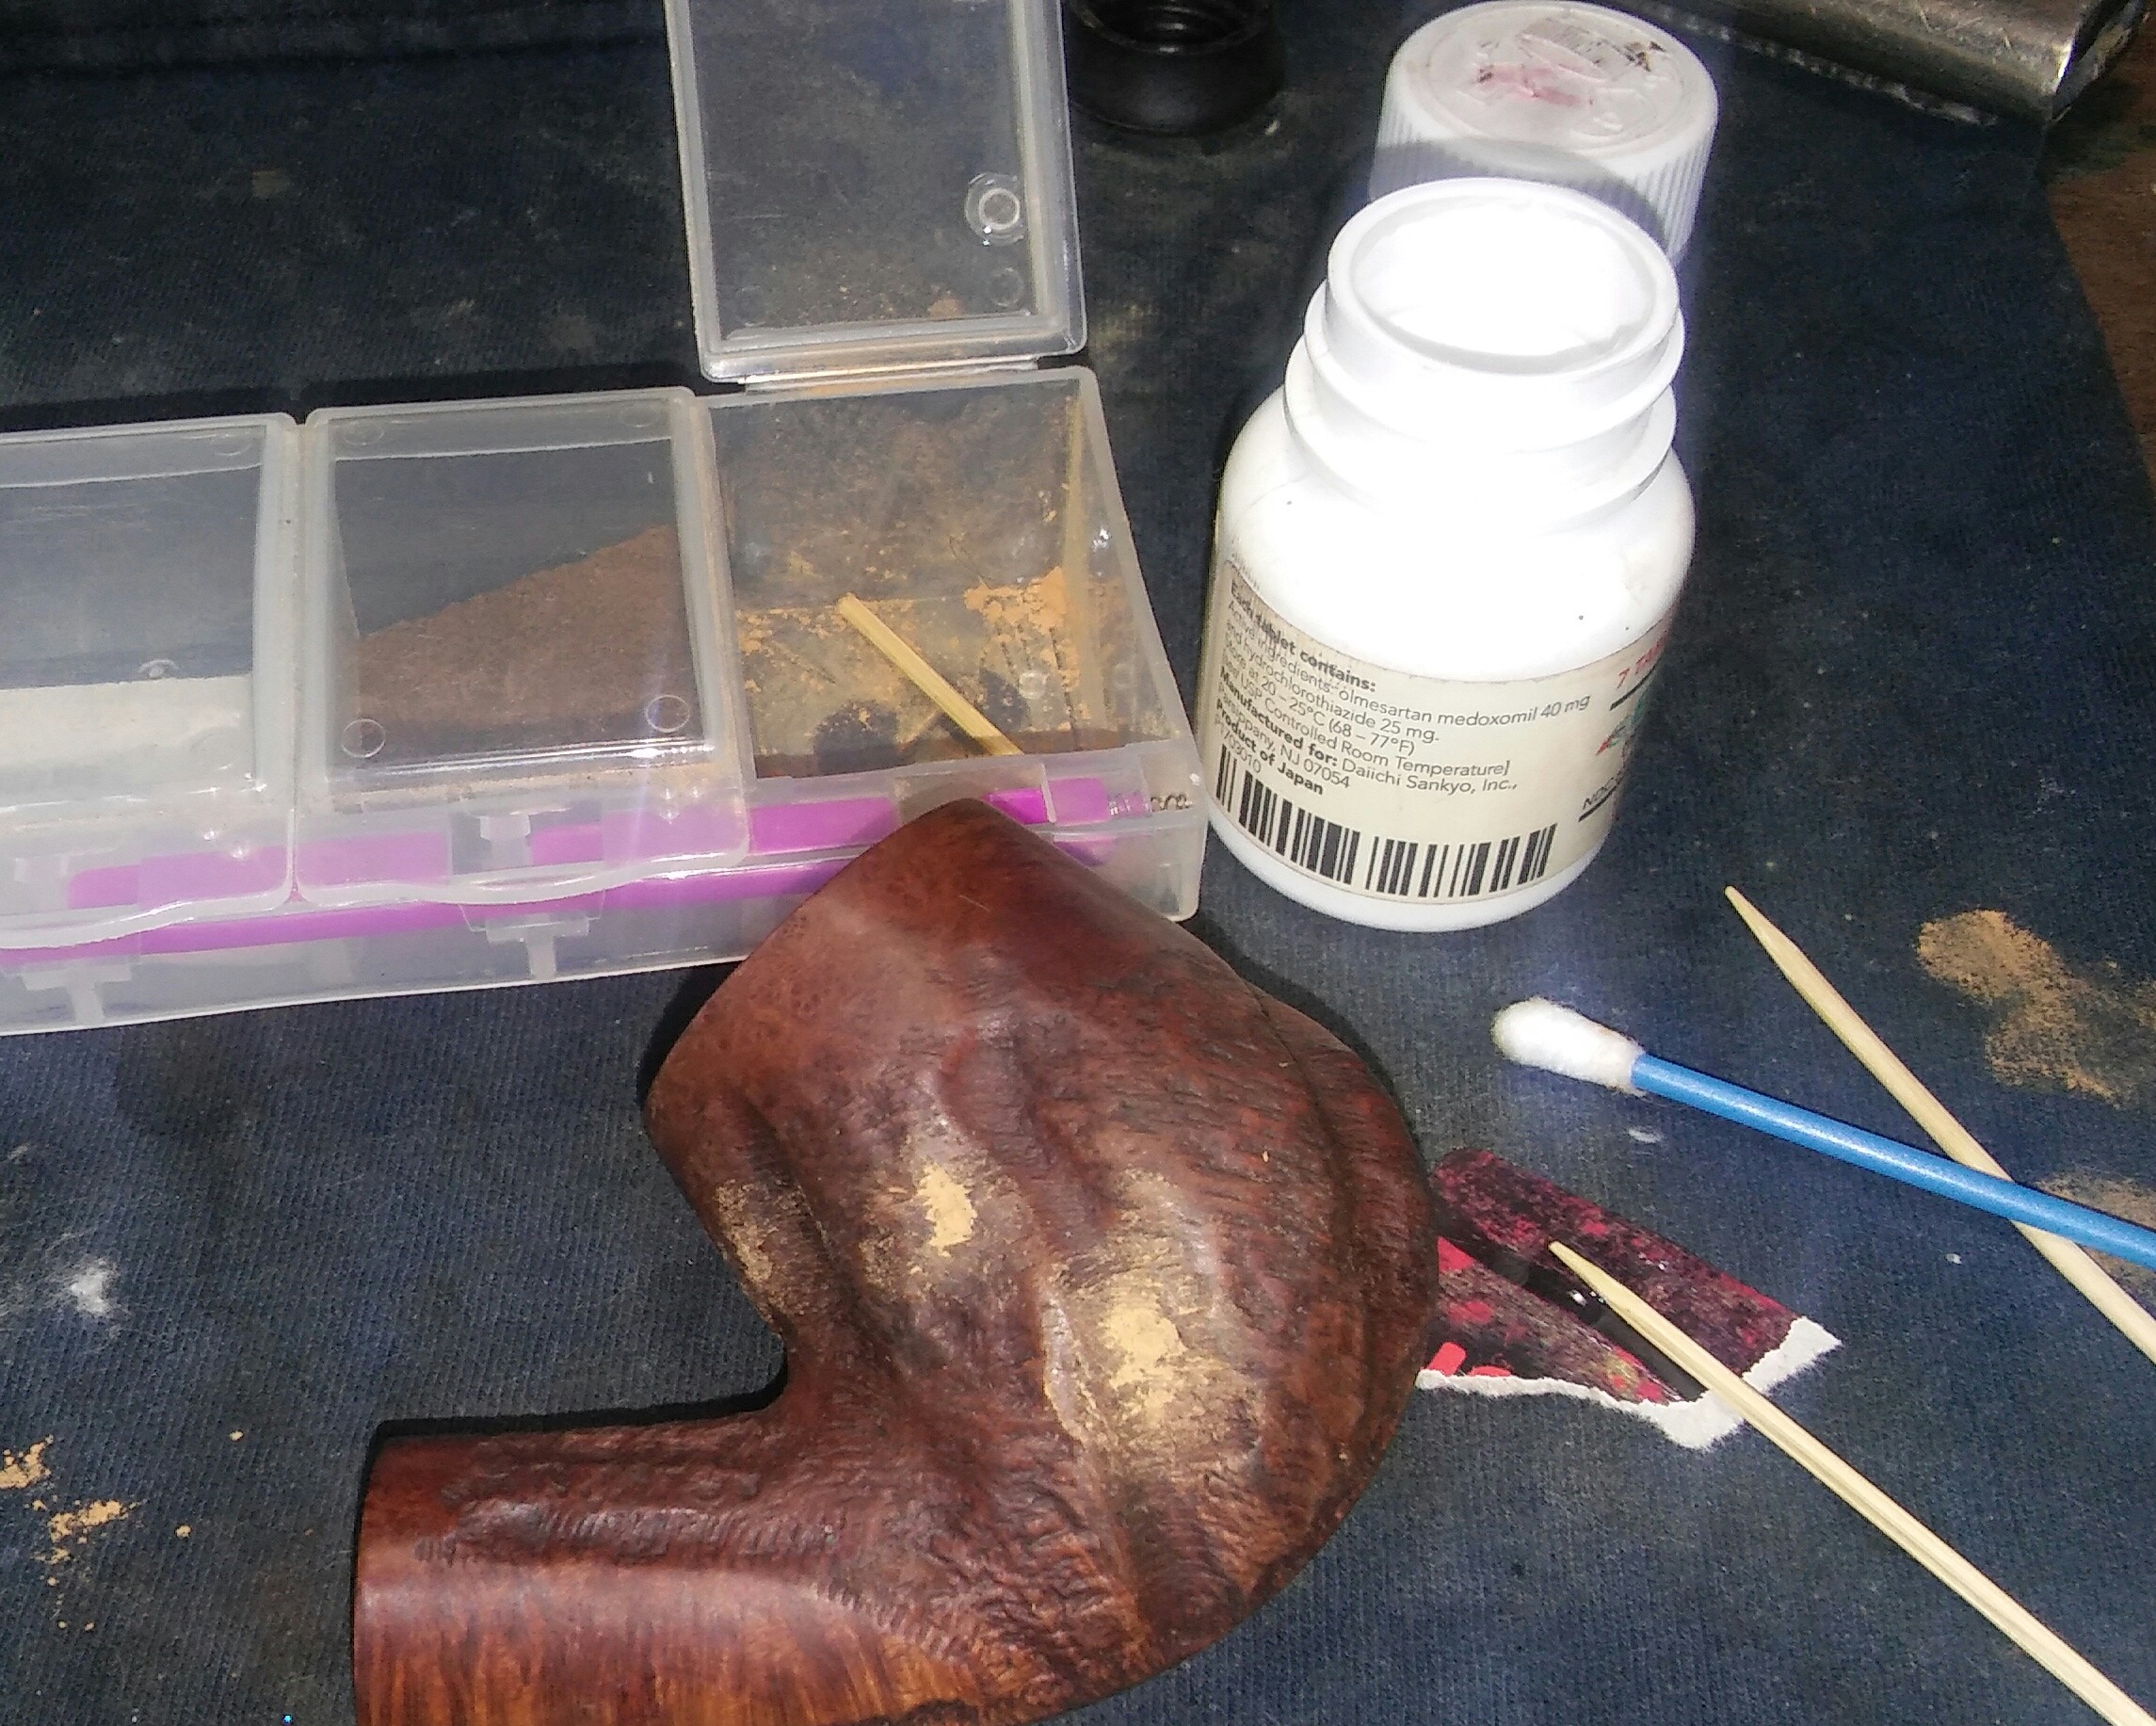
In the process of filling the sand pits I inadvertently removed some of the original stain surrounding the repair. I used a makeup pad and EverClear to remove the rest stain from the stummel and re-stained the stummel with a dark brown touch-up marker, allowing dry time and removing the excess with an alcohol dampened rag. Sandy was now ready for the wheel. The stem was oxidation free and chatter free, I cleaned the stem inside and out with EverClear and would just need a good buffing.

Complete

PhotoGrid_1471060222529PhotoGrid_1471060121452PhotoGrid_1471060088968

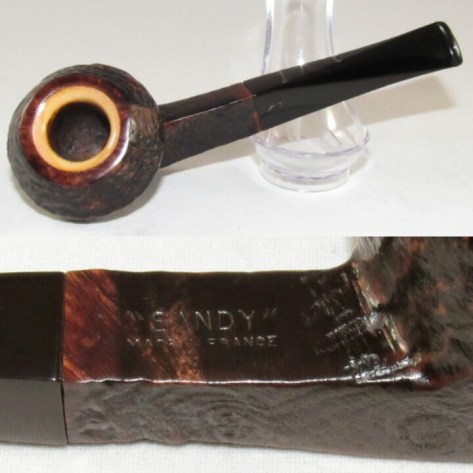
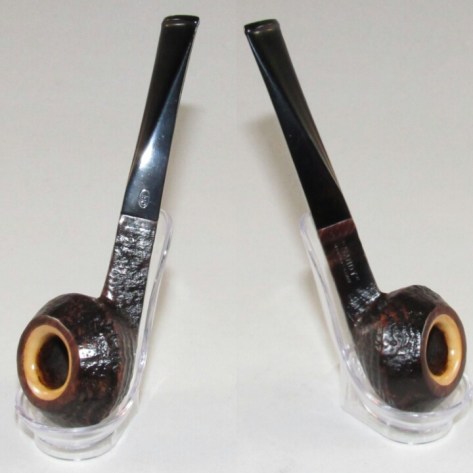
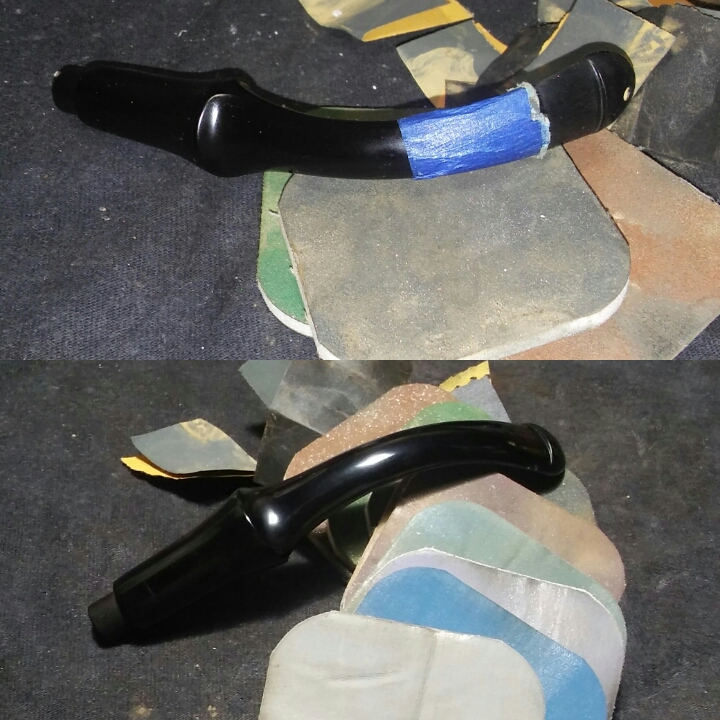
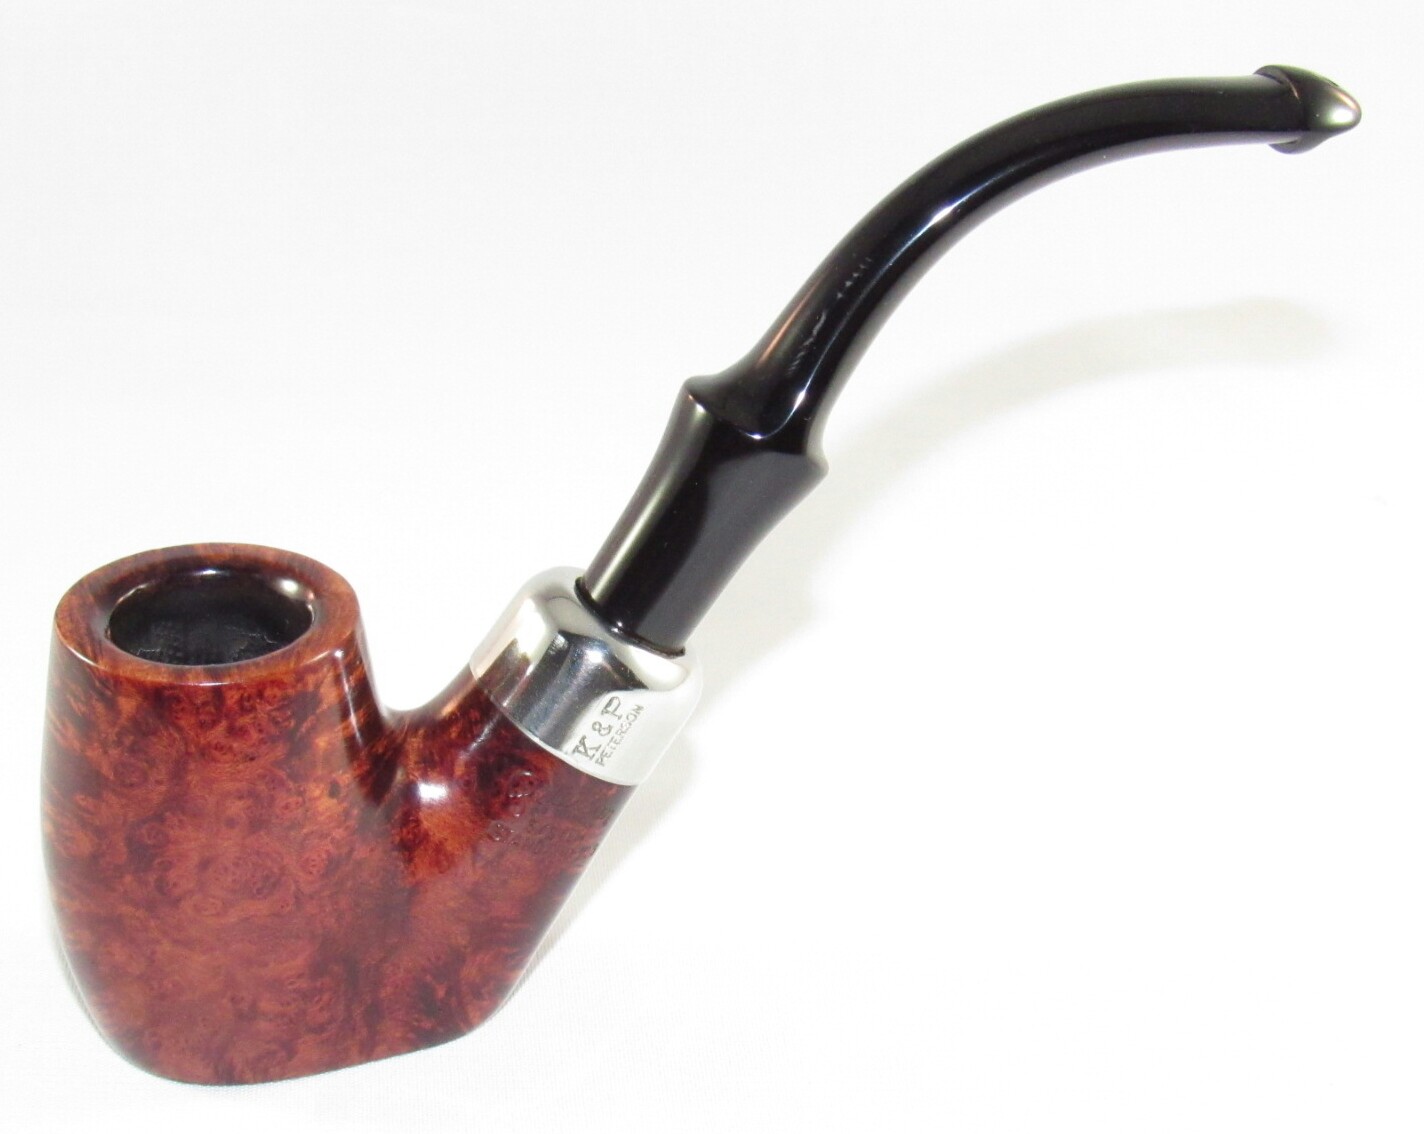
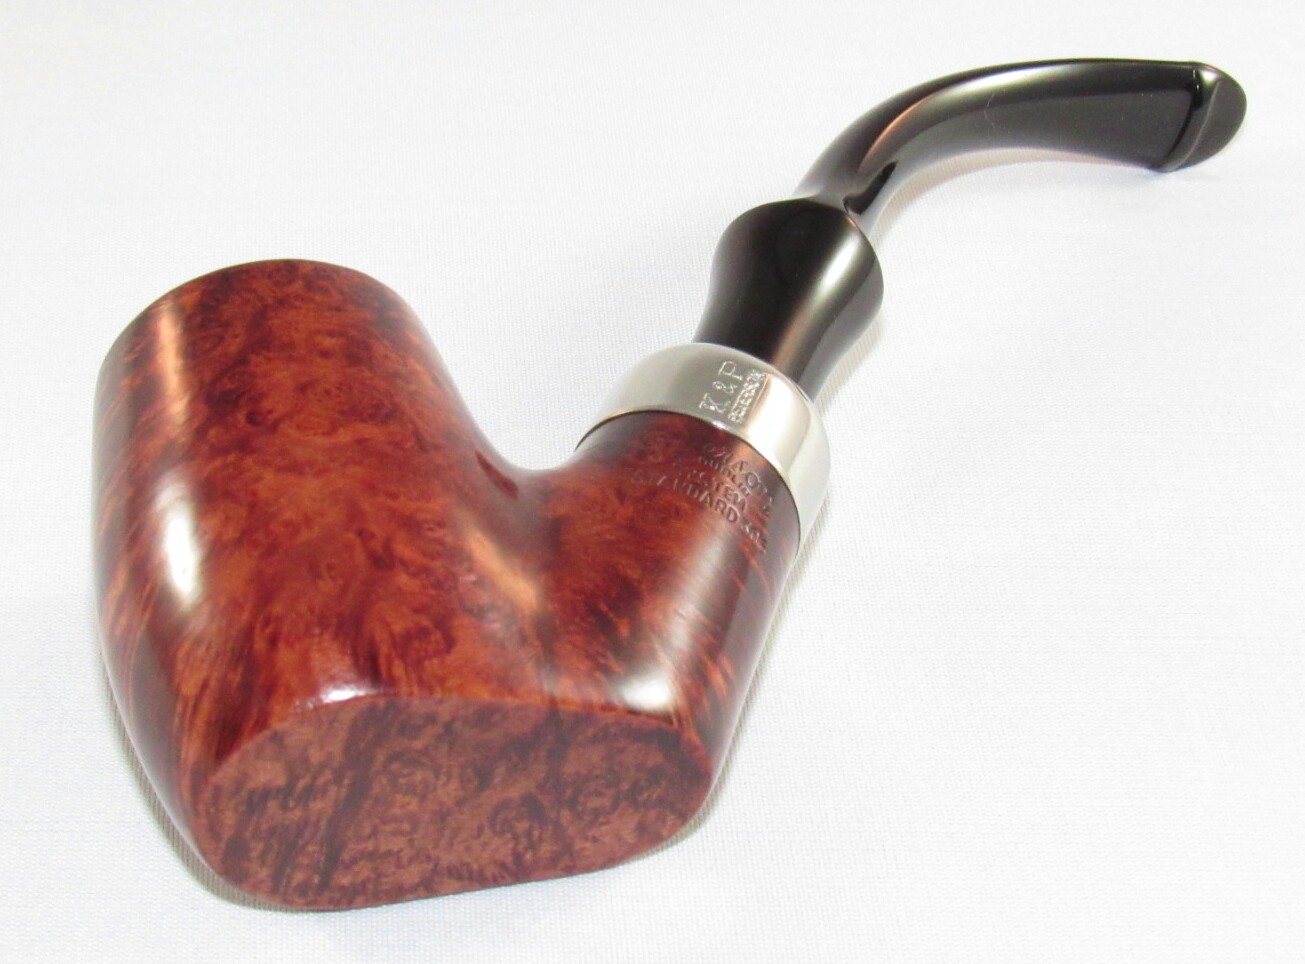
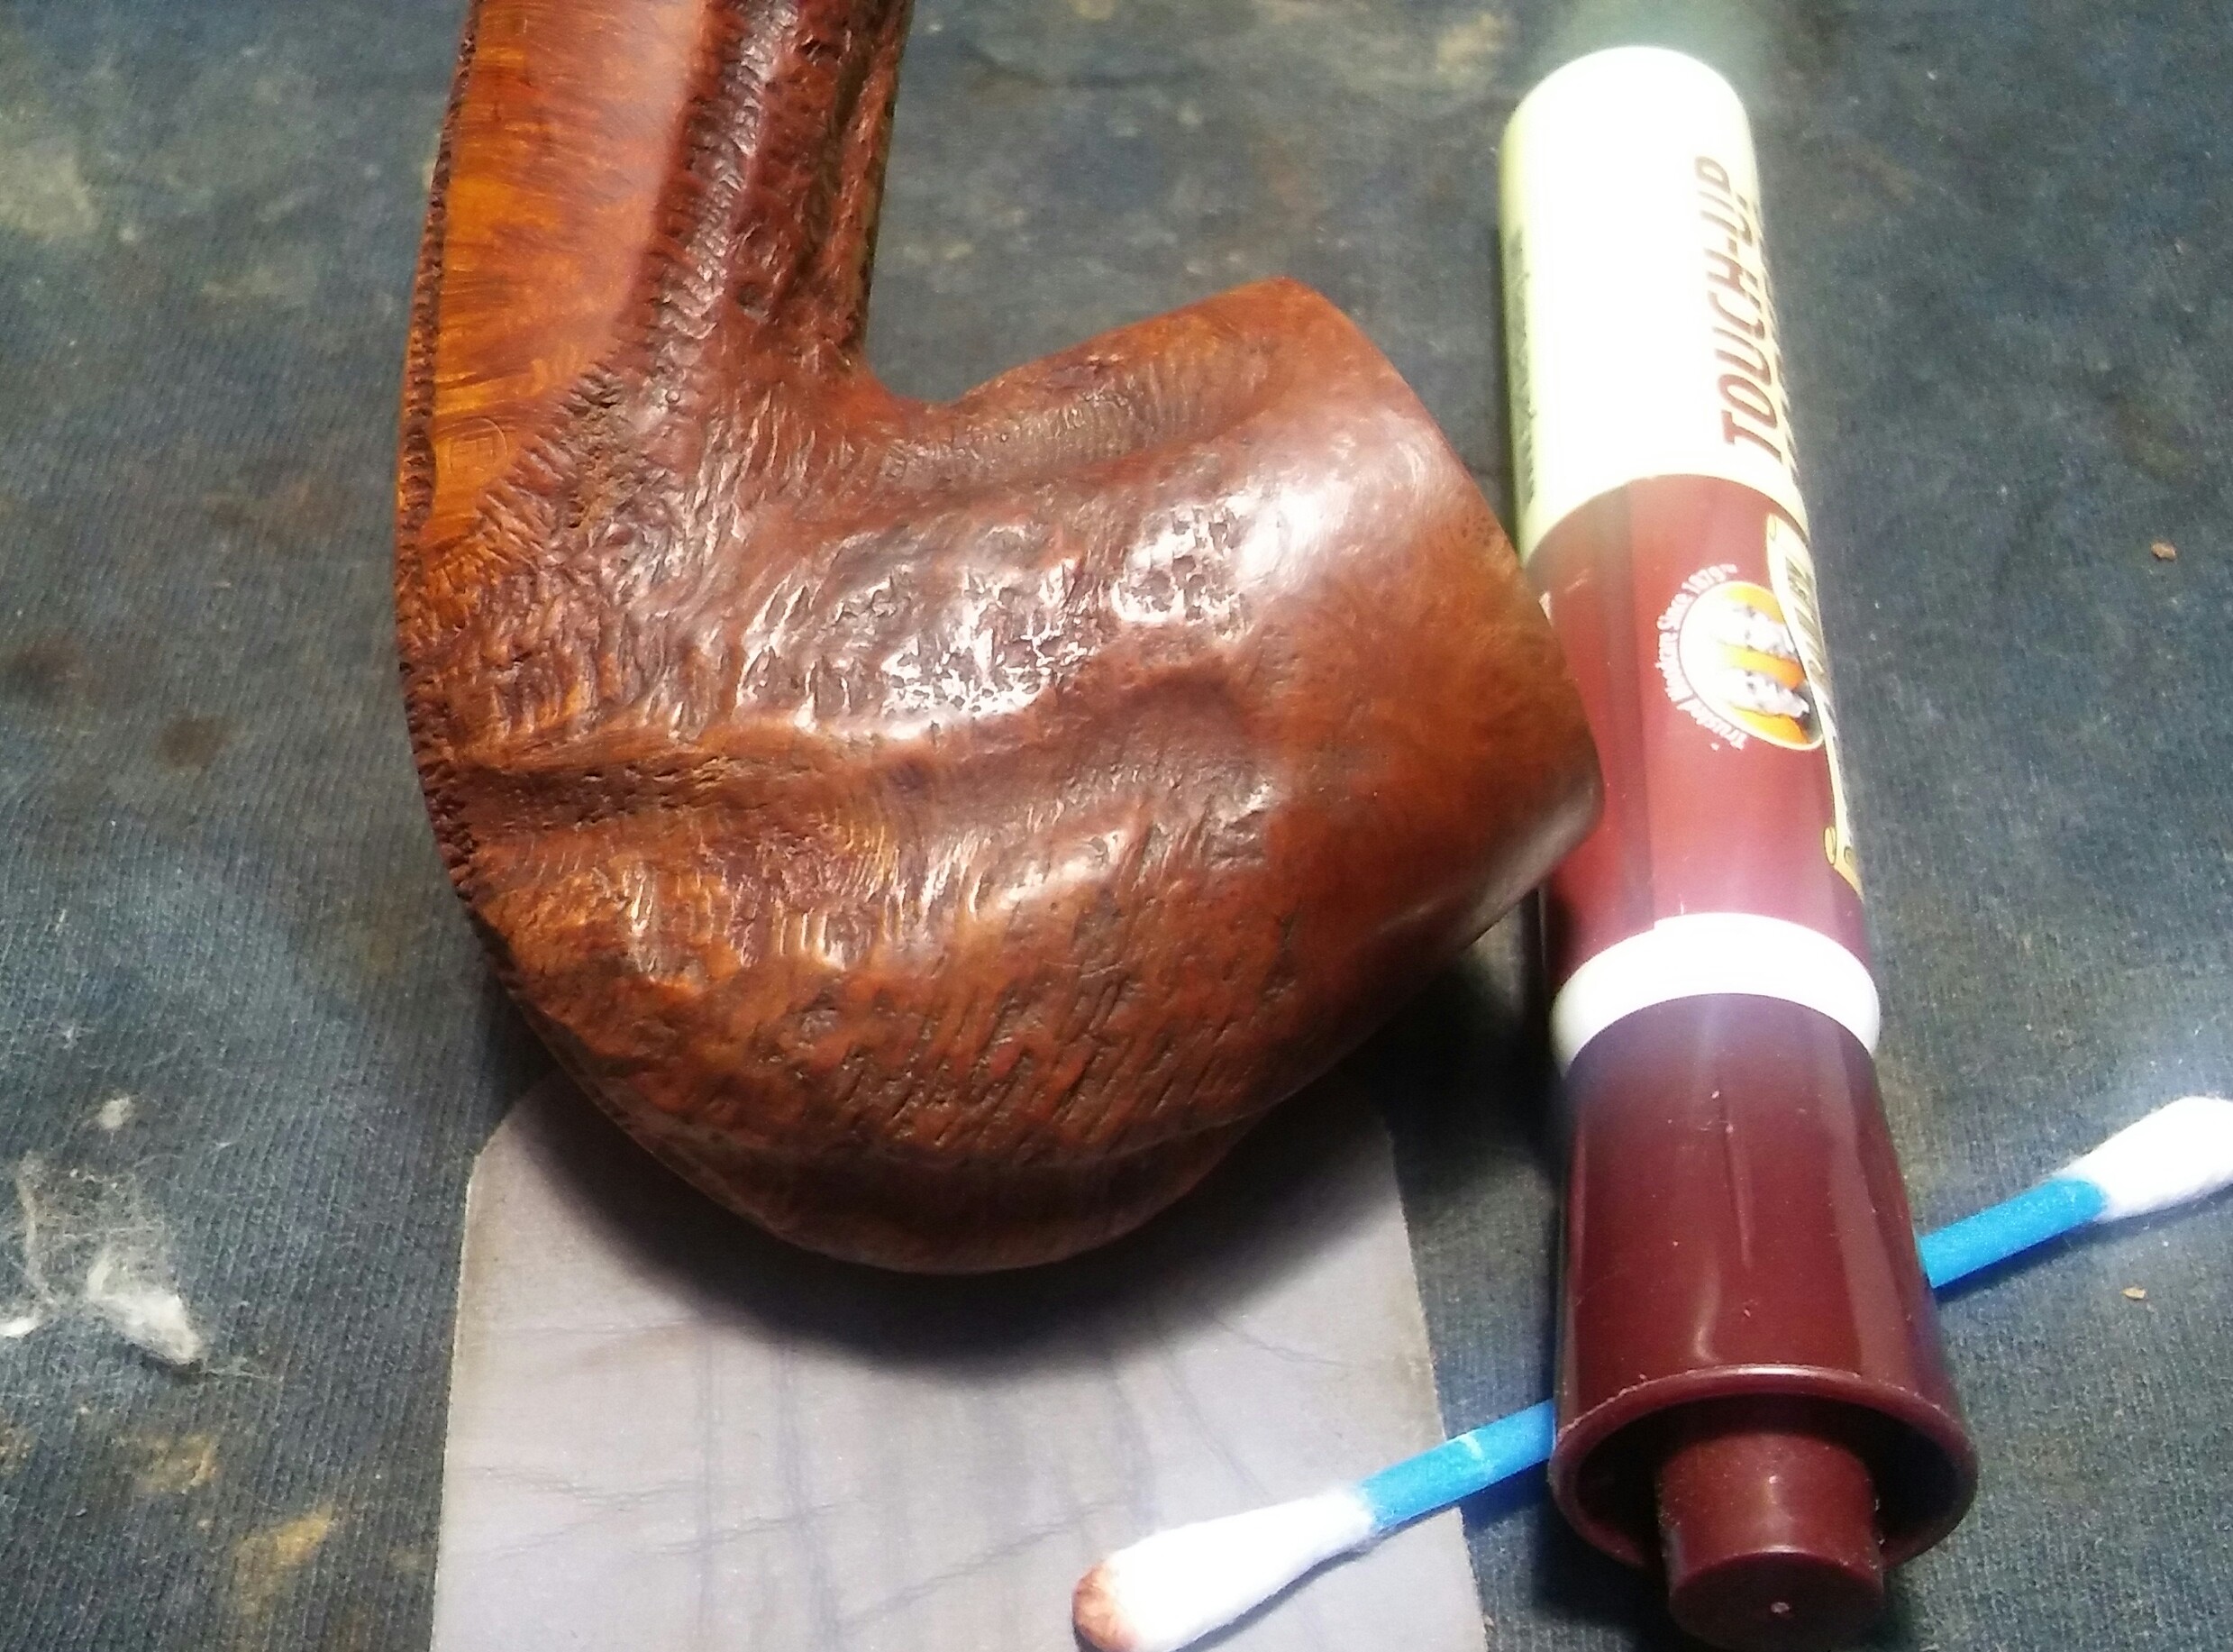
 Before buffing the stummel I lightly polished the meer rim with worn micro-mesh 4000-12000. I finished the stummel on the wheel with white diamond, a few coats carnauba and micro-fiber hand buffing. Buffing the stem with blue compound and a few coats carnauba.

Thanks For Taking A Look.

Tim.

Peterson System Standard 306

Screenshot_2016-01-21-21-34-52~2

 This is the first of eleven pipes I recently acquired. The Peterson System Standard 306 is the first sitter in my small Peterson collection. I am unsure of its age as it does not have a made in or hallmarks, which I found odd as all my other Petes have some sort of way to date them. The only markings on the pipe is Peterson of Dublin System Standard 306 and K&P Peterson on the band.
As Received.


20160223_081032~220160223_080952~220160223_080944~220160223_081050~2PhotoGrid_1456276037968

Over all in pretty descent shape, the stem was oxidized and a few tooth impressions. The chamber had an uneven crumbling cake and the rim was built up with old tar/oils, there is also charring around the inside edge of the rim. The finnish was worn and tired and one small spot of filler. The biggest hurdle was the Lakeland ghost.

20160223_081648~220160223_081920~2

I started with the stummel and my Pipnet Reamer. Starting with the smallest attachment and working up to the second largest, I brought the chamber back to briar, it was free of burn or pitting. I smoothed things out with 400 grit sandpaper wrapped around a finger .

PhotoGrid_1456276847786

Next I could tackle the caked and charred rim. I applied a generous amount of Method Good For Wood Polish to the rim and set it aside to penetrate the build-up for a few minutes. Using Q-tips I removed the rim build-up, I would repeat this process a few times to remove all the debris. After the build-up was removed the rim darkening was still present, using worn micro-mesh I was able to fade most of the darker spots of the rim.

PhotoGrid_1456276703846

Next I gave the internals a good cleaning. Using EverClear, shank brushes, Q-tips and stiff/soft pipe cleaners. Cleaning until the last pipe cleaner came out as it went in. I now filled the chamber and mortise with cotton balls and added EverClear until the cotton balls were saturated and set it aside for a few hours to absorb the tars and oils. The Lakeland ghost would not give up, the stummel was left over night  with EverClear and cotton balls and hopefully did the trick.

PhotoGrid_1456276643670

My attention now turned to the oxidized stem. I applied non-bleach Soft Scrub to the stem with a children’s toothbrush and left it aside to penetrate the oxidation. Once the Soft Scrub turns from white to a brownish color its time to introduce the old elbow grease and scrub vigorously with a rag until the oxidation is removed. I finished up with a damp Magic Eraser to remove the leftover oxidation.

PhotoGrid_1456276798588

With the oxidation removed I could begin removing the impressions at the bit. I tapped off the stem with blue painters tape just before the P-lip so my rough sanding would remain in one area, the rest of the stem would not need as abrasive grit. Starting with 400 grit sandpaper wet I removed the deep impressions, then working through 800, 1000 grit sandpaper wet, 1500, 1800 micro-mesh wet, 2000 grit sandpaper wet and finally 2400 micro-mesh wet until smooth. Before sanding with the finial six micro-mesh pads I removed the painters tape and dry sanded the entire stem 3200-12000.

PhotoGrid_1456276094304

There was one small spot of filler that would need to be removed. To remove I used Method Good For Wood Polish, an X-ACTO knife and a Q-tip, I applied a small amount of the polish with a Q-tip to the filler and left it aside to soften up. Once softened I removed the filler with the X-ACTO knife, I then cleaned the area with a Q-tip and EverClear to remove any oils or debris. I filled the pit with Gorilla Glue and briar dust and allowed it to dry. Once dry I sanded the area with worn micro-mesh until the repair was flush.

20160223_133249~2~220160223_134138~2

The rim and filler spot was left lighter after sanding with  the micro-mesh, using a touch up marker I  was able to blend the faded rim and filler spot into the rest of the finnish. Coloring in the rim and filler spot with the marker allowing to dry and removing the excess with an alcohol dampened rag. In the end I could not exserminate the Lakeland ghost completely but with smoking it will likely dissipate.

Complete.

20160224145519~220160224145634~220160224145641~220160224145909~220160224145653~220160224145823~220160224145836~2

I finished up on the wheel with white diamond, a few coats of carnauba and a microfiber hand buffing. Buffing the stem with blue compound.

Thanks For Taking A Look.

Custombilt Bent Billiard (Rich Era)

The scoundrel Pipes

The pipes I received from fellow blogger Clint of Pipe Scoundrel are complete. They have a new home and are ready to be enjoyed once again. This trio of Bilts has been an eye opener, I believe there will be many more Rich era Custombilts in my future.

The last pipe as received

20160104_222830~2

The nomenclature was stamped unevenly but I could still make out the tell tail (S) of Eugene Rich era Bilts.

PhotoGrid_1451965163069PhotoGrid_1451965201323PhotoGrid_145196517494120160104_222954~2

The last of the trio a large bent billiard. Much like the last shes in pretty descent shape. The cake is a little thicker, the tennon would need tightening, rim tar&char, there is a little filler present and light chatter.

20160105_080059~220160105_111226~2

I started off with the smallest attachment of my Castleford reamer and moving on to the largest that the chamber would except in this case it was one up from the first. I finished up with 400 grit sandpaper. The chamber was free of pitting or the start of a burn out.

PhotoGrid_1452021326533

Now for the rim, it was thick with tars and build up. I applied a generous amount of Method Good For Wood Polish to a makeup pad and left the stummel upside down so the polish could soften the build up. I would have to repeat this process a couple of times to remove all the debris, using a children’s toothbrush and Q-tips. I have also uncovered a couple of dents on the rim that I will address later on.

PhotoGrid_1452021270770

With the rim clean I moved to the chamber and mortise. I did a quick clean of the internals with EverClear and Qtips to remove the loose debris. Now the soak, I unrolled a cotton ball and formed a long swab, using the swab I twisted it into the mortise tightly. I now filled the chamber a quarter of the way with EverClear and allowed the swab to absorb the alcohol. Once the alcohol is absorbed I filled the chamber with two cotton balls and added EverClear to the cotton balls untill saturated. I now set the stummel aside while I worked on the stem.

PhotoGrid_1452021196393

I started the stem by cleaning the exterior first with EverClear and a makeup pad, then the internals with EverClear and stiff/soft pipe cleaners, cleaning until the pipe cleaner came out as it went in.

20160105_143453~2

Now the oxidized stem I applied non-bleach Soft Scrub with a children’s toothbrush and left aside until the Soft Scrub turns from white to a brownish color.

20160105_145753~2

Now the elbow grease, I  now scrubbed the stem vigorously with Soft Scrub and a rag to remove the oxidation

20160105_150600~2

Finishing with a damp Magic Eraser to remove the leftover oxidation. The surface still has a rough texture and would need to be sanded.

PhotoGrid_1452024653610

The stem had a couple of tooth impressions, using a Bic lighter I heated the area of the impressions (moving the flame at all times never leaving it in one spot too long). I was able to raise a few but one was stubborn and would need filling.

PhotoGrid_1452116628613

I roughed up the area to be repaired with 400 grit sandpaper, then wiped the area with an alcohol dampened rag. I made a paste using thick black CA glue and activated charcoal power and applied it to the impression with a toothpick, hitting it with accelerator to set the patch.

20160106_095533~2

After allowing time for the paste to cure I removed the excess using a needle file. I smoothed out the repaired area with 400 grit sandpaper .

20160106_141755~2

I now ran the stem though the various grits of sandpaper and micro-mesh 1000-2400 wet and 3200-12000 dry.

PhotoGrid_1452116681213

The tennon was loose upon receiving the pipe. I used jewelers pliers and a Bic Lighter to expand the tennon from the inside out, by heating the tennon with the lighter and inserting the tip of the pliers into the tennon gradually untill a snug fit between mortise and tennon was achieved.

20160105_163400~2~2

With the stem complete I moved on to the stummel. After sitting for an hours or so the cotton balls had time to absorb some of the tars. The chamber was clean but I would have to repeat the process on the mortise a few more times. Then finishing up the mortise and draught with  EverClear, Q-tips and stiff/soft pipe cleaners until the pipe cleaners came out clean.

20160105_164435~2~2

Now to address the rim dents and darkening.

20160105_192609~2

Using a hot iron and a damp rag I steamed the dents out and lightened the rim darkening with worn micro-mesh.

20160104_222954~2~2

There were three spots of filler present that would have to go.

20160105_165224~2

I applied Method Wood For Good Polish to the filler and let it soften up for a few minutes.

20160105_165804~2~2

Using a pick and X-acto knife I removed the light colored filler.

20160105_195139~2

I refilled with briar dust and Gorilla Glue and left aside to dry.

20160105_200737~2

I removed the excess glue with worn miro-mesh, then stained the new fill with a touch up marker, lighting up the color to match with an alcohol dampened Q-tip.

PhotoGrid_1452116736757

I now wiped down the stummel with Method polish and let dry. Next Howard’s butcher block conditioner, using a Q-tip I worked the Howard’s into the crags and then applied Howard’s to the whole stummel letting it penetrate for a few minutes, hand buffing the excess off with a clean rag. She was now ready for a final buff.

Complete

20160106_190947~220160106_191005~220160106_191025~220160106_191048~220160106_191108~220160106_191034~2

Finished her up on the wheel with white diamond, a few coats of carnauba and a microfiber hand buff.

20160106_191335~2

The Gang all together.

 Clint your generosity is greatly appreciated. The pipes are beautiful and right at home in my collection.