

Lorenzo Firenze Monterosa
Lorenzo pipes I’ve always been a fan of there shapes and thick walls but not so much with the use of filler a little overboard in the putty department. In the past pipes with an overwhelming amount of filler or to beat up to save the shape I’ve opted to rusticate instead of sanding and filling. I had a few in my collection but recently gave one away to my father, so when I received this thick walled Lorenzon I knew it was a prime candidate to be carved and rusticated. Its been a few years since I’ve rusticated a pipe and I couldn’t wait to get into it..
The Restoration.


The pipe was in poor condition when received , it appeared the previous owner attempted to band the cracked shank or removed an existing band. The shank was cracked in multiple areas straight though to the mortise. The shank was sanded leaving an uneven fit between shank and stem. The stem had tooth impressions, oxidation and the button was chewed. The chamber was thick with crumbling cake and rim tar and char. The stummel had quite a few large fills.

I started with the chamber reaming back the cake to a suitable thickness. The odd shaped chamber led me to use both the Pipnet and Castleford reamers. Starting with the smallest attachments and working up to the largest the chamber would accept.

With the chamber reamed I now concentrated on the caked rim. I applied a generous amount of Method Wood For Good Polish with a Q-Tip to the rim and left it upside down on a makeup pad to allow the polish to penetrate the build-up, once the build-up is softened it is easily removed with a makeup pad and Q-Tips.
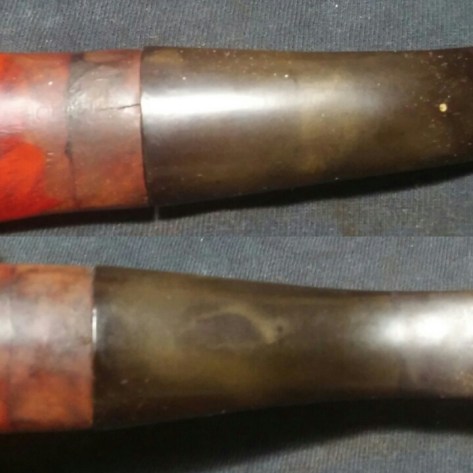
I now worked the stem/shank portion , sanding the stem/shank flush , the nomenclature due to my sanding and the previous owners sanding was almost nonexistent.

I now banded the cracked shank with a wide band, I worked the band part way on then heated the band with my Wagner’s heat gun and pressed the band into place using the banding tool..

I cleaned the internals using EverClear, stiff/soft pipe cleaners and shank brushes, cleaning until the final pipe cleaner came out as it went in.

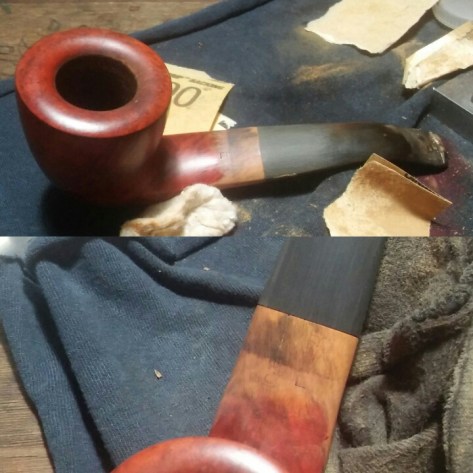
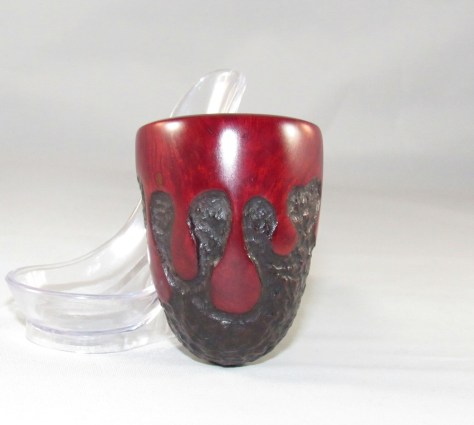
I decided to rusticate the stummel instead of filling multiple large fills. In the past I have craved stummels on less desirable pipes or pipes that are too far damaged . I drew out the pattern to be carved on the stummel and using a rotary burr set I carved the stummel, the thick walls of the Lorenzo pipe allowed me to go deeper into the briar.

Before staining the stummel I sanded the smooth areas with 400,800 and 1000 grit sandpaper. Using Fiebing’s Leather dye I stained the stummel. I mixed black Fiebing’s with a little EverClear and applied it to the rusticated area of the stummel using a Q-Tip. Finally I mixed red Fiebing’s with a little EverClear and applied it to the smooth area of the stummel, I now left it for a few hours to dry, I removed the excess stain with an EverClear dampened rag.
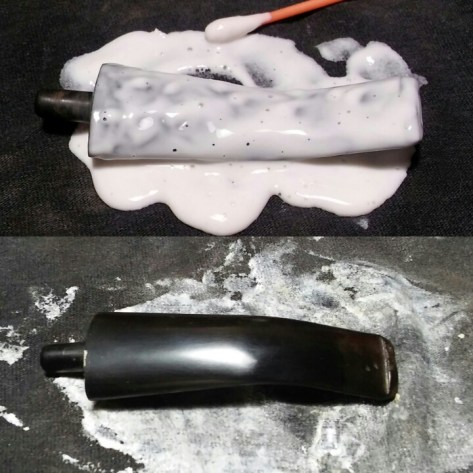
With the stummel ready to hit the wheel I moved onto the stem. I applied a generous amount of non-bleach Soft Scrub to the stem and left it aside to penetrate the oxidation. Once the Soft Scrub turns from white to a brownish color is time to scrub vigorously with a rag adding more Soft Scrub as needed. Holding the stem under natural light will help to see if all oxidation was removed.
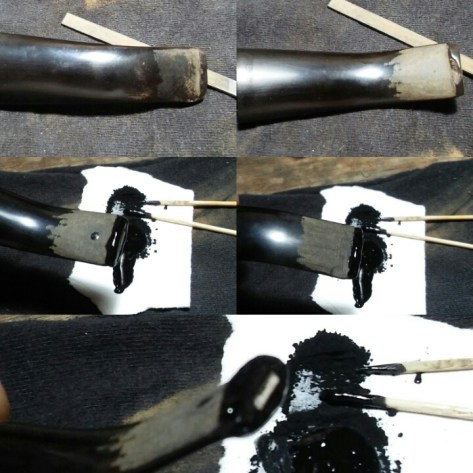
After cleaning the stem I worked on the chewed button and tooth impressions, I removed some of the shallow impressions with a flat sided needle file , the deeper impressions would need filling. I rough sanded the area of repair with 400 grit sandpaper wiping down with an EverClear dampened rag. I filled the impressions with thick black CA glue and allowed to dry. I mixed thick black CA glue and charcoal powder together to form a paste to rebuild the button, applying the paste with a toothpick to the button and hitting it with accelerator to set ,I left it over night to cure. Using needle files and sandpaper I reformed the button .
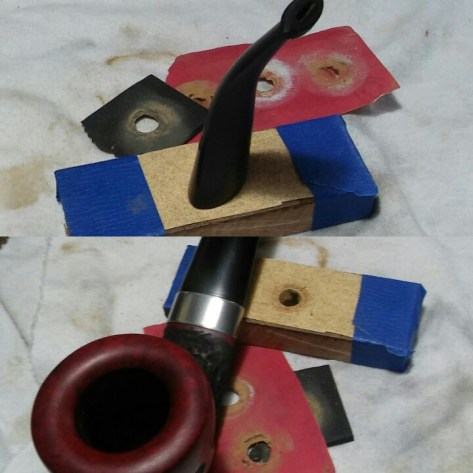
After banding the shank the stem / shank fit was off leaving a small gap between stem and shank. Using a small block of wood drilled to fit the tenon loosely , I lightly sanded the stem flat. I was able close the gap but not completely , the draw is air tight but if held up to the light you can still see a small gap.
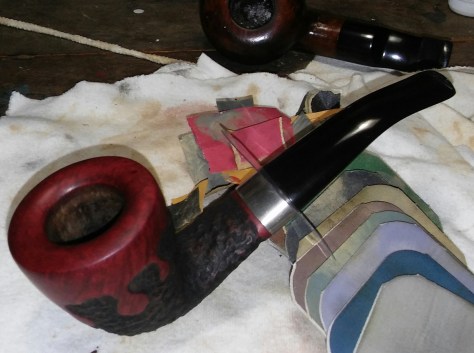
I now ran the stem thought the various grits of sandpaper and micro-mesh pads. Sanding the stem with 800, 1000 and 1500 grit sandpaper wet and micro-mesh 1500-3200 wet and 3600- 12000 dry.
Complete.

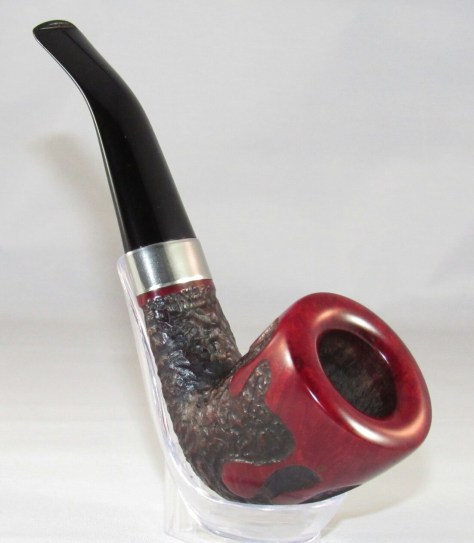

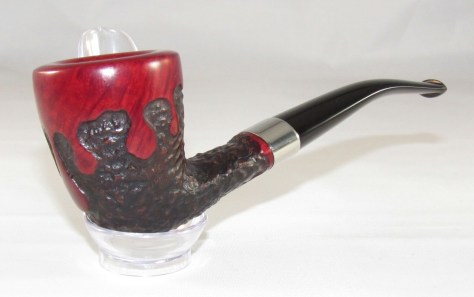


I finished up on the wheel with white diamond , a few coats of carnauba and a micro-fiber hand buffing. Buffing the stem with blue compound and carnauba.
Thanks For Taking A Look.
Tim.

I love the candle wax drip and rustication. A really nice job.
LikeLiked by 1 person
I like the contrast between the red and black. Very eye-catching! Enjoy your “new” pipe.
LikeLiked by 1 person