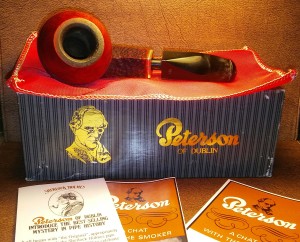
I was gifted this Captain Pete for Christmas by my wife its one that has pasted me by a few times and I didn't think I'd get in the shape I wanted the XL80, a shape I'm very found of. The Captain Pete XL80 is chunky and has a shorter stem then the standard 80 shape and thats what was so eye catching for me, short and fat like many of the pipes in my collection. Jim Lilley connoisseur and collector of Peterson Pipes wrote a post on the Captain Pete on his blog, he has also contributed to Pipedia The Peterson Page , the Peterson's in his collection are amazing.
As Received
The Captain was in was in decent shape when I received it, rim build up, tight tennon fit, a little chatter, worn stain and the start of an uneven cake.
After looking over and disassembling the pipe, I set aside the stem and started with the stummel. First reaming the chamber with my Pipnet reamer starting with the smallest attachment and working up to the second attachment, smoothing things out with 400 grit sandpaper wrapped around a finger. The chamber was free of burn or pitting. Now my attention turned to the rim build up, I applied a generous amount of Method Wood For Good Polish with a Q-tip and allowed it to penetrate the oils and tars.
After the Method Polish had time to penetrate the build it was easily removed with Q-tips. Some of the stain was removed along with the build up, which doesn't typically happen with Method polish.
With the rim free of oils/tar I began my internal cleaning of the stem, chamber and mortise using EverClear, Q-tips, makeup pads and stiff/soft pipe cleaners, cleaning until the pipe cleaners came out as they went in.
After my internal cleaning, I did a EverClear and cotton ball soak on the chamber allowing it to absorb the tars and oils while I worked on the stem.
The stem was in good condition aside from a a little chatter and a couple of tooth impressions. To remove some of the shallow tooth chatter I heated the area with a Bic Lighter ( moving the flame at all times never leaving it in one spot too long) all but a couple of impressions raised.
I now applied non-bleach Soft Scrub to the stem with a children's toothbrush and left it aside to penetrat the oxidation. Once the Soft Scrub turns from white to a brownish color its time to scrub vigorously with a rag until the oxidation is removed, removing the leftover oxidation with a damp Magic Eraser.
The couple of tooth impressions that were left I would remove with 1000 grit sandpaper wet. I tapped off the bit/button portion of the stem with blue painters tape so my rough sanding would remain in one area.
Before polishing the stem with the finial three Micro-Mesh pads I touched up the P with Rub'n Buff. I applied it with a Q-tip and buffed off the excess with a rag and continued with my final polishing with the last three micro-mesh pads.
The rest of the stem would not need as much work as the bit/button portion, as the Soft Scrub and Magic Eraser removed all the oxidation. I left the painters tape on the stem and ran the button area though the various grits of sandpaper and micro-mesh 1500, 1800, 2000 paper, 2400 wet then 3200-4000 dry, I removed the painters tape just before sanding the entire stem with the last three Micro-Mesh pads 6000-12000 dry.
Raising rim dents with steam. Using a household iron on medium/high heat and damp rag, I covered the rim dents with the damp rag and applied it to the hot iron working in intervals until all the dents raised.
This is the first time I had results work this well and would not have to sand the area afterwords.
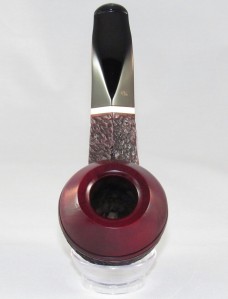
When I received the Captain the red stain on the rim was faded to an almost pink color and after cleaning the debris from the rim it was more so. I decided to re-stain the whole stummel with Fiebings Red leather dye. I gave the stummel a wipe down with an alcohol dampened rag, allowing it to dry then appling the red stain, I hit it with a Bic Lighter to set the stain, removed the excess stain with a alcohol dampened rag and left it overnight to dry completely before buffing.
Captain Complete
I Finished up on the wheel with white diamond, a few coats of carnauba and a microfiber hand buffing. Buffing the stem with blue compound and buffing the spacer with black emery before gluing it back in place.
I had fun taking photos of this one, My Pop was a Navy Man so I’m also a collector of vintage nautical item’s as well.


That Capt Pete cleaned up beautifully! Nice work.
LikeLike
Reblogged this on rebornpipes and commented:
One of my favourite shapes well restored. Nice work.
LikeLike
Nice clean up! I have the same pipe I smoked it two days ago.
LikeLike
Thanks Everyone-
Definitely a long-awaited piece, haven’t sparked her up yet I’m gonna give it a few day’s.
LikeLike
Nice job on the dent removal! That’s a great looking Pete, the bowl top really makes the pipe.
LikeLike
Really nice looking pipe. I also like the way you raised those dents to where they became invisible. Excellent!
LikeLike
Great pipe!. I have a smooth one, and it’s a favorite. Thank you for including the before/after photos of the dent repairs. I’m sure you’re going to love this pipe.
LikeLike