Tag Archives: pipe restoration

B P JUM

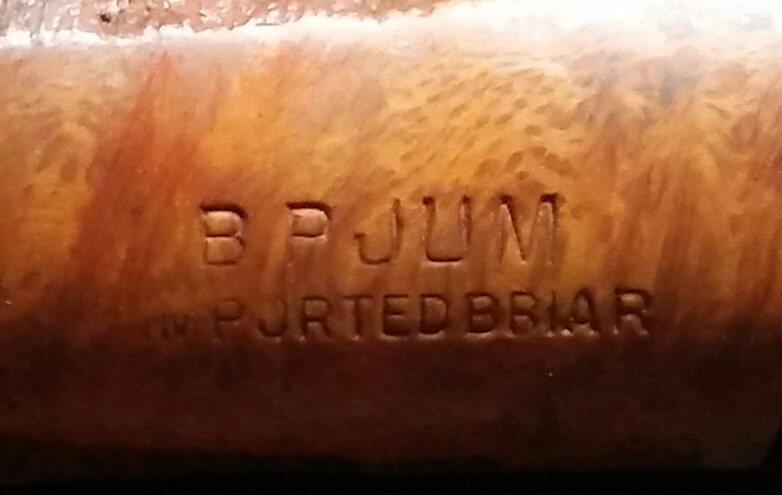
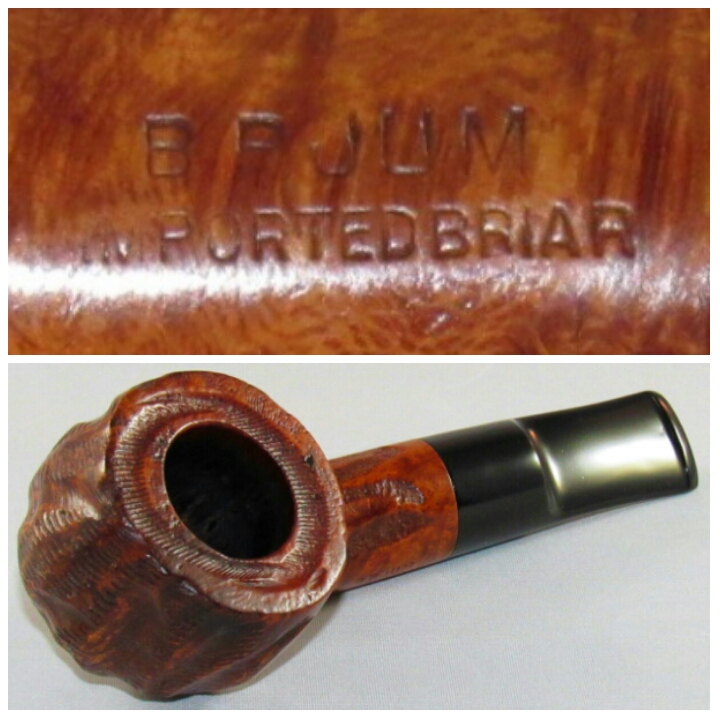
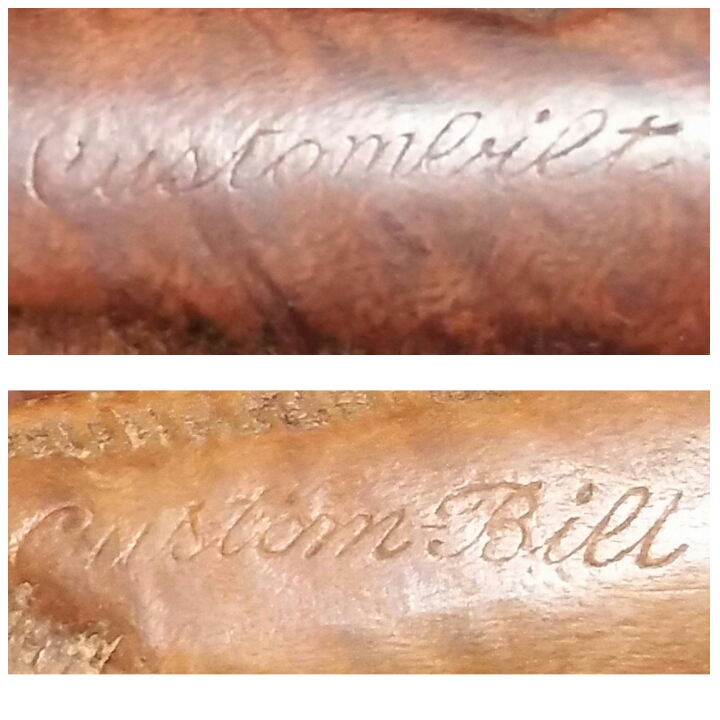
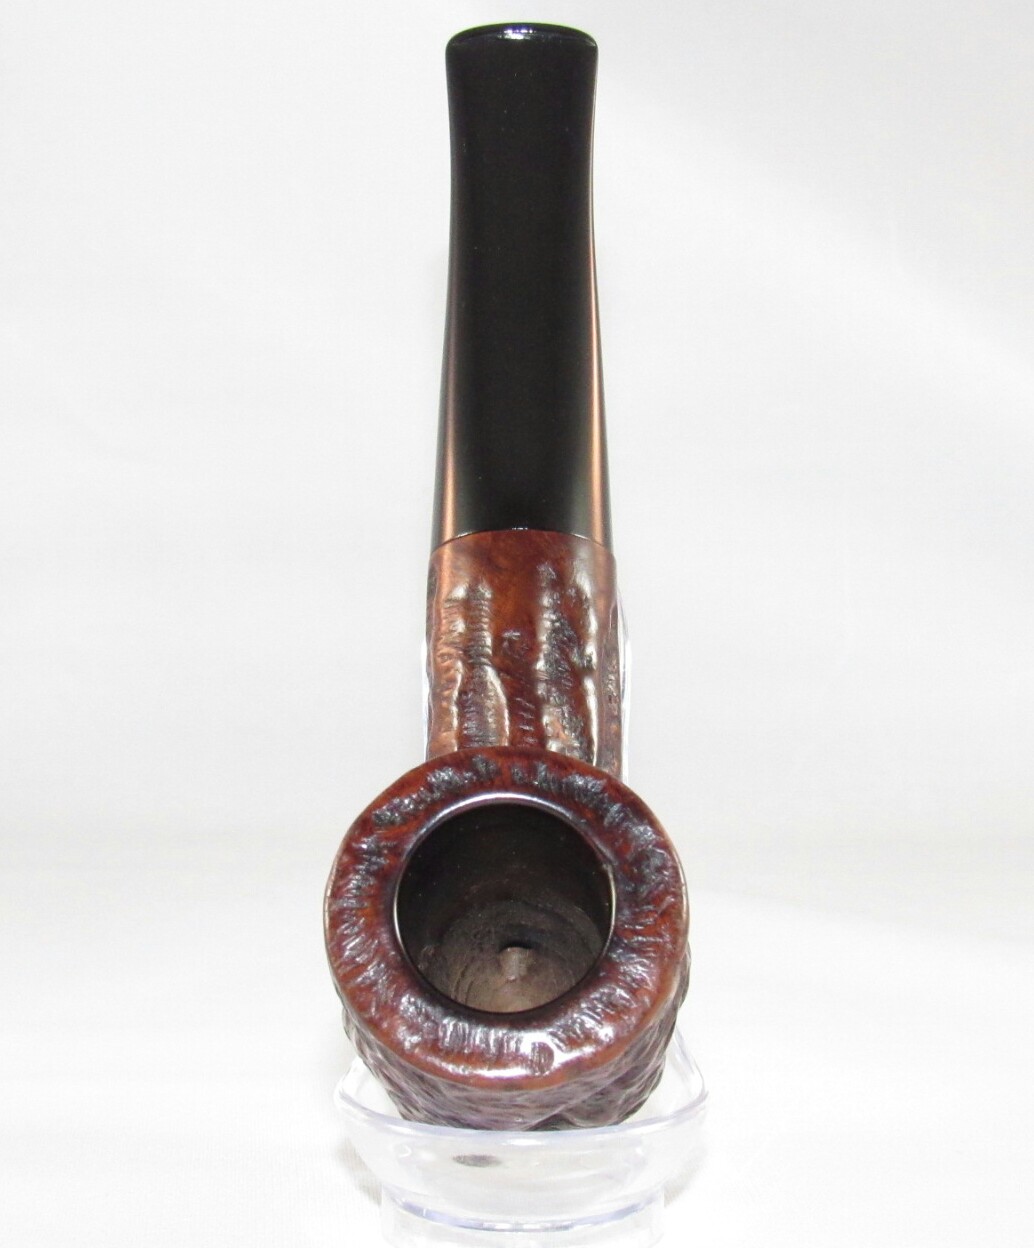
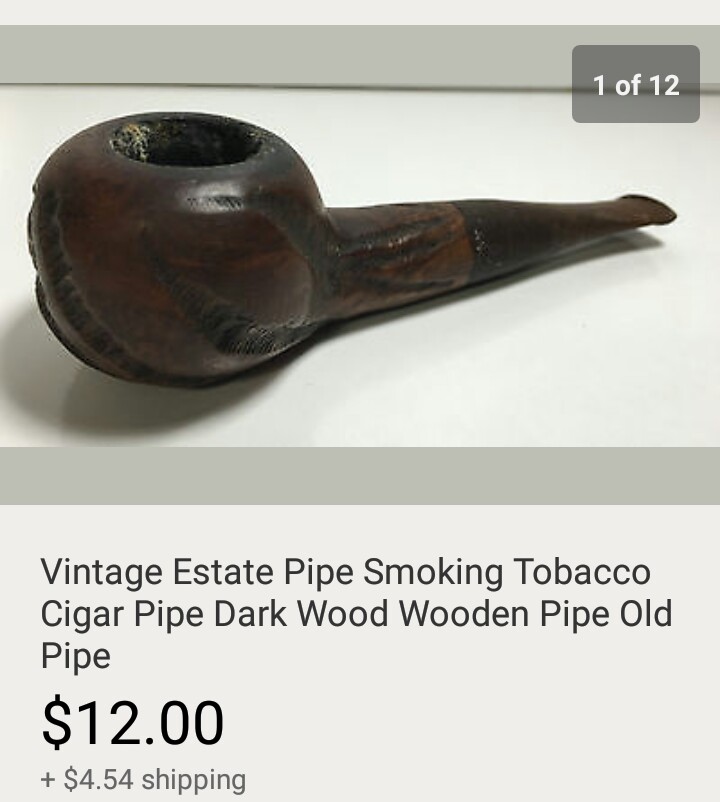
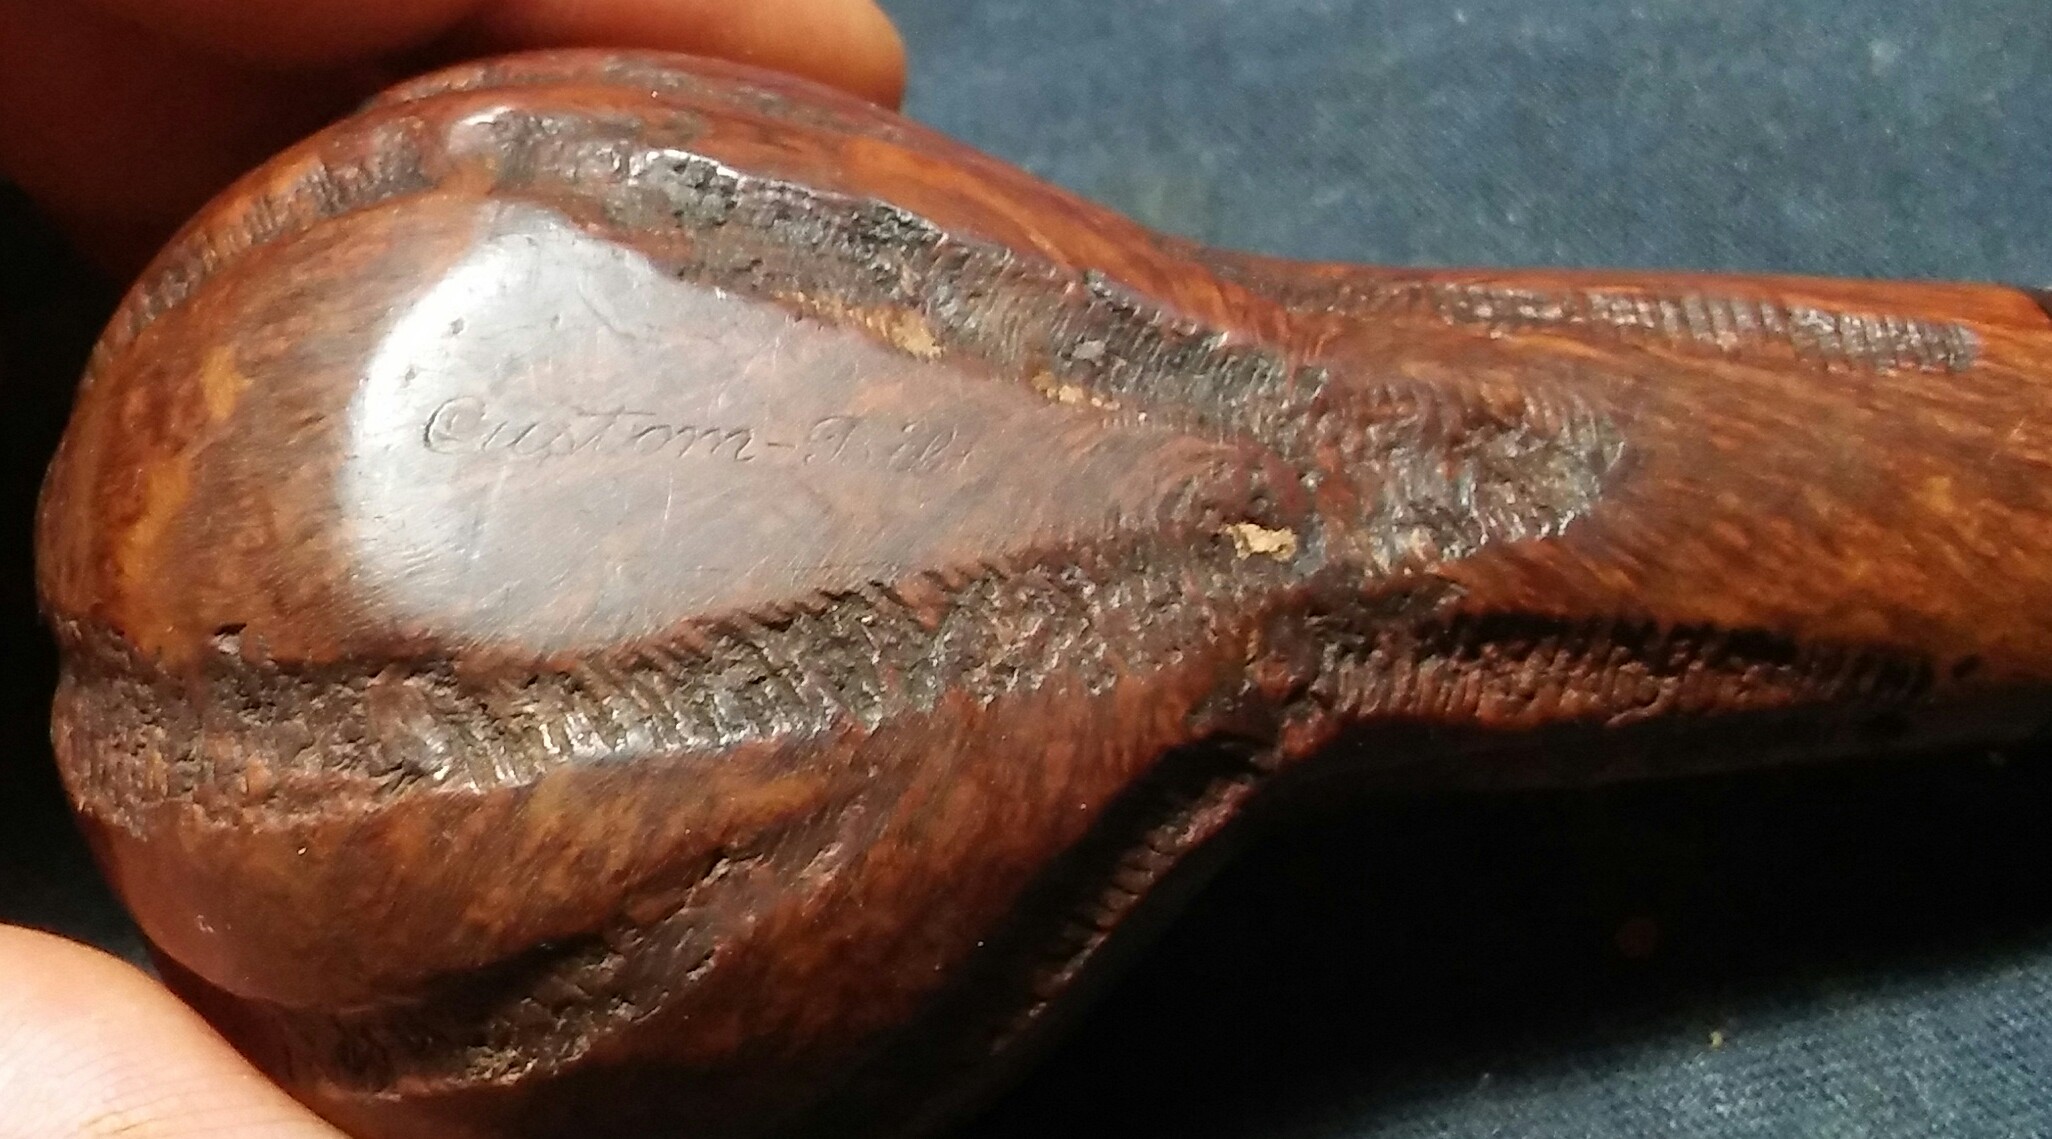
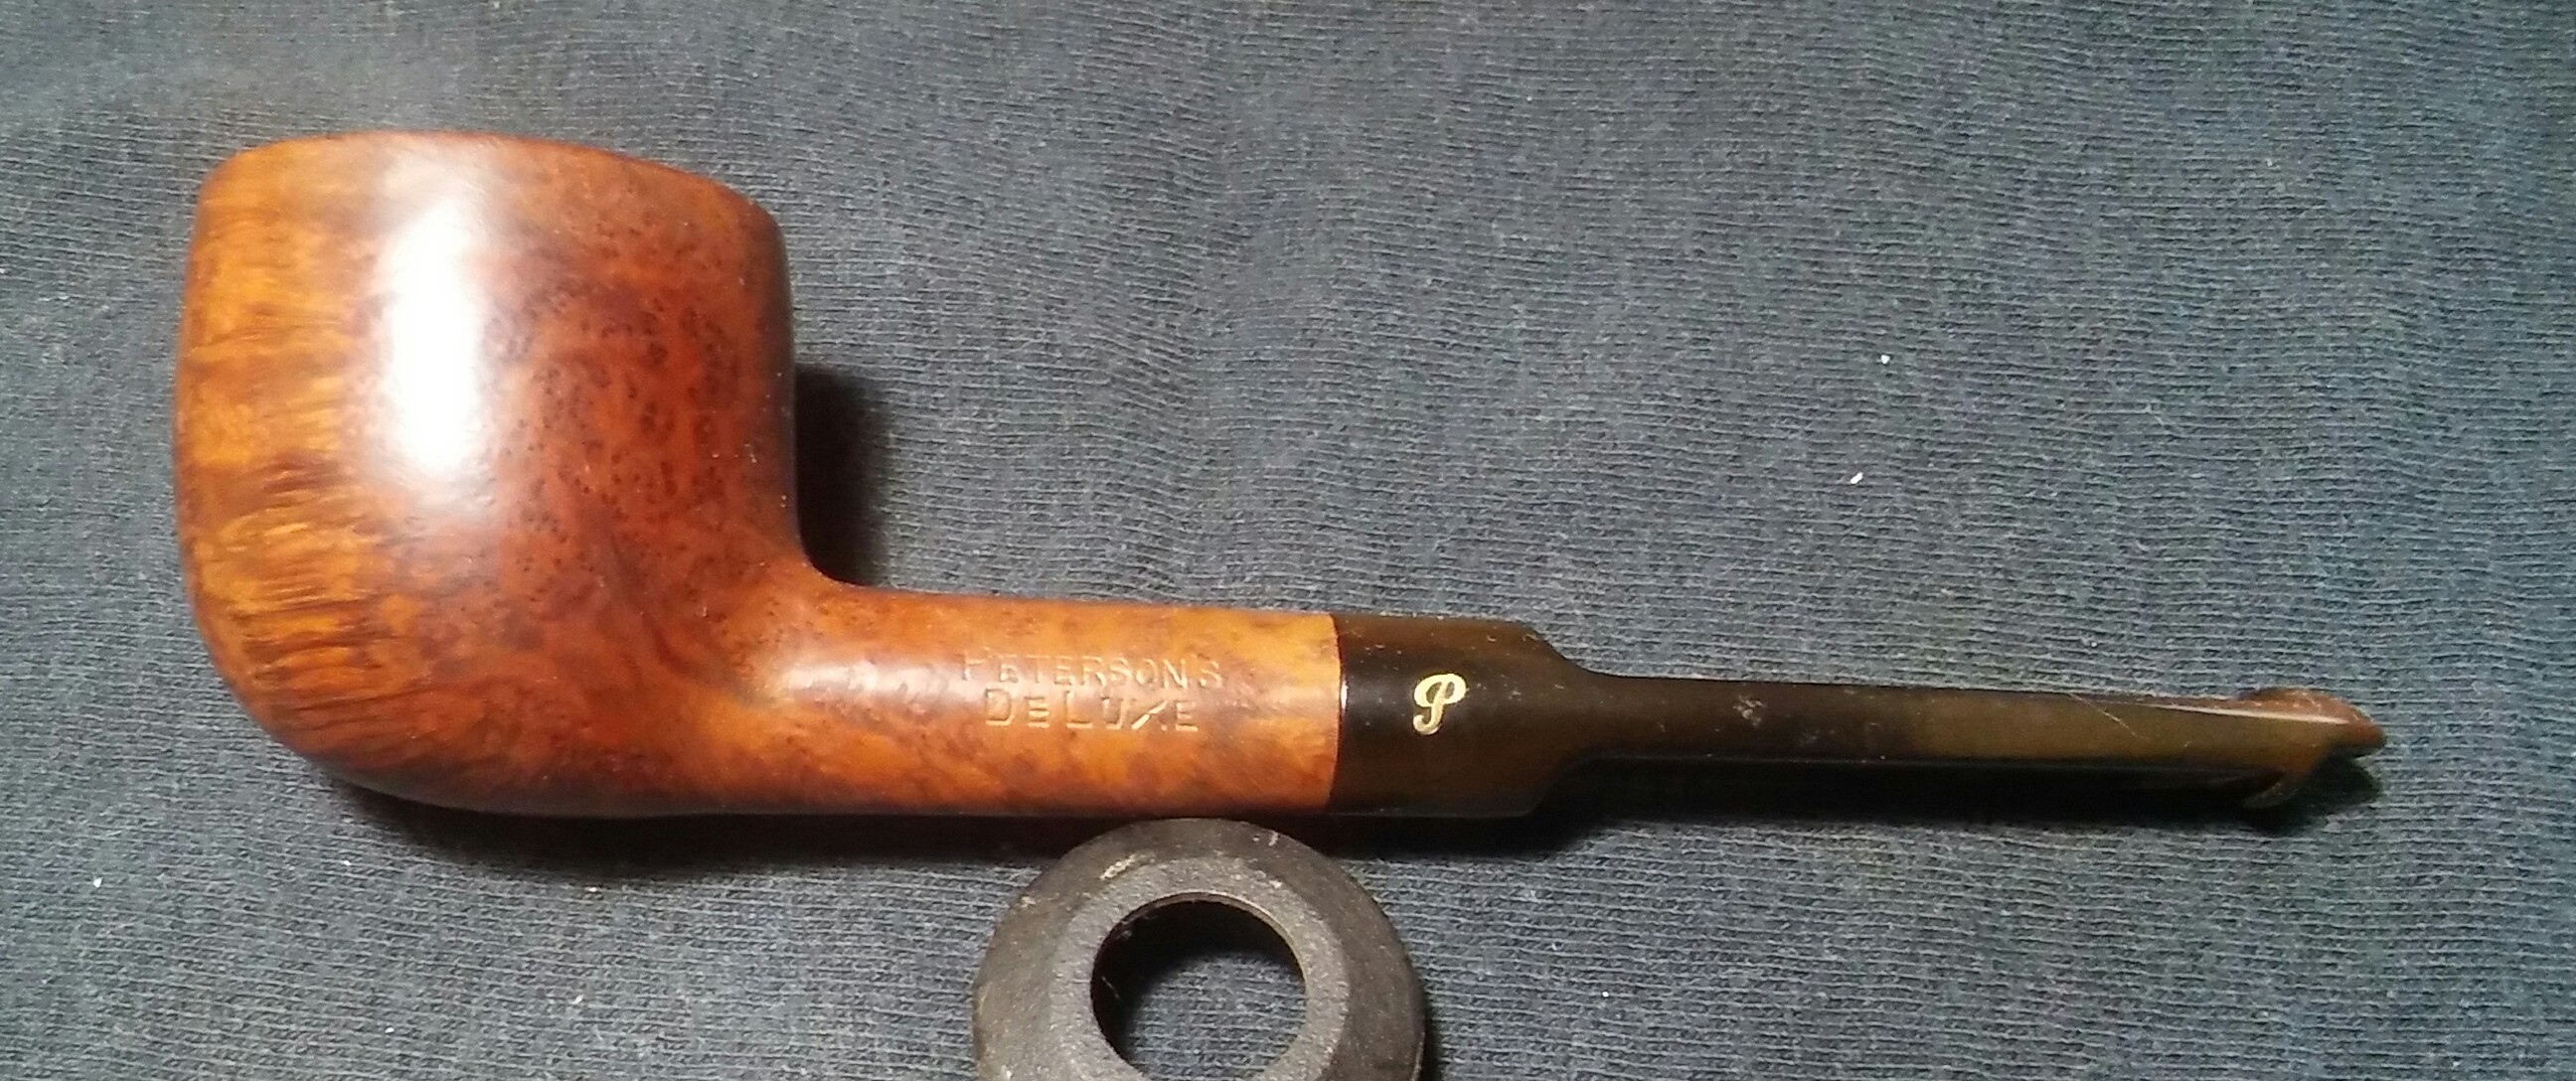
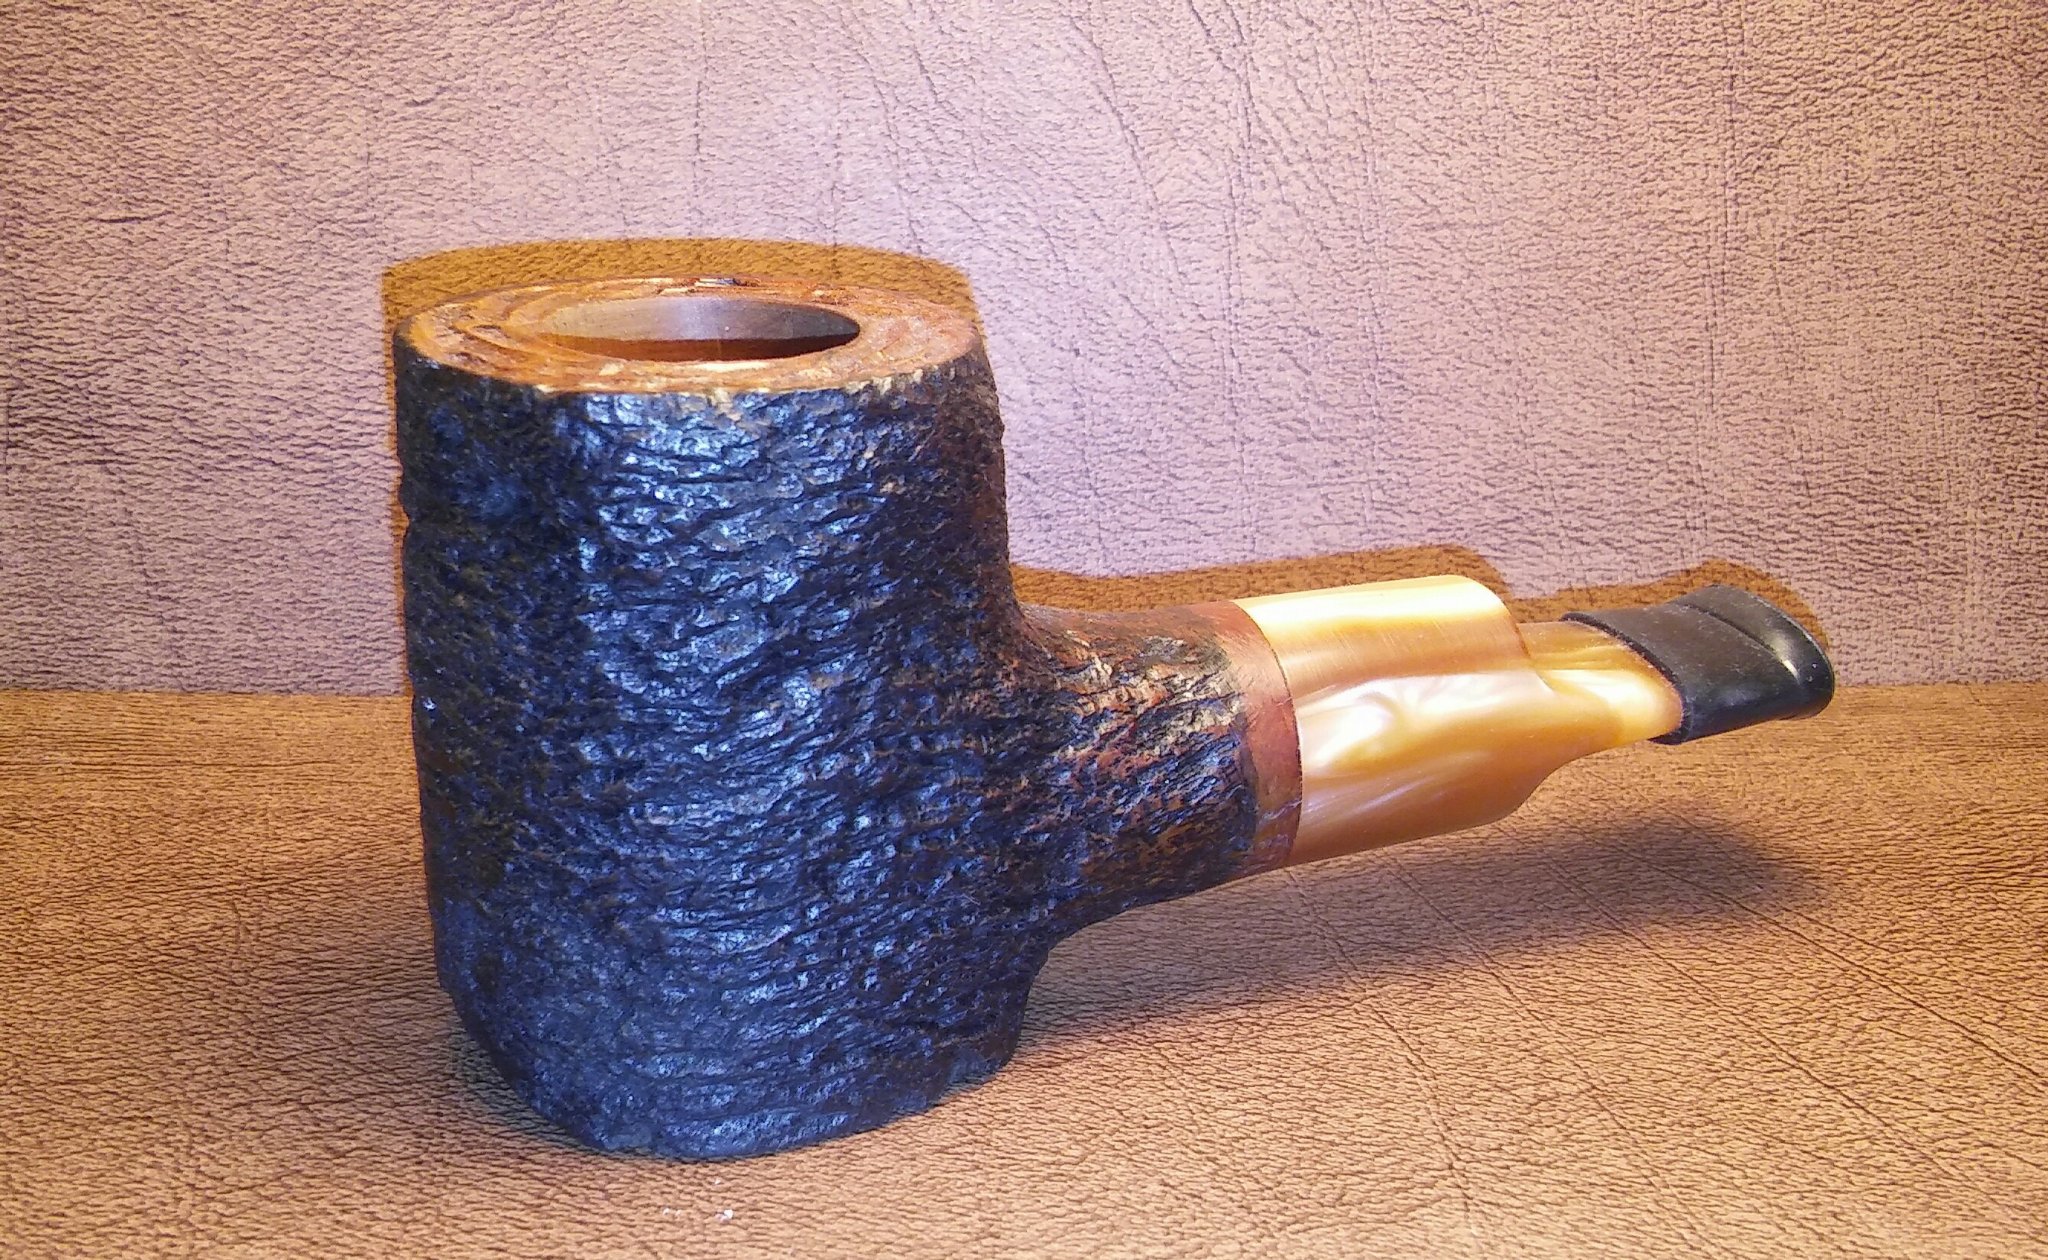
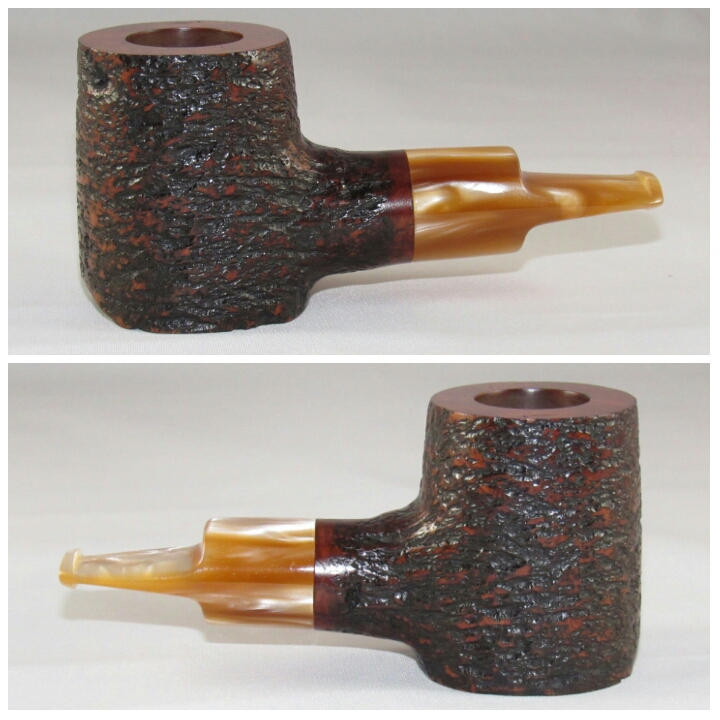
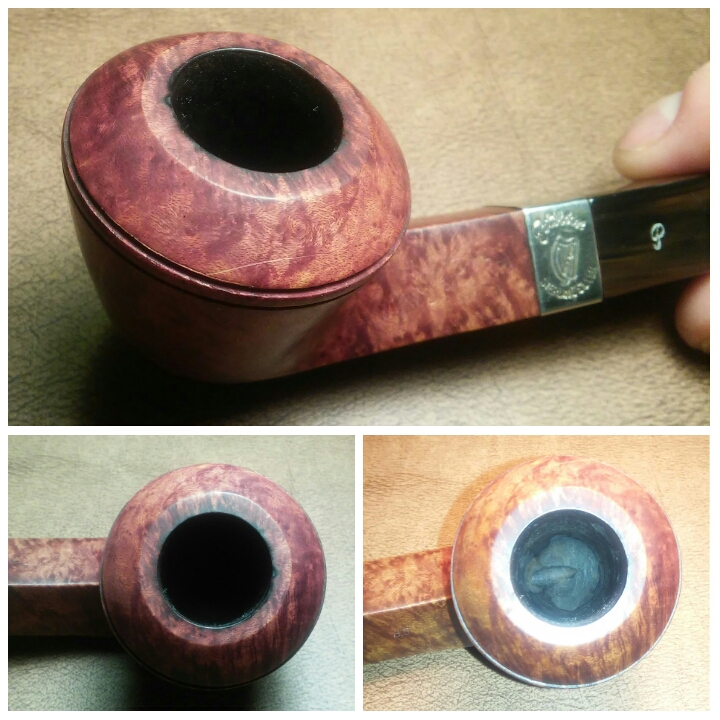
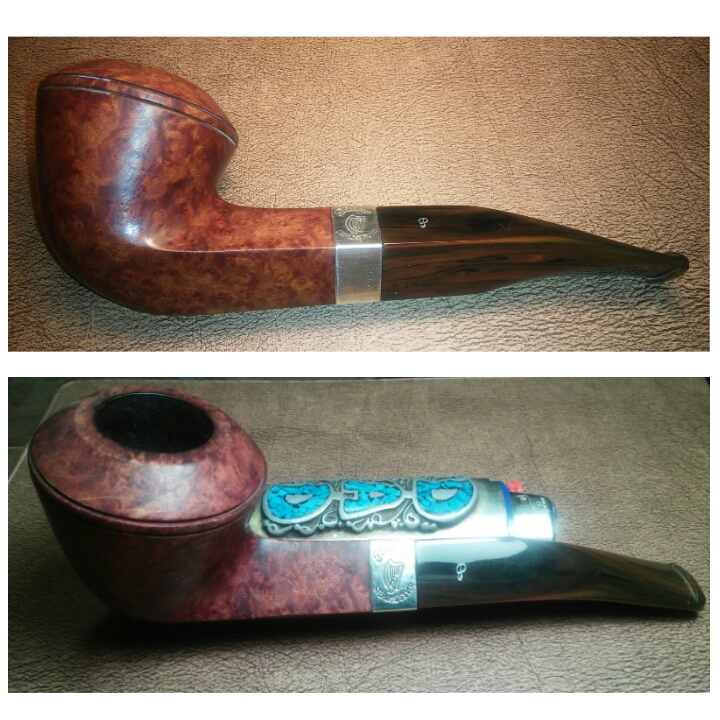
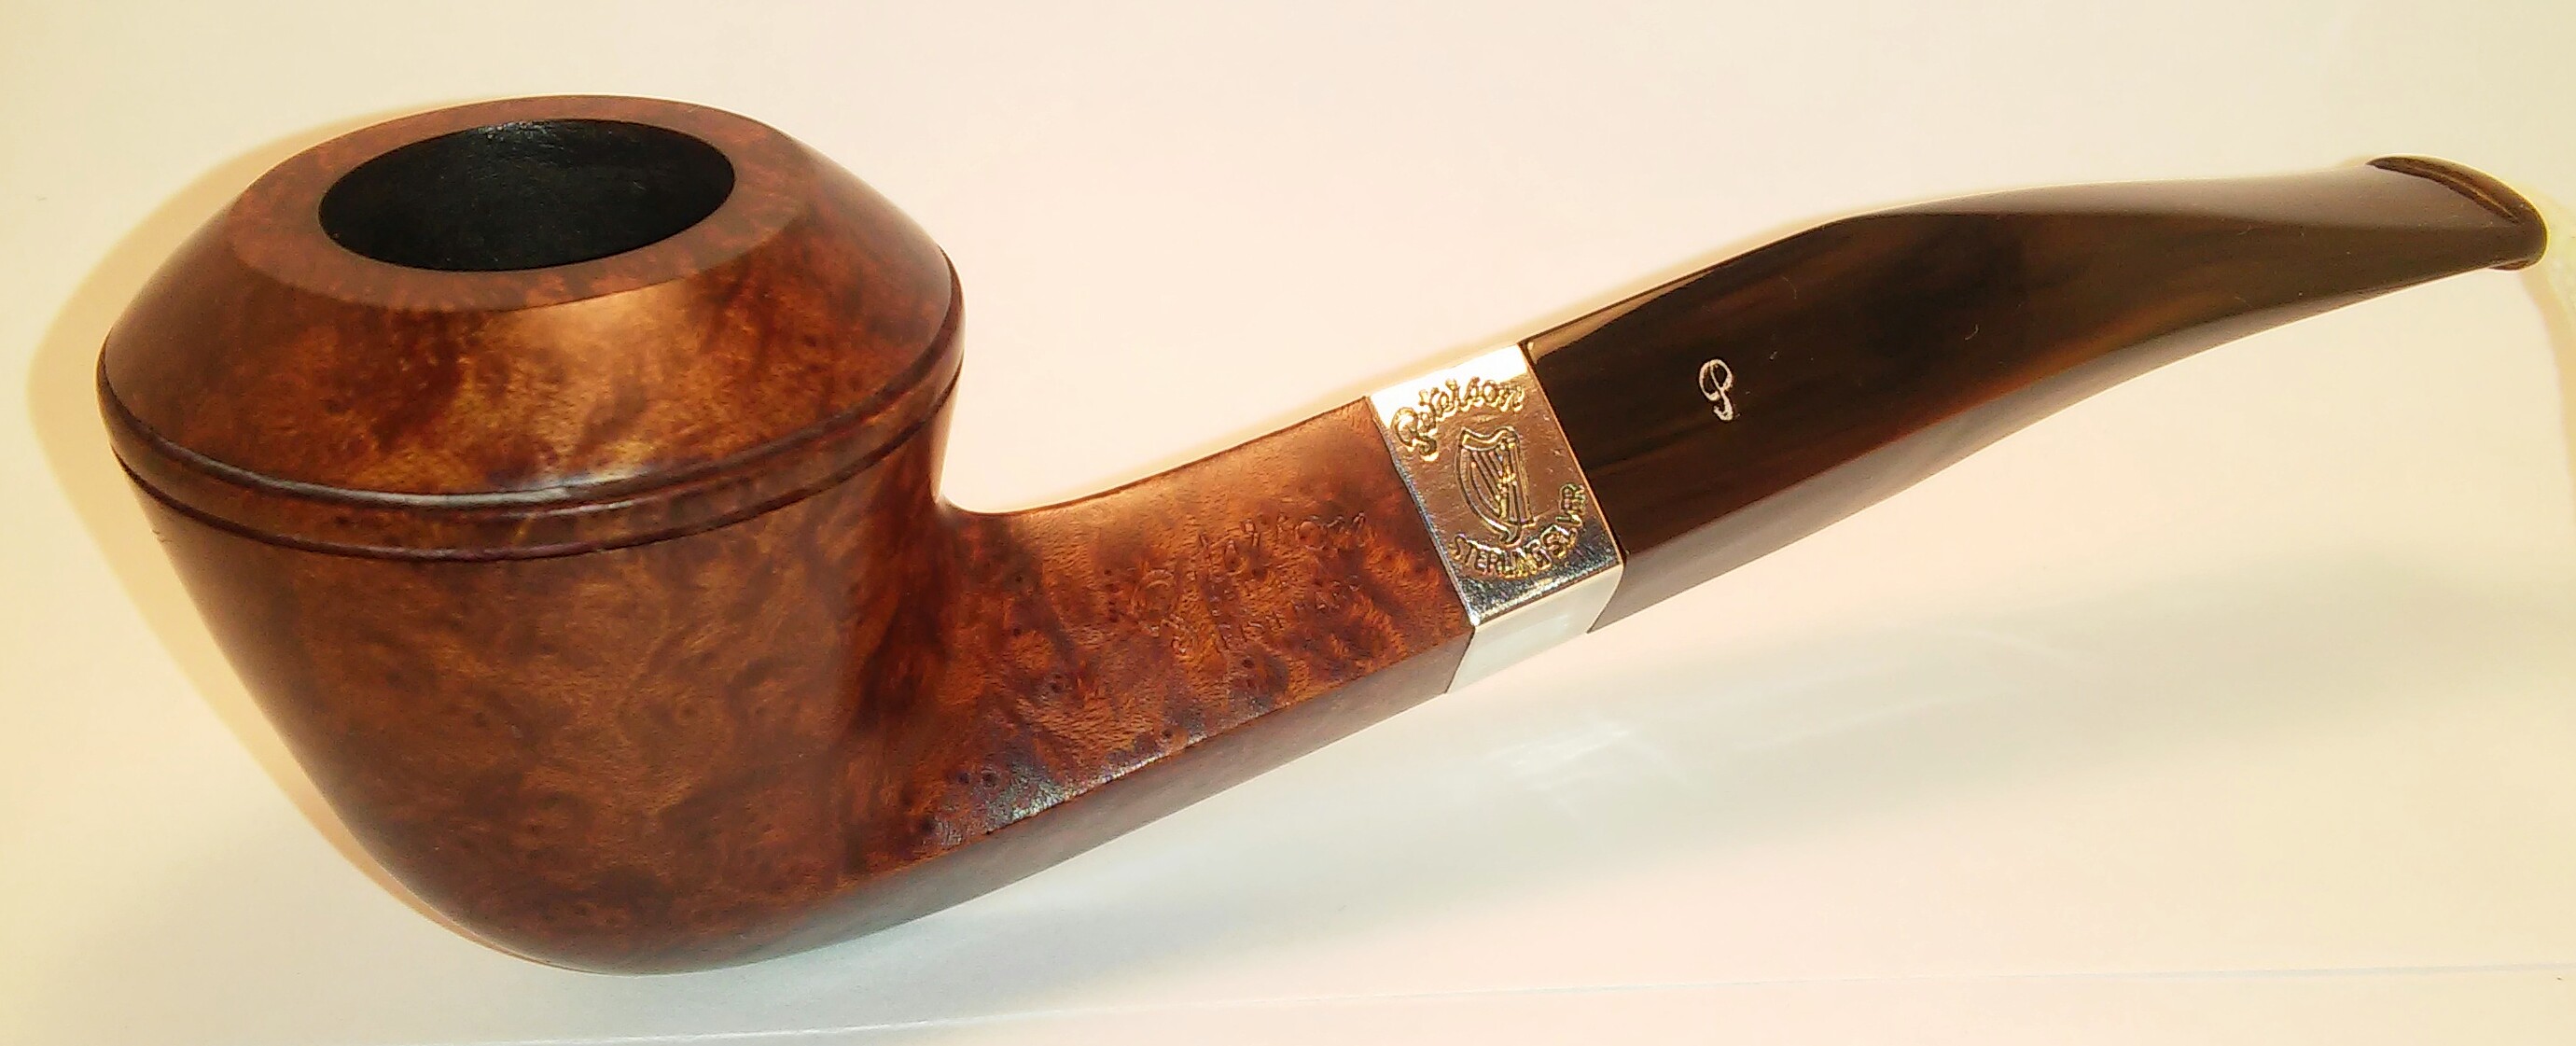
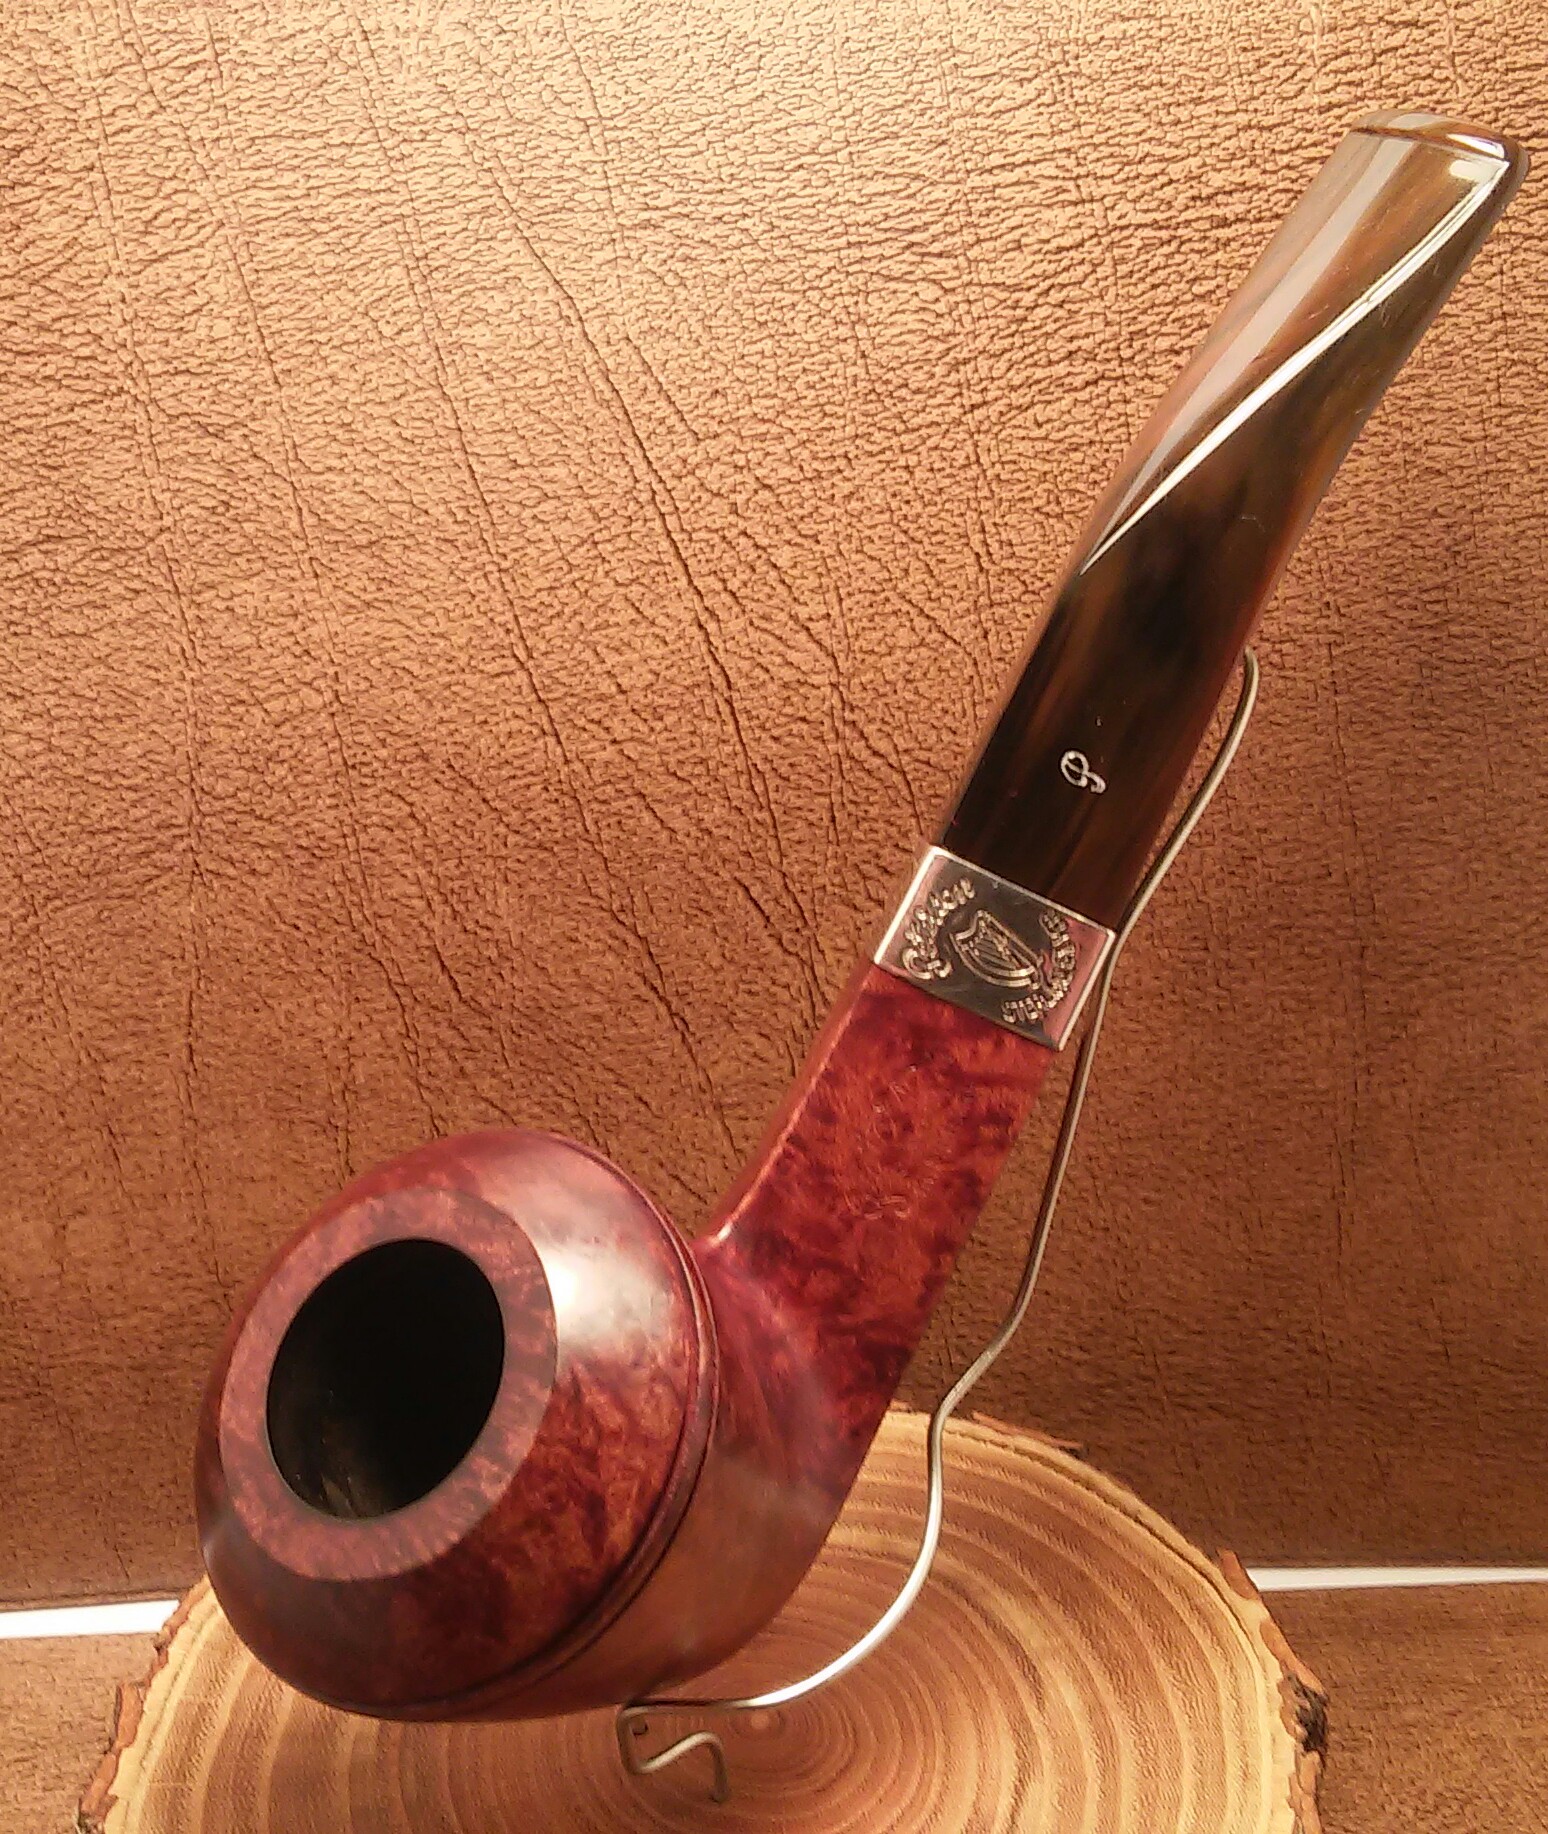
B P JUM Imported Briar.

I have a few in my collection some of my favorites, they smoke cool and comfortable in the hand. I have yet to find any information or advertisement for these pipes. Bill Unger suspected they could have been produced by Mincer but there was no evidence.
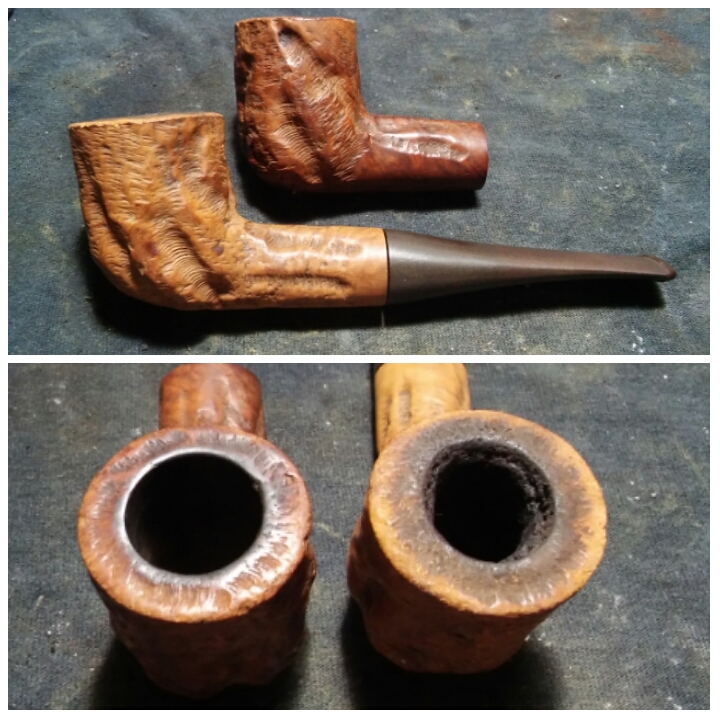
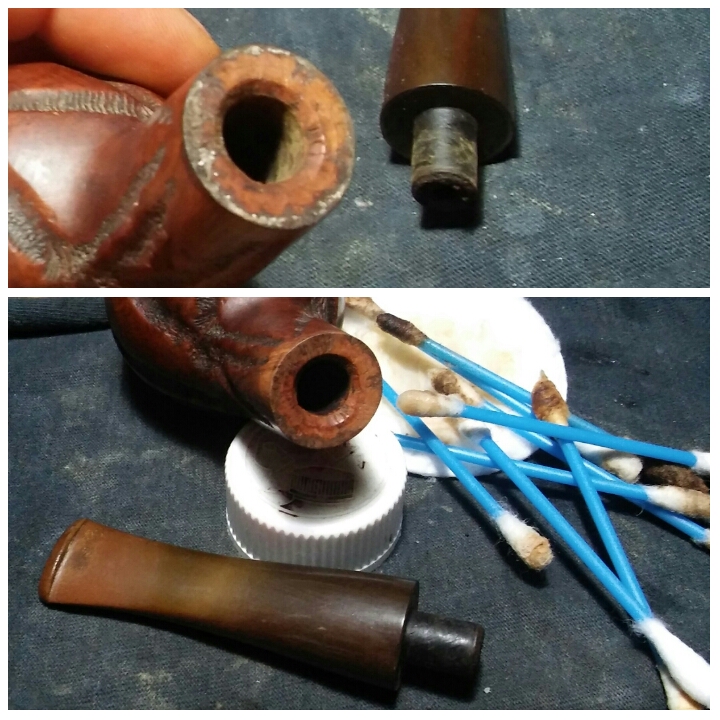
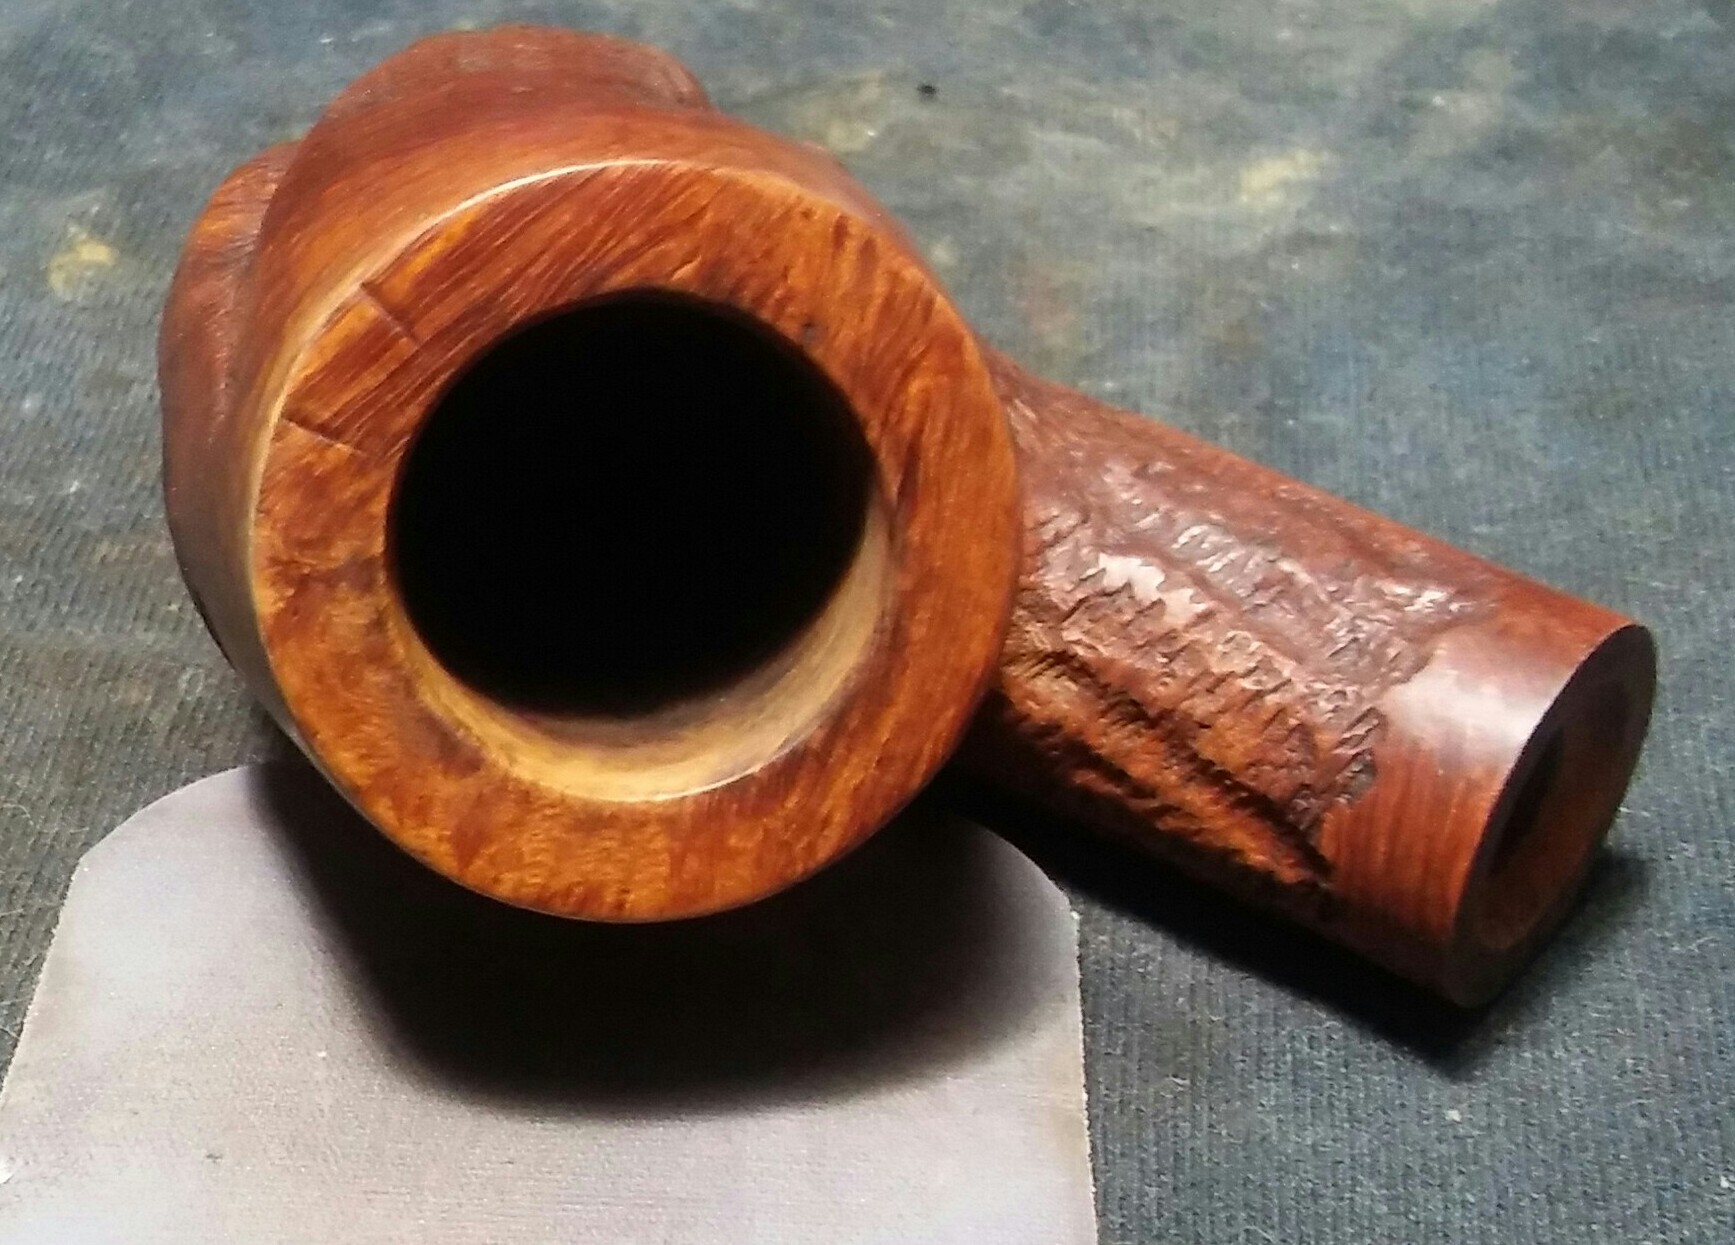
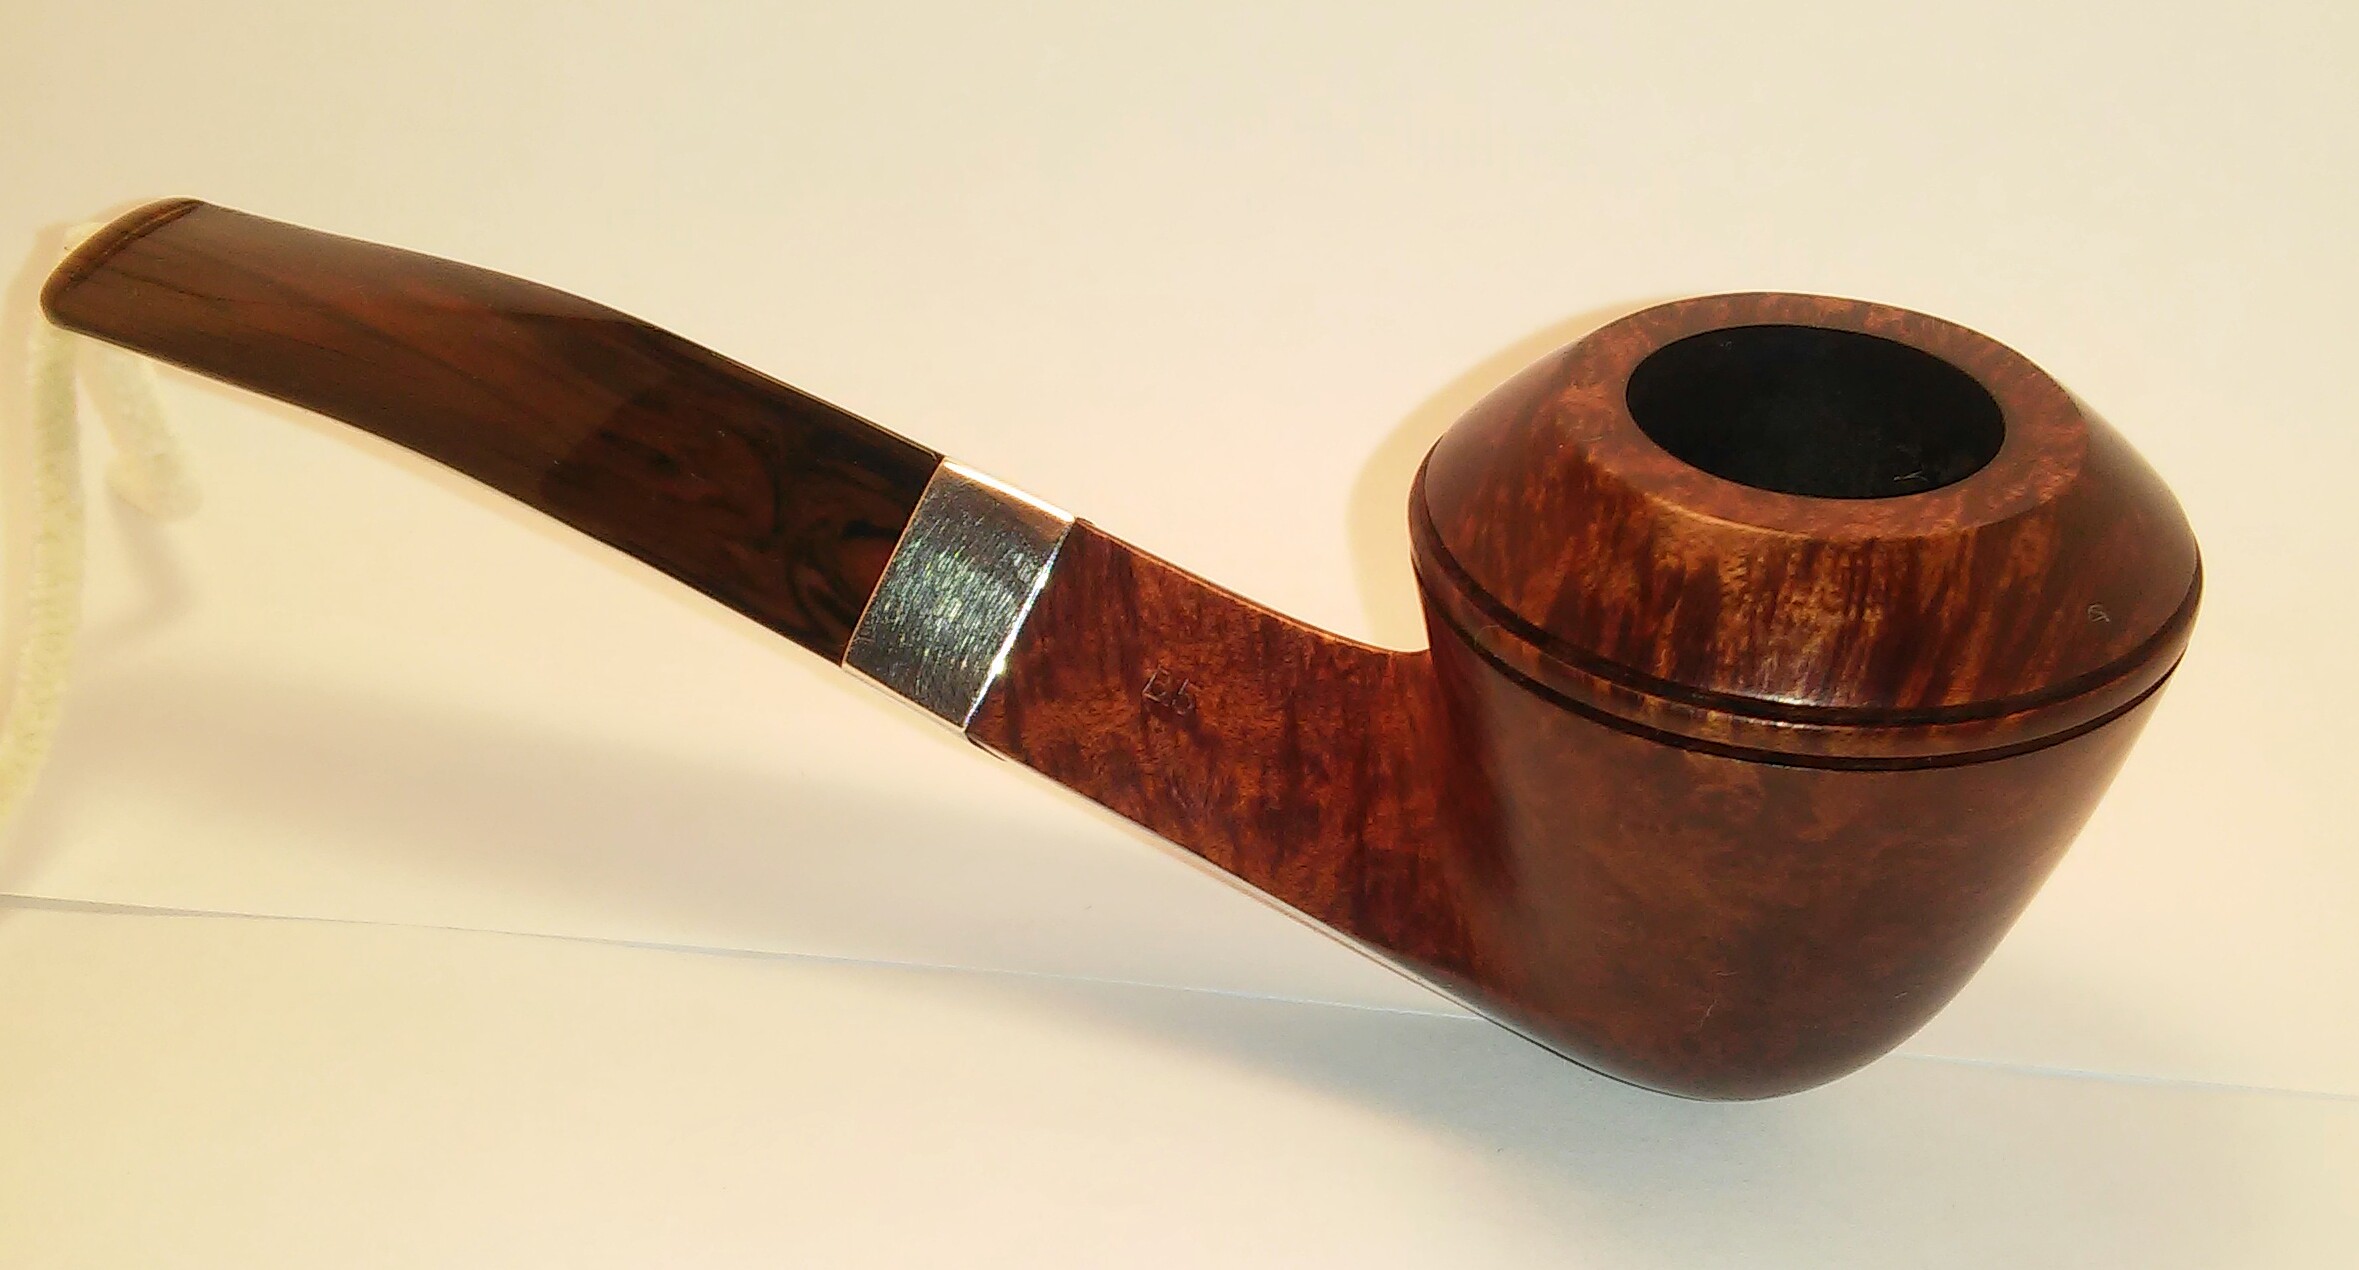
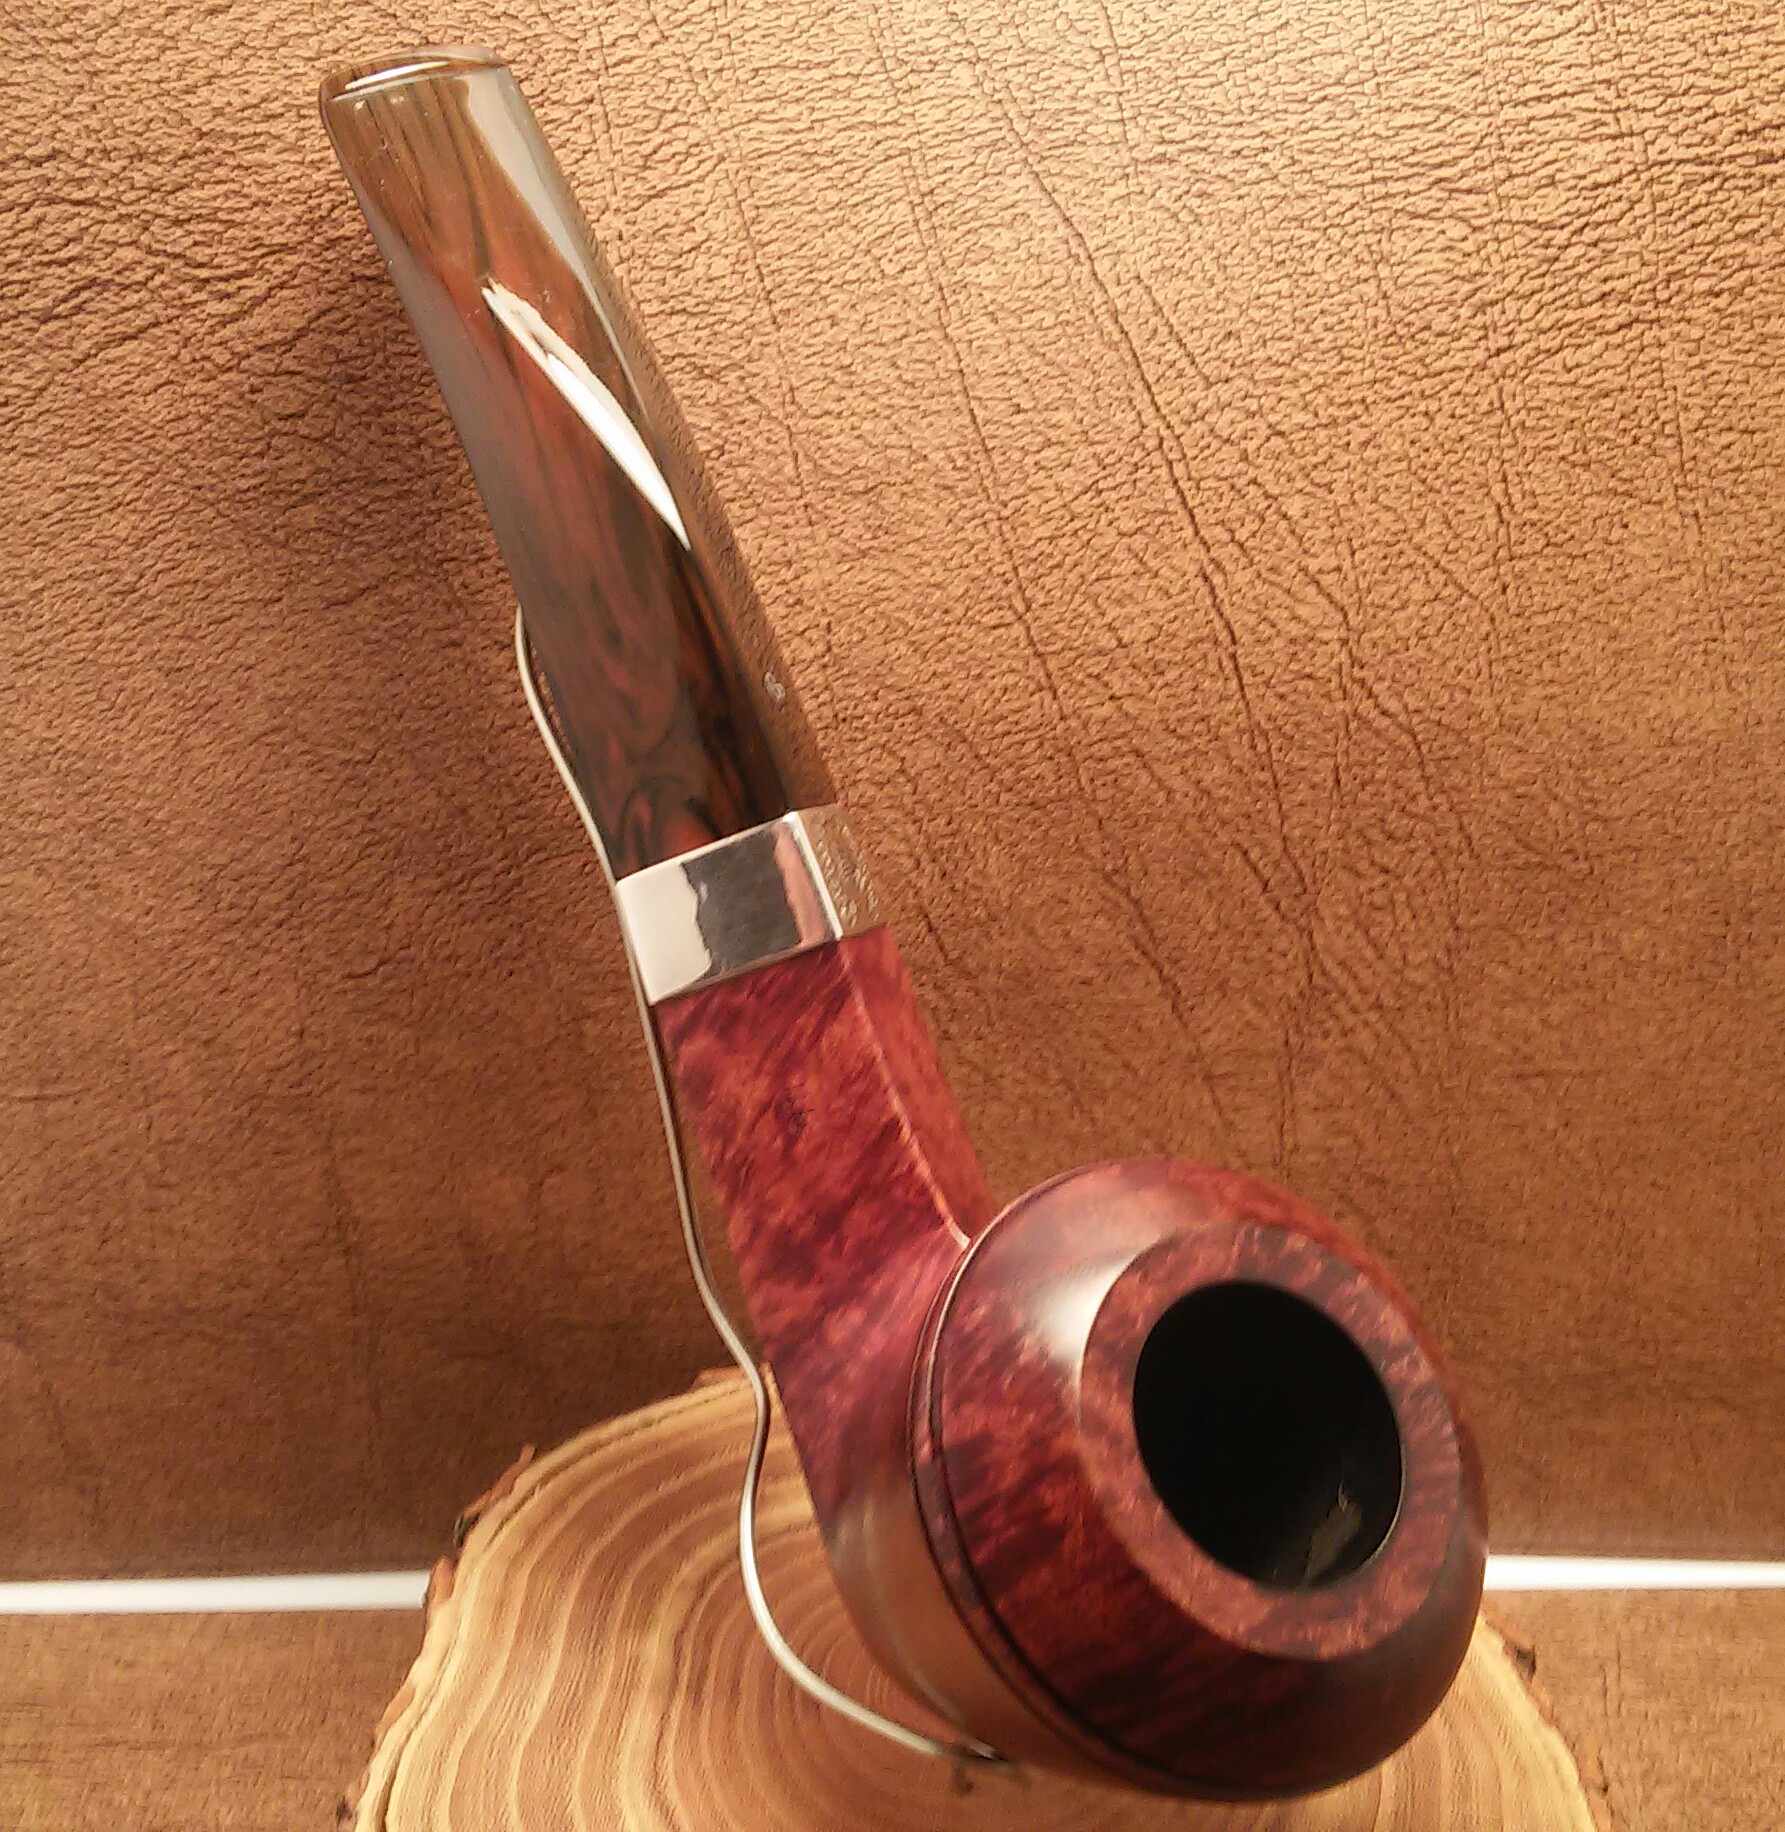
 

As Received.

20160130_141655~2PhotoGrid_1454187976270PhotoGrid_1454188001227PhotoGrid_1454188024564

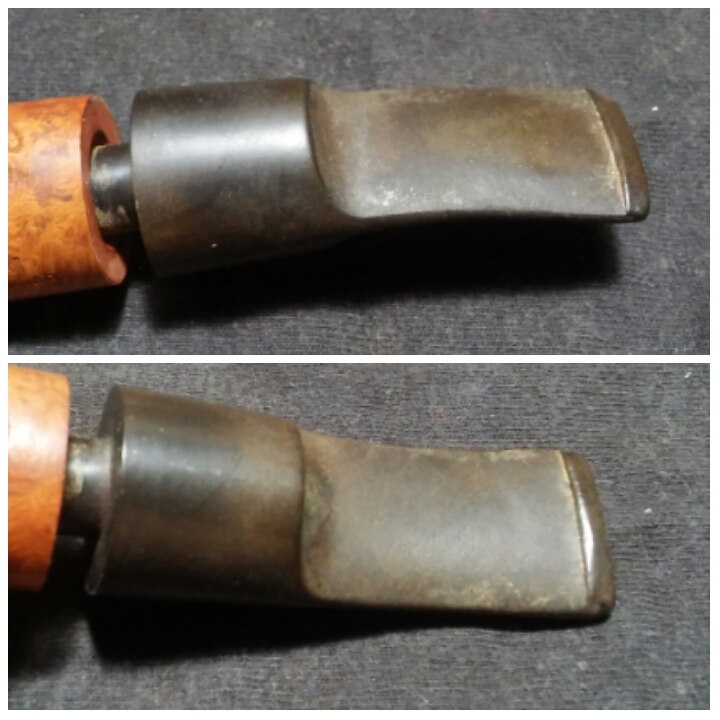
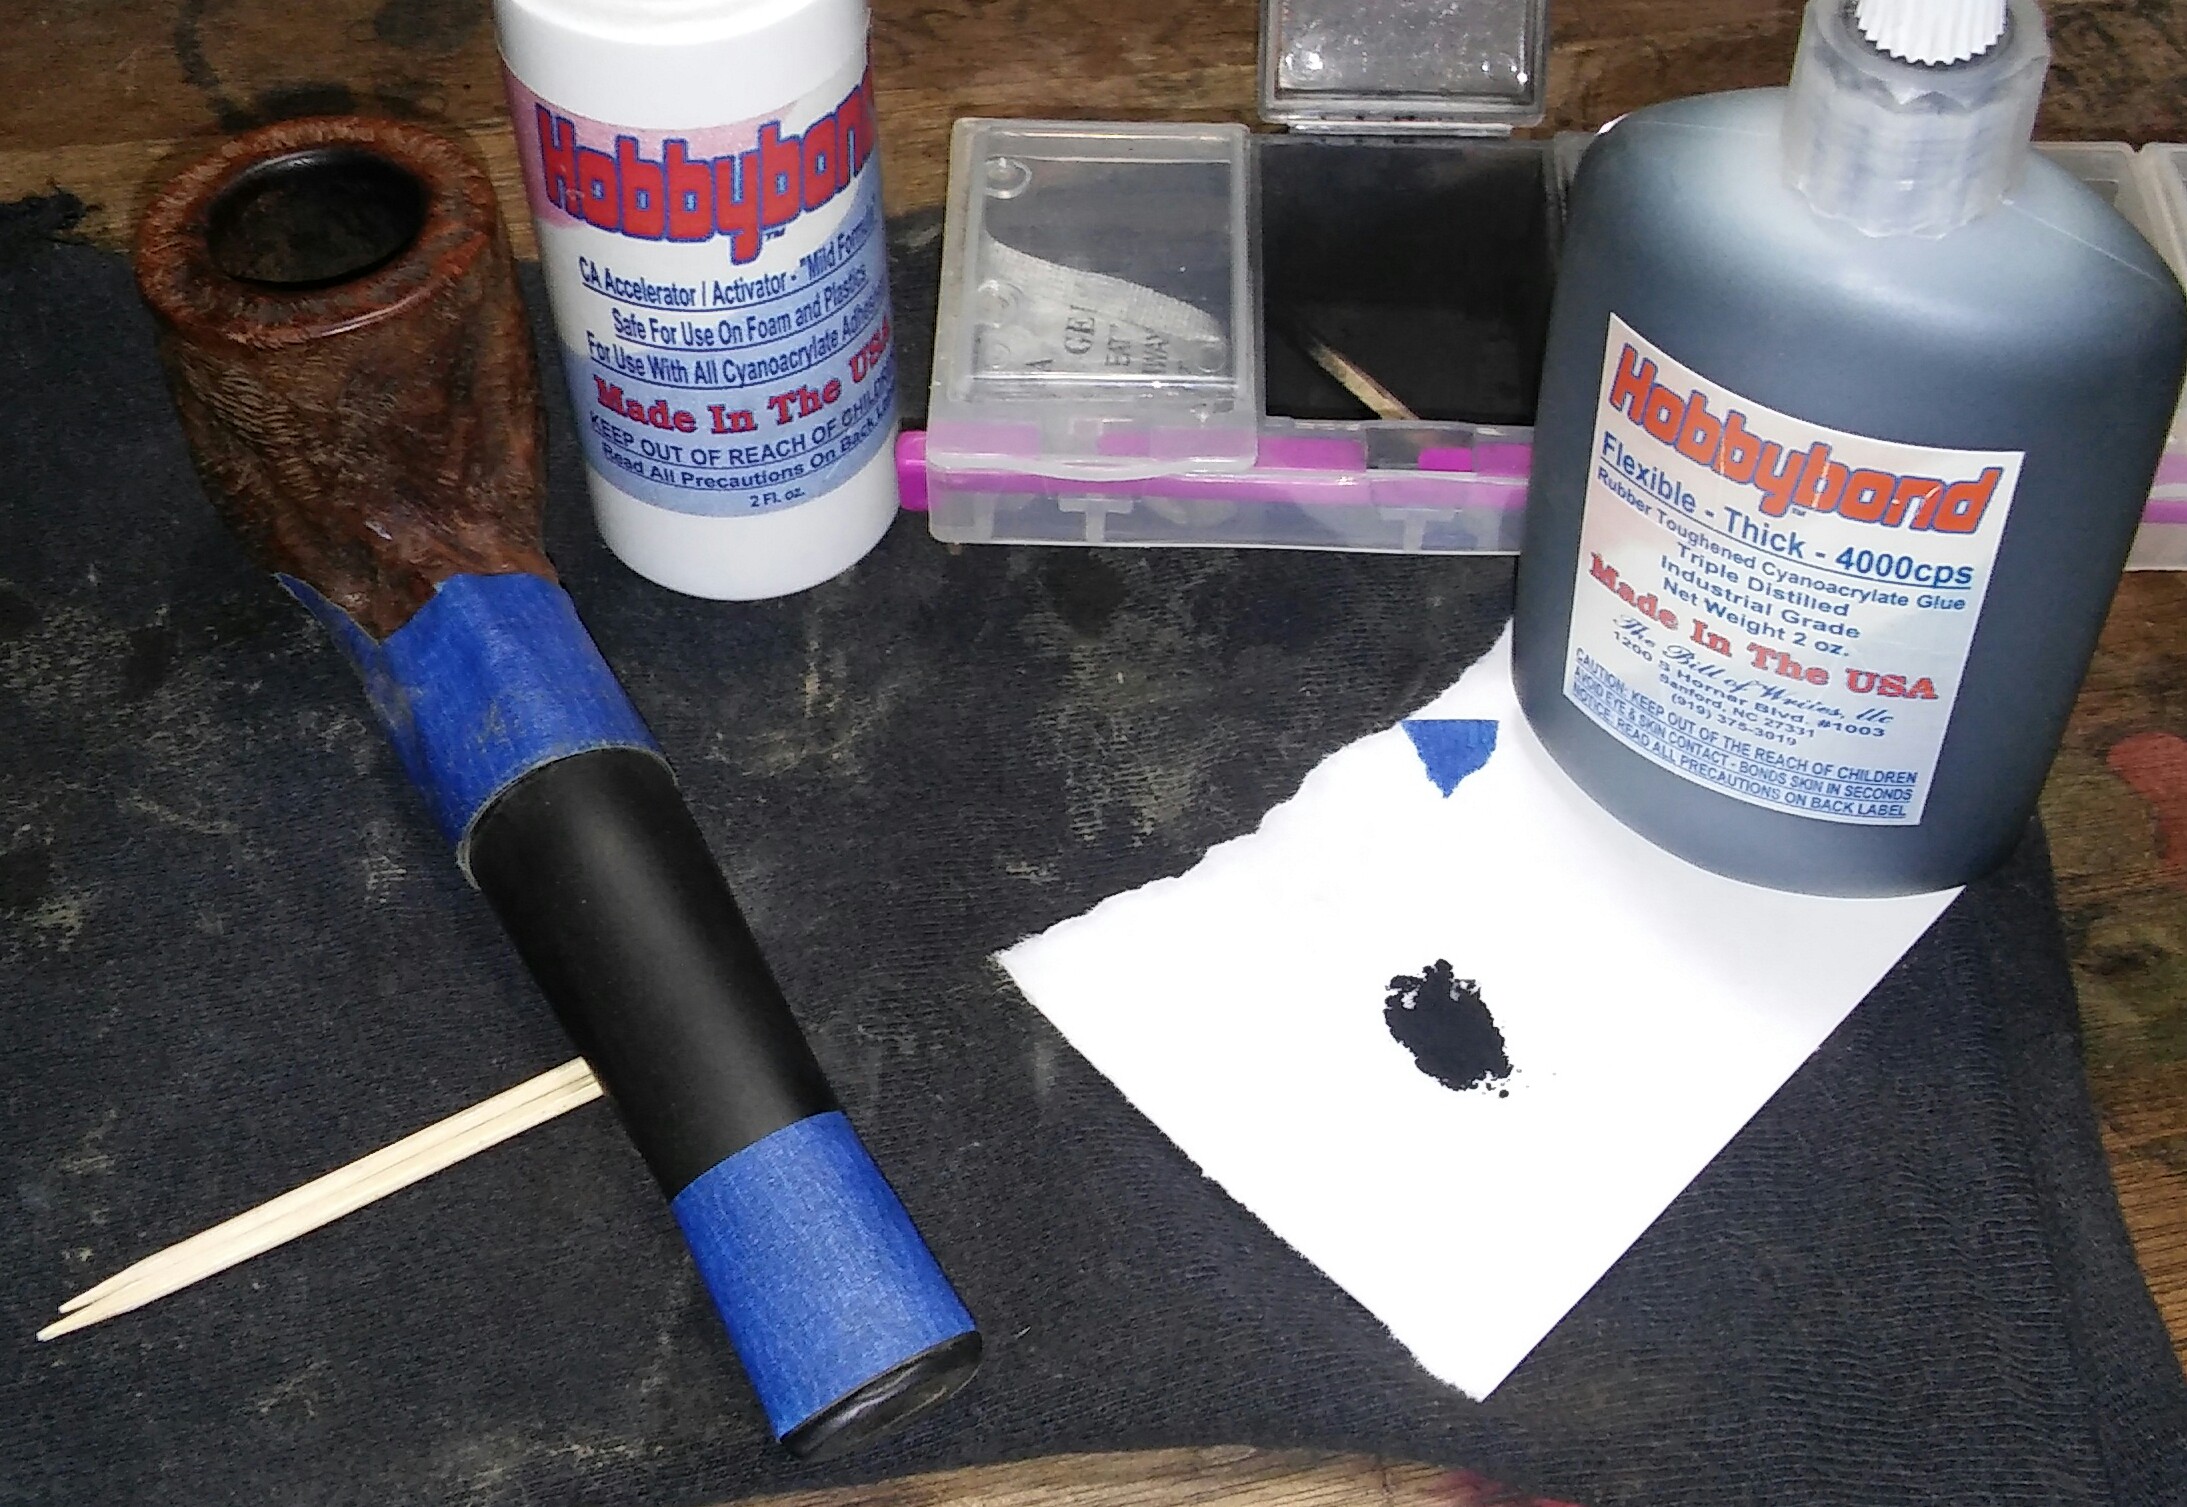
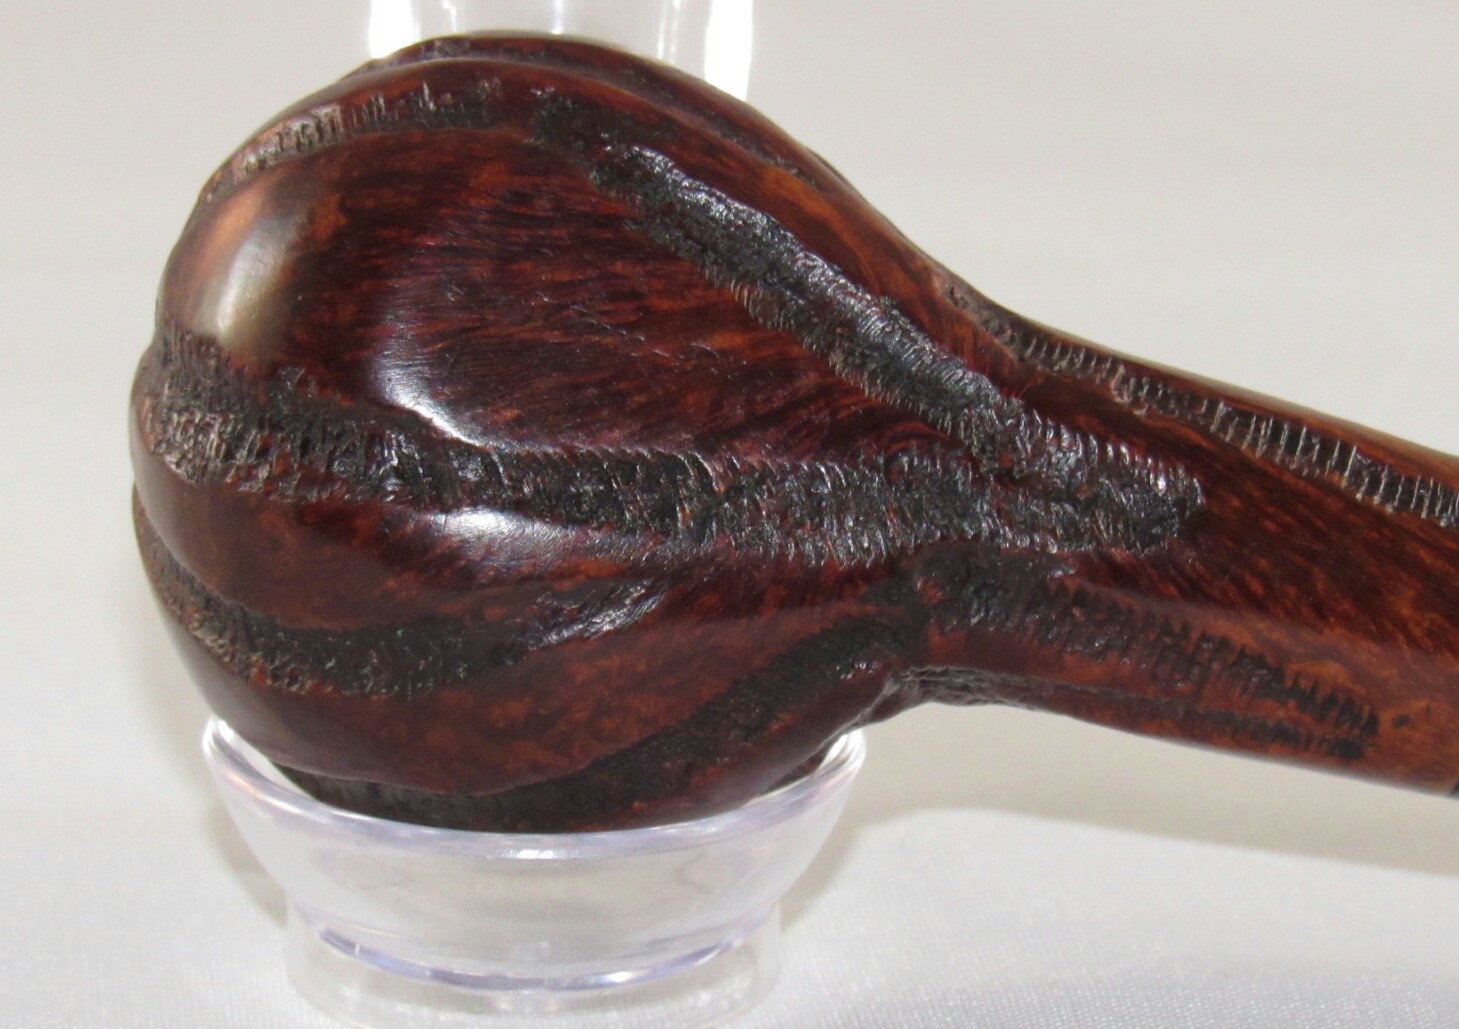
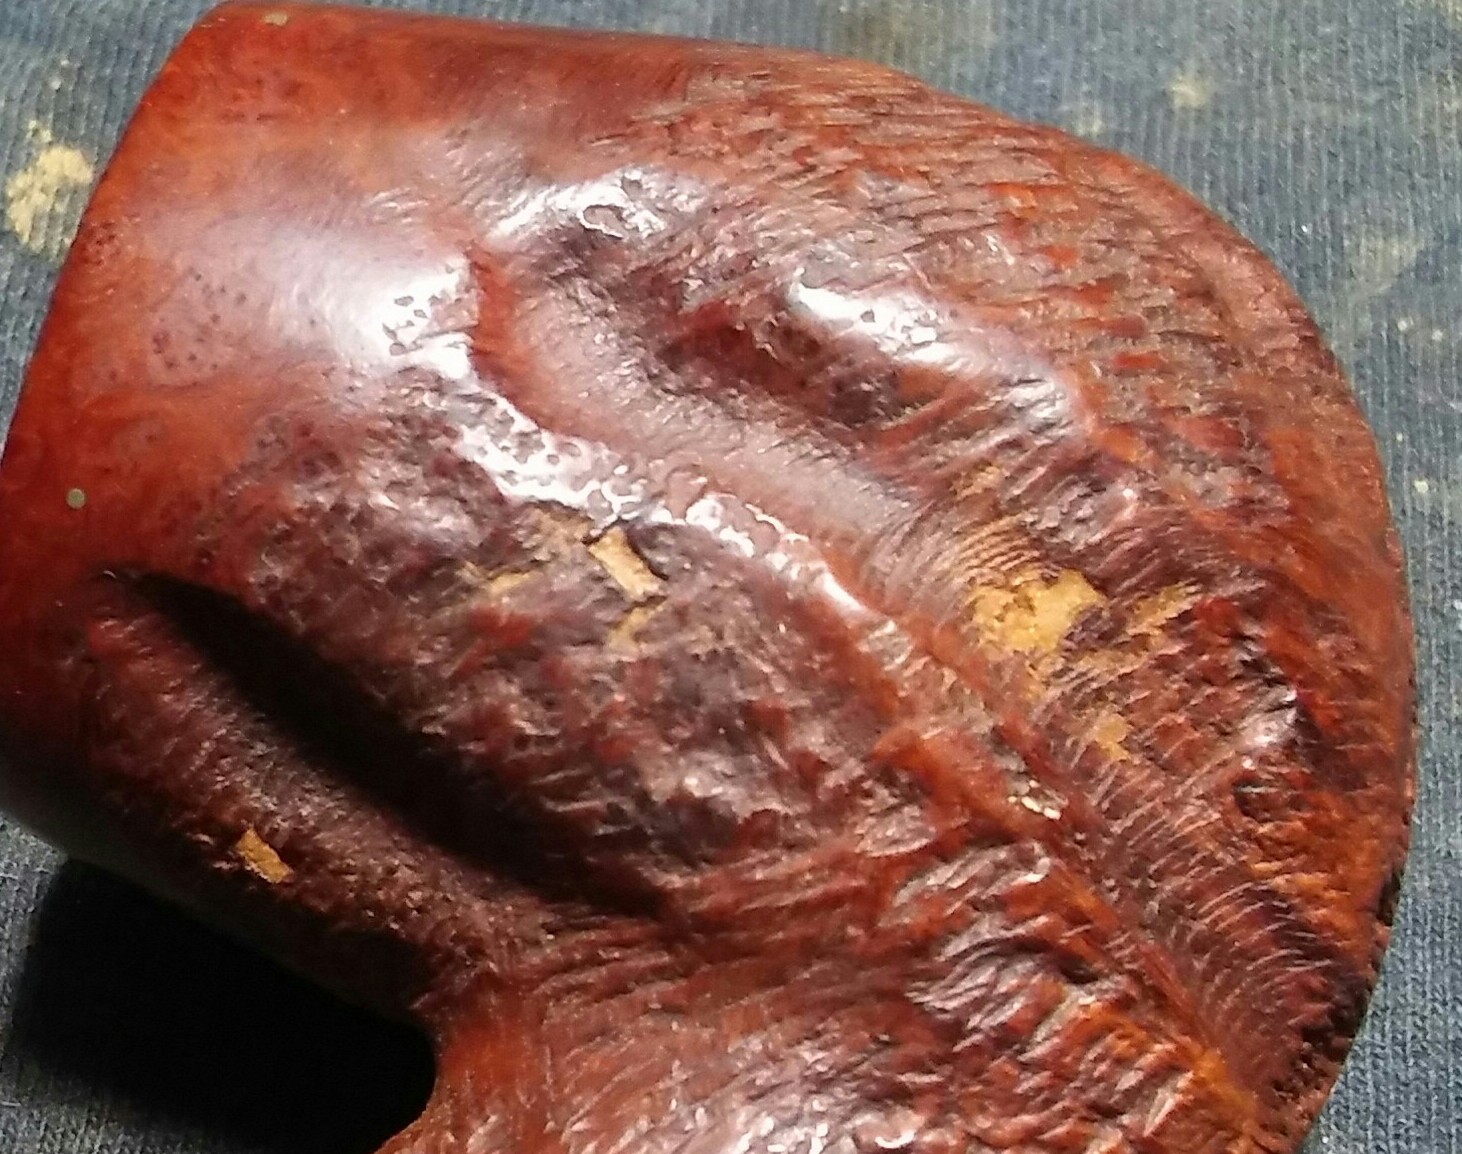
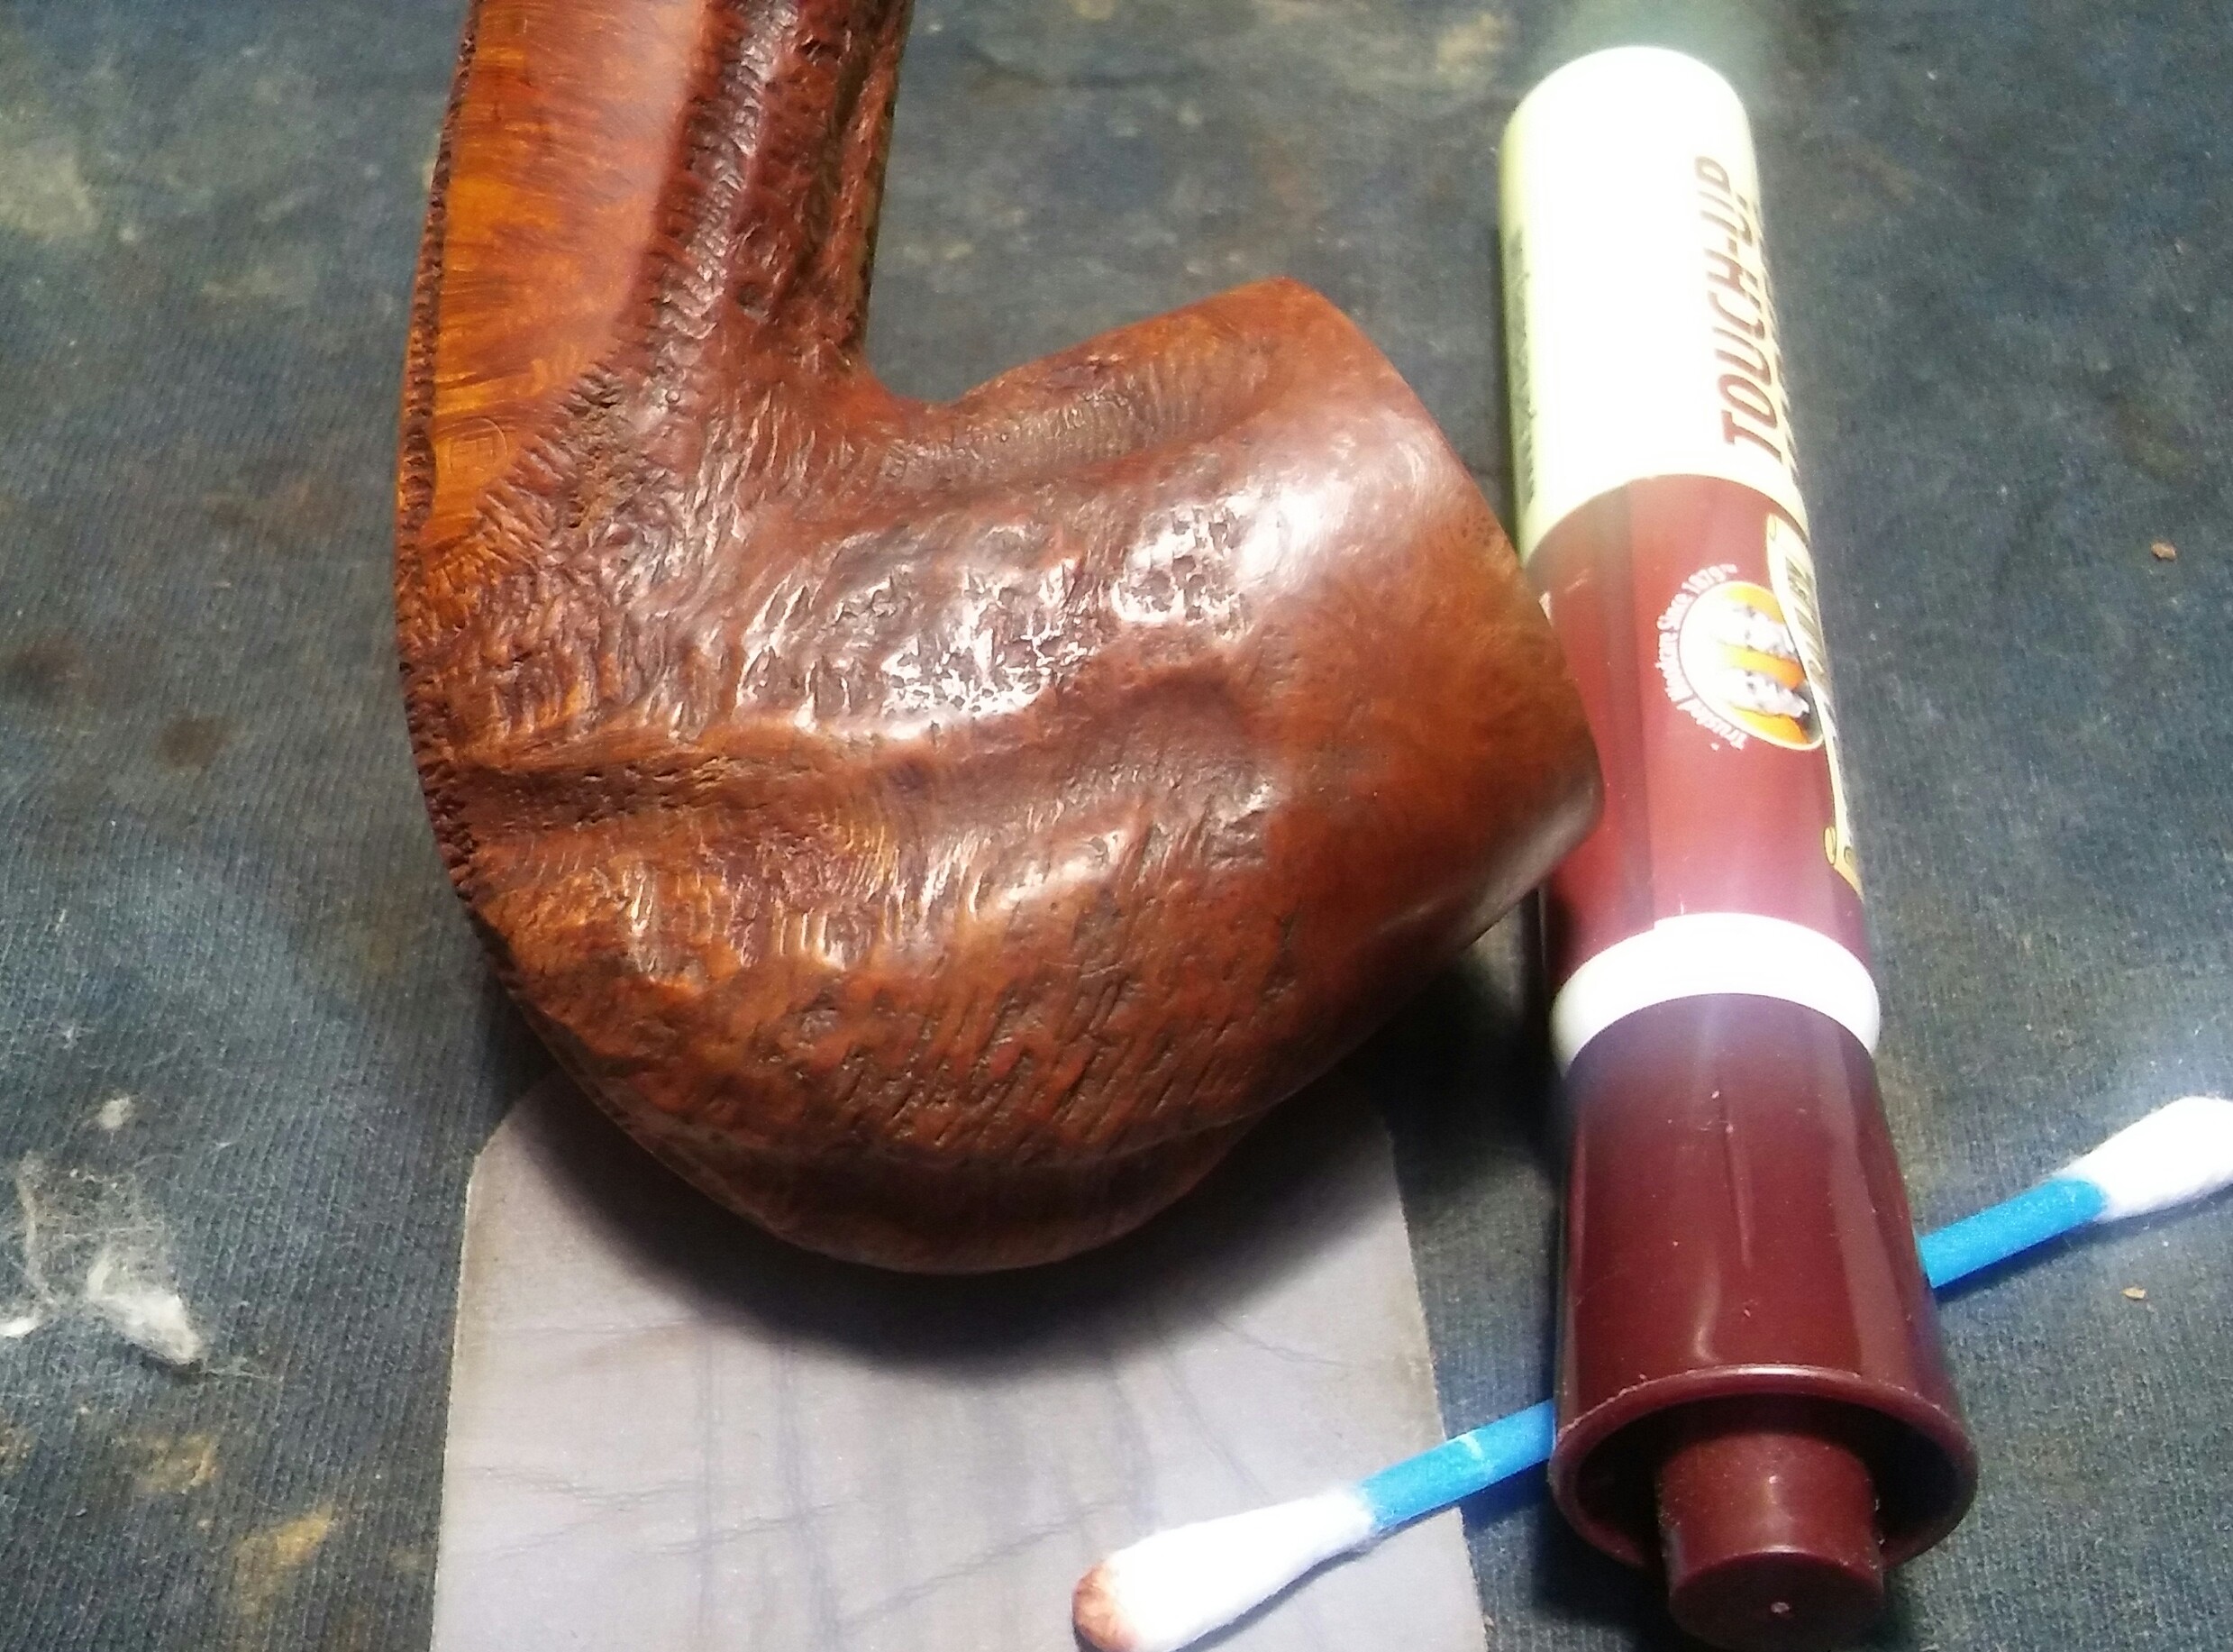
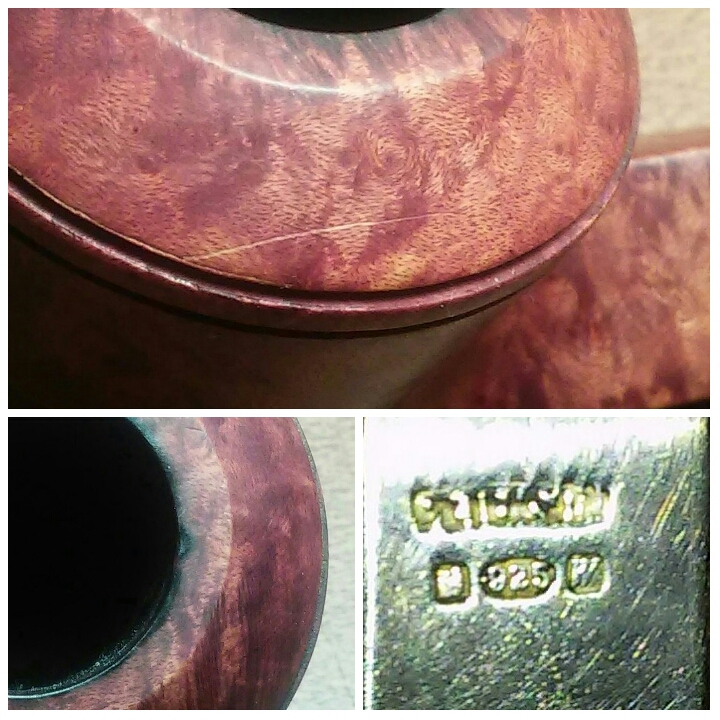
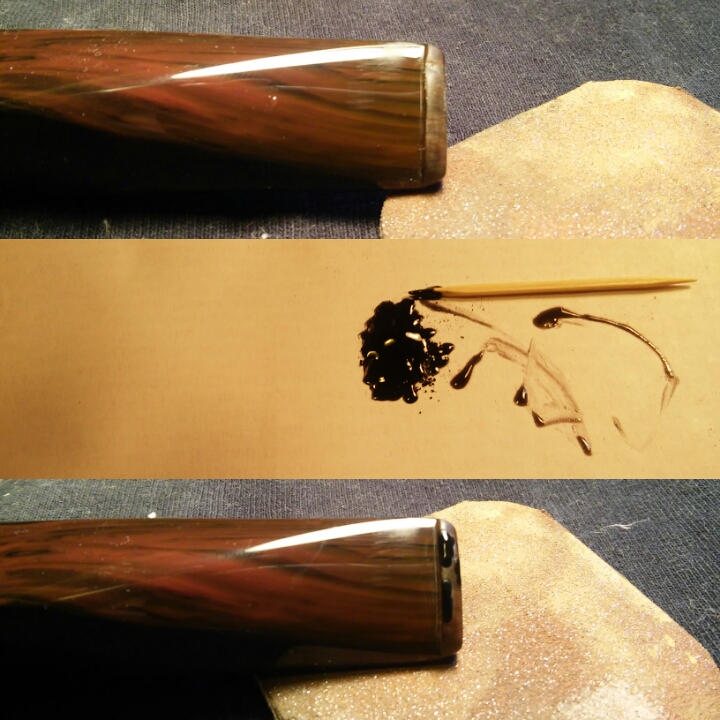
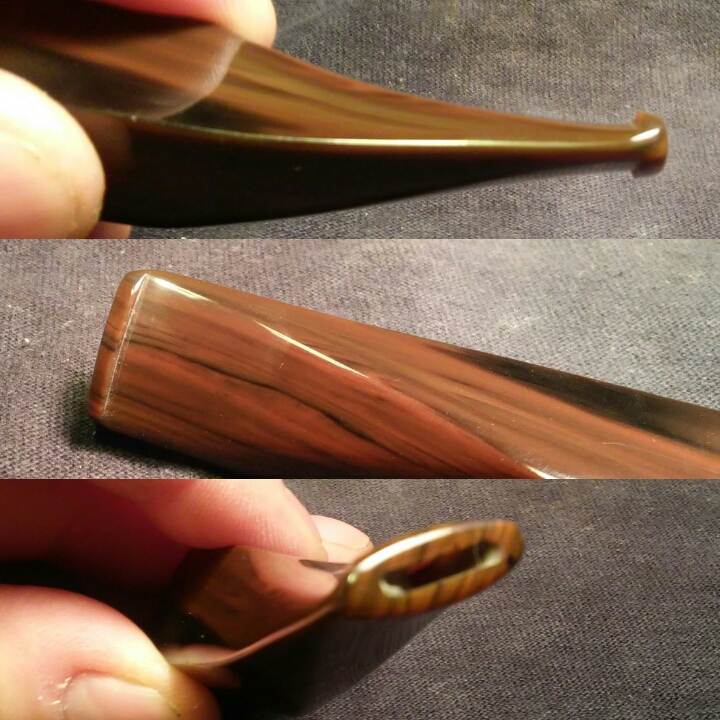
Over all she was in good shape. The stem was oxidized with a little chatter, a bridle cake, rim tar and char. There was also embedded metal in the stem which gave the stem a rough oxidized surface. The embedded metal is something I’ve run into before and tells me the pipe was produced during war-time late 40’s -50’s, they were using recycled rubber to manufacture the hard rubber stems.

PhotoGrid_1454199523168

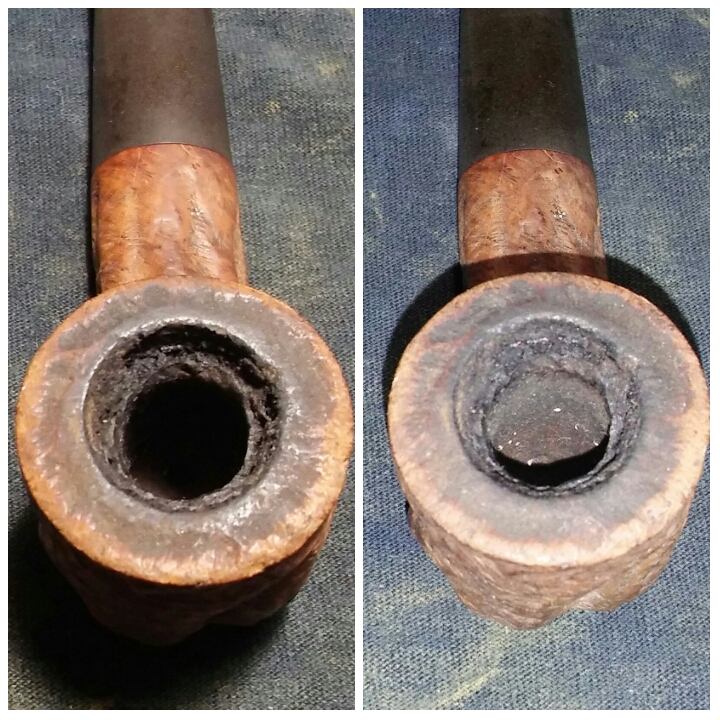
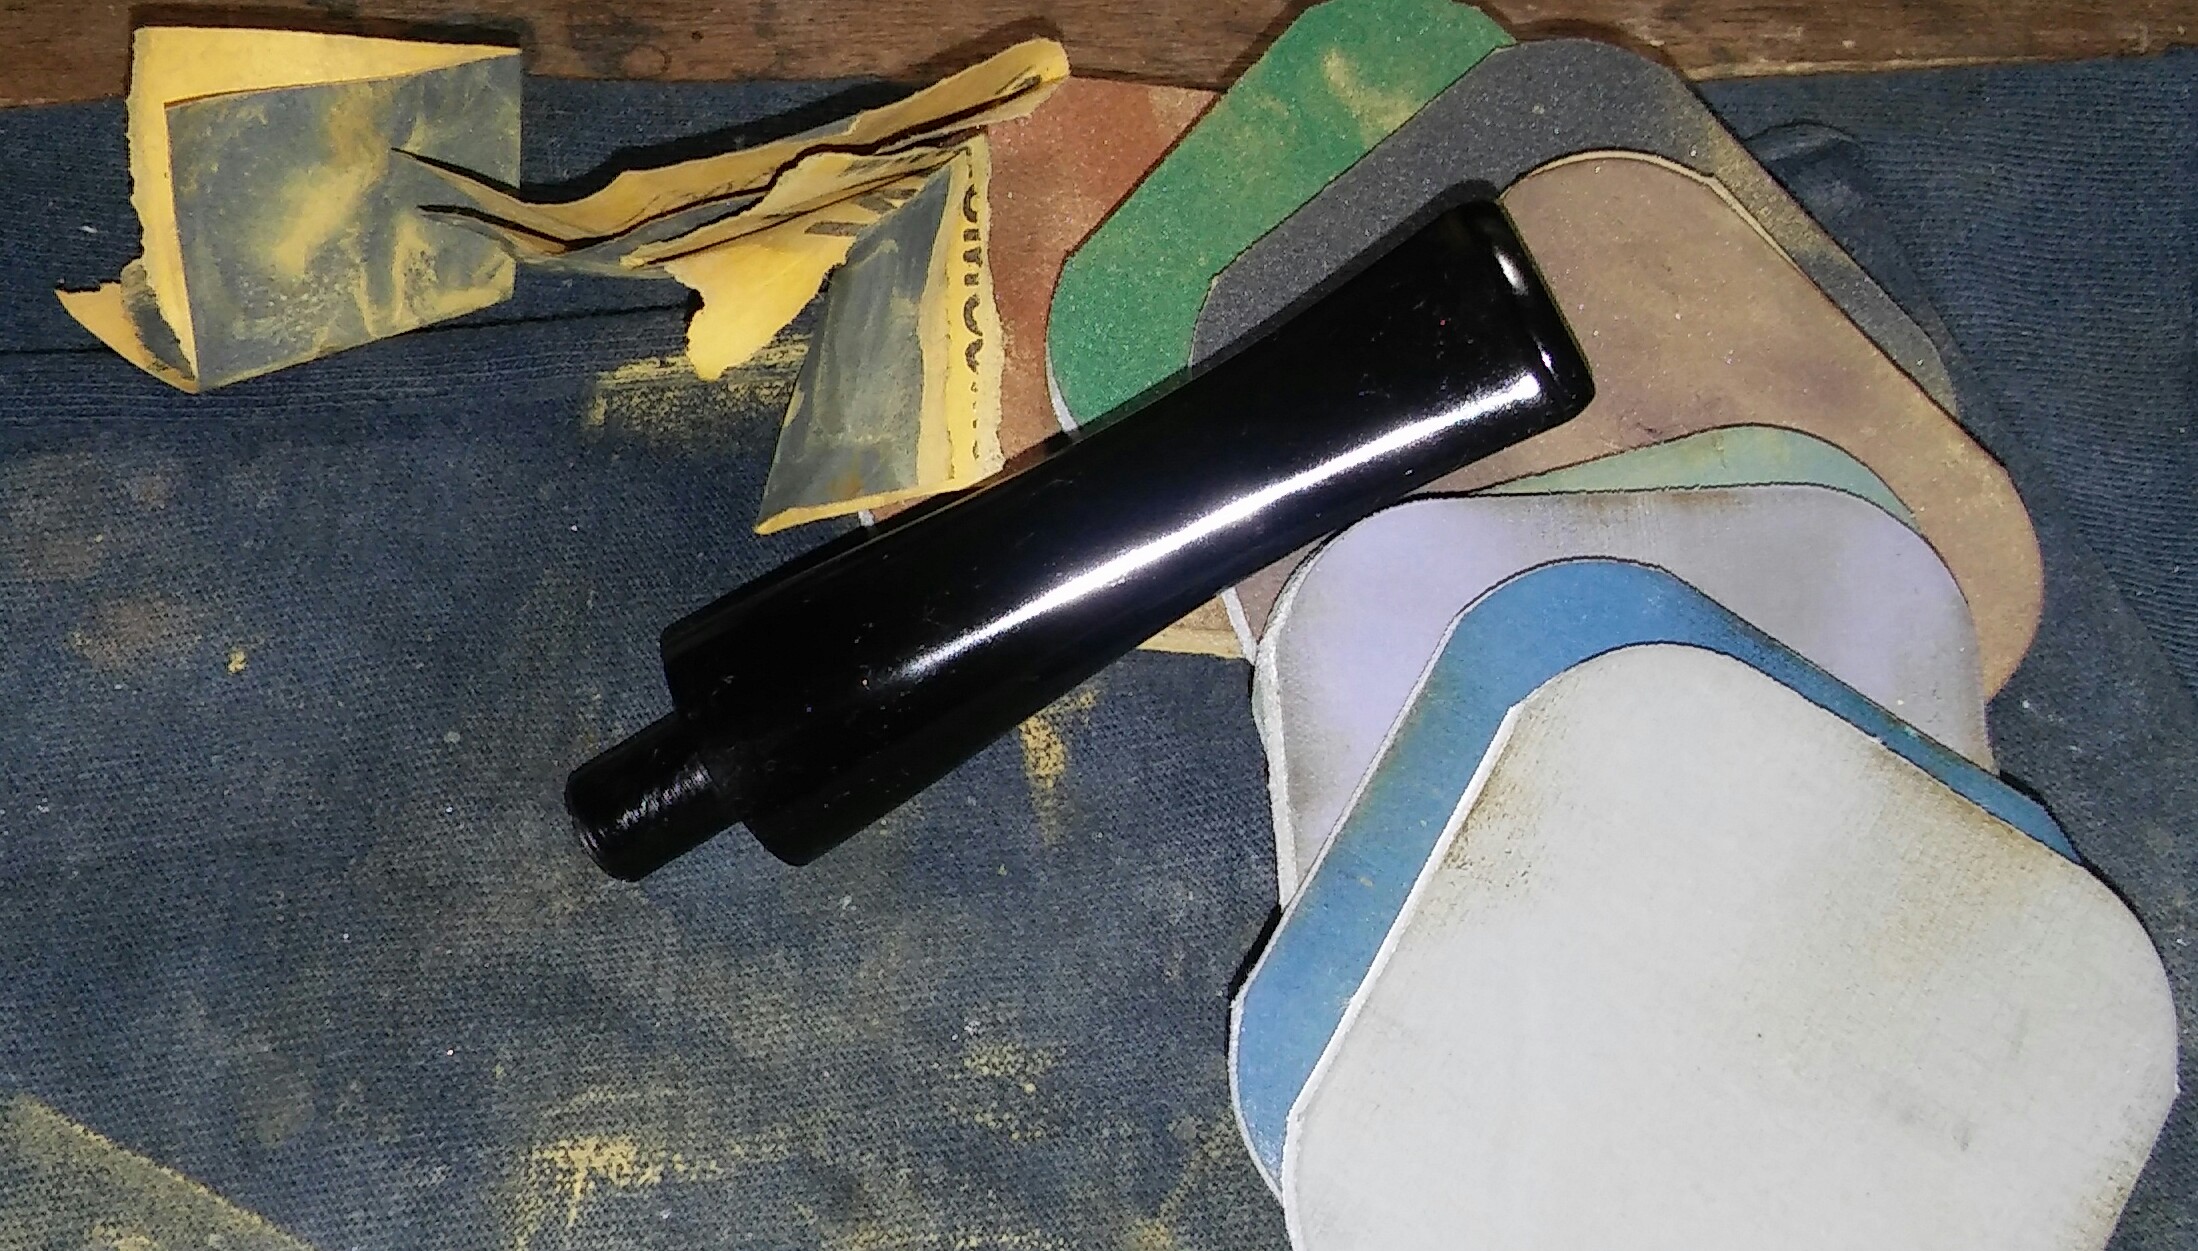
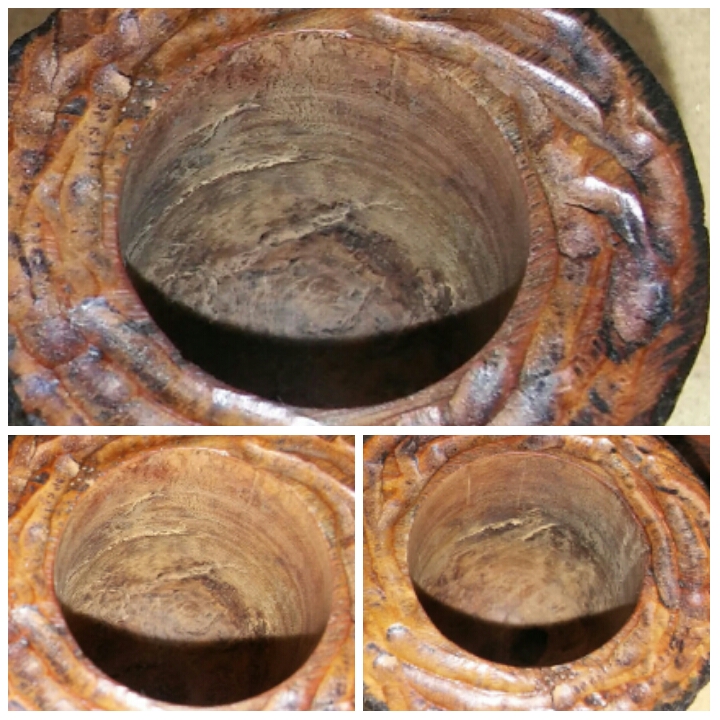
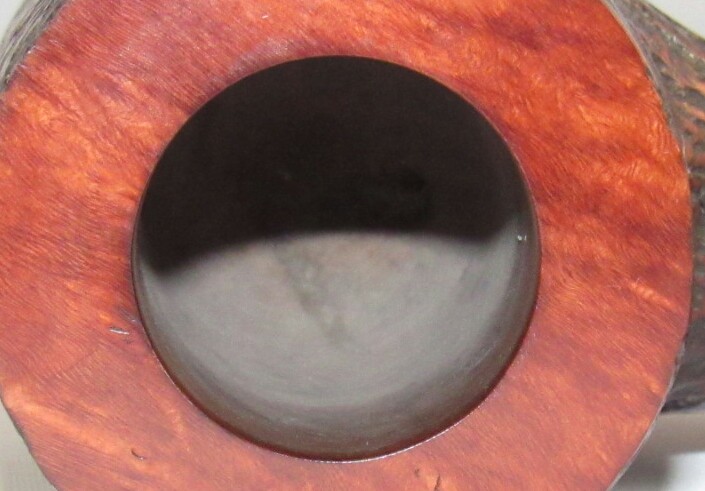
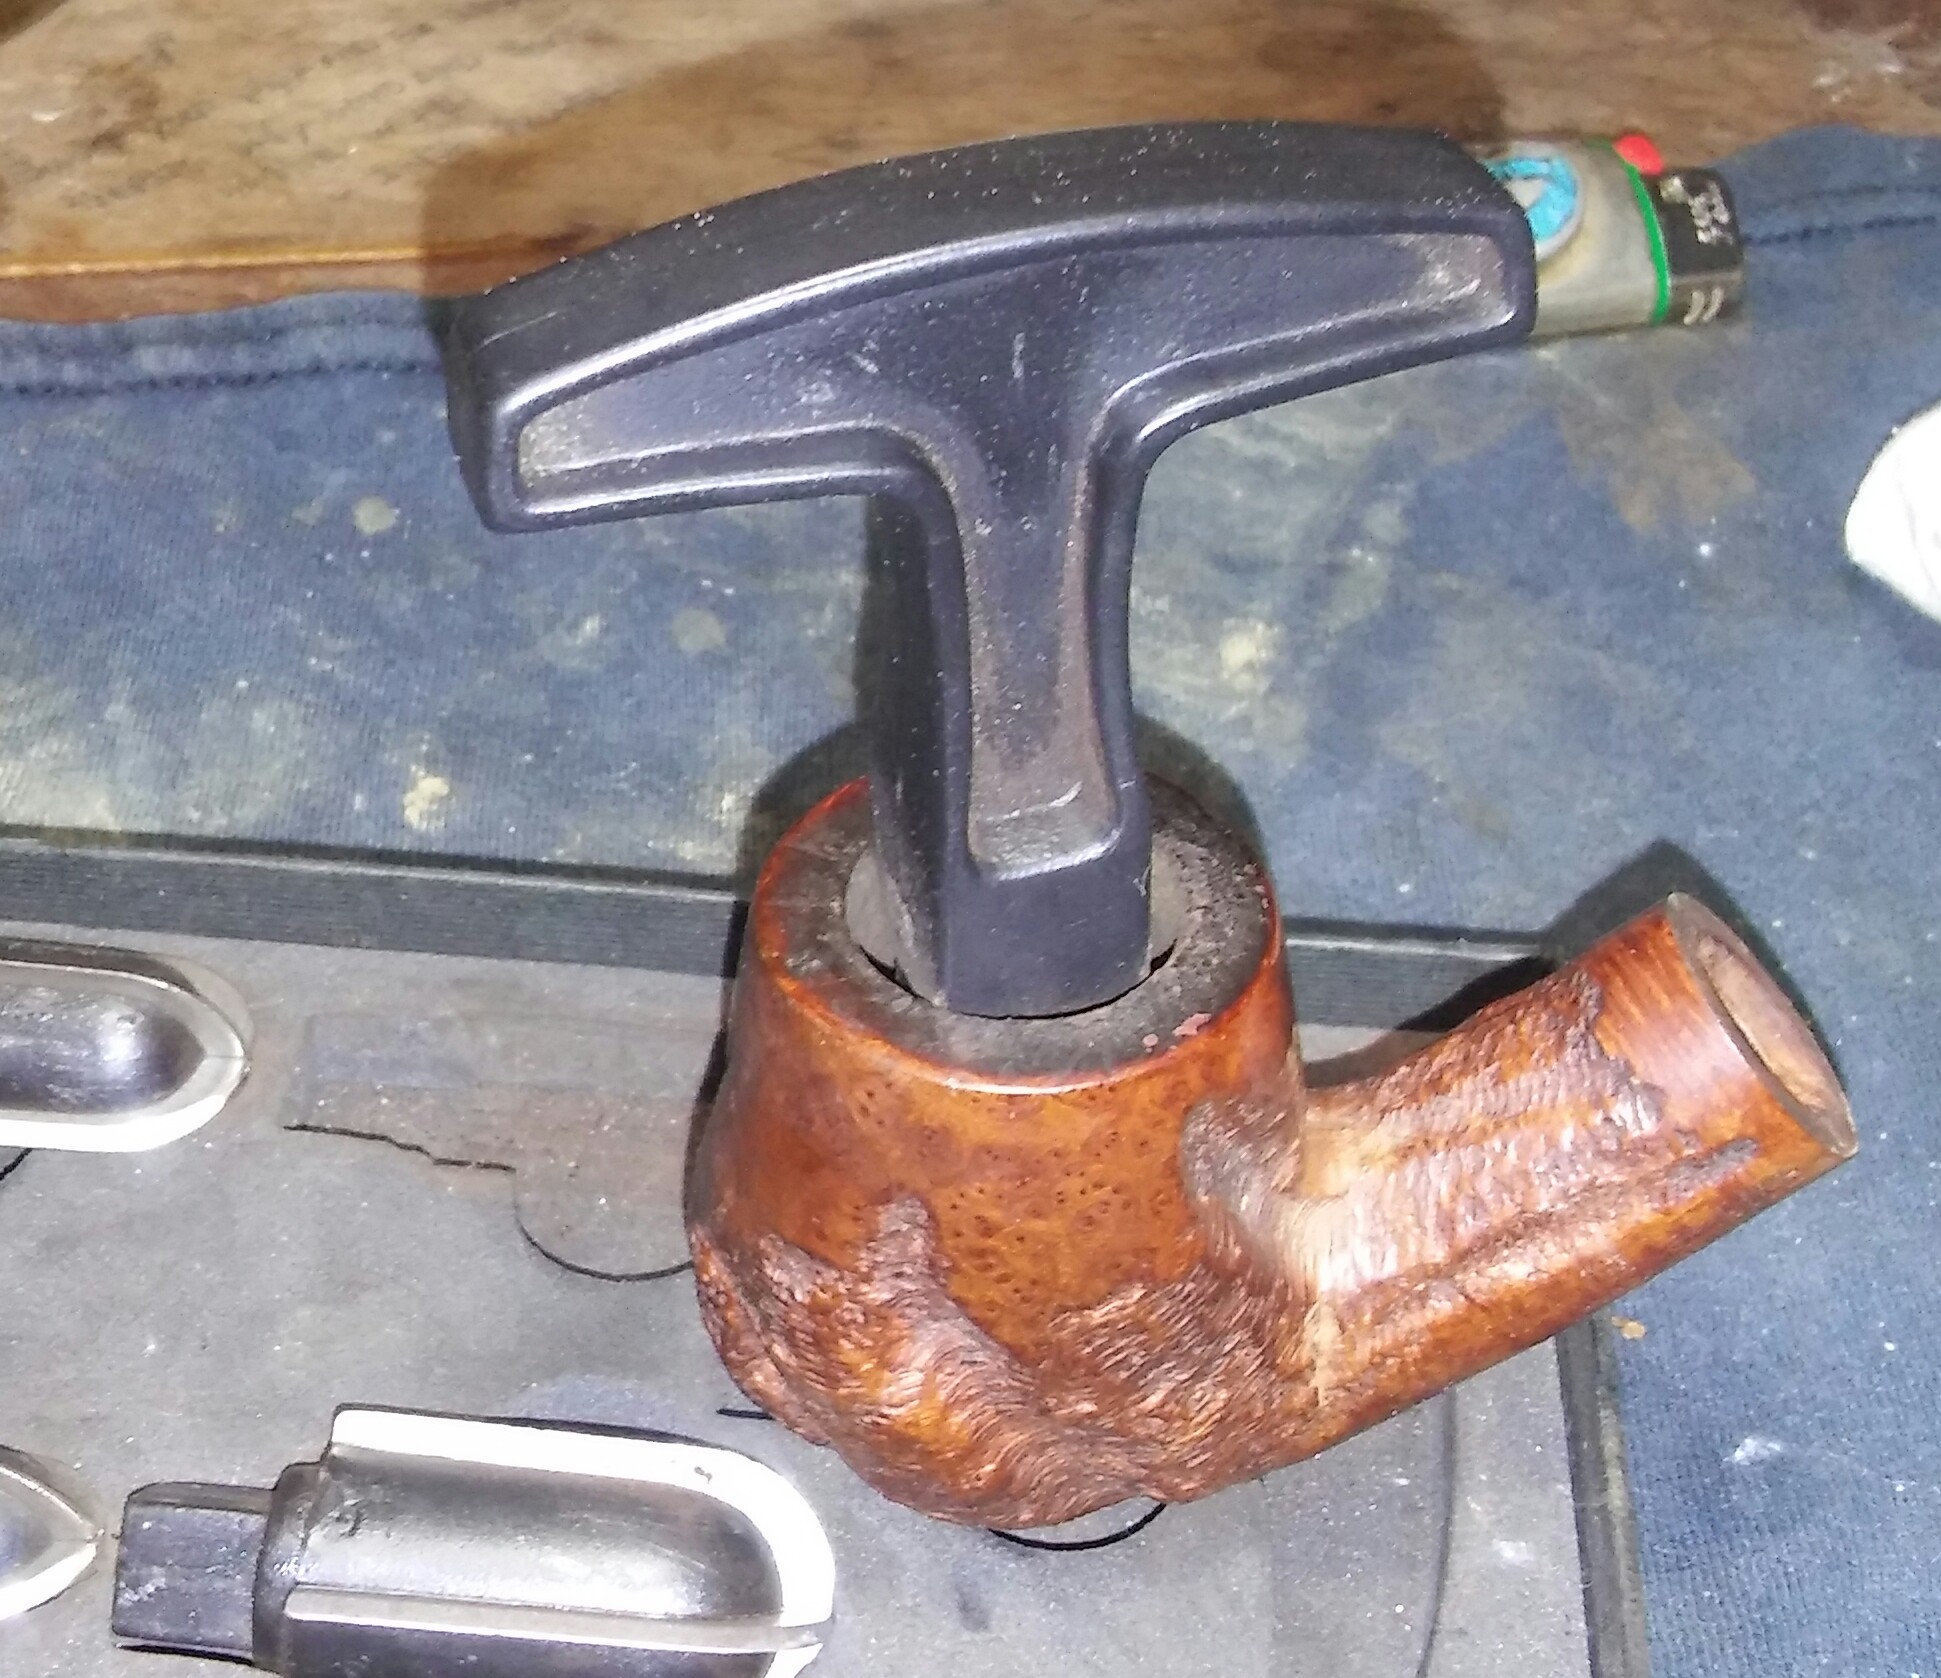
First I started with my Pipnet Reamer and the smallest attachment working up to the largest that the chamber would except in this case it would accept the largest. I smoothed things out with 400 grit sandpaper wrapped around a finger.

PhotoGrid_1454188104573

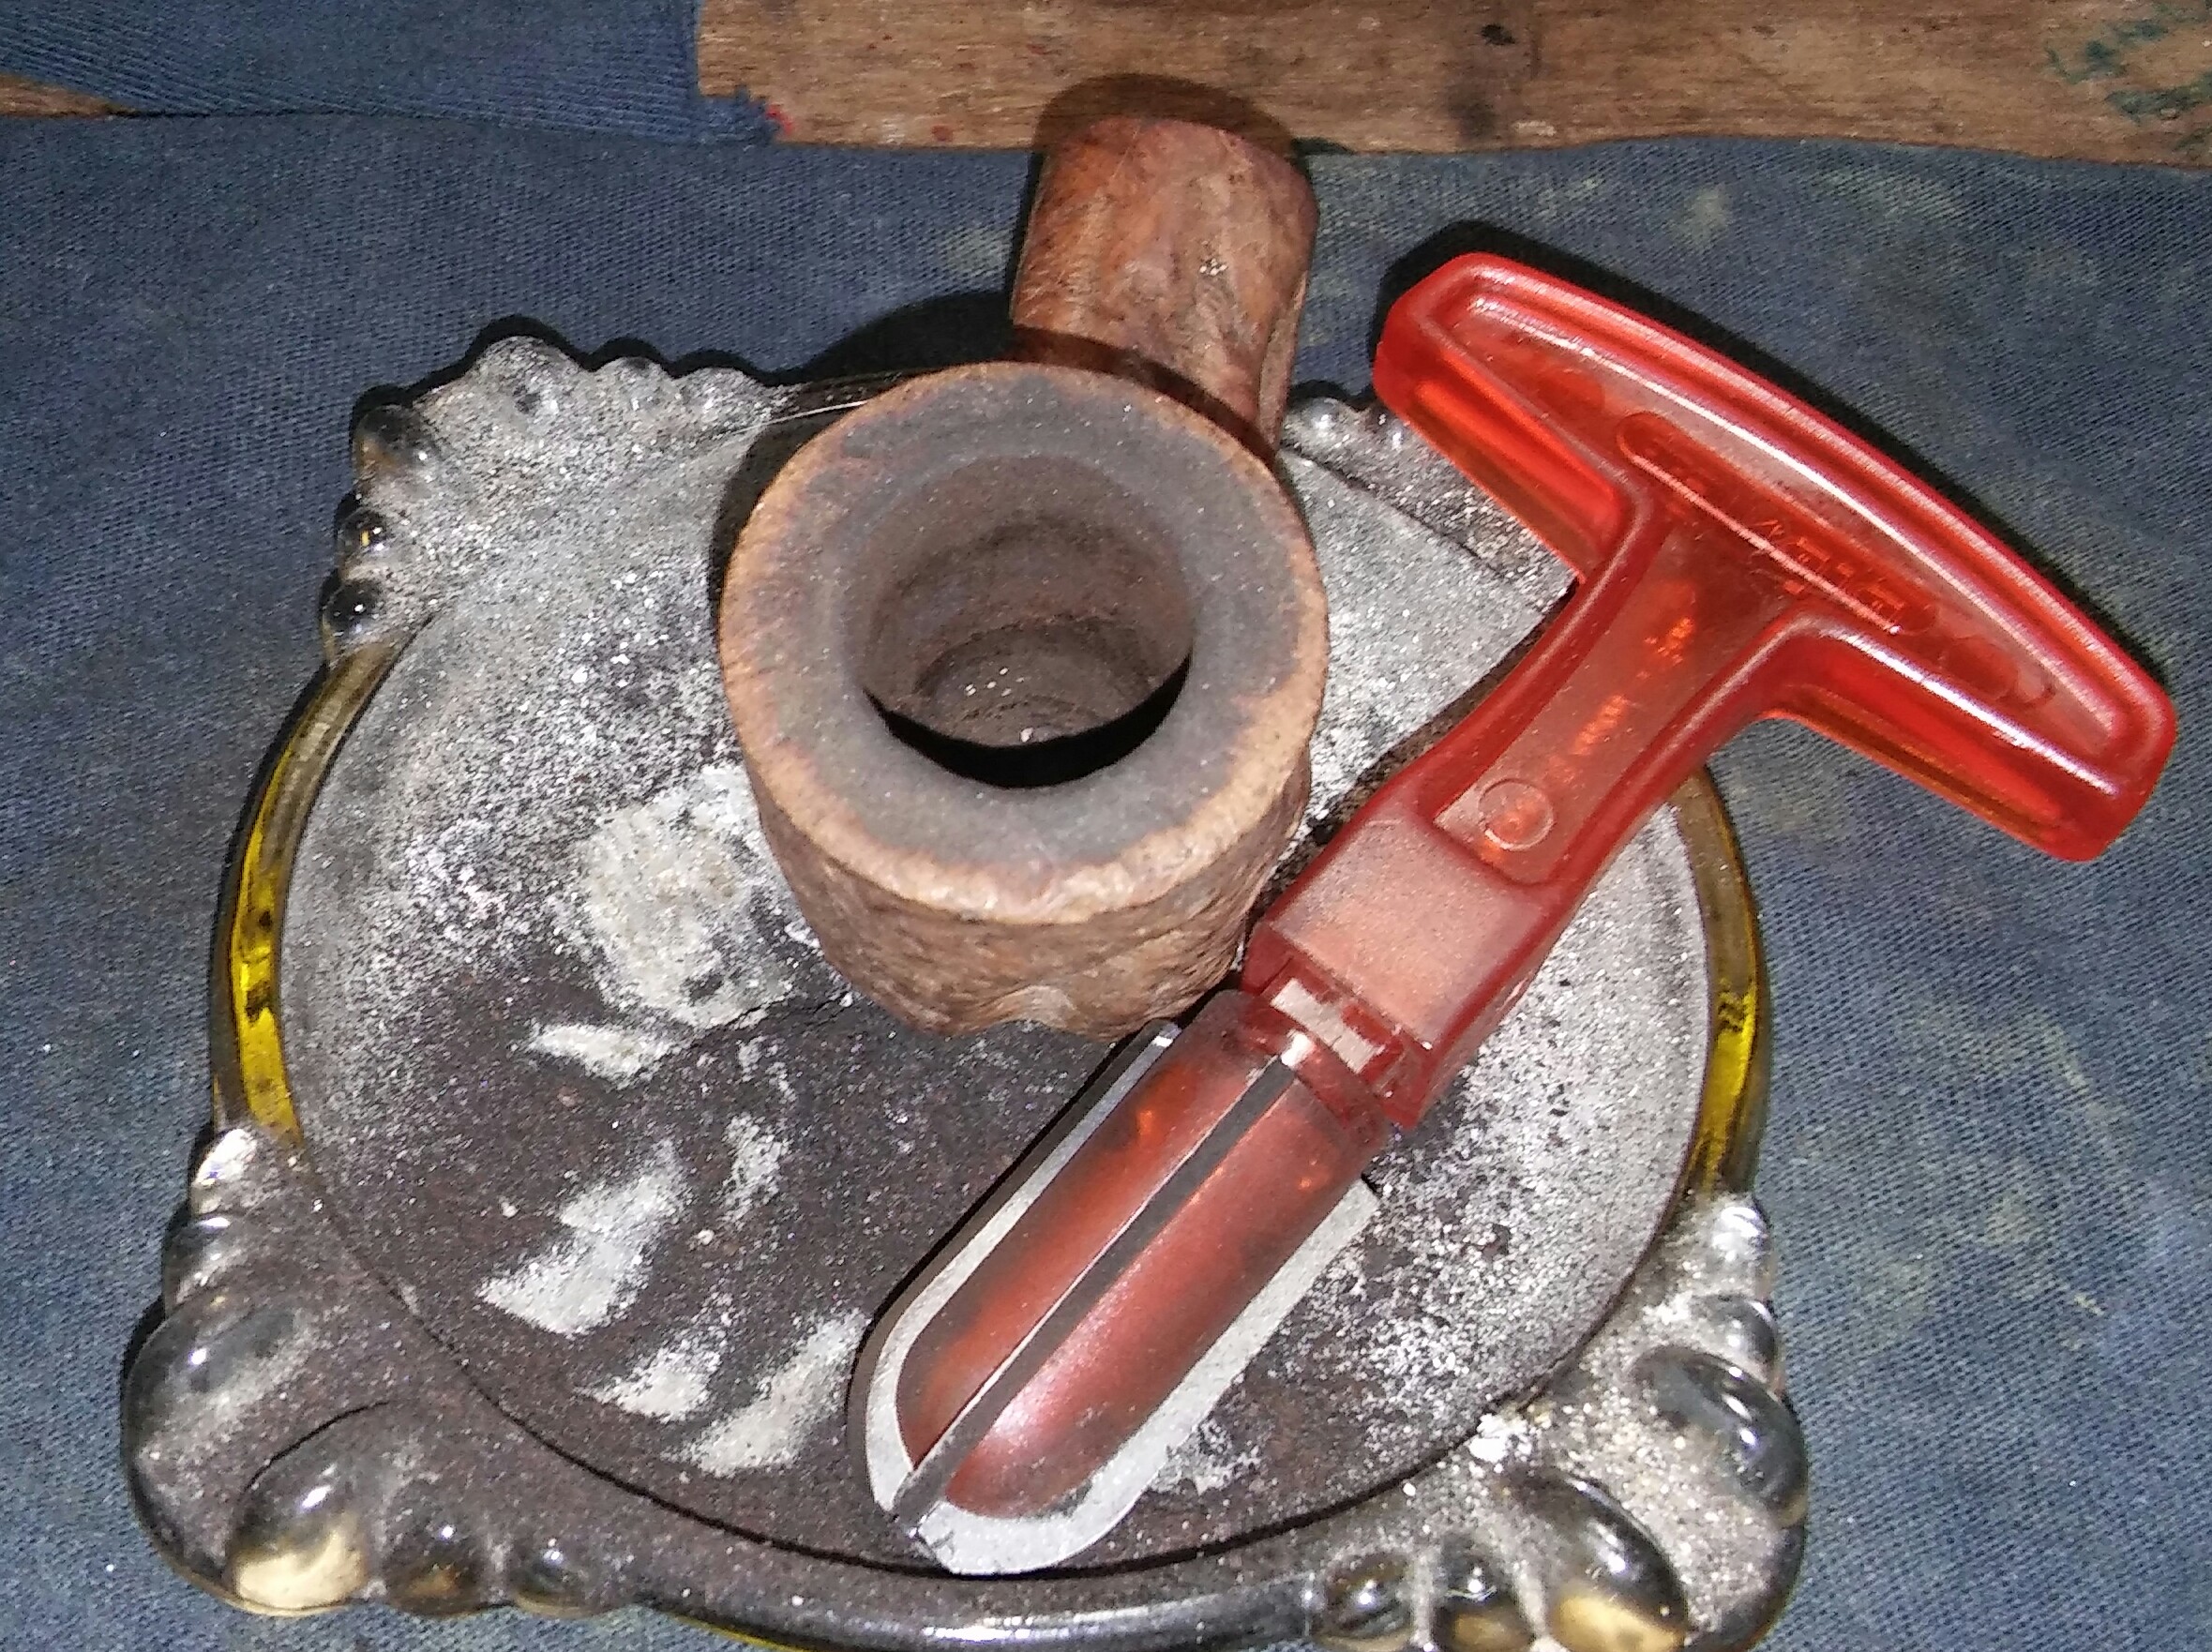
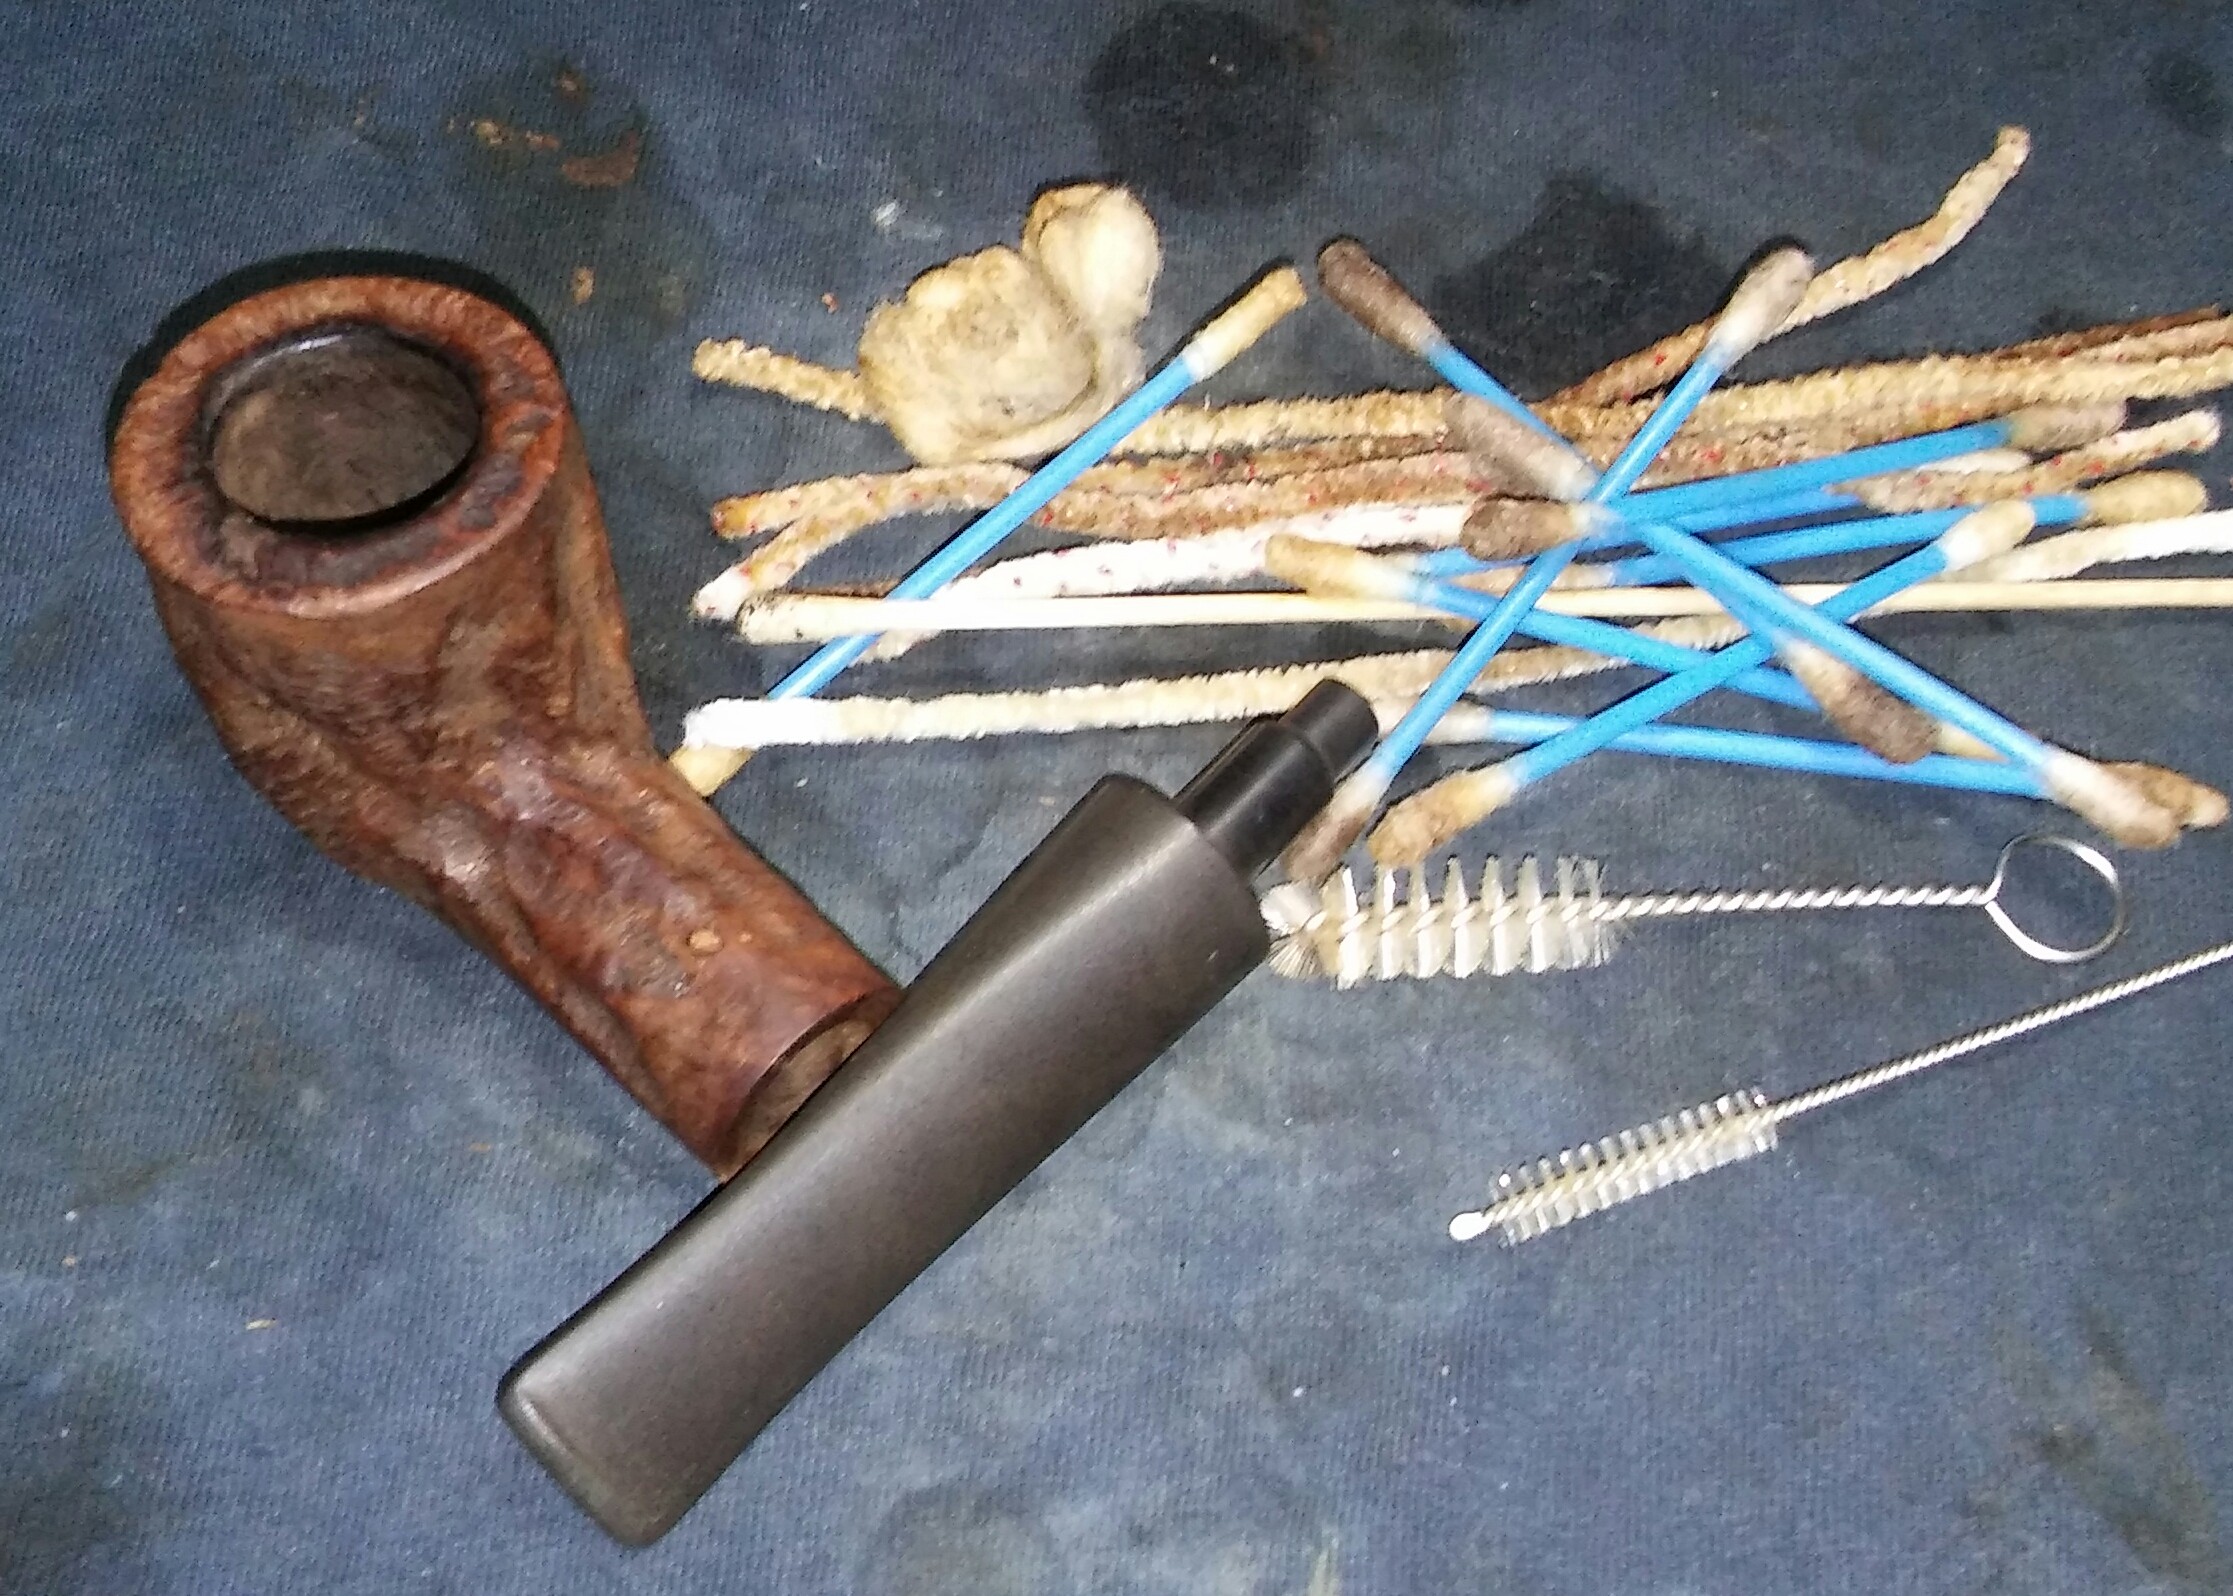
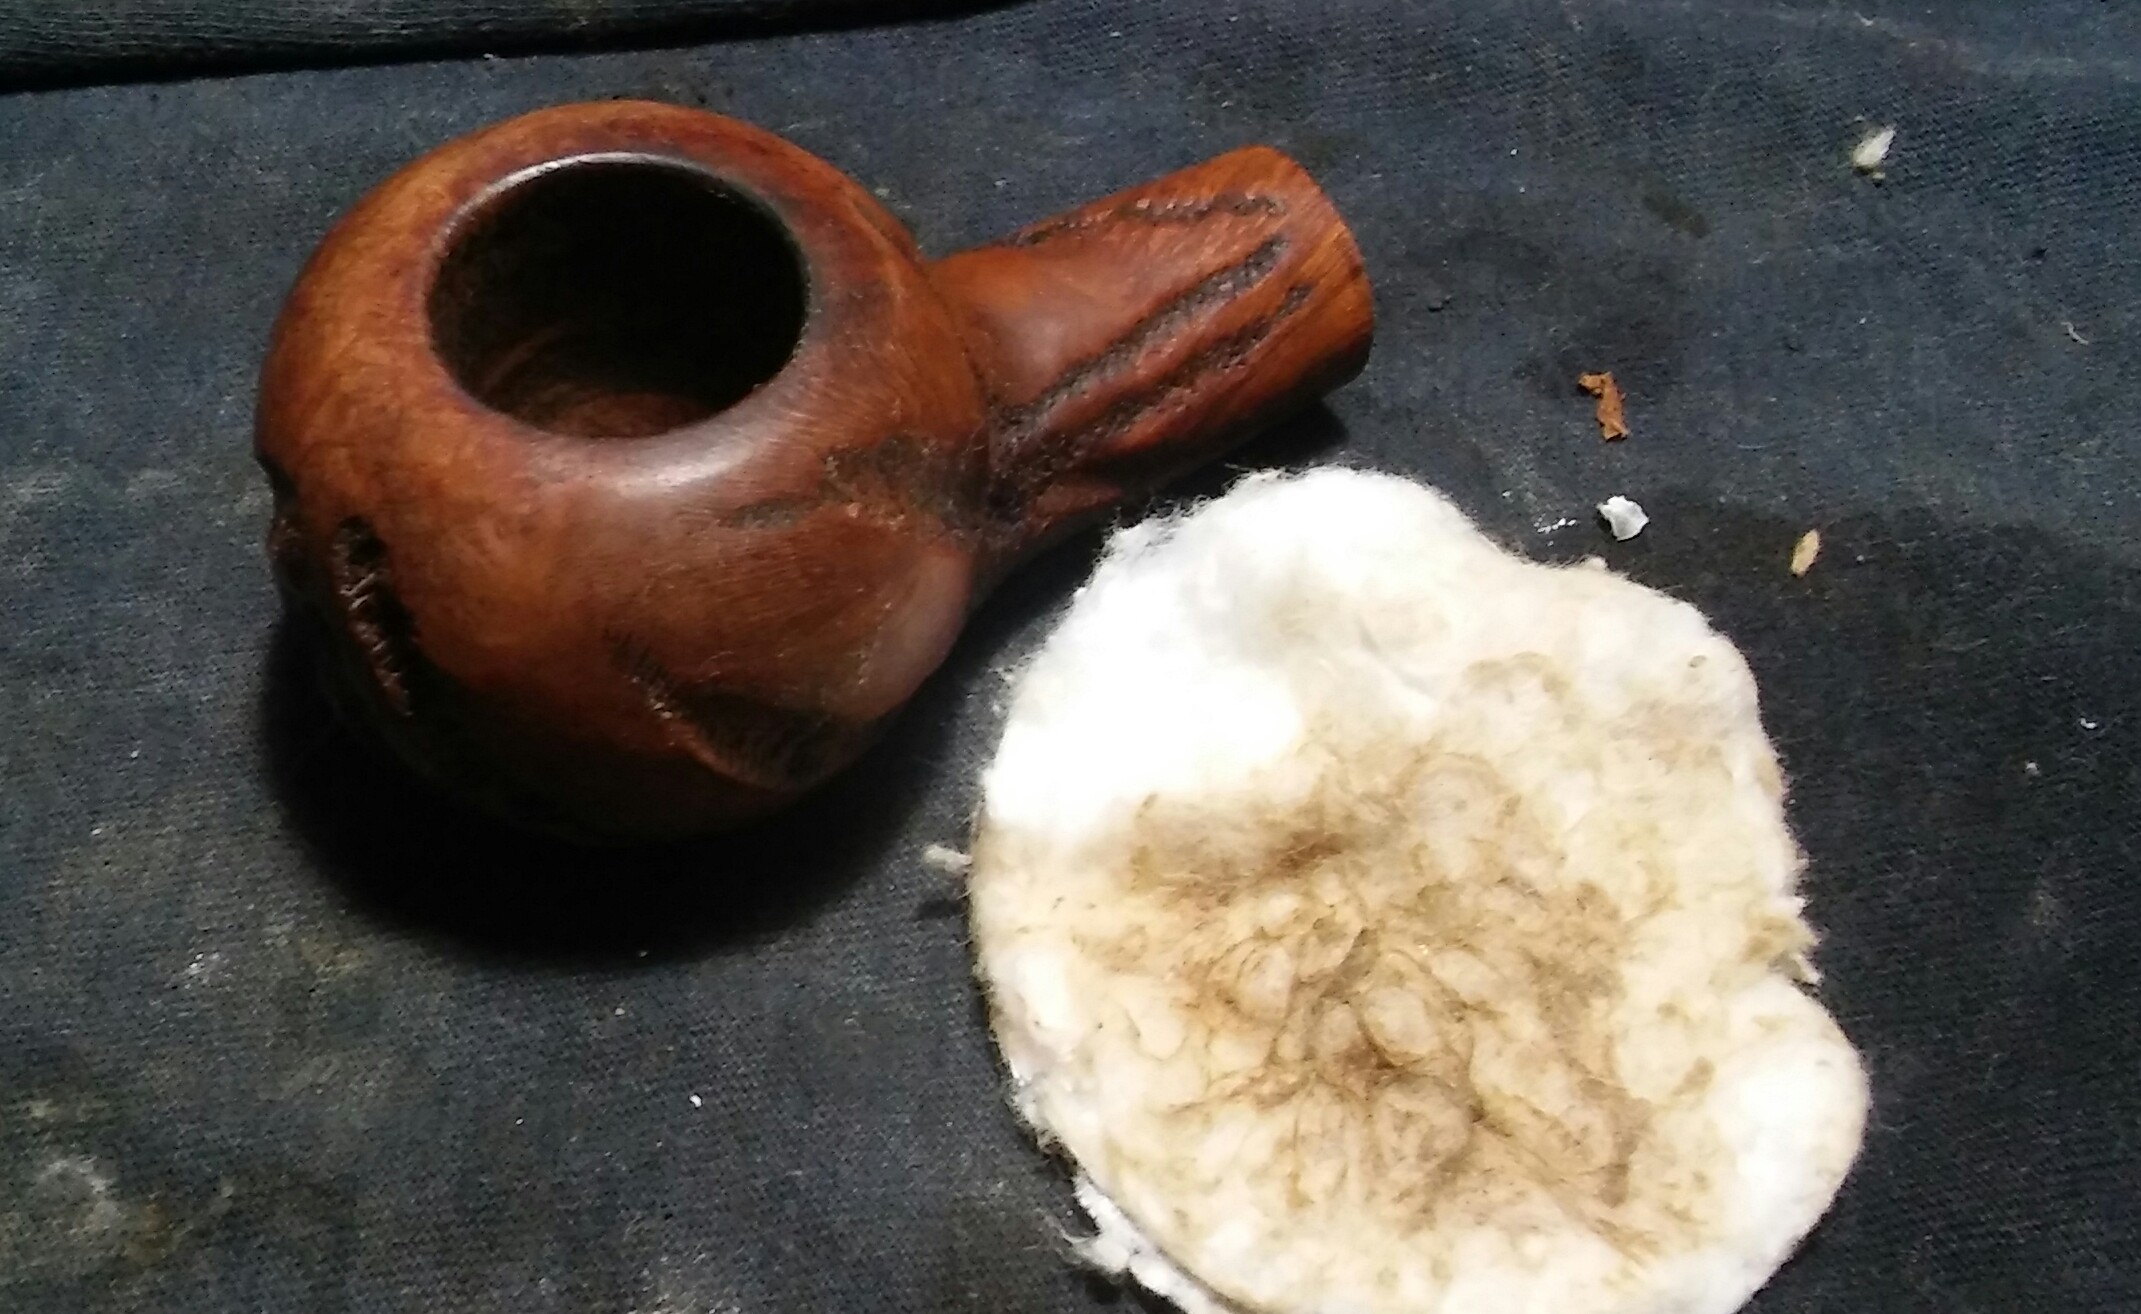
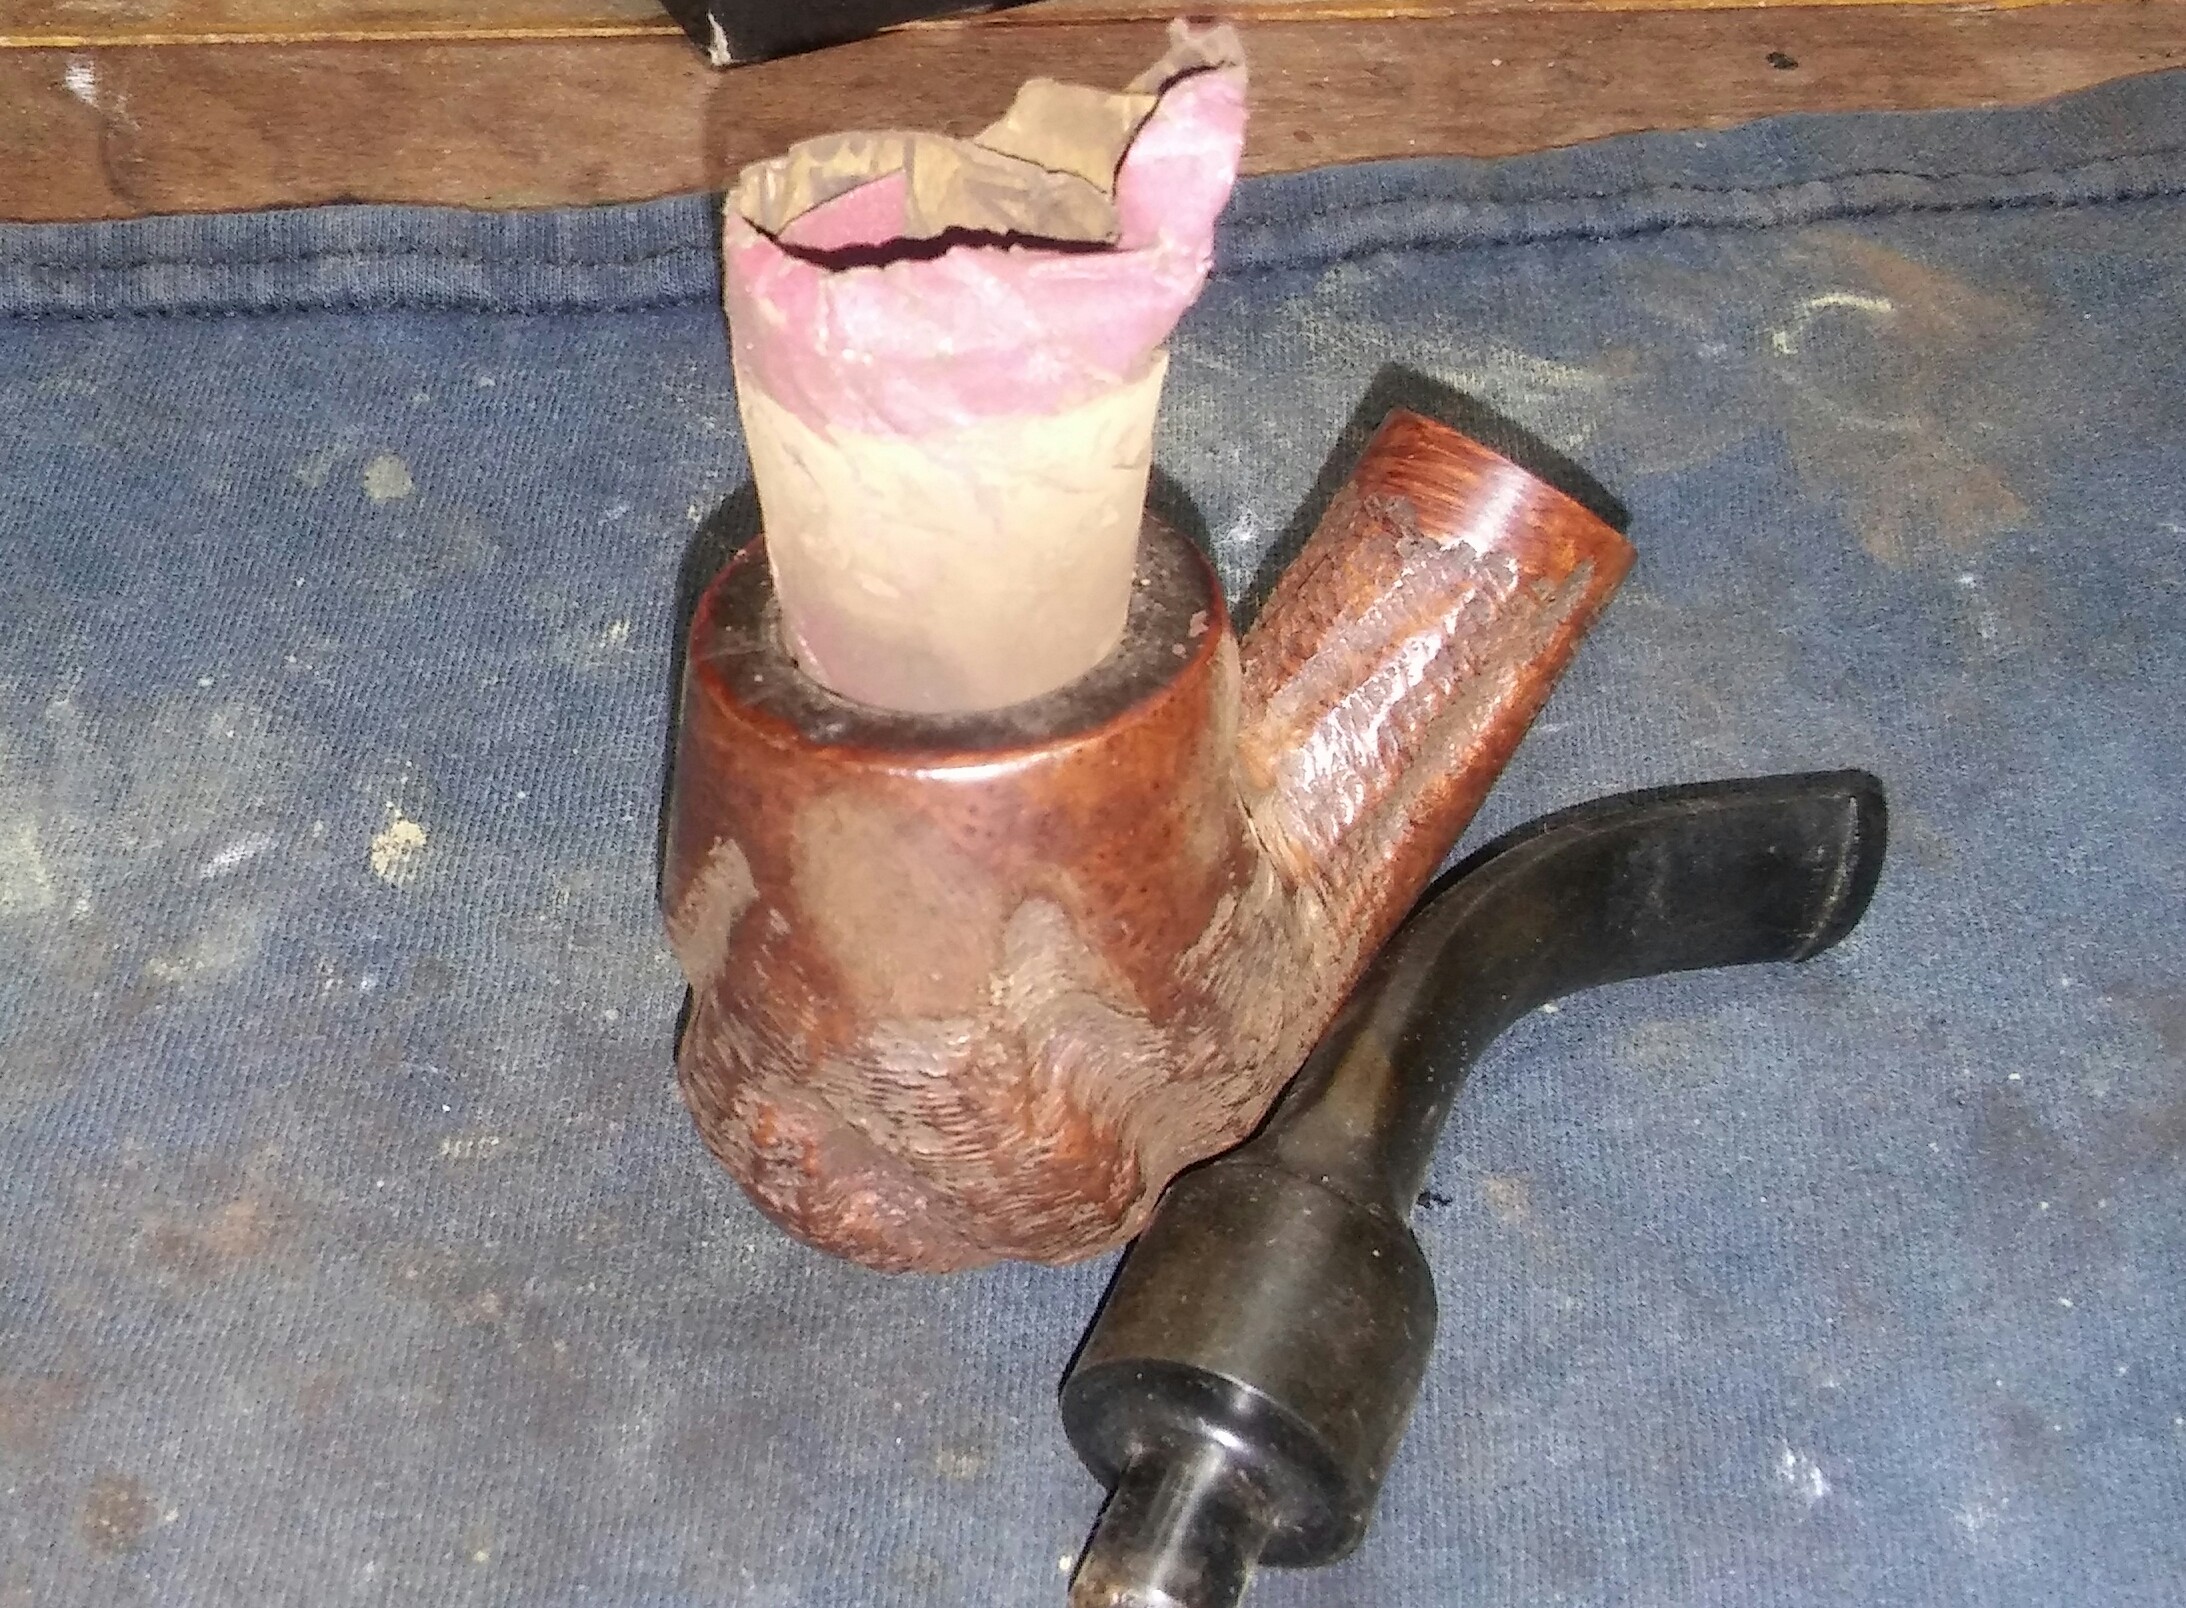
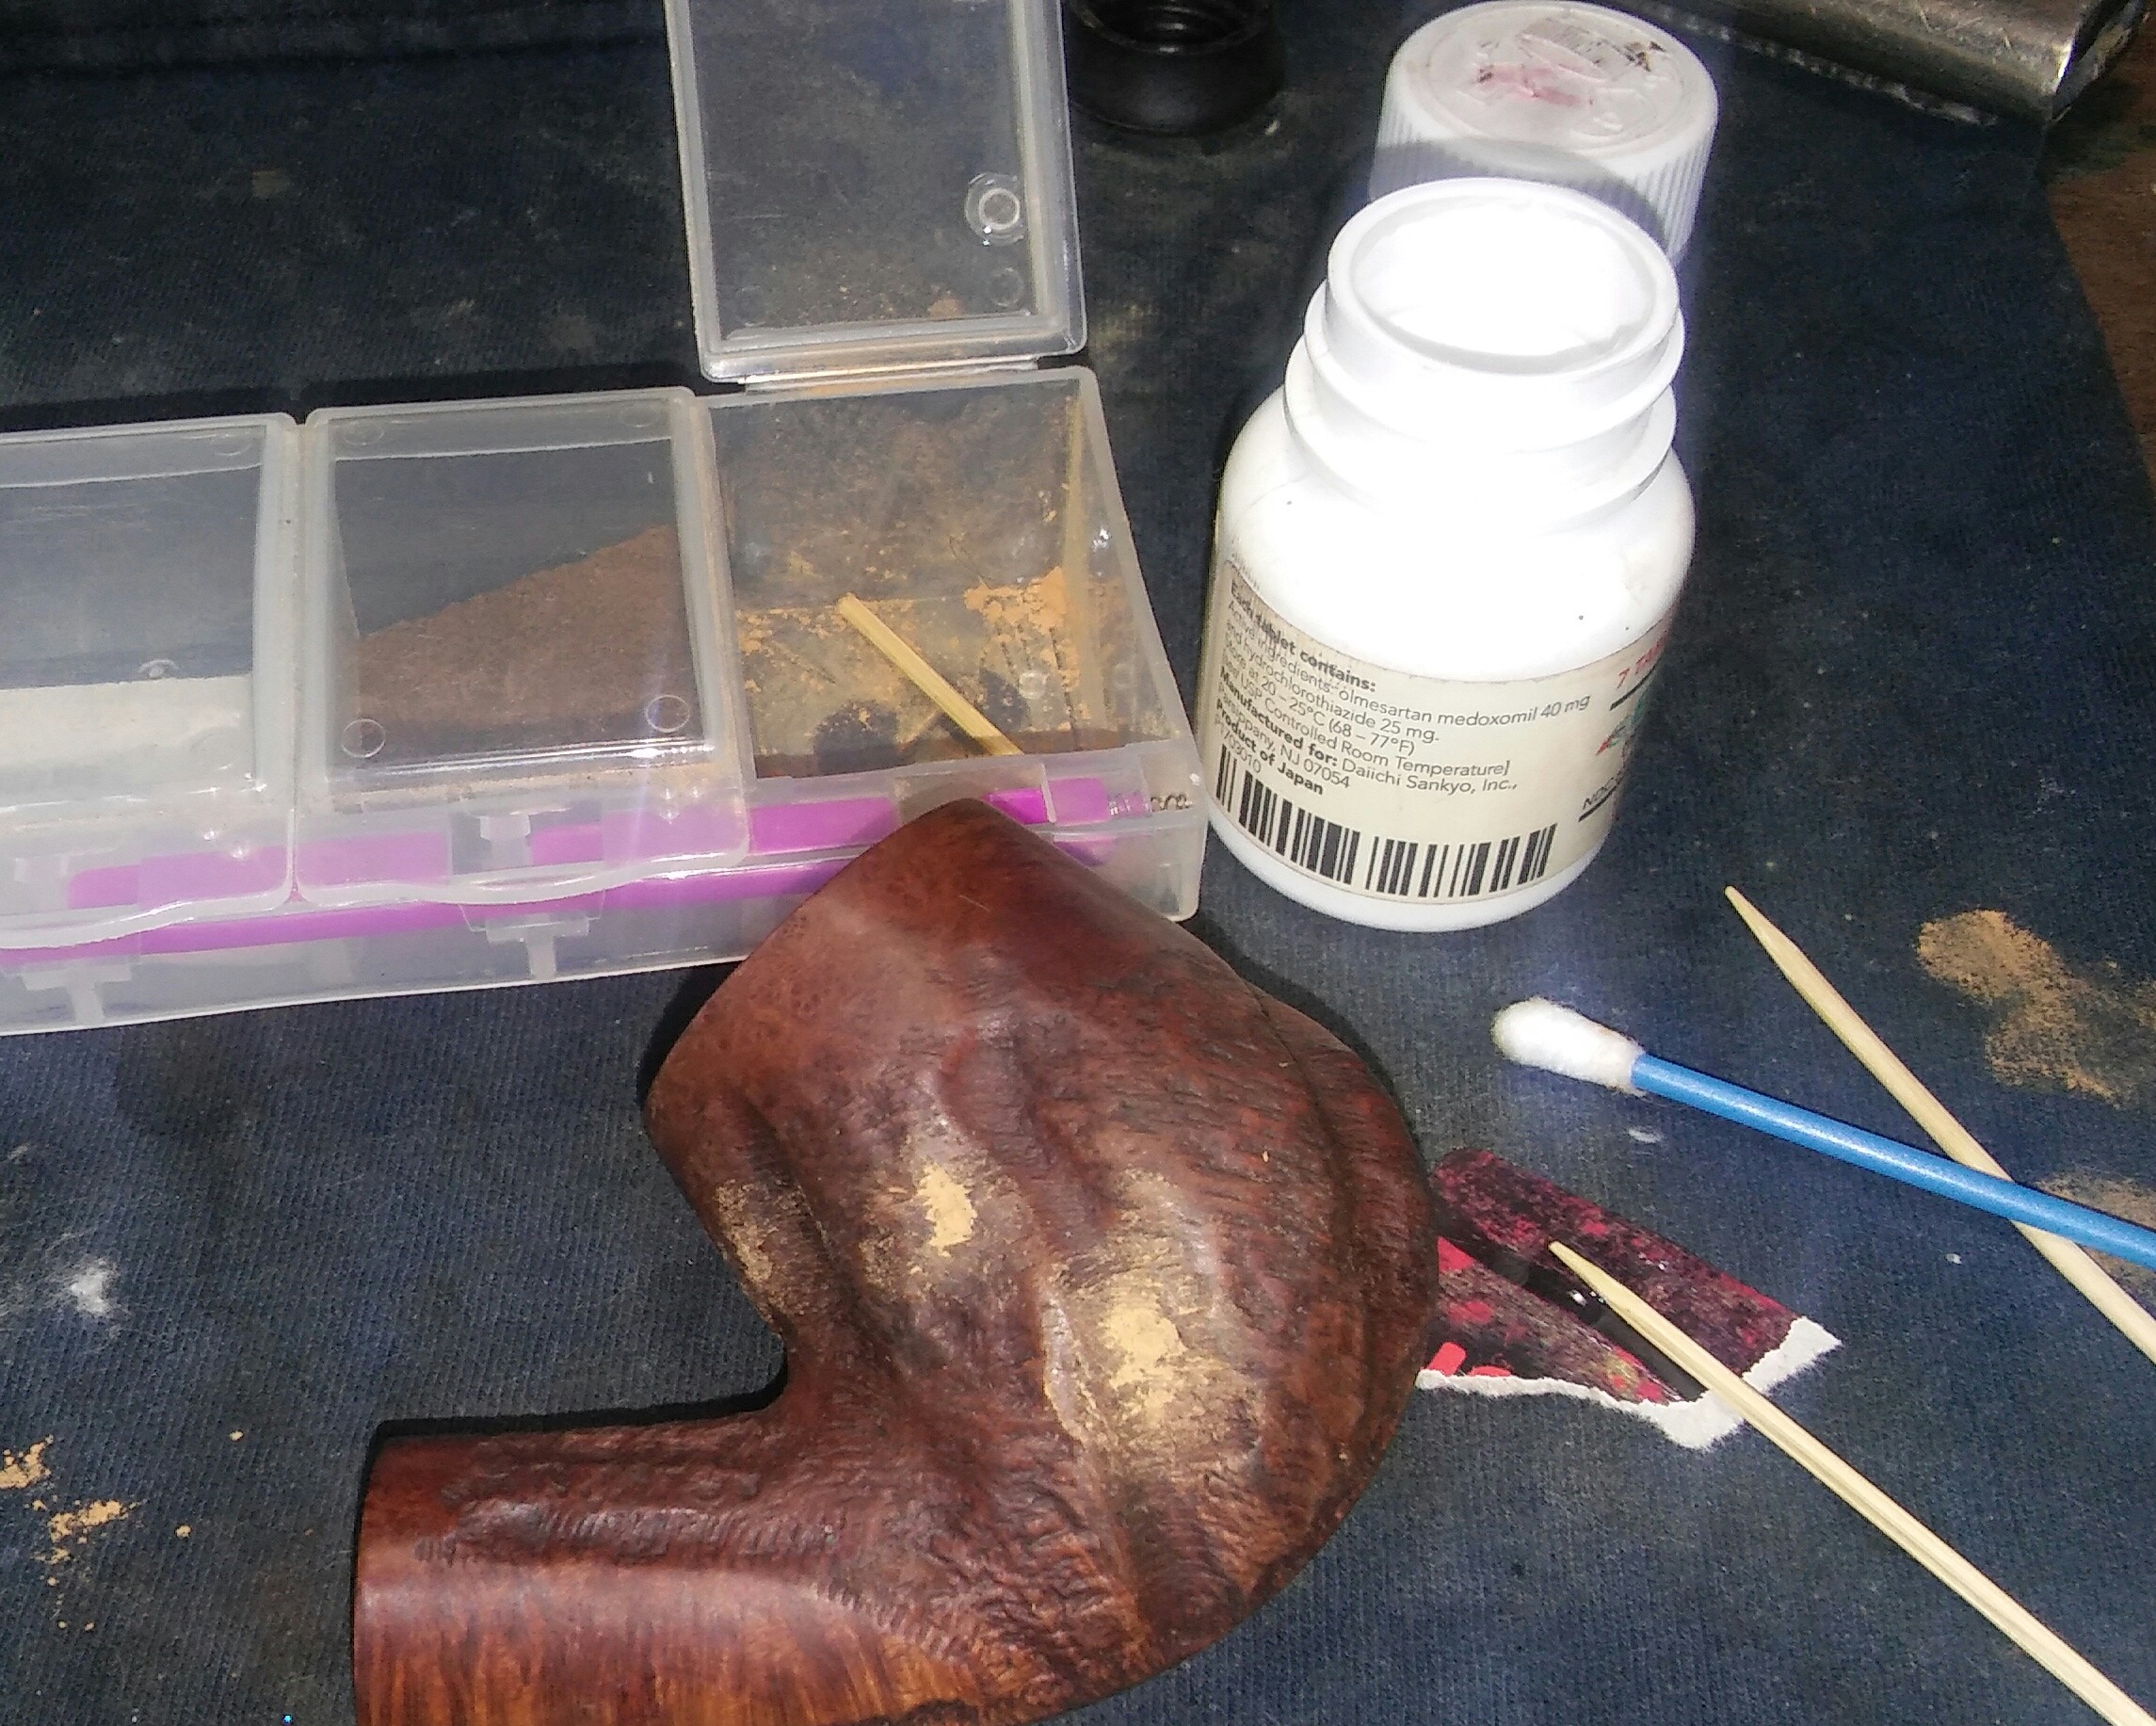
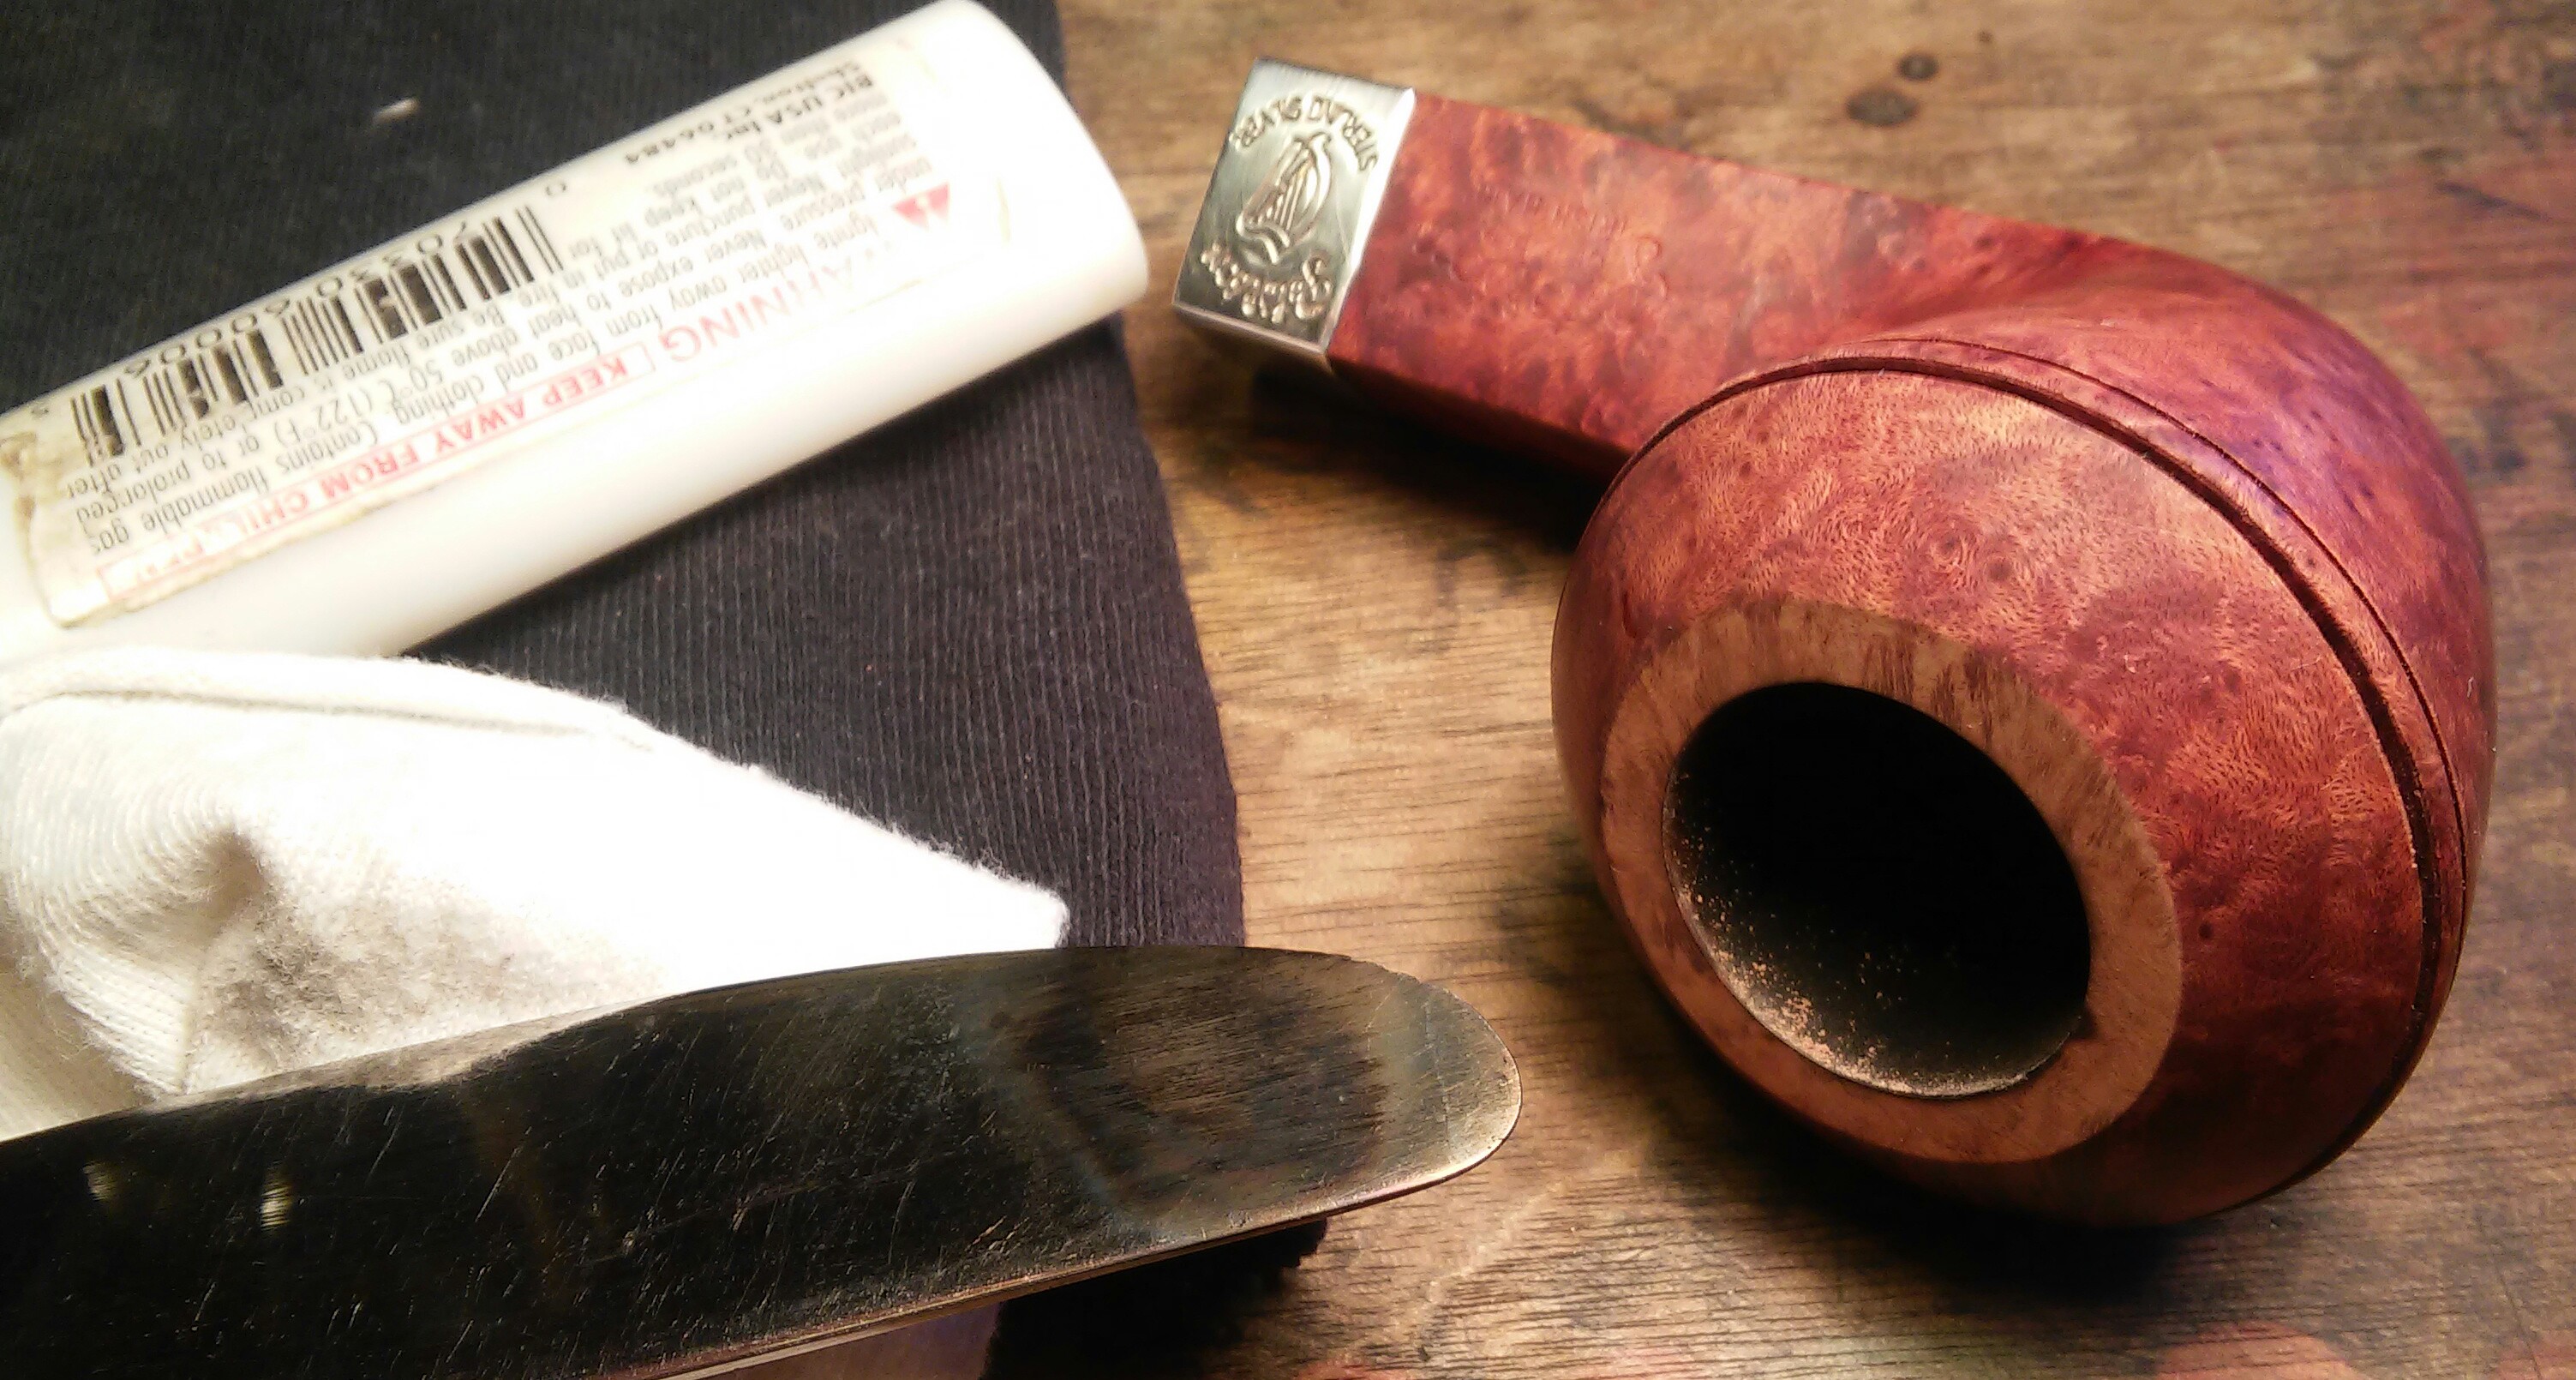
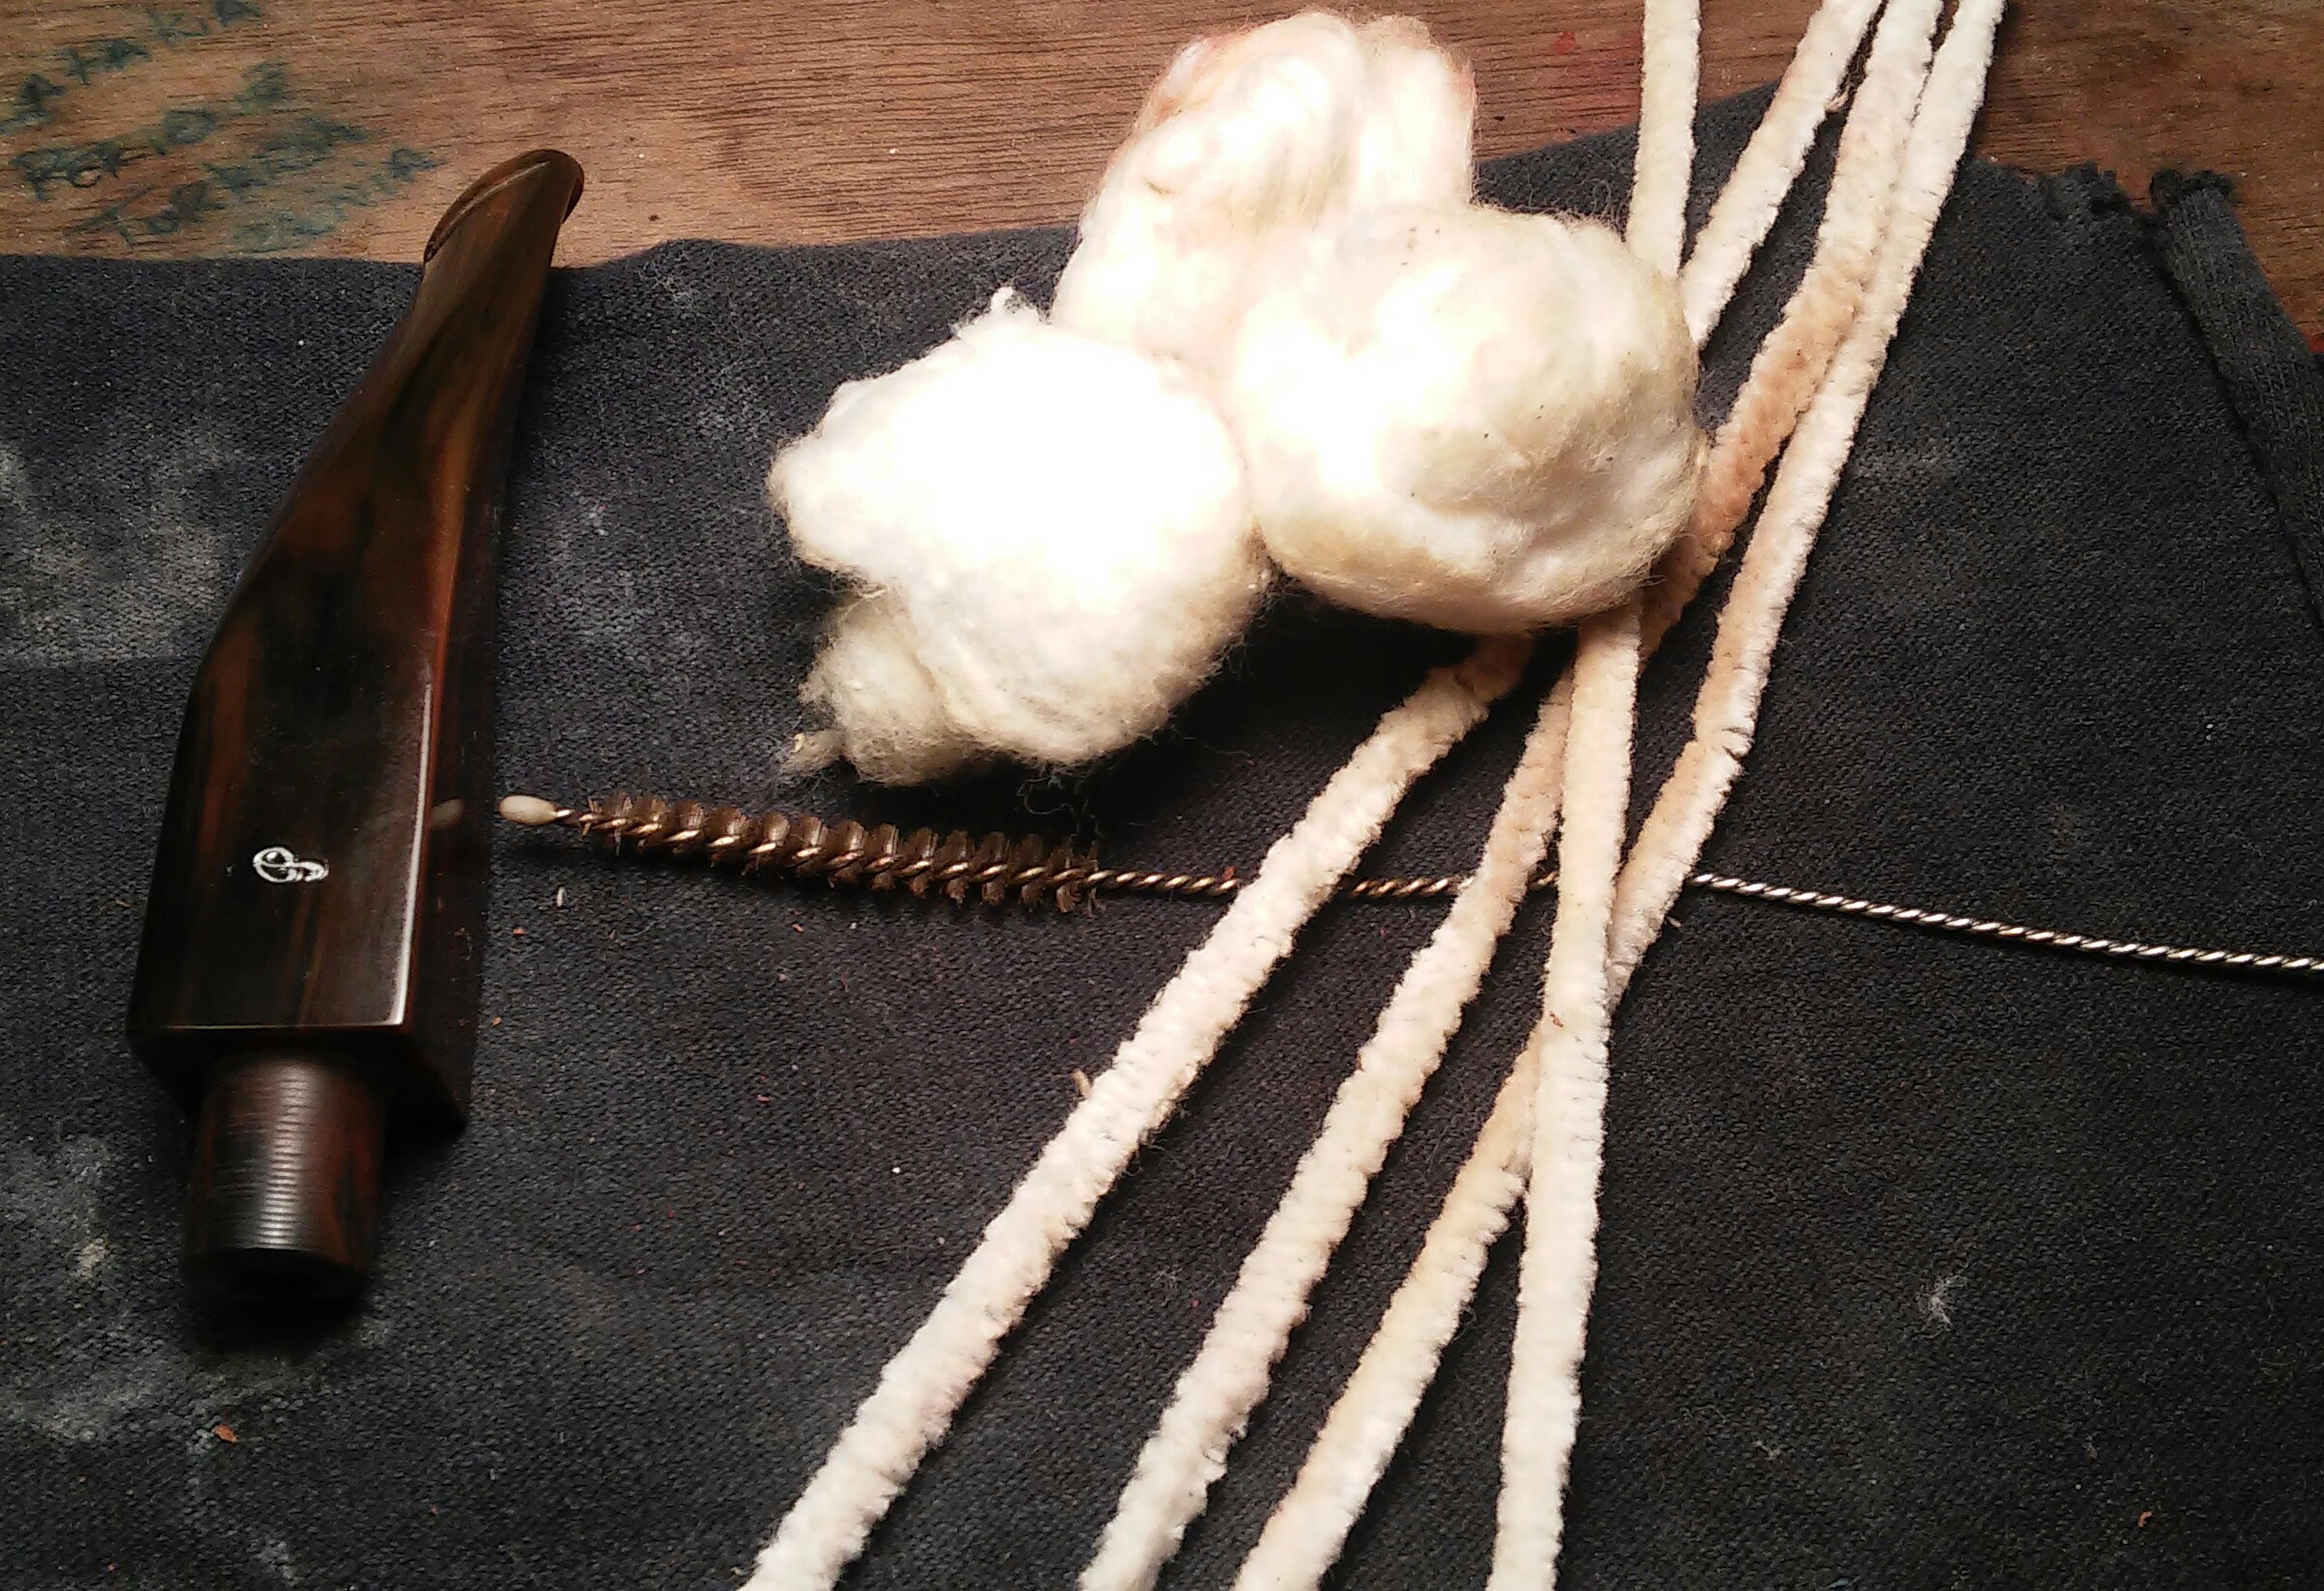
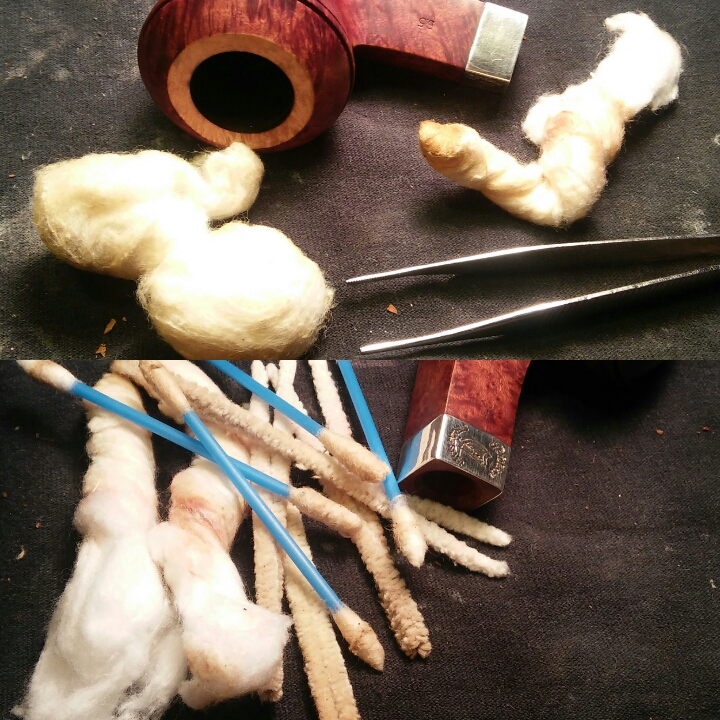
After completing the chamber my attention turned to the internals of the mortise and stem, they were pretty caked with tar, oils and old tobacco. I decided a retort was in order. Using EverClear and cotton balls I ran the pipe though the process. After the retort loosened the internal debris I did a cleaning using EverClear, Q-tips, un-rolled cotton balls and stiff/soft pipe cleaners. I cleaned the internals until the pipe cleaners came out as they went in.

20160130_154652PhotoGrid_1454199196034

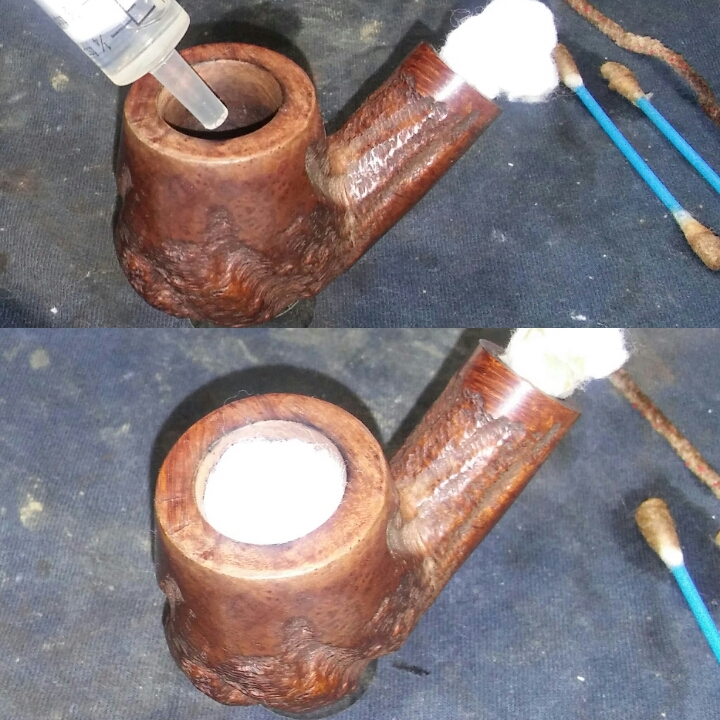
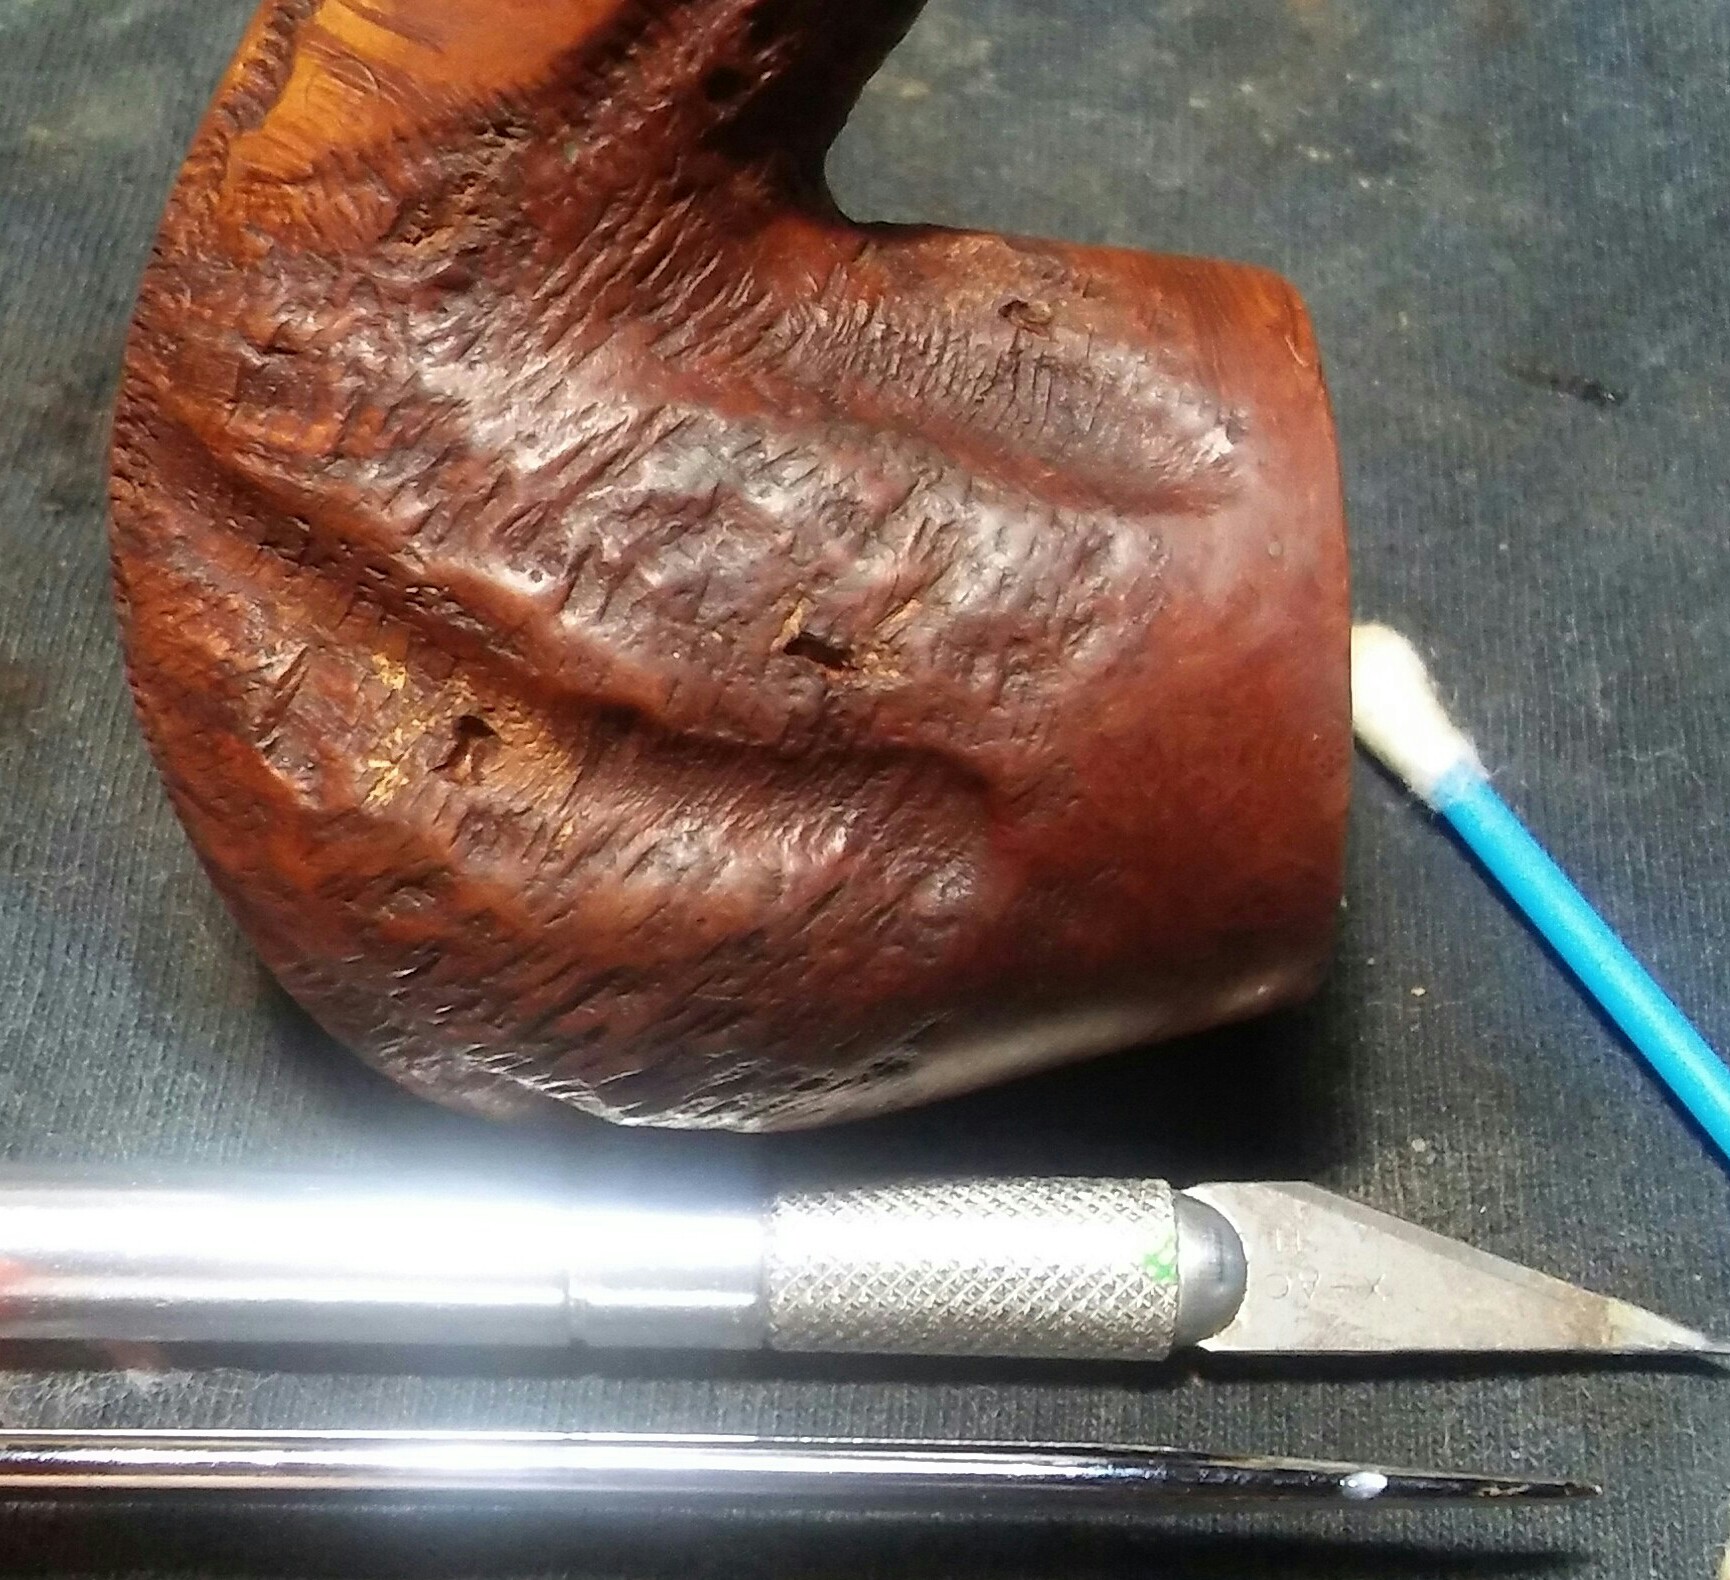
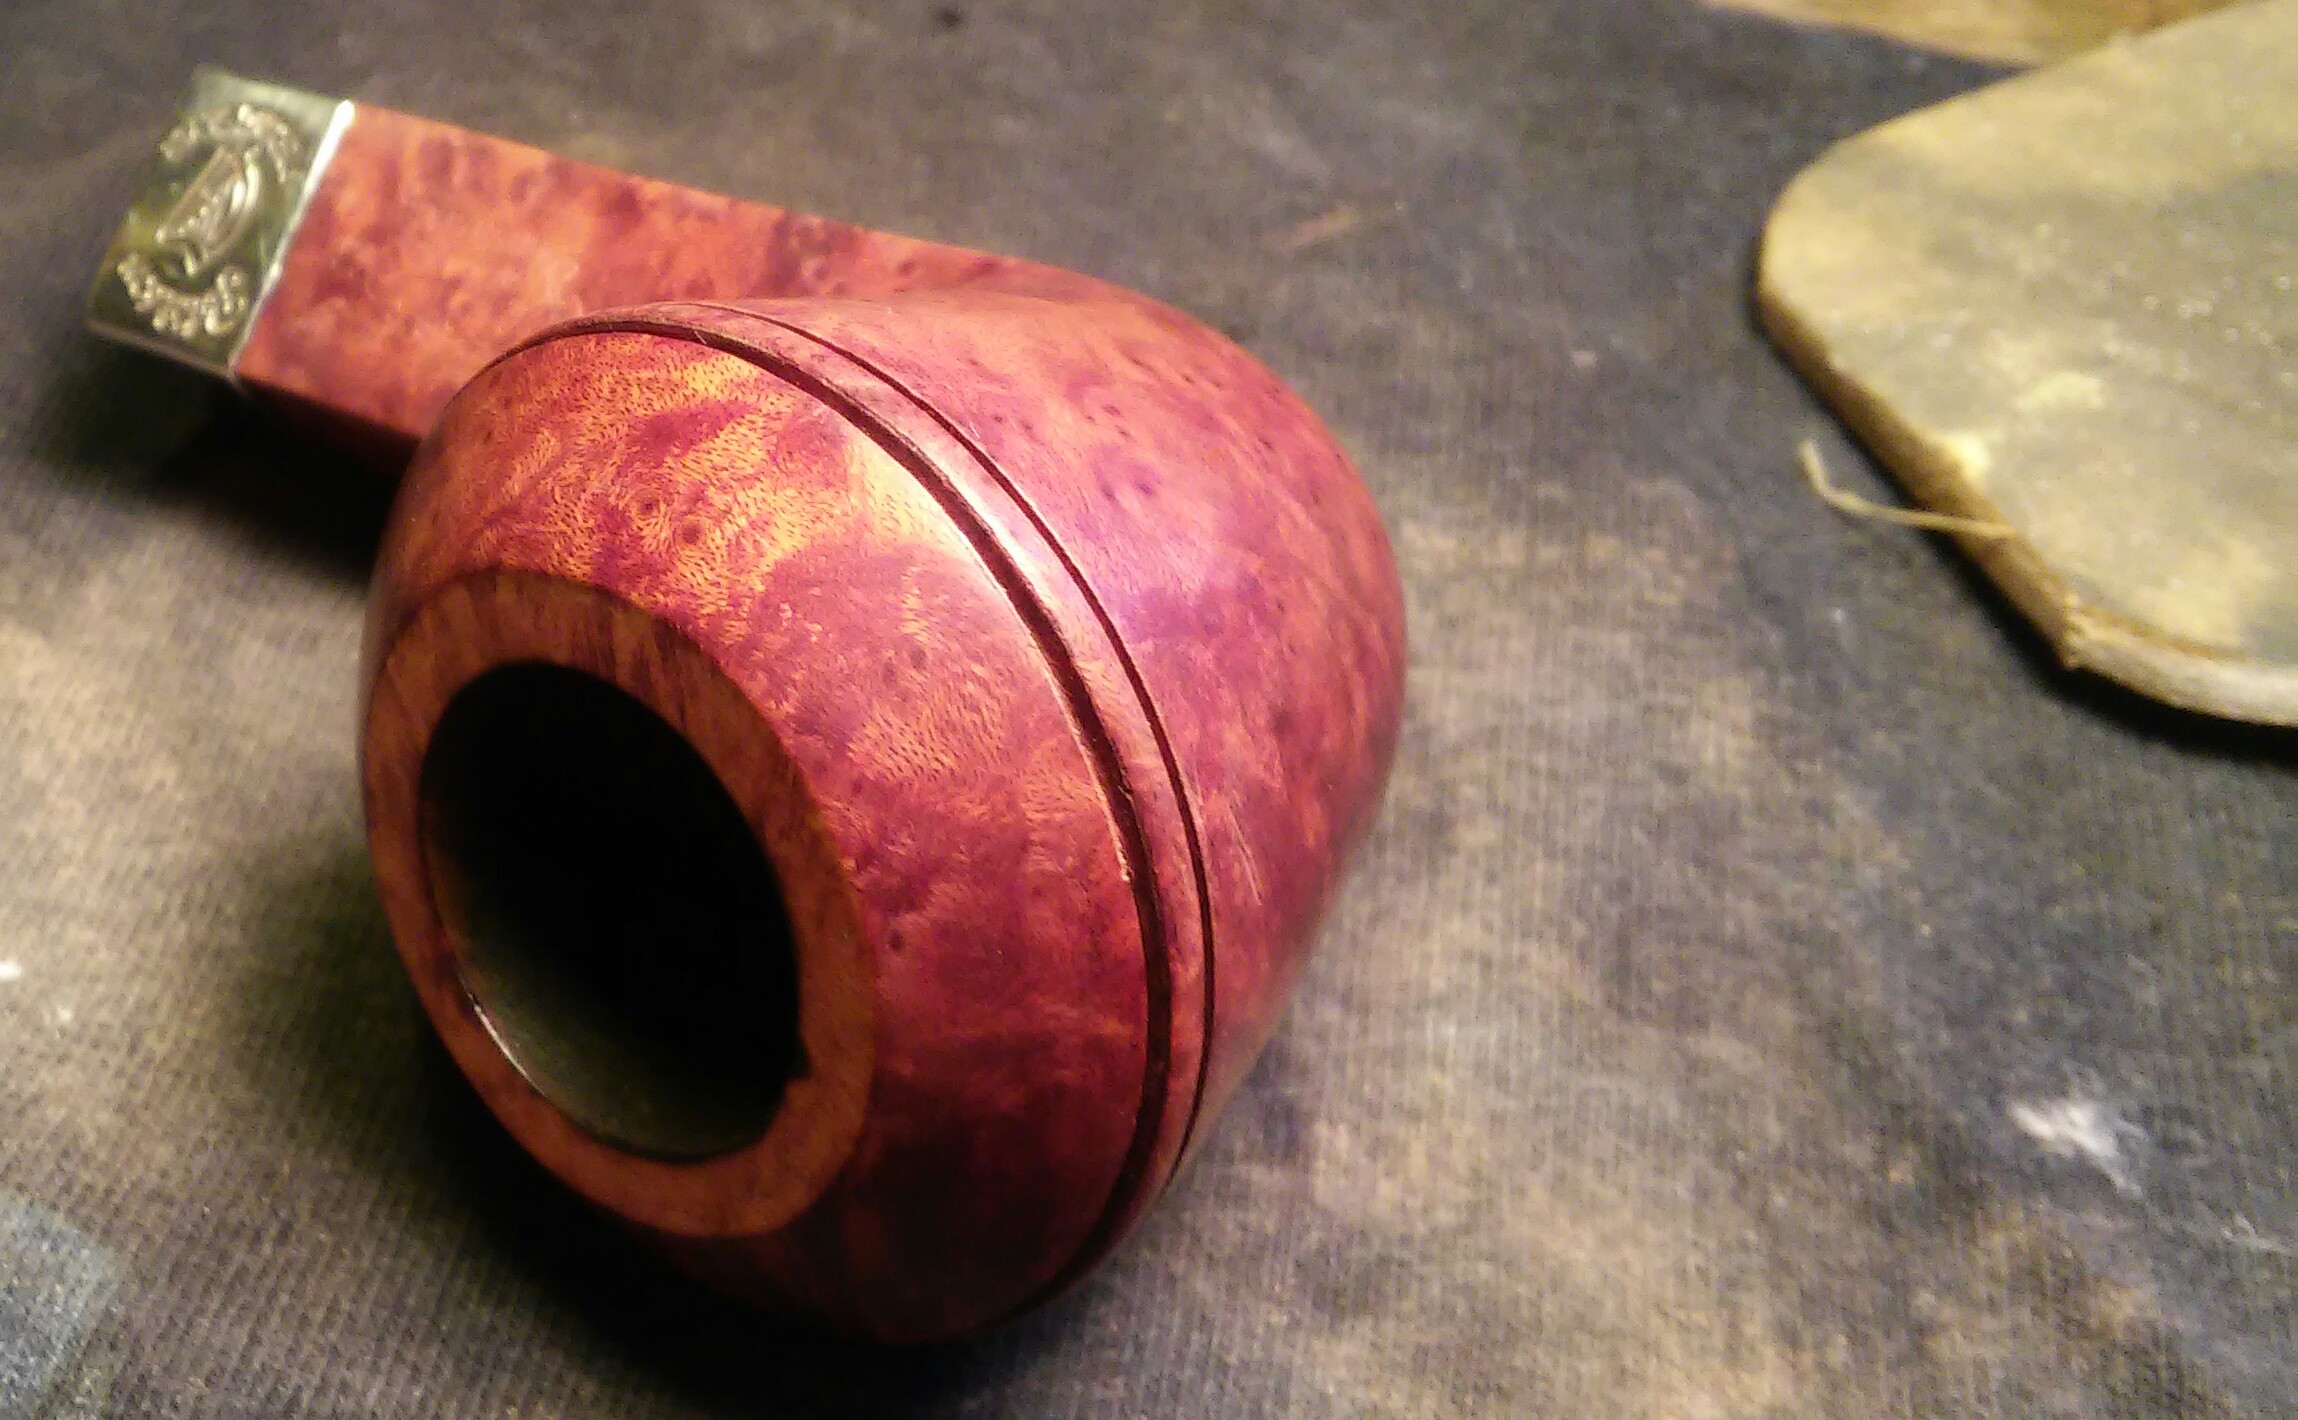
Now for the caked rim. I applied a generous amount of Method Good For Wood Polish to the rim and set it aside to allow the polish to soften the build-up. After sitting, I removed the build-up with Q-tips and a rag working until the rim free of debris. I did repeat this process a few times.

PhotoGrid_1454199223426

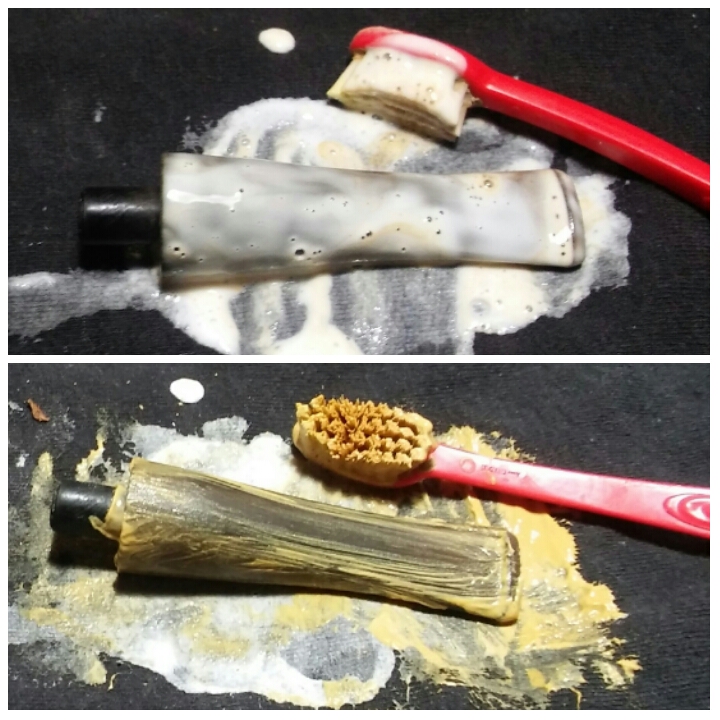
With the stummel ready for the wheel, I could now concentrate on the stem oxidation. I applied non-bleach Soft Scrub to the stem with a children’s toothbrush and left it aside to penetrate the oxidation. Once the Soft Scrub turns from white to a brownish color its time to introduce the old elbow grease and scrub vigorously with a rag until the oxidation is removed, finishing up with a damp Magic Eraser to remove the leftover oxidation.

20160131_005920~2

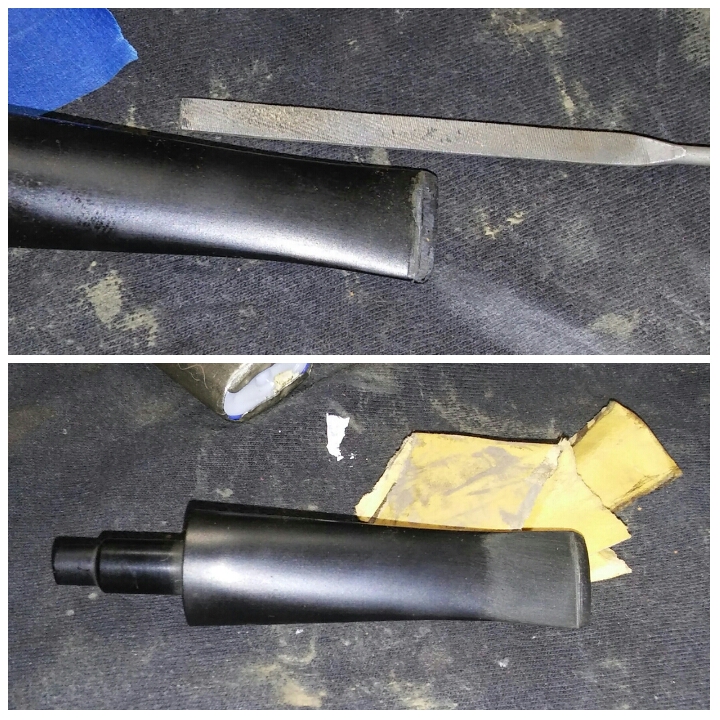
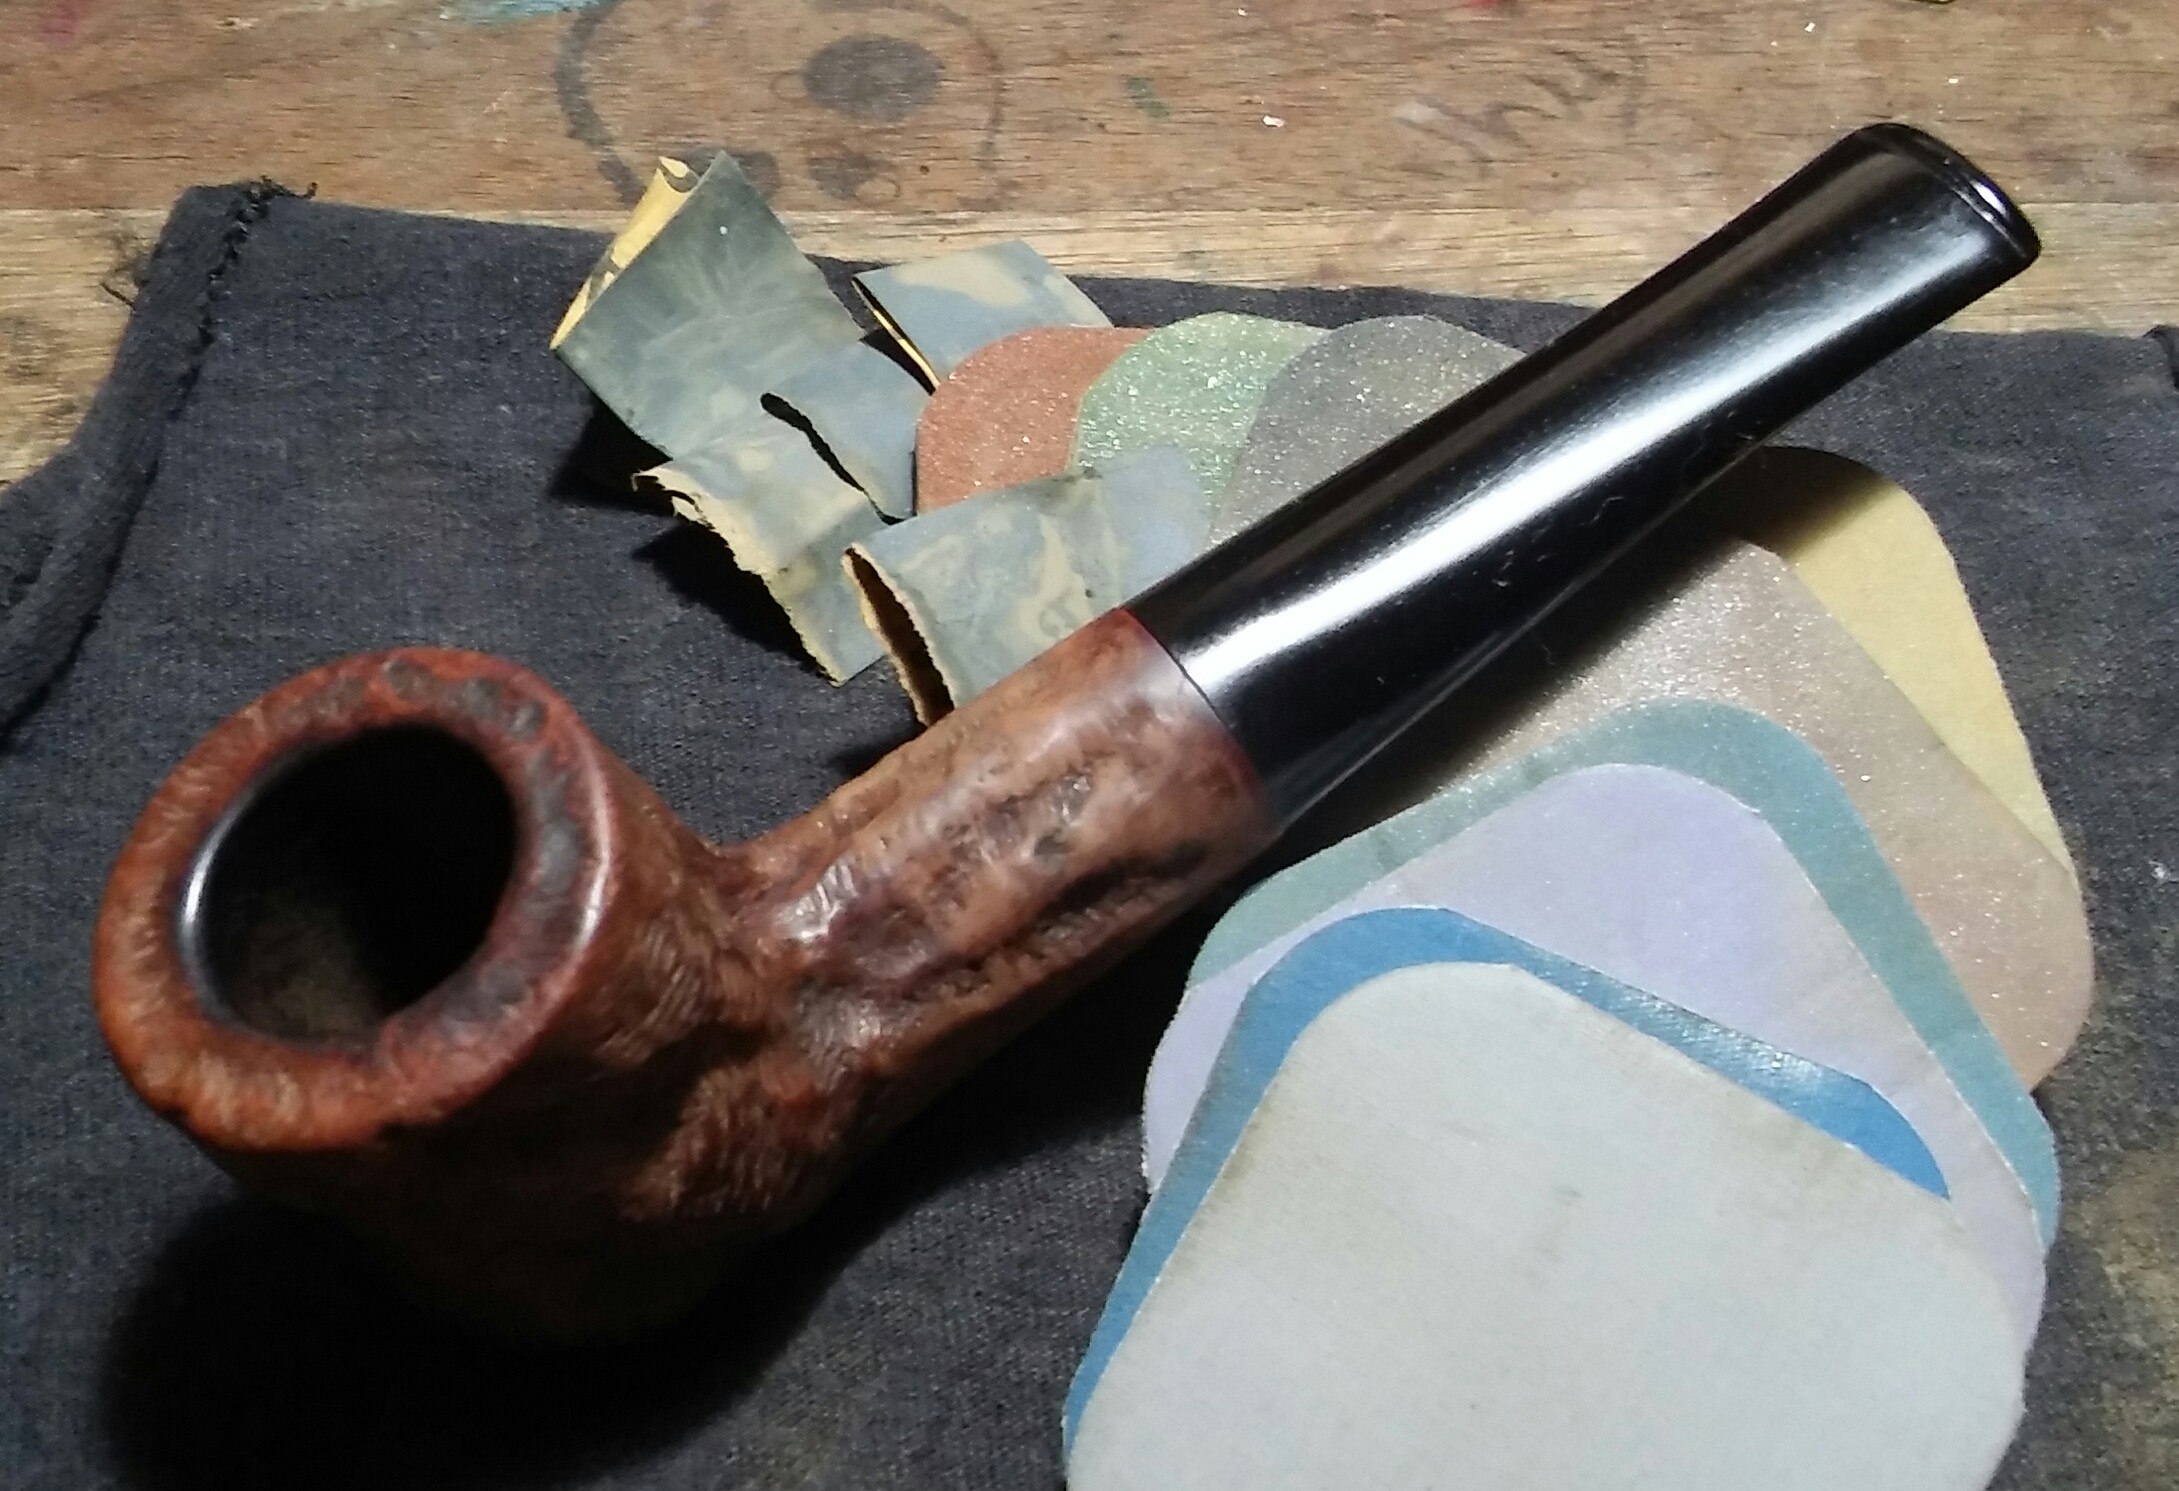
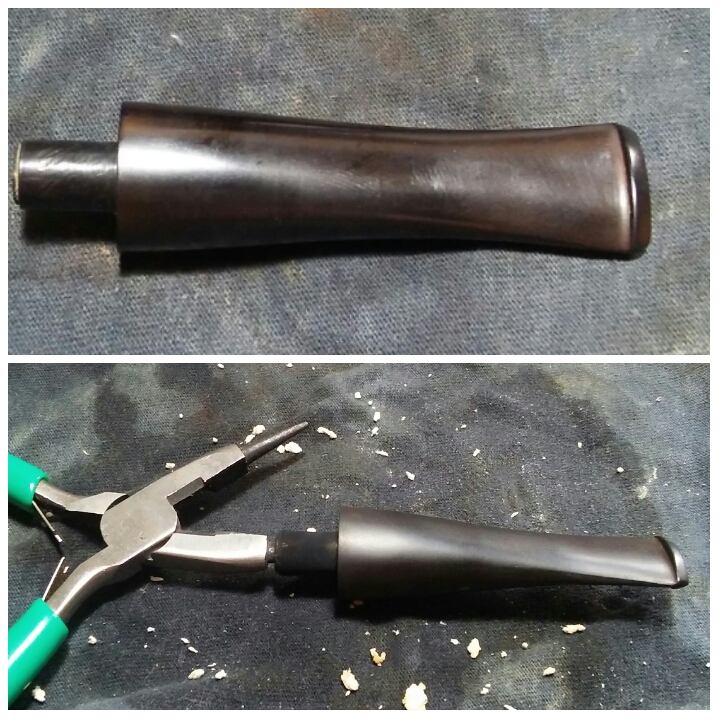
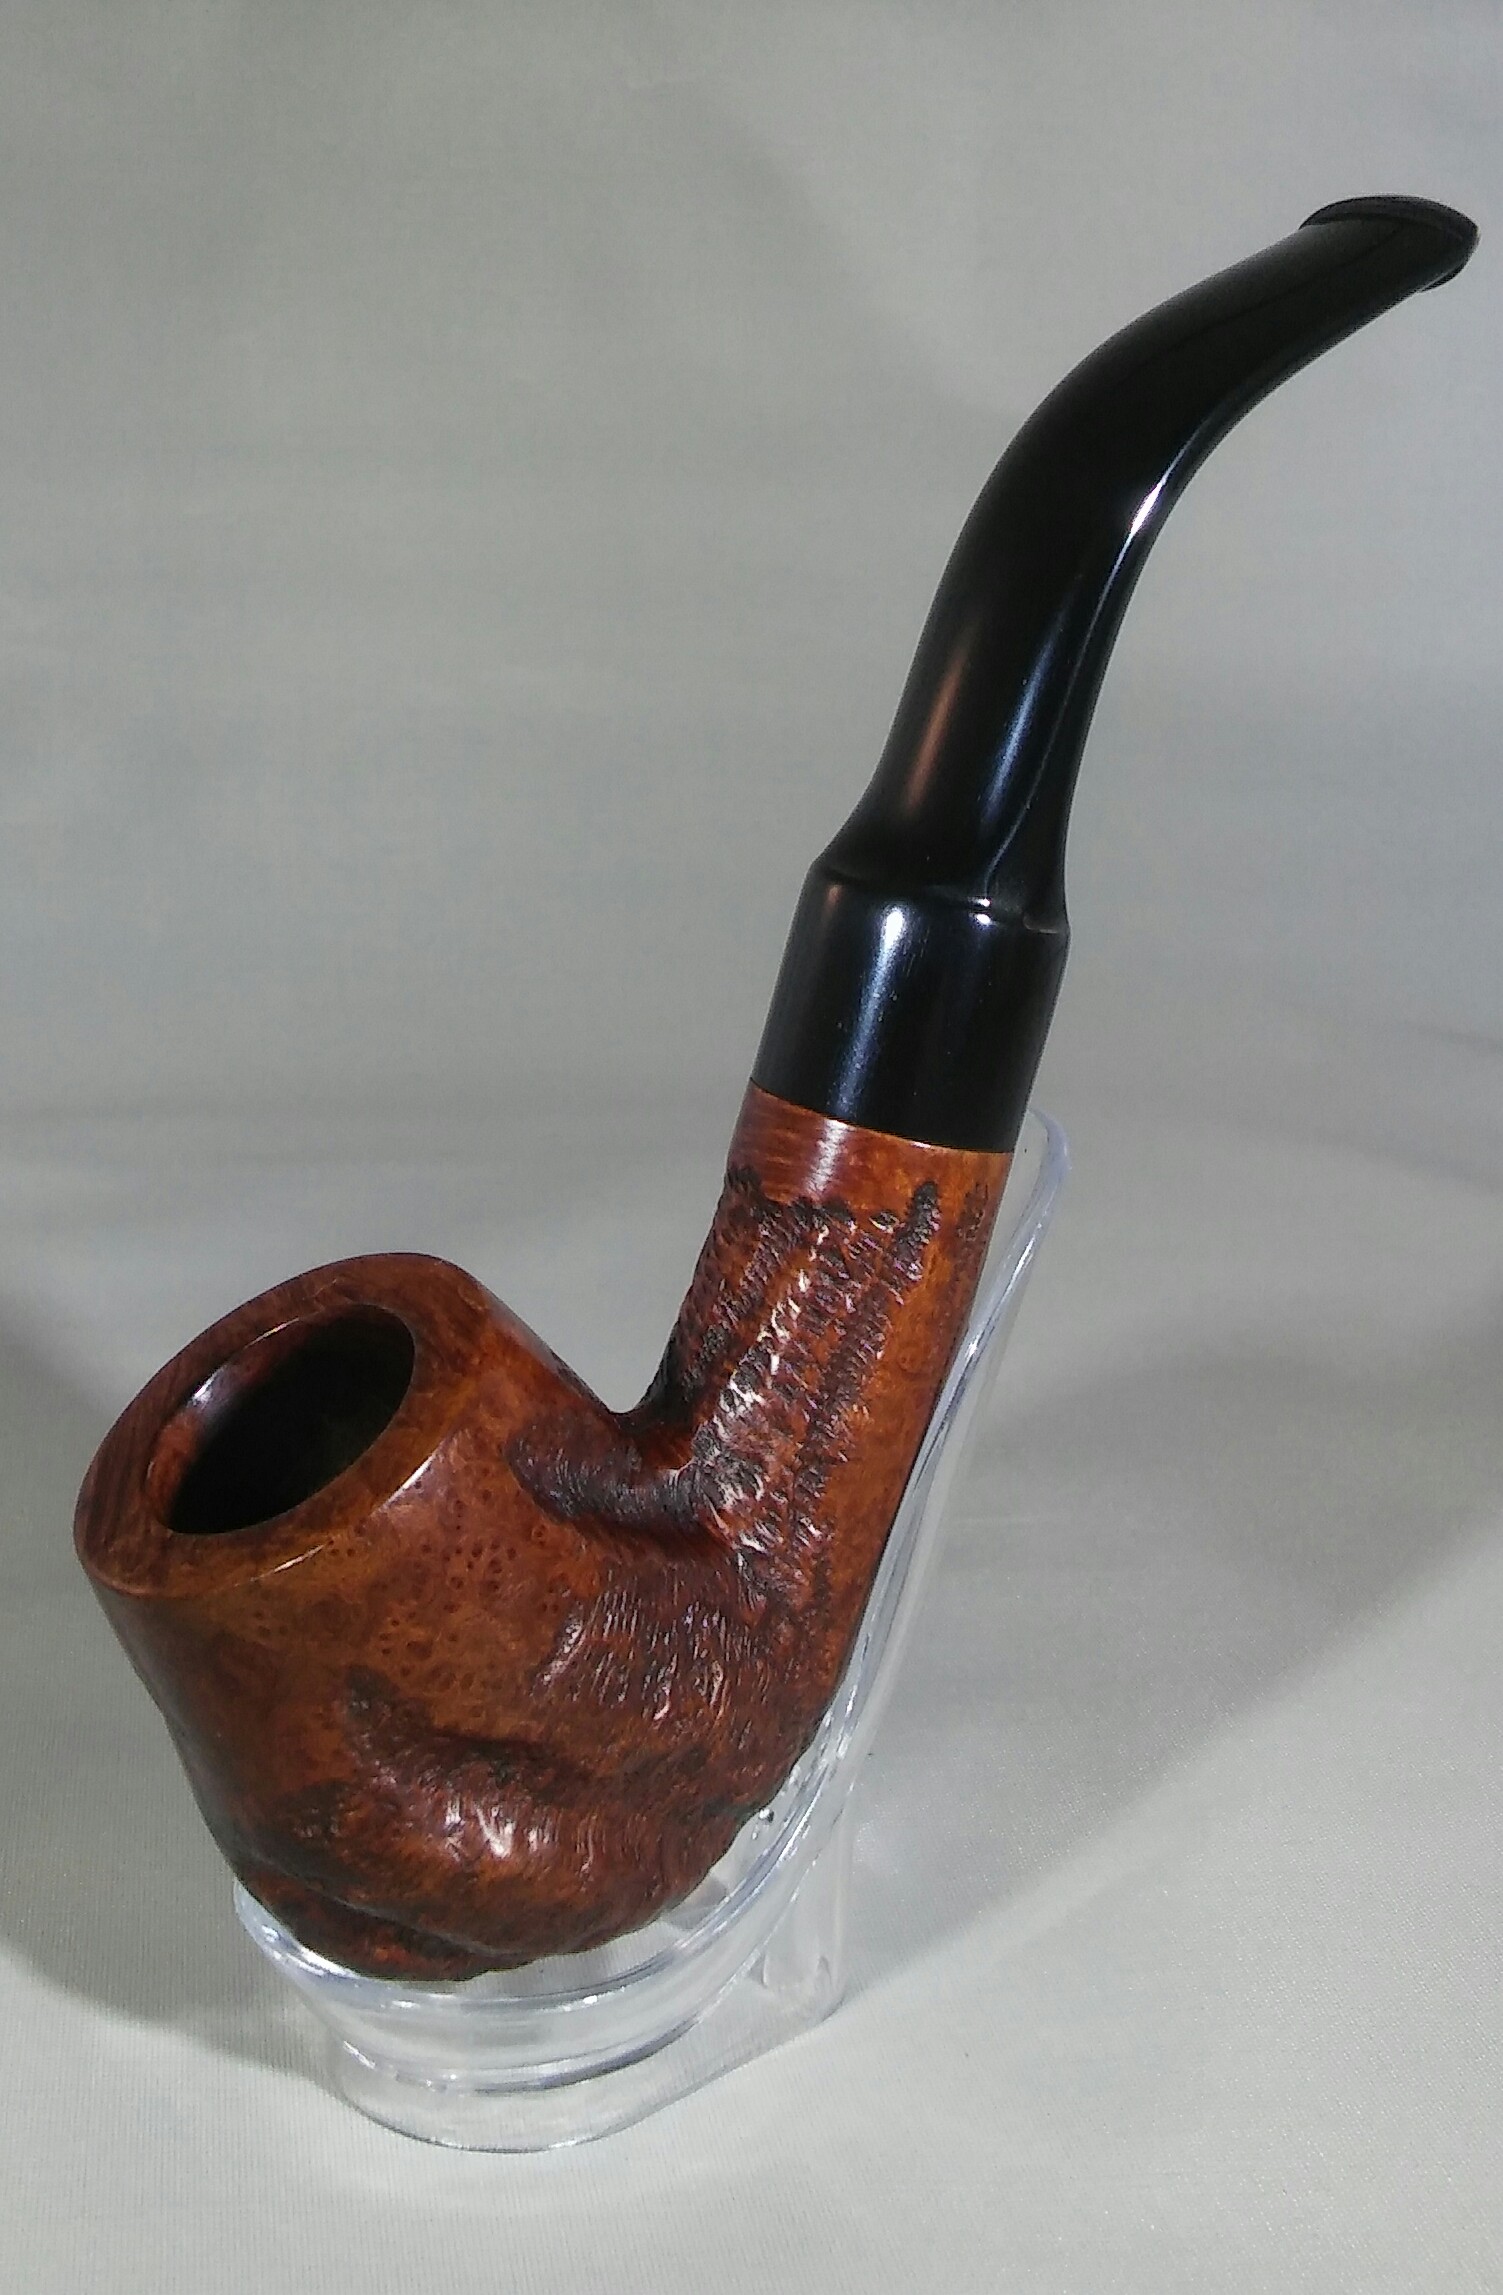
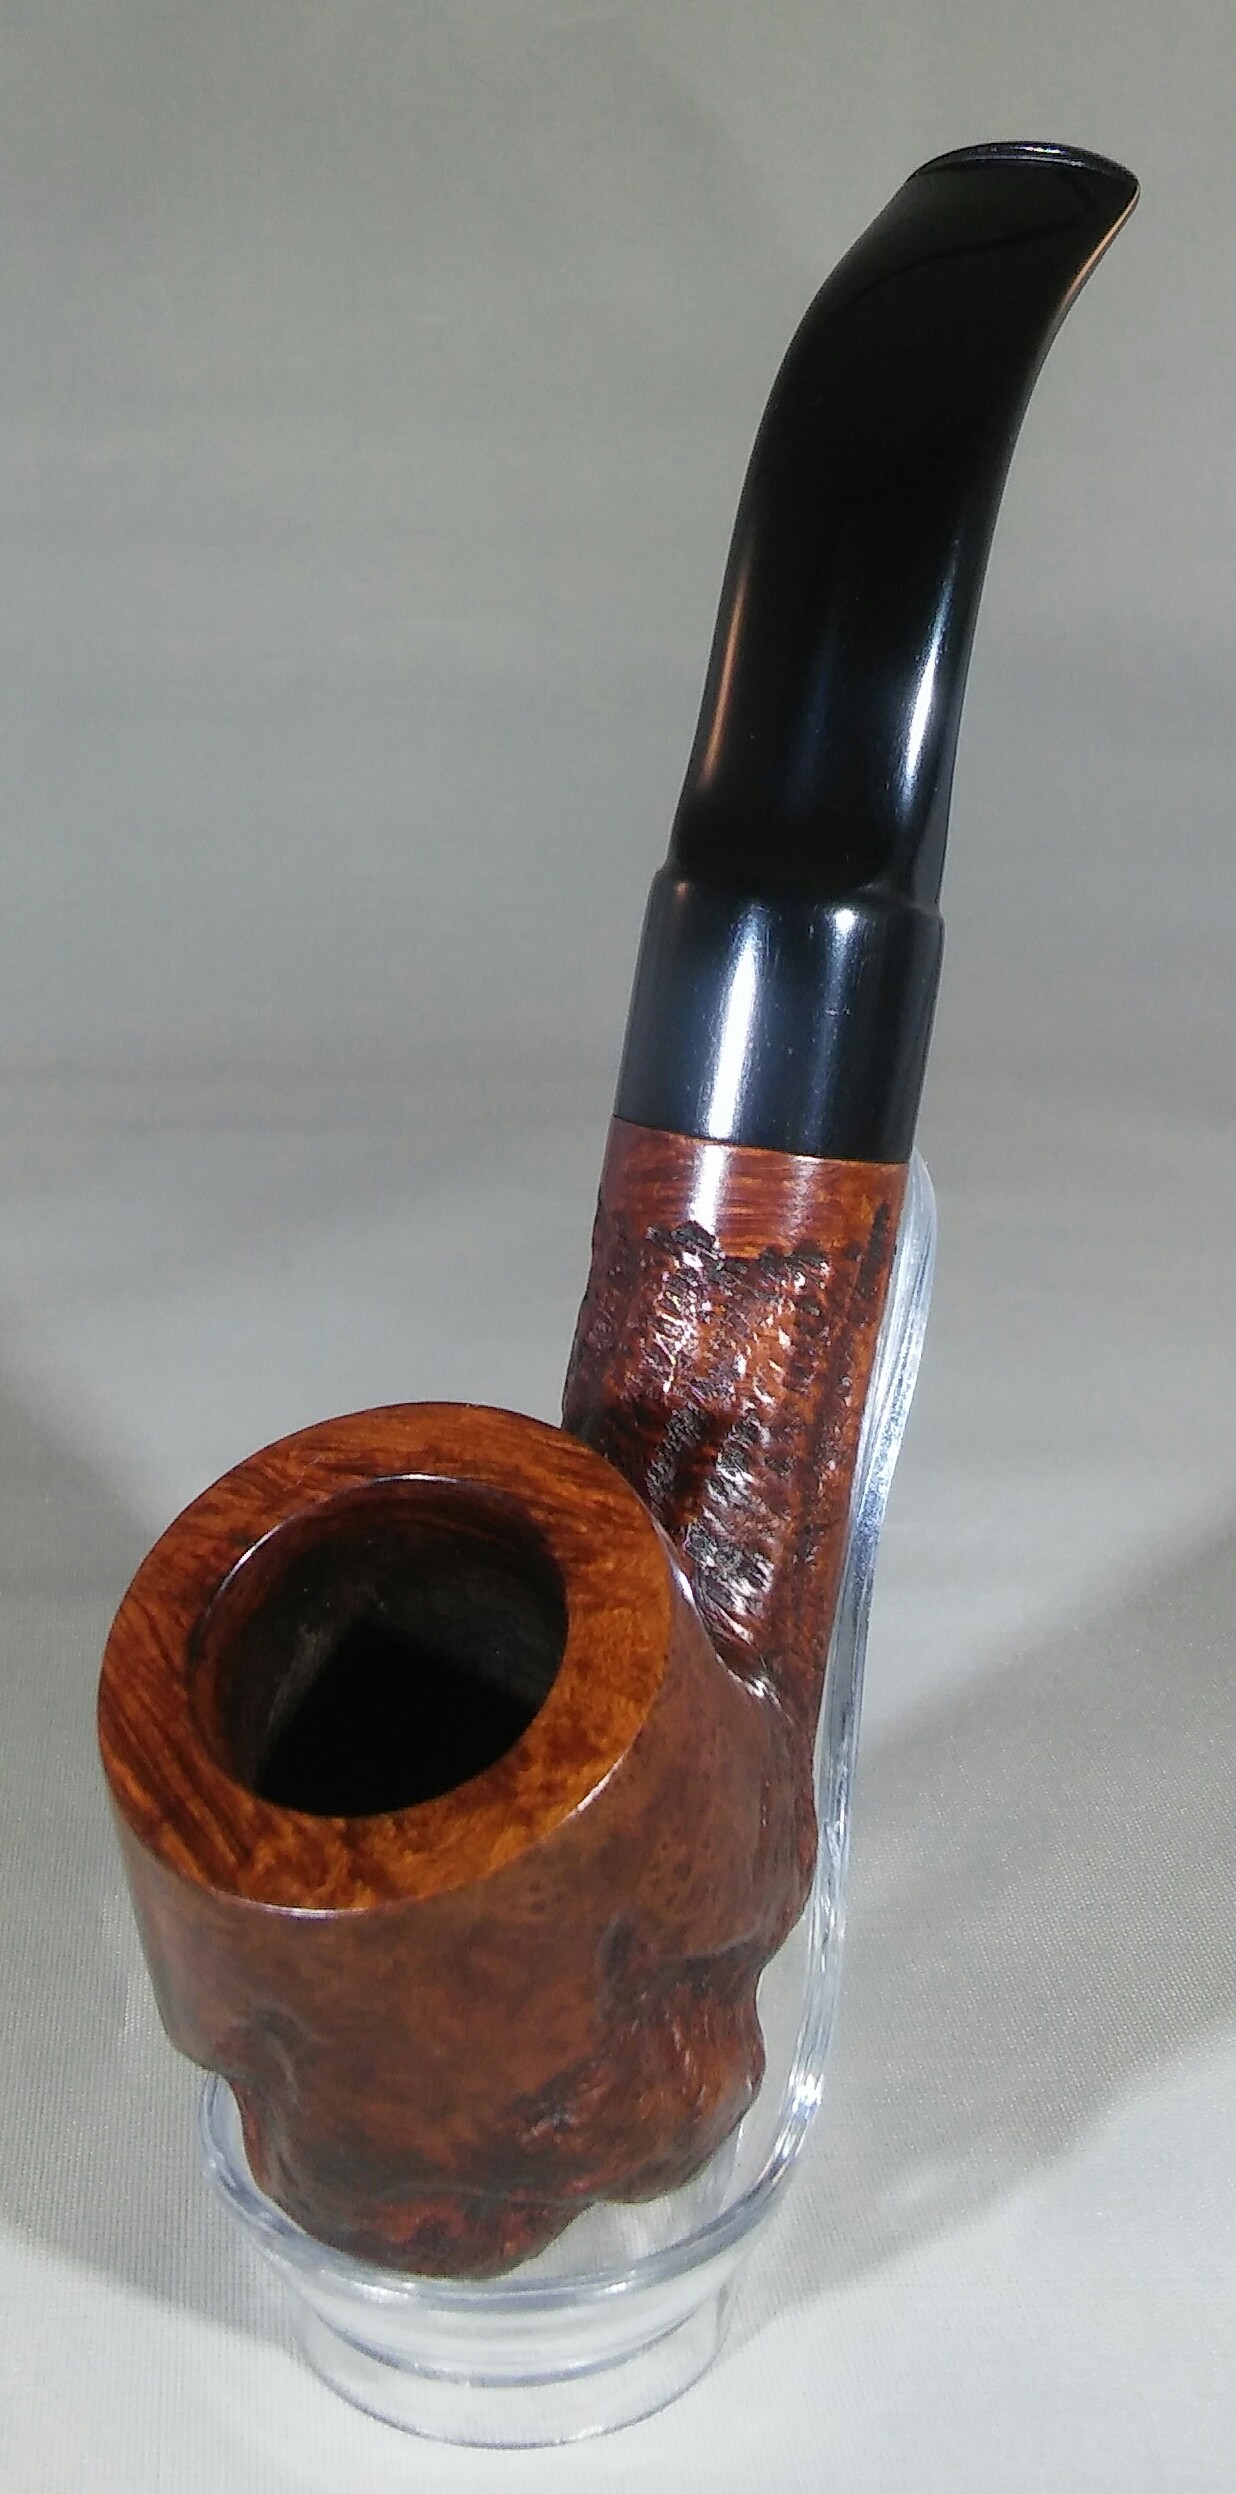
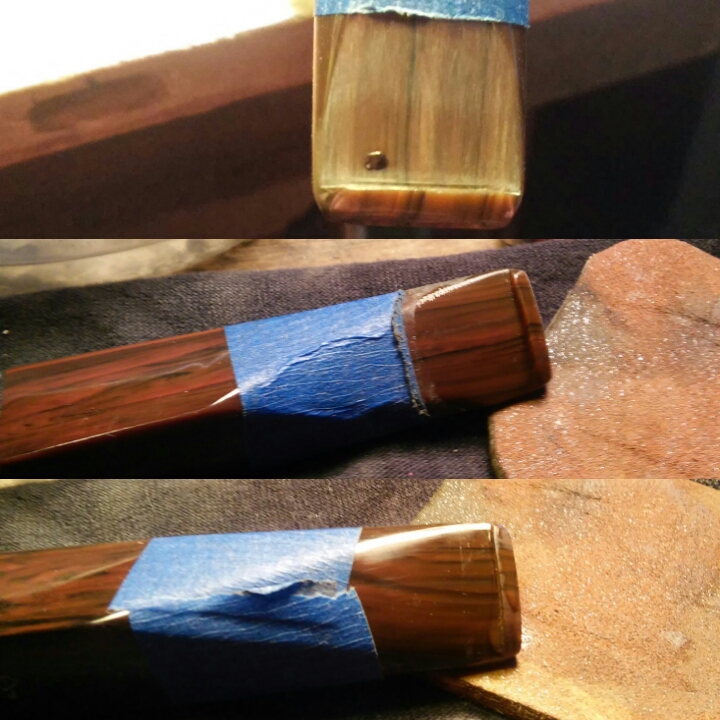
I now ran the stem through the various grits of sandpaper and micro-mesh. I removed the chatter with 1000 grit sandpaper wet and then moved on to the first three micro-mesh pads 1500 mesh wet, 1800 mesh wet, 2000 grit sandpaper wet and 2400 mesh wet. I ran it though the last six micro-mesh pads dry 3200-12000. The metal flecks are still are still visible, I have many in my collection from the same war-time era where the flecks are apparent.

20160131_011026~2

Just before hitting the wheel I applied Howard’s Butcher Block Conditioner with a rag and let it penetrate for a few minutes, hand buffing off the excess with a clean rag. She was now ready for the final buffing.
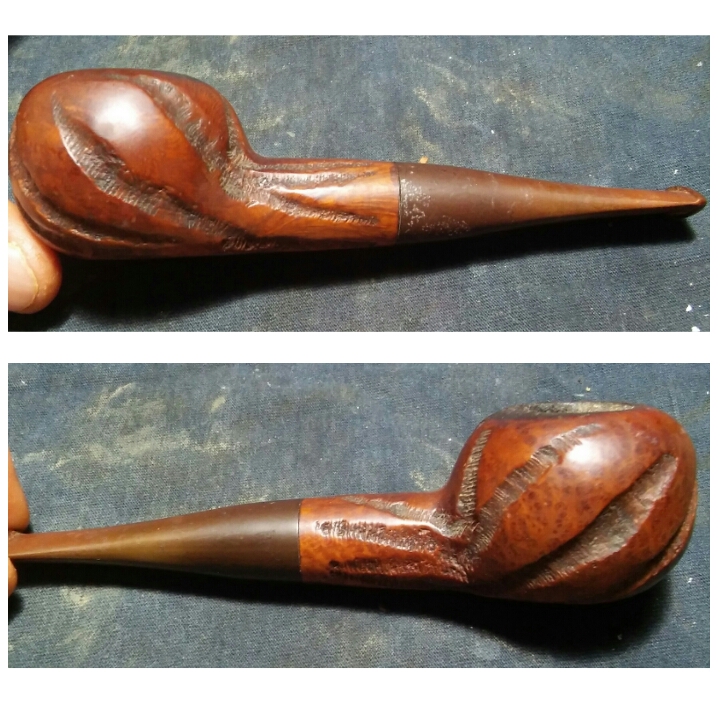
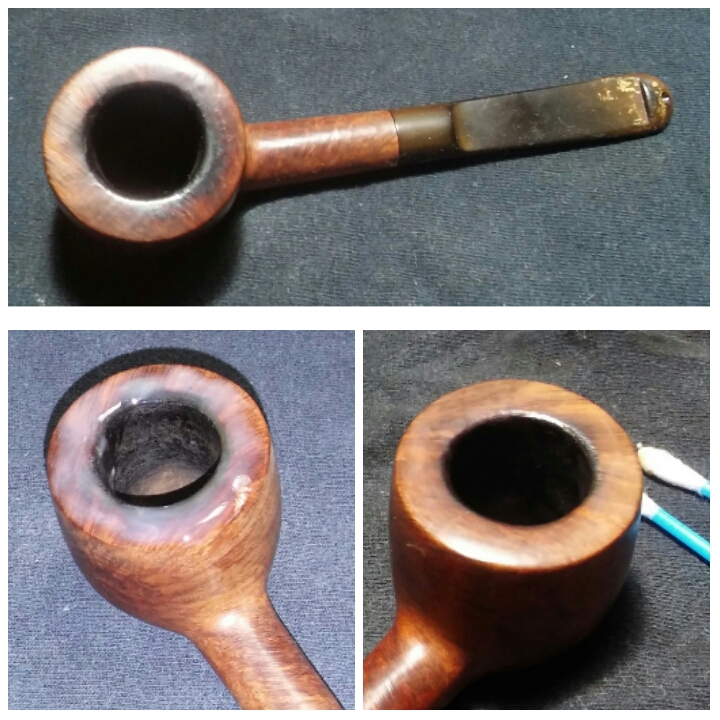
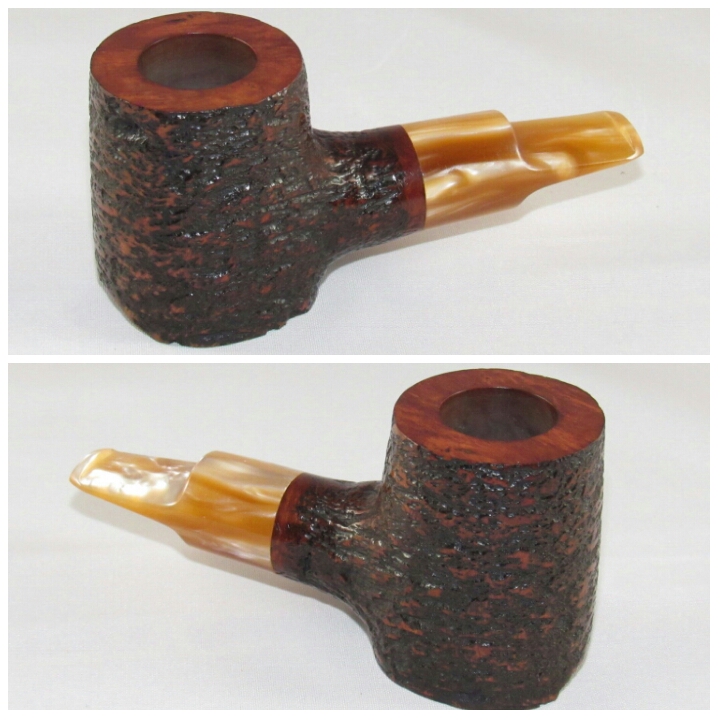
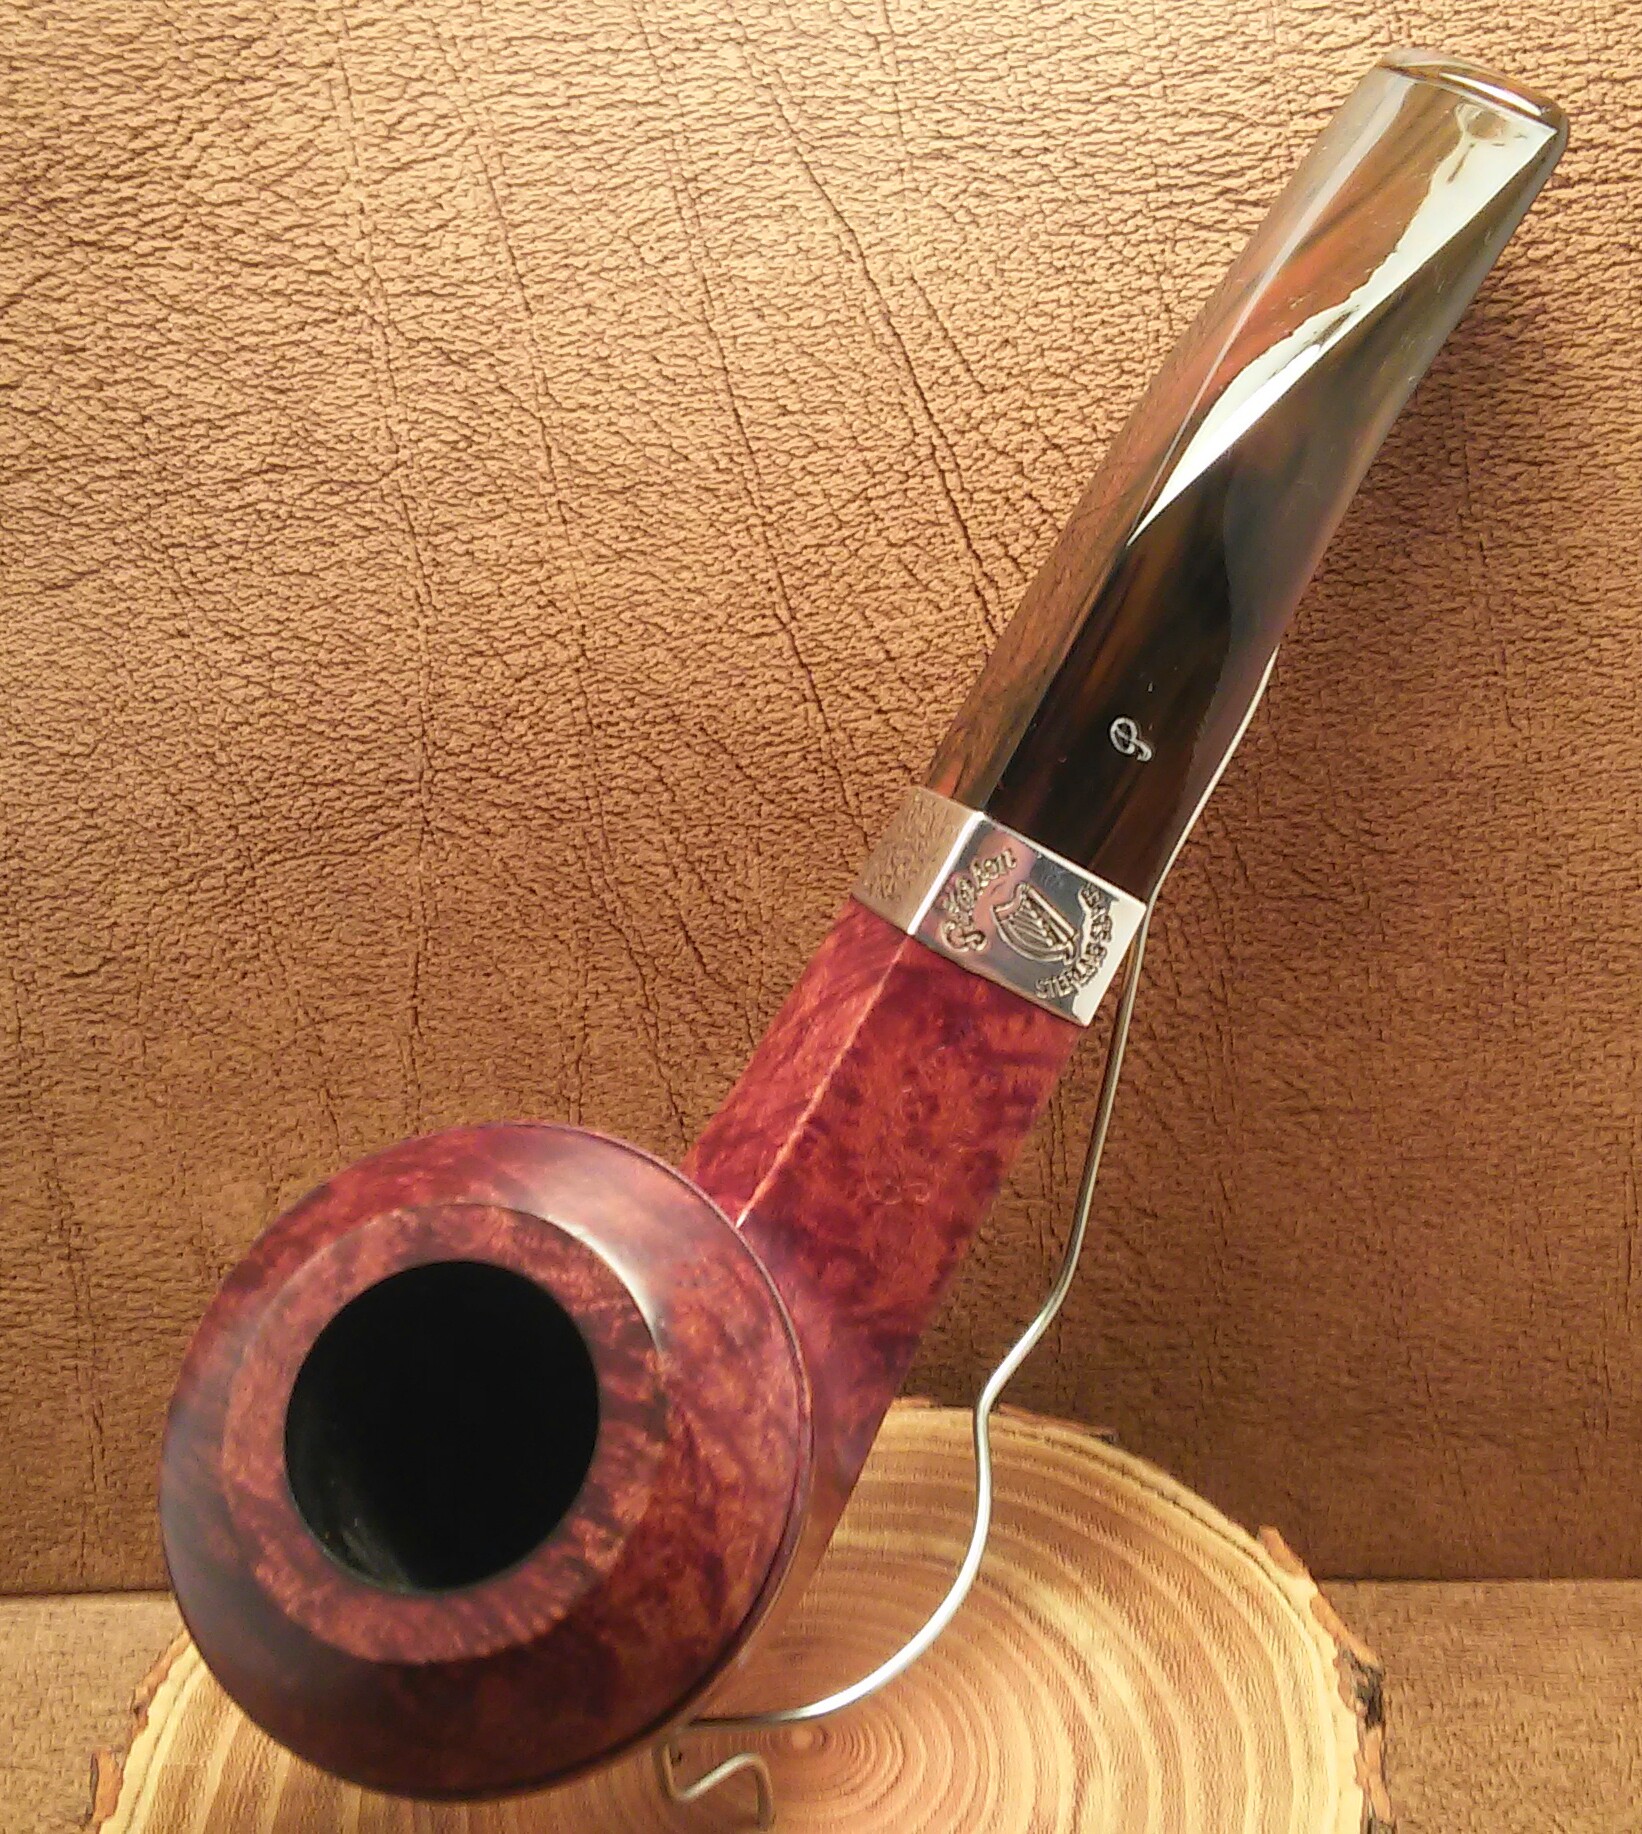
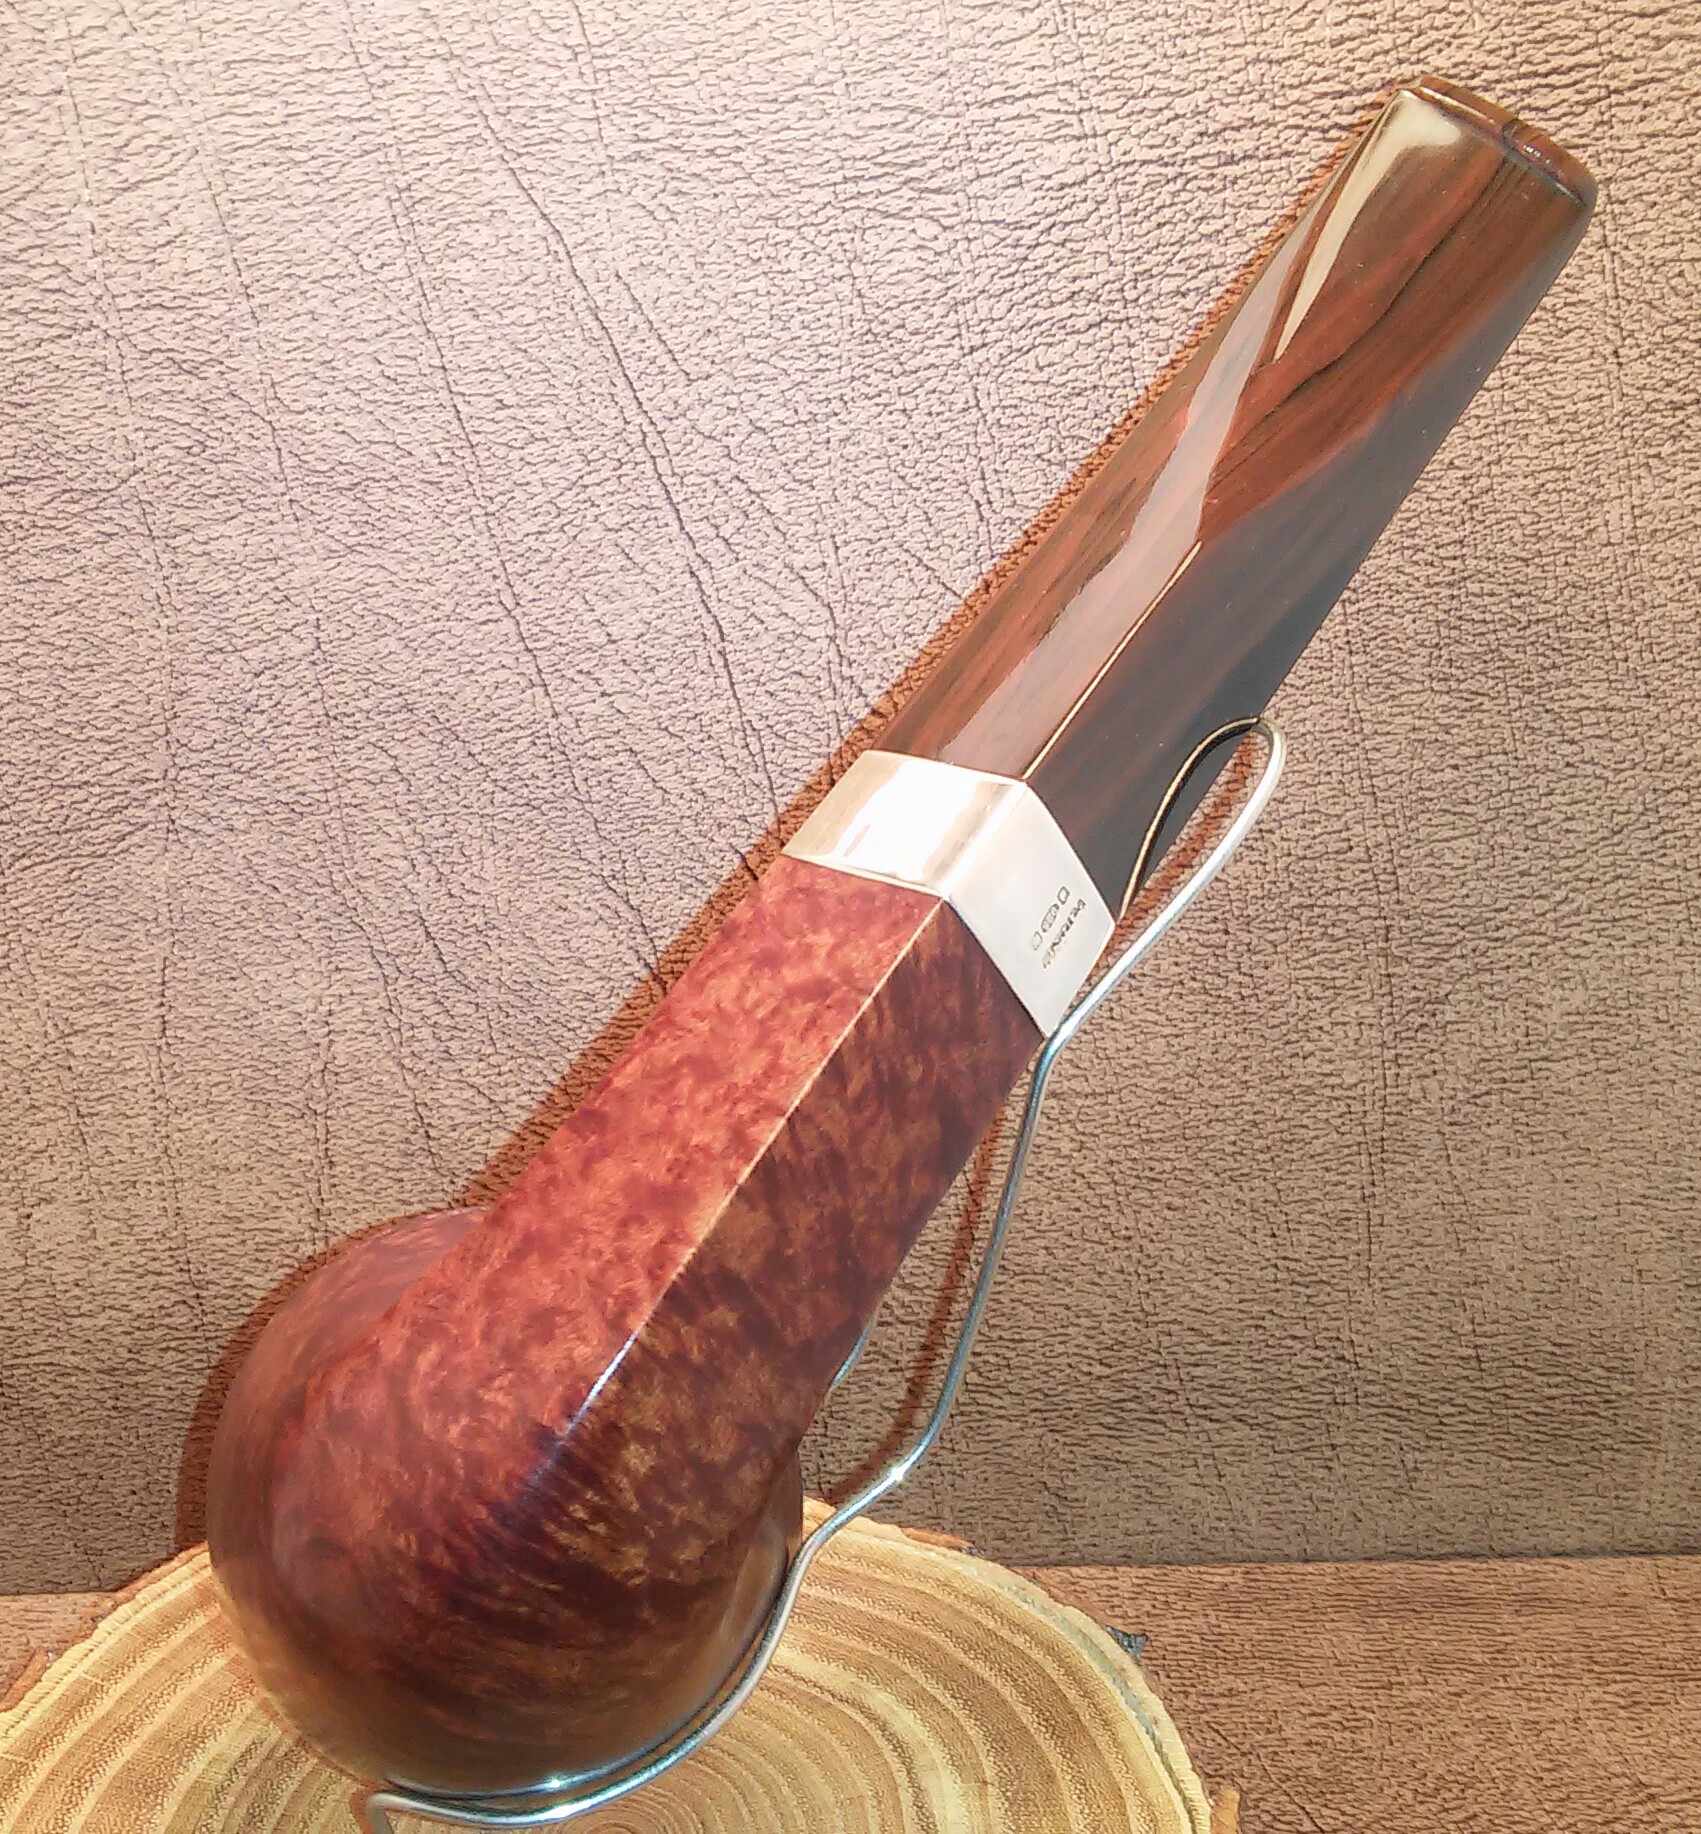
Complete.

PhotoGrid_1454271693417PhotoGrid_145427104234920160131164943~220160131165011~220160131165021~2~2

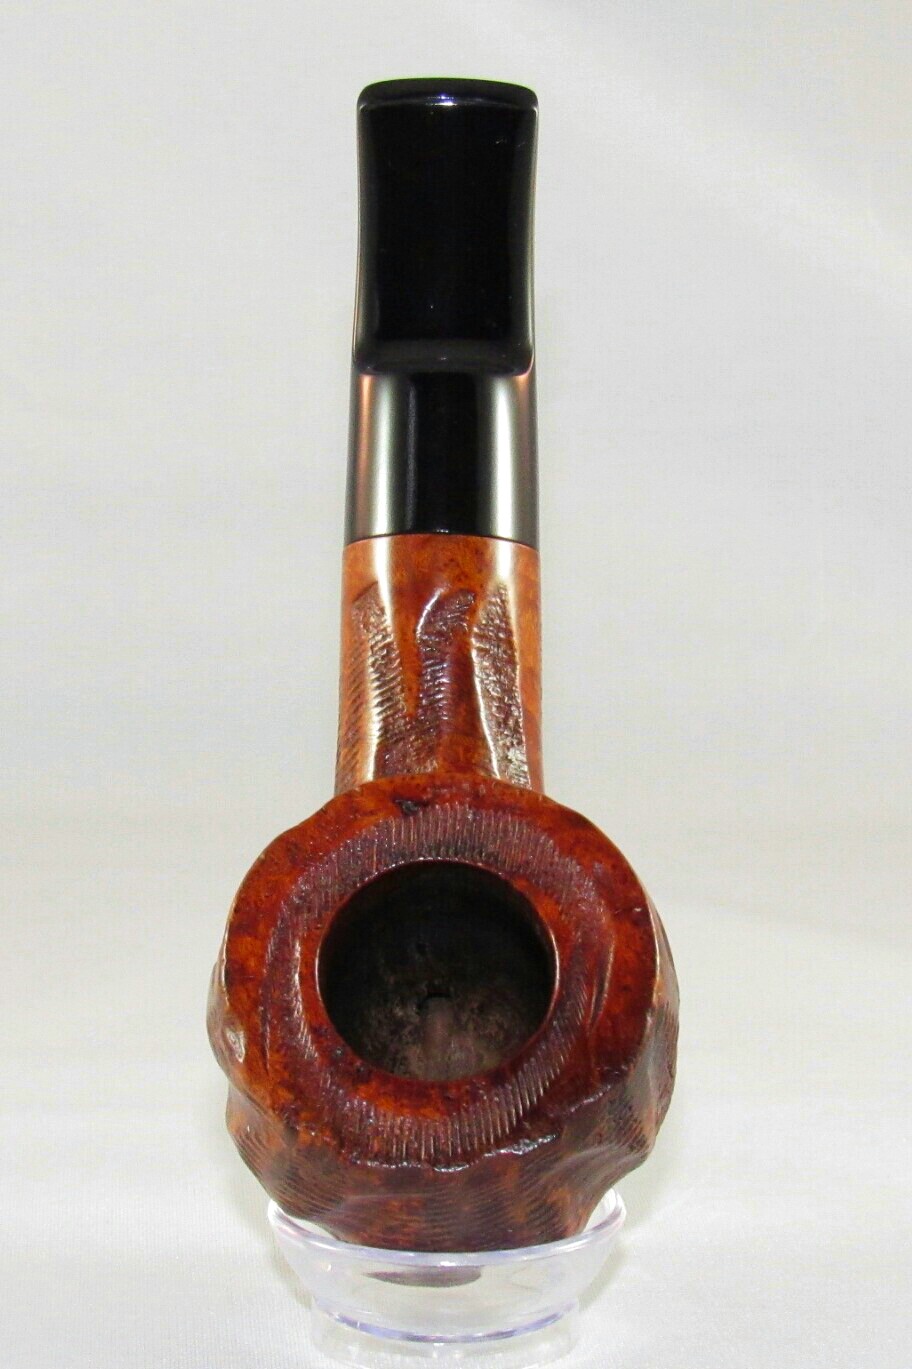
Finished up on the wheel with white diamond, a few coats of carnauba and a microfiber hand buffing. Buffing the stem with blue compound.

Thanks For Taking A Look.


Custombilt ( Rare Stamping )

20160129_100652~220160129_103155~2

This stamping was a puzzler for Bill Unger, as he wrote in his book. It’s equally as puzzling for me, out of the thirty or so in my collection this is the only one with this stamping. Bill found that the stamping was used on what he thought was a Eugene Rich Era and Wally Frank Era Custombilt pipe. My example I could swear is Tracy Mincer Era.
PhotoGrid_1454081640667 PhotoGrid_1454081722255   
  I received two pipes from the same seller one marked with the standard Mincer stamp and shape stamp  of a triangle, the other pipe has the rare stamp and a shape stamp of a square. Both pipes are of similar medium size and deep rustication. I have seen sets with two pipes in a claim shell case and I think that’s what I have here, minus the case. Any Custombilt collectors with more information please leave a comment.
Pipe As Received.

PhotoGrid_145407098617420160128_193743220160128_1937542PhotoGrid_1454071030116PhotoGrid_1454071008778

Very well-loved, thick cake, oxidation, worn button, rim char, rim tar and worn finish.

20160128_231701~2

I started with my Pipnet Reamer and the smallest attachment working up to the second largest. Finished with 400 grit sandpaper wrapped around a finger.

PhotoGrid_1454104869641

The rim was embedded with tars ,oils and char. I applied a generous amount of Method Good For Wood Polish to the rim and set aside to penetrate the build-up. I removed the build-up with Q-tips. I removed the rim char and darkening with worn micro-mesh until it faded.

PhotoGrid_1454104405876

The pipe was heavily smoked, I decided to run a retort using EverClear and cotton balls. I would repeat the process twice to get a good clean.

20160129_114700~2

After the retort I cleaned the internals of the stummel and stem with EverClear, Q-tips, stiff/soft pipe cleaners, a mortise brush and a shank brush. Cleaning until the last pipe cleaner came out clean.

PhotoGrid_1454104731247

I now turned to the oxidized stem, I applied non-bleach Soft Scrub to the stem with a children’s toothbrush and left it to penetrate the oxidation. Once the Soft Scrub turns from white to a brownish color, I scrubbed vigorously with a rag until the oxidation was removed, finishing up with a damp Magic Eraser to remove the leftover oxidation.

20160129_131822~2

The button was worn down and would have to be built back up. I first taped off the button portion of the stem with blue painters tape so my work would remain in one area. I mixed thick black CA glue and activated charcoal power into a paste .

PhotoGrid_1454104278156

 I applied the paste to the button with a toothpick, then removing the tape just before hitting with the accelerator. I left it aside for a few hours to cure.

PhotoGrid_1454104355842

Once the repair had time to cure, I could begin to form the new button. Using needle files I shaped the button to a suitable thickness. I finished up with 400 grit sandpaper wet to remove the file marks.

20160129_163406~2

I now ran the stem through the various grits of sandpaper and micro-mesh. 1000 grit sandpaper wet, 1500 mesh wet, 1800 mesh wet, 2000 grit sandpaper wet and 2400 mesh wet. Then finishing up with the rest of the micro-mesh pads 3200-12000 dry.

PhotoGrid_1454104577491

Just before hitting the wheel I applied Howard’s butcher block conditioner to the stummel with a rag and let it penetrate for a few minutes hand buffing off the excess with a clean rag. The change in coloring of this pipe was incredible after applying the Howard’s Conditioner. I use Howard’s butcher block conditioner on all my Custombilt, Tom Howard, BP Jum and Kaywoodie Handmade pipes before buffing.

Complete

PhotoGrid_1454124028848PhotoGrid_145412399569820160129235625~220160129235652~220160129235744~2

 I finished her up on the wheel with white diamond, a few coats of carnauba and a microfiber hand buffing. Buffing the stem with blue compound.

Thanks For Taking A Look.

Custom-Bilt (Mincer Era)

20151009_1027472_zpsuvvs9drj~2

. Mincer Era Custom-Bilt .

Screenshot_2015-12-07-07-27-00~2

I love when auctions go this way , I only wish I was the one who won it. My wife took a chance on this one and gave it to me for Christmas. Sure enough its a Custom-Bilt, the nomenclature is worn or lightly stamped but its there. I have so many in my collection and I talk about them constantly she knows exactly what to look for.

As Received

PhotoGrid_1453699522594PhotoGrid_145369957971420160124_210347~220160124_210431~2

She was in rough shape when received, thick crumbling cake, stem oxidation and the tennon was glued into the mortise. Once the the glue was removed from the tennon and mortise, I realized the glue was the previous owners attempt to fix a loose fitting stem. In my excitement Christmas morning I had already removed the glue. Using EverClear I filled the chamber and left it to soak, eventually I was able to free the stem from the stummel.

PhotoGrid_1453699681920

I set the stem aside to come back to and started with the stummel. I started with my Pipnet Reamer and the smallest attachment and worked up to the third attachment, finishing up with 400 grit sandpaper wrapped around a finger. The chamber was well preserved from the thick cake, no cracking or pitting.

PhotoGrid_1453761268436

Next the rim tar and char, I applied a generous amount of Method Good For Wood Polish with a Q-tip and allowed it to penetrate the residue. I had to repeat the process a few times to remove all the build up, using Q-tips.

PhotoGrid_1453760194830

After freeing the tennon from the mortise Christmas morning there was still glue leftover one the stem, mortise and tennon. I used EverClear Q-tips and makeup pads to remove the rest of the glue.


20160124_231118~220160124_231247~2

I did a quick internal cleaning to remove the loose debris using EverClear, Q-tips and stiff/ soft pipe cleaners. I then did an alcohol and cotton ball soak on the chamber allowing it to absorb the oils and tars, leaving it overnight.

PhotoGrid_1453749192862

The following morning I decided to run a retort using EverClear and cotton balls. I then cleaned the internals of the stummel and stem with EverClear,Q-tips,cotton balls and stiff /soft pipe cleaners, cleaning until the pipe cleaners came out as they went in.

20160125_091354~2

The stummel was pretty caked with dirt and oils. I wiped down the stummel with EverClear and makeup pads making sure I got into the crags.

PhotoGrid_1453749307223

Next the rim dings, using a household iron on medium /high heat and damp rag. I  covered the rim with the damp rag and applied the rim to the hot iron working in intervals until the imperfections were almost gone.

PhotoGrid_1453749336366

Happy with the rim, I now applied Howard’s butcher block conditioner to the stummel using rag and Q-tip to get into the deeper crags and left it aside for a few minutes to penetrat. Hand buffing off the excess.

PhotoGrid_1453749071378PhotoGrid_1453749128658

The stem was heavily oxidized, I applied non-bleach Soft Scrub to the stem with a children’s toothbrush and left it aside to penetrat the oxidation. Once the Soft Scrub turns from white to a brownish color its time to scrub vigorously with a rag until the oxidation is removed. I would repeat this process a few times and finish with a damp Magic Eraser to remove the leftover oxidation.

PhotoGrid_1453749144980

The loose fitting tennon, I heated the tennon with a Bic Lighter (moving the flame at all times never leaving it in one spot too long) and inserted the tip of round tipped jewelry pliers into the tennon and slowly expanded the tennon from the inside out until a snug fit between mortise and tennon was achieved.

20160125_112623~220160125_165534~2

I now ran the stem through the various grits of sandpaper and micro-mesh. I tapped off the shank with blue painters tape so my sanding would remain on the stem. I removed what little chatter there was with 1000 grit sandpaper wet and then moved on to the miro-mesh pads 1500-2400 wet and 3200-12000 dry. She was now ready for the wheel.

Complete

20160125224057~220160125224119~220160125224135~2PhotoGrid_1453773455838PhotoGrid_145377340917320160125224406~2

Finished her up on the wheel with white diamond, a few coats of carnauba and a microfiber hand buffing. Buffing the stem with blue compound.

Thanks For Taking A Look.


Peterson’s DeLuxe 608S

Screenshot_2016-01-21-21-34-52~2

Peterson’s DeLuxe 608S

My pipe refurbishing companion, shes in need of some TLC herself. I will admit when I’m working on a pipe I have a bad habit of puffing away like theres no tomorrow, the P lip seems to helps in this area as not to cause tongue bite. The flat, saddle, P lip bit is also comfortable clenched in jaw for hours on end. She was picked up as an estate and has been in service for myself going on six years. While refurbishing my last pipe it dawned on me that my little DeLuxe hasn’t been cleaned property by me ever, my skills have changed  much since  its cleaning almost six years ago and I thought now would be a good time to do right by her and give her a good once over.

My DeLuxe

20160122_154604~2PhotoGrid_1453496238732PhotoGrid_145349626917120160122_154633~2

I’m a little embarrassed with the upkeep of one of my favorites or lack their of but this is the only pipe in my possession that has been overlooked, it has always rested on my work desk there in a pinch when needed. Oxidation, rim tar&char and the stain has since faded .

PhotoGrid_1453651688165

I started with the rim tar/oils there was no need to ream, I wipe my chamber clean after each smoke, what cake has built I’m keeping. I applied Method Wood For Good Polish to the rim build up with a Q-tip and allowed it to penetrate the tars and oils for a few minutes, removing the debris with a Q-tip.

PhotoGrid_1453651578075

I cleaned the internals of the stummel and stem with EverClear ,Q-tips and stiff/soft pipe cleaners working until the pipe cleaners came out as they went in.

PhotoGrid_1453651552716

The stain was faded and dull it would have to be re-stained. I gave the stummel a good wipe down with an alcohol dampened makeup pad, removing the worn stain and oils from handling.

20160124_111557~2

I would re-stain with Fiebings leather dye. I mixed a little EverClear,a little red dye and dark brown together.

PhotoGrid_1453657210736

I inserted a Bic pen end into the mortise so I could apply the stain, using an old homemade brush I applied a generous amount of the mixed stain , being careful not to get in the chamber. I then hit it with a Bic Lighter to set the stain, removing the excess with a alcohol dampened rag. I now left it aside to dry while I worked on the stem.

PhotoGrid_1453657358872

The stem was oxidized and had a little chatter, I applied non-bleach Soft Scrub to the stem with a children’s toothbrush and left it aside topenetrate the oxidation. Once the Soft Scrub turns from white to a brownish color its time to introduce the old elbow grease and scrub vigorously with a rag until the oxidation is removed, finished up with a damp Magic Eraser to remove the leftover oxidation.

20160124_143034~2

I removed the chatter with 1000 grit sandpaper wet, I then ran the stem through the various grits of sandpaper and micro-mesh , 1500mesh, 1800mesh, 2000 paper and 2400mesh wet and 3200-12000 dry. With the stem polished and stummel stained and dry she was ready for the buffer.

Complete.
She’s ready for six more years and a bowl of Royal Yacht.


20160124181149~2PhotoGrid_145367208871020160124180953~220160124180938~2

Finished her up on the wheel with white diamond, a few coats of carnauba and a microfiber hand buffing ,Buffing the stem with blue compound.

Thanks For Taking A Look.

A New Look For A Poker Made By Brian Doran

20151226_231136~2

I received this stubby poker made by Brian Doran for Christmas its a shape I’ve wanted for some time. I couldn’t find much information on the pipe maker, other then his EBAY actions. He’s from West Virginia and makes affordable pipes for the working man. My wife purchased the pipe as an estate from a separate seller it was listed as clean and ready to smoke. The pipe it self seemed it had more to offer.


The facelift

20160115_104834~2~2

The pipe was pretty clean but the chamber had cracks/pits that would need mud, the rim had a strange rustication done with a dremal tool. It had more potential it just had to be uncovered.

PhotoGrid_1452883930232

I started by topping the bowl with 150, 220, 400 grit sandpaper then 1000 to finish the rim off. I uncovered imperfections in the wood, it seemed insects may have made there home here first. I was able to remove all but one on the rim, I’ll say it adds character.

PhotoGrid_1452884081508

After topping the bowl I decided to sand the stummel with 1000 grit sandpaper to add a little depth in color. I restained the rim and stummel with a light brown touch up marker, allowing it to dry and removing the excess with a alcohol dampened makeup pad. The stummel and stem were now ready for a buff.

PhotoGrid_145288403920820160115231129~2

Before hitting the wheel I wanted to address the chamber, I mix a batch of pipe mud to fill in the pits, using cigar ash and a little water and smoothing it around the chamber with my finger.

Complete

PhotoGrid_1452910975405PhotoGrid_1452911003456PhotoGrid_1452911031307

Finished her up on the wheel with white diamond,  a few coats of carnauba and a microfiber hand buffing.

Custombilt Bent Billiard (Rich Era)

The scoundrel Pipes

The pipes I received from fellow blogger Clint of Pipe Scoundrel are complete. They have a new home and are ready to be enjoyed once again. This trio of Bilts has been an eye opener, I believe there will be many more Rich era Custombilts in my future.

The last pipe as received

20160104_222830~2

The nomenclature was stamped unevenly but I could still make out the tell tail (S) of Eugene Rich era Bilts.

PhotoGrid_1451965163069PhotoGrid_1451965201323PhotoGrid_145196517494120160104_222954~2

The last of the trio a large bent billiard. Much like the last shes in pretty descent shape. The cake is a little thicker, the tennon would need tightening, rim tar&char, there is a little filler present and light chatter.

20160105_080059~220160105_111226~2

I started off with the smallest attachment of my Castleford reamer and moving on to the largest that the chamber would except in this case it was one up from the first. I finished up with 400 grit sandpaper. The chamber was free of pitting or the start of a burn out.

PhotoGrid_1452021326533

Now for the rim, it was thick with tars and build up. I applied a generous amount of Method Good For Wood Polish to a makeup pad and left the stummel upside down so the polish could soften the build up. I would have to repeat this process a couple of times to remove all the debris, using a children’s toothbrush and Q-tips. I have also uncovered a couple of dents on the rim that I will address later on.

PhotoGrid_1452021270770

With the rim clean I moved to the chamber and mortise. I did a quick clean of the internals with EverClear and Qtips to remove the loose debris. Now the soak, I unrolled a cotton ball and formed a long swab, using the swab I twisted it into the mortise tightly. I now filled the chamber a quarter of the way with EverClear and allowed the swab to absorb the alcohol. Once the alcohol is absorbed I filled the chamber with two cotton balls and added EverClear to the cotton balls untill saturated. I now set the stummel aside while I worked on the stem.

PhotoGrid_1452021196393

I started the stem by cleaning the exterior first with EverClear and a makeup pad, then the internals with EverClear and stiff/soft pipe cleaners, cleaning until the pipe cleaner came out as it went in.

20160105_143453~2

Now the oxidized stem I applied non-bleach Soft Scrub with a children’s toothbrush and left aside until the Soft Scrub turns from white to a brownish color.

20160105_145753~2

Now the elbow grease, I  now scrubbed the stem vigorously with Soft Scrub and a rag to remove the oxidation

20160105_150600~2

Finishing with a damp Magic Eraser to remove the leftover oxidation. The surface still has a rough texture and would need to be sanded.

PhotoGrid_1452024653610

The stem had a couple of tooth impressions, using a Bic lighter I heated the area of the impressions (moving the flame at all times never leaving it in one spot too long). I was able to raise a few but one was stubborn and would need filling.

PhotoGrid_1452116628613

I roughed up the area to be repaired with 400 grit sandpaper, then wiped the area with an alcohol dampened rag. I made a paste using thick black CA glue and activated charcoal power and applied it to the impression with a toothpick, hitting it with accelerator to set the patch.

20160106_095533~2

After allowing time for the paste to cure I removed the excess using a needle file. I smoothed out the repaired area with 400 grit sandpaper .

20160106_141755~2

I now ran the stem though the various grits of sandpaper and micro-mesh 1000-2400 wet and 3200-12000 dry.

PhotoGrid_1452116681213

The tennon was loose upon receiving the pipe. I used jewelers pliers and a Bic Lighter to expand the tennon from the inside out, by heating the tennon with the lighter and inserting the tip of the pliers into the tennon gradually untill a snug fit between mortise and tennon was achieved.

20160105_163400~2~2

With the stem complete I moved on to the stummel. After sitting for an hours or so the cotton balls had time to absorb some of the tars. The chamber was clean but I would have to repeat the process on the mortise a few more times. Then finishing up the mortise and draught with  EverClear, Q-tips and stiff/soft pipe cleaners until the pipe cleaners came out clean.

20160105_164435~2~2

Now to address the rim dents and darkening.

20160105_192609~2

Using a hot iron and a damp rag I steamed the dents out and lightened the rim darkening with worn micro-mesh.

20160104_222954~2~2

There were three spots of filler present that would have to go.

20160105_165224~2

I applied Method Wood For Good Polish to the filler and let it soften up for a few minutes.

20160105_165804~2~2

Using a pick and X-acto knife I removed the light colored filler.

20160105_195139~2

I refilled with briar dust and Gorilla Glue and left aside to dry.

20160105_200737~2

I removed the excess glue with worn miro-mesh, then stained the new fill with a touch up marker, lighting up the color to match with an alcohol dampened Q-tip.

PhotoGrid_1452116736757

I now wiped down the stummel with Method polish and let dry. Next Howard’s butcher block conditioner, using a Q-tip I worked the Howard’s into the crags and then applied Howard’s to the whole stummel letting it penetrate for a few minutes, hand buffing the excess off with a clean rag. She was now ready for a final buff.

Complete

20160106_190947~220160106_191005~220160106_191025~220160106_191048~220160106_191108~220160106_191034~2

Finished her up on the wheel with white diamond, a few coats of carnauba and a microfiber hand buff.

20160106_191335~2

The Gang all together.

 Clint your generosity is greatly appreciated. The pipes are beautiful and right at home in my collection.

( EUGENE RICH ) Boxed Custombilt 1946-1952

20151030_223109~2

My wife and father through a joint effort picked this one up for me, it arrived today and I was blown away . I’ve been trying to get my hands on a boxed Custombilt for a few years but they were always just out of reach. This beautiful bulldog is a Eugene Rich era Custombilt very lightly smoked, amazing condition and it came with the original box, paperwork and guarantee. The box was a little rough around the edges not unlike the pipes themselves. This is my first Rich era Bilt and not an ounce of filler, I’m starting to think it’s time to broaden my horizons.

 This is more of a standard clean up then a restoration. I decided to share this clean up because every collector/pipe smoker has there white whale. Whether it be a priceless one of a kind or an inexpensive hard to find piece.

20151030_211521~2 20151030_211525~2 20151030_211515~2 20151030_211530~2 20151030_211535~2

Sometimes it’s the packaging that needs the work.  This is my first pipe box refurb. Using Q-tips, Method disinfectant and a rag I carefully removed the mold/mildew from the box and set it aside to dry.

20151030_223102~220151030_223136~2 20151030_223201~2 20151030_223212~2 20151030_223230~2 20151030_223239~2 20151030_205405~2 20151030_205508~220151030_205540~220151030_205424~220151030_205519~220151030_205607~2

The box is in pretty good shape for almost 70 years old.

( Pipe As Received)

20151031_222352~2 PhotoGrid_1446345411004PhotoGrid_1446423022819 PhotoGrid_144634538649420151031_222424~2

The pipe was in wonderful condition the mildew that had engulfed the box did not affect the pipe itself. Light chatter, little to no cake and the mortise was spotless. The nomenclature was well stamped , crisp and clear. On the right side of the shank there’s a circle stamped, I was unaware that these stamped shapes were used past Mincers era 1946. There is also the presence of a bowl coating, the first I’ve seen in a Custombilt .

 PhotoGrid_1446381168423

I started with the bowl, cleaning the chamber and mortise with Q-tips, soft pipe cleaners and EverClear. It would not need a ream as I believe it was only smoked once or twice at most. The stem needed a quick once over, I wiped down the stems exterior with EverClear and a cotton ball and cleaned the internals with an EverClear soaked soft pipe cleaner.

PhotoGrid_1446381133655

The rim and shank needed a little attention. The rim had a small scorch mark and the shank an ink spot. I applied a small amount of Method wood for good polish to the rim and shank and allowed it to soak in for a few minutes, using Q-tips I worked the rim and ink spot.

20151031_232132~2~220151031_232211~2

I was able to completely remove the scorched area and fade the ink spot on the shank. My use of Howard’s conditioner and final buff would hide this spot completely.

PhotoGrid_1446406109625

Using a Bic lighter I carefully heated the area of the chatter to raise the impressions. (Moving the flame rapidly so not to burn the stem)  I would repeat this process in intervals until all the impressions had risen.

PhotoGrid_1446406132477

There was a little oxidation present and would still need micro mesh to smooth out the area but the button impressions had risen back to its original shape.( I neglected to take a photo of the oxidation removal ) I applied a generous amount of non-bleach Soft Scrub and scrubbed the stem vigorously with a rag until the oxidation was removed.

20151101_185231~2

I ran the stem through the various grits of micro mesh. 1500-2400 wet and 3200-12000 dry.

20151102_092051~2

I now applied a little Howard’s butcher block conditioner to the bowl with a rag, I let it soak a few minutes and removed the excess with a clean rag.

20151102_093010~220151102_094400~220151102_094159~220151102_094302~220151102_094318~220151102_094345~220151102_094332~2

I finished up with white diamond, carnauba and a micro fiber hand buff.

20151102_093356~2

Not one of my toughest refurbs but definitely one of my favorites.


Peterson Irish Harp B.5

20150904_110911_zpsotamwek9-1

The pipes my wife picked up with the exception of the Savinelli, were in great shape. The Peterson’s- two were lightly smoked and one un-smoked. The Harp B.5 is the next to my desktop.

(The pipe as received)

PhotoGrid_1445654191596 PhotoGrid_1445654133375 PhotoGrid_1445653989042PhotoGrid_1445906195492

2007 Peterson Irish Harp B.5

From what I could find via web/collector sites I believe this Pete is from 2007. ( please correct me if this info is wrong) With the addition of three more Peterson’s it has brought my collection to seven. The B.5 is one of many I’ve had my eye on, the smooth bulldog shape and fishtail stem made this comfortable not only in hand but also clenched in jaw.  Lightly smoked and in decent condition just a few problem areas. A couple of tooth impressions, a scratch on the bowl and a burn on the rim that was deeper then first thought. 

PhotoGrid_1445908287603

When I first received the pipe the silver band was tarnished, this was my wife’s department. She used her silver jewelry cleaning trick, cigarette ash, a little saliva and rubbed in with a fingertip, then wiping with a damp rag.

20151025_221929~2 20151025_222429~2

For a newer and lightly smoked pipe I was surprised to see the bowls finnish was very worn in certain areas. With some pipes in the past the worn finnish was a result of a hot bowl from rapid puffing, it would have to be re-stained. I started with Murphy’s oil soap and moved on to acetone to remove the rest of the finnish. I was happy to see I had not uncovered any filler.

20151026_112756~220151026_113356

 The burn on the rim seemed it was just surface deep and could be easily removed with little work but it had gone deeper then I originally thought. I taped 1000 grit sandpaper paper to my desktop and began slowly taking layers off until the burn was almost gone, I didn’t want to remove too much and change the shape of the pipe. What remained of the burn hopefully would blend with the new stain.

PhotoGrid_144595304901020151026_110847~220151026_112142~2

 The scratch at the top of the bowl luckily did not affect the bulldog ring around the bowl. I started with a heated butter knife and a damp rag to steam some of the indentation that came along with the scratch. After the steam had raised some of the indentation I used worn micro mesh pads to remove the rest of the scratch.

PhotoGrid_1445954745859 PhotoGrid_1445954811685

Using un-rolled cotton balls I formed one long twisted cotton swab. I use this swab to clean the mortise by turning it tightly into it. Once tightly inserted into the mortise I fill the chamber with a little EverClear and allow the swab to absorb the alcohol. Once absorb I filled the chamber with two cotton balls, soaked them with EverClear and set it aside to soak. As it soaked it began to pull out the tars

20151027_103936~2

With the bowl set aside I began work on the stem first by cleaning the internals with EverClear, shank brush and pipe cleaners and worked until the pipe cleaners came as they went in. Then the externals I worked carefully around the P on the stem so it would not accidentally be removed by the alcohol.

PhotoGrid_1445957720500

I started with the button, sanding the area with a 1500 micro mesh pad and then wiping down with EverClear. I mixed a paste of CA glue and activated charcoal powder to apply to the worn button. I used less activated charcoal powder then normally because of the cumberland stem, I didn’t want one big dark spot. I applied little dots of the paste with a toothpick and then sprayed it with accelerator and left it to dry.

PhotoGrid_1445957602791

I tapped off the stem with painters tape so my work on the bit/lip area would remain in one spot, the rest of the stem was in good condition there was no need to make more work for myself. I wrapped 400 grit paper around a flat needle file and wet sanded the area of the impressions.

PhotoGrid_1445957761146

After the 400 grit wet sand there was still one stubborn impression present, I filled the impression with a dot of the paste and sprayed it with accelerator.  I then moved to the various mico mesh pads to smooth over the stem and button.

PhotoGrid_1445957799054PhotoGrid_1445957869447

It wasn’t perfect but better then before. This stem was a little more difficult, as I began removing the tooth impressions I uncovered bubbles within the stem that would also have to be filled.

 PhotoGrid_1445956129650

After sitting for a few hours I removed the cotton balls/swab and proceeded to clean the internals with EverClear, Q-tips, swabs and pipe cleaners until the pipe cleaners came out as they went in.

20151026_120110~2

While working on the pipe over a two day period I realized I was quite happy with the way the pipe had colored from handling it, I decided to try and match the rim to the bowl coloring. There was still light stain left on the pipe after the acetone wipe down, the acetone seemed to remove a reddish top coat leaving the darker walnut finnish underneath.

20151027_134933~2PhotoGrid_1445969181197

I used touch up stain markers to match the rim to the bowl, I applied several coats and hit it with a Bic lighter to set the stain, wiping away the excess with an alcohol dampened rag until I had a close match.

20151027_143453~2 20151027_143554~2

Buffing with white diamond, carnauba and a micro fiber hand buffing  .

20151027_142925~2 20151027_142938~2 20151027_143006~2 20151027_142750~2 20151027_142851~2 20151027_142911~2 20151027_142901~2